

Intel's comeback: $1000 gaming PC
45sControversial choice of an old Intel CPU and GPU sparks debate about budget builds.
▶ Play Clip"Title accurately describes a $1000 gaming PC build guide with classic LTT style; content delivers exactly that."
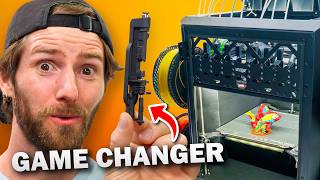
Riley hosts a $1000 budget gaming PC build guide, featuring an Intel Core i5-12600K and Intel Arc B580 GPU, targeting 1440p gaming. The build navigates high component prices and limited availability, emphasizing value and upgradeability.
Intel is recommended for both CPU and GPU in a $1000 budget build, despite using a five-year-old processor. The build targets 1440p gaming.
Chosen for its value and upgrade path. AMD's AM5 socket requires expensive DDR5, and AM4 chips are scalped. At 1440p, GPU does more work, so a 9800X3D is unnecessary.
A $100 board with competent VRMs, PCIe Gen5, and 2.5Gb LAN. Lacks USB-C on rear I/O and internal header.
Place motherboard on its box. Align golden triangle with bottom left corner. Gently place CPU, wiggle to seat, then close latch. Cover pops off—save it for RMA.
G.Skill kit costs ~$150. High-speed, low-latency. Two DIMM slots on MATX board simplify installation. Unseated RAM is a common troubleshooting step.
Plenty for i5-12600K and most upgrades except Core i9. Includes LGA 1700 mounting hardware. Apply thermal paste (one line down the middle) and don't forget to peel the sticker.
Costs $60 on sale. Plenty of space, ARGB fans, front USB-C port (but board lacks header). Looks similar to Hyte Y60.
Opted for SATA SSD due to high NVMe prices. DirectStorage is slow to adopt; loading times only a few seconds longer. Easy to upgrade later.
Costs $60. Rated silver efficiency by 80 Plus. Poor performance with power brownouts; avoid if power is unreliable. Non-modular, so extra cables must be tucked away.
$300, 12GB VRAM, improved drivers. Great for 1080p, good for 1440p, capable of 4K on low with XeSS. Half the budget should go to GPU, but current prices make it a good upgrade target.
System runs at 1440p 240Hz. RAM at 3600 MT/s. Resizable BAR enabled. In Marathon (medium preset), ~100 FPS. In Resident Evil (mixed settings), ~70 FPS.
The $1000 build delivers solid 1440p gaming performance, with Intel emerging as a budget option for both CPUs and GPUs. The build balances cost and performance, with easy upgrade paths for storage and GPU.
What CPU is used in the $1000 build?
Intel Core i5-12600K
01:02
Why was AMD not chosen for the CPU?
AM5 requires expensive DDR5, and AM4 chips are being scalped.
01:33
What is the approximate cost of the motherboard?
$100
02:27
What should you do if the CPU doesn't drop into the socket easily?
Carefully pick it up and try again; do not force it.
03:51
What is a common troubleshooting step for RAM issues?
Remove and reseat the RAM modules.
05:19
What type of thermal paste application does Riley prefer?
One big line down the middle of the CPU.
06:34
Why was a SATA SSD chosen over NVMe?
NVMe prices are high; SATA offers similar real-world performance with only a few extra seconds in loading screens.
08:43
What is the GPU used in the build?
Intel Arc B580 (Acer Steel Legend version).
12:01
How much VRAM does the Intel Arc B580 have?
12GB
12:13
What is the recommended budget split for a gaming PC?
Half the budget should go towards the GPU.
12:37
What performance was seen in Marathon at medium preset?
Around 100 FPS.
16:03
What performance was seen in Resident Evil at mixed settings?
Around 70 FPS.
17:10
Intel Comeback Story
Riley humorously frames Intel's resurgence as a comeback story, setting a nostalgic and optimistic tone.
Welcome to F***ing Hell
Riley's candid frustration with high component prices adds humor and relatability.
09:10Cozy Game Scream
Riley's exaggerated scream during a 'cozy' Resident Evil moment is unexpectedly funny.
18:17[00:00] I love a good comeback story. And Intel is the kind of guy that just keeps getting back up. Not only are we about to recommend their graphics card for a $1,000 budget bill, we're about to recommend a Core i5-12600K.
[00:16] Am I disappointed? We're going to put a five-year-old processor in a brand new computer? Yes. But unfortunately, that's just... You know, things sometimes...
[00:29] Truly! the wildest of times. So wild, in fact, that I'm going to be showing you how to build a PC. Hello, old friend. It's been a while. Hmm. Nearly seven years since I was at the
[00:46] helm, guiding you, young viewer, on your 1440p capable gaming rig journey. And, Linus was there too, I guess. Now it's time for my comeback story. So take my hands. Hold on tight. It looks a
[01:02] little scary out there, but hey, things are going to be all right. Yeah. Sponsor time, Kelo. A wireless option that doesn't drive you crazy? Kelo me about it. Kelo Mobile offers flexible and affordable
[01:16] phone plans with prices up to $25 a month. Check them out using our link down below. We're starting Starting with our CPU, Team Blue's Core i5-12600 case. True, AMD's more popular these days, but their latest socket, AN5, is only compatible
[01:33] with DDR5 memory, which is out of our reach! Thanks to stuffy's are! And their previous generation, AN4 X-Greeting chips, are being scalped. Very cool!
[01:45] Luckily for us, our 1442 resolution target means that our GPU will be doing a bit more of the work than the CPU, which may not be the case at lower resolutions. And that means we don't need something as beefy as a 9800X3D.
[01:59] Wouldn't it be nice? Yeah, but this little guy right here with 6 P cores and 4 E cores offers solid bang for the buck right now, and a decent upgrade path later.
[02:11] Next! Wow, delivery. Motherboard! Motherboard! Upgrading should be easy thanks to our reasonably beefy motherboard. A super sleekly titled B760M-AEYW-WiFi-D42.
[02:27] These days, 100 bucks is about as cheap as decent boards get. It's got competent DRMs, just maybe don't try to run a 14900K in this thing, a PCIe Gen5 expansion slot, and 2.5GB RAM.
[02:40] Look, I'm gonna level with you guys. I would have loved the USB-C port on the rear I.O. or an internal header. But $100 is $100. Now before we get to assembly, let's make sure we've got the usual suspects of PC building supplies.
[02:54] You will need some kind of screwdriver. I'm partial to this one from LTTstore.com. And you'll want some extra help in the form of a magnetic parts tray, zip ties, side cutters, and sometimes a set of needle nose pliers, someone handy too.
[03:09] Last but not least, wear an ESD wrist or ankle strap that's properly grounded. To install our CPU, we're going to start by putting our motherboard on top of the box that it came in. This works as a great little work platform that eases any fears of scraping the back of the board by accident.
[03:27] Next is one of the only steps where you can kind of easily wreck your motherboard. We're going to unlatch our socket cover like so, take our CPU, and line up the golden triangle with the bottom left corner.
[03:39] It's pretty small and hard to see, so sometimes I like to just line up the top and bottom notches here and here. Once you're ready, gently place the CPU into the socket. Don't force it.
[03:51] If it's not dropping in nicely, carefully pick it up and try again. It's okay. Once it looks like it's in properly, give it a little wiggle to make sure it's seated, just a little one. Then push the cover down and close the latch.
[04:04] This does take a little bit more force than you might expect, but don't worry, you're doing fine. Don't be alarmed when the cover pops off. That's supposed to happen. Throw it into your motherboard box. You will need this if you ever have to RMA your board.
[04:17] Now, let's talk memory. This 2x8 gig kit of DDR4 from G-Skill costs us about $150. That's bad, but at least they're high-speed, low-latency modules,
[04:29] so unless you need more capacity, you should need to upgrade for quite a while. You can save a buck here and get this kit from Grusel, but we felt this was a pretty reasonable spot to spend an extra $25 for better performance.
[04:41] We're going to use this very similar kit from Patriot today because we don't want to buy more DDR4 that could go into someone's hands who needs it. This kit has got slightly tighter timings, but performance should be relatively the same.
[04:54] The nice thing about MAPS motherboards like the one we going with is they often just have two DIMM slots so you won be confused about in which slot your DIM should go And we only got two DIMs
[05:07] So, we'll just undo the clips at the top, line up the key like so, then push the module into the slot firmly with your thumbs until you hear a click. Repeat for Module 2, and that's RAM installed.
[05:19] Easy. By the way, if you run into trouble later, I can't stress enough how often unseated RAM is the issue. So remove these and try again for one of your first potential troubleshooting steps.
[05:31] Next! Cool! Y'all need something to take the heat away from the CPU, and it's hard to go wrong with thermal write these days. The pairless ISASA 90SE should be plenty for our CPU today, and probably enough for most
[05:47] chips we might upgrade to tomorrow, as long as it's not a Core i9. Coolers typically have different mounting instructions, depending on the brand or model of cooler and the motherboard socket it's being strapped to.
[05:59] If you have a different cooler than the one we're using today, then follow those instructions. Otherwise, follow mine. Start by grabbing the LGA 1700 hardware. Our back plate already has the sliders installed, so Justin is needed to fit these four holes around the CPU socket.
[06:17] Peel the sticky strips, install the back plate right way up, then put down the plastic spacers over the mounting post. Next, take the two straight brackets and put them over the spacer with this mounting post facing up, then screw them down with the included screws.
[06:34] Make sure to apply thermal paste. A little dab will do ya. But you can't ruin performance by overdoing it, so feel free to use whatever style you prefer. I'm partial to one big line down the middle.
[06:46] Now, before installing the cooler, don't forget the peel. It's fun and also important. Remove the sticker from the bottom of your cooler, place it down on the CPU, and screw it down onto the bracket.
[06:58] As for the fan, orient the cable so it's in the bottom right corner, slide it into the middle, and then pull the clips back over the E-Sync like so. Lastly, plug this into your CPU fan header up here.
[07:11] And you can feel free to tuck the excess cable in underneath. But where are we going to put all this hardware? Well, there are many cases like the Sama SV02, but this one is mine.
[07:23] And for just $60 on sale, it's pretty tough to beat. There's plenty of space for big coolers or graphics cards. Comes with a few ARGB fans. Has a Type-C port on the front I.O. And it looks a lot like the more upscale Height Y60.
[07:38] Okay. To be clear, our board doesn't have a Type-C header. So that top I.O. port is just for show right now. If you want, you can get a Type-C adapter and any card for pretty cheap.
[07:50] But we won't be covering that in this video. Alright, let's pop our motherboard in there. Start by removing the front and side glass panels. This may take some force and you might need a plastic prying tool, but they just pop off and slide out like so.
[08:05] Put the case on its side and confirm the standoff match the motherboard. Ours started out ready for ATX, so use the standoff removal tool and move the two bottom posts to here and here.
[08:18] We're going to make sure the I.O. shield is installed on our motherboard. Then pick the board up by the cooler and install it gently onto the standoff. You really don't want to scrape the board against the post.
[08:30] So, if it's not seated right, just lift it up and try again. Next, screw it down with these six screws like so. Hey! Nice. Now, at this point, you're probably screaming at me,
[08:43] Riley! You didn't install an NVMe SSD yet! And you're right, because guess what? Now SSDs and hard drives are expensive too. So that means we're opting for a good old-fashioned 1TB Theta SSD.
[08:57] Sure, direct storage is slowly happening and a few games will benefit from a faster drive, but for the most part, we're talking about waiting maybe a few extra seconds in the lengthiest of loading screens.
[09:10] Welcome to Rush, or as I like to call it, welcome to fucking hell. We wanted to make sure a 1TB drive fit in our budget, And adding a faster drive later is one of the easiest upgrades you can do. Now who knows what will happen, but at the time of filming, prices are starting to stabilize a little bit.
[09:27] This crucial drive is no longer on sale, but maybe check out this 1TB Samsung 990 EVO if you're willing to pay a little bit extra for a more modern drive. Your motherboard should include some SATA data cables that we're going to need.
[09:40] We like to plug into the board first and then route the cable out the back. We'll mount our drive to the case on the back where it's labeled SSD by taking the mounting tray off, screwing it down with these four screws, and then reattaching the tray to the
[09:53] case. Then attach the data cable. It just that easy This is also a good time to grab the tiny M standoff and screw from your motherboard box and install that on the board for a future upgrade These are really easy to lose and this will keep it safe
[10:10] We're so close to being done, I can't wait! But first, the power supply. We bought this 650W 80 Plus Bronze unit from MSI for just $60. You can find cheaper options, but we've had good test experiences at the lab
[10:24] with these MSI MAG ADN units, and 80 Plus actually rates this guy as silver efficiency. The only issue we found was some poor performance with power brownouts, so if you live somewhere with unreliable power,
[10:36] maybe check out the lab's website and pick something else that we've reviewed positively that fits your budget. The nice thing about non-modular power supplies is you can't really install the cables long because they're already plugged in.
[10:48] With the cables pulled out of the way, stick it into the basement, line it up with the screw holes, then screw it down. If your case, like ours, has a filter on the bottom, you can feel free to install the PSU in either orientation. Even if it's intaking air from the bottom, pet air shouldn't be an issue.
[11:05] The annoying thing about non-modular units is we don't need all of these cables, but we do need most of them. Take your 24-pin ATX power connector and route it up through the side and to the board.
[11:18] Make sure it's keyed the right way before pressing down. Now this is another moment that requires a little more force, but you can do it. I believe in you. Next, let's get our CPU power routed up through here and into our little 8-pin header.
[11:32] If there's not enough space for your hands, feel free to remove the cooler and just move it to the side. As long as you don't write that paste anywhere, you can just put it back on after, no reapplication necessary. After that's in place, we'll route a pigtailed 8-pin PCIe power cable out of the side
[11:47] and just leave it dangling here for later. We'll need both the 8-pin and the 6-pin from that for the GPU. Finally, we need our SATA power cable. Now this can stay in the back since all we need it for is our SSD and fan hub.
[12:01] Plug it in wherever you want along the chain and tuck the rest of the cable into the basement along with everything else we're not using. Now we are at the moment you've all been waiting for, the Intel Arc B580, specifically the
[12:13] Agrox Steel Legend version with a little bit of overclock right out of the box. For $300, this is about as good as it gets with 12GB of VRAM and much improved driver
[12:25] support. It took Intel a little bit of time, okay? But these little cards are great for 1080p, good for 1440p, and capable of 4K gaming if
[12:37] you're willing to run everything on low and enable XDSS. Okay? Typically for a gaming PC, we recommend taking half of your budget and putting it towards the GPU. you know, you're a little weird right now with memory and storage at all-time high prices
[12:52] and hard to obtain. Sure, graphics cards have gone up in price, but at least you can still buy them, making this a part you can easily upgrade in the future. Knock off. A lot of that.
[13:04] Let's get our PCIe slot covers out of the way first by taking off the slot cover cover. You heard me. Once those are removed, eyeball the PCIe slot and do your best to line up the gold teeth with the slot. Once you're ready, give it a solid push to seat it into place. Screw
[13:21] it down where you removed the slot cover, then plug in our 8 and 6 pin power connector. We are so close you guys! Okay, just gotta wire everything else up. Plug in HD audio at the bottom left over here, plug in our USB 3.0 slot near the ATX power connector over
[13:36] here, and then let's get our fan hub plugged into any of our PWM fan headers. I'm going use this one. I like its vibe. We're going to plug in our pre-daily chained ARGB cable to this
[13:48] header on the board up here. And last but not least, plug in your front panel header. Conveniently enough, this case has just one solid unit instead of a few individual pins. So as long as it's oriented the right way, it just plugs right into your F panel header like so. Now contrary to
[14:05] popular opinion, this next step is technically optional. For cable management, pull them all just a little bit pot to get rid of excess slack, and then we're going to use those zip ties to attach them to some of these handy tie-down points.
[14:19] It doesn't take a lot of time, and it looks much nicer after. Everything else, like those extra cables on our non-modular PSU, stuff them into the basement and never think about them again.
[14:31] Heck yeah! Found that! Aha! All right, we're all done. This build is ready to gain. Let's see how she goes. Ooh, the colors.
[14:45] Now, this is a hardware-focused video, so we're not going to get too into software tuning and all that, but I will just check that we are running at 1440p on this monitor, 240 hertz. The RAM as seen in the task manager running at 3600 megatransfers per second That as it supposed to be We got a fairly up driver on the ARC and it helpfully showing us that resizable
[15:09] bar is enabled. I'm, you know, I'm happy. But leave a comment if you want us to do a video on how to tune your PC after you build it. I feel like that's a whole video in itself. With that out of the way, let's get into some games, okay?
[15:22] What have we got installed locally here? Marathon! I haven't had a chance to play Marathon yet. So we're going to do it on this brand new squeaky clean build. Who's that guy? I want to know. What's the lore? I do want to start with Marathon because it is a competitive shooter, but it is fairly new.
[15:38] And as far as I understand, the graphics are interesting to look at. I don't know if it's very intensive or not, but I'm going to give you my subjective experience. Wow. Now that's what I call graphics.
[15:51] What do you get when you get Riley? That was a LGT video. This is the first time I've loaded in. It's beautiful Look at those rocks We got a lot of weather effects And wind and rain Okay, I'm at medium preset now
[16:03] Getting about 100 FPS Although not in an intensive combat situation I don't like how it's already all loaded so slowly like that It's like generating as you go Survey drone cartridge
[16:16] My backpack's full Ah! Okay, I'm shooting people now We got effects going 86 FPS Damn, damn, damn Woo! Oh, those are little missiles. Okay, 95 FPS for, like, some crazy, you know.
[16:32] Oh, I can't do anything except give up. I'm going to give up. You won't turn me into a different kind of cybernetic Android thing. Okay, I'm not super happy with how that run went,
[16:45] but overall I'm kind of happy with the performance so far. I mean, we started in at highest settings, and, you know, we're getting around 60-ish, You probably want a bit more than that for a competitive shooter. So we drop down to medium. We're hovering around 100.
[16:58] You know, for a brand new game that's probably got some optimization yet to do, I'm happy with it. And that's what's important. Marathon, that's a fast-paced competitive shooter. You know, a lot of jerky action. Now we're in Resident Evil, which is very calm.
[17:10] And as I understand, I haven't played a single one of the franchise, but as I understand, it's kind of a relaxing game, right? That's right. Why is it so dark in here, though? That's my question. But in this dark room with almost nothing going on, we got 71 FPS average.
[17:26] Oh, you can run. If I run, am I going to run headfirst into a zombie? There's one. Has anyone tried healing them, though? But I want action. Ah! I've got spaces.
[17:38] Jeez, Louise. Why? Why is he dead? I shot him. Jeez. Guys in Resident Evil can just kind of take a couple zombie bites and you're fine? Yeah, you can't disturb that. What kind of game is this?
[17:51] 71 FPS. Grenade! Give me some explosion effects. Whoa, we dropped down to 66. Please fiddled around with the settings, and some are at medium, some are at high, so it's kind of a mix of how he likes it.
[18:04] But, you know, I think with a build like this, it's not the kind of build where you're absolutely just going to be able to drop in at highest settings. You are going to, you know, you want to tune things, especially for, like, more modern titles. But, like, even in this, this game just came out.
[18:17] 70 fps or so, it'll do especially for kind of like a cozy game like this. AHHHHHHHHHHHHHHHHHHHHHHHHHHHHHHHHHHHHHHHHHHH Well, there you have it folks, we spent a little over a thousand dollars but we're here
[18:31] and we're gaming. And at 1440p no less who could have guessed a few years ago that Intel will be a budget option not only for CPUs but for graphics cards too. If you're interested in any of the products we use in this build, we'll have those linked
[18:45] in the video description. Hey, why don't you head down there and leave a comment. Let me, Riley, the host of this video, know if you think we should have fit a beefier GPU in there, you know? What would you have sacrificed to make it all work?
[19:00] I'm pretty happy with it. Almost as happy as I am with this segue to our sponsor, Telo. Having an affordable phone plan should never come at the cost of call quality, and Telo knows this. Their mobile phone plans are super flexible, with prices up to just $25 a month.
[19:17] And if you think that's the best part, their unlimited phone plan gets you nationwide 5G coverage and 50 gigabytes of high-speed data, all on America's largest network. They also give you the option to build out a plan that matches your personal needs as well.
[19:31] You even get to keep your old phone and numbers. There's lots of other freebies to be had, including free hotspotting and Wi-Fi calling, international calls to over 60 different countries, eSIMs, and more.
[19:43] Plus, they have thousands upon thousands of excellent reviews on Trustpilot. Get started with the right plan for you with our link down below. Hello! Thanks for watching. If you liked this video, make sure to check out the last time I helped line with Build-A-VC.
[19:57] Now, I'm doing it all by myself. I'm grown, papa.


⚡ Saved you 0h 20m reading this? Transcribe any YouTube video for free — no signup needed.