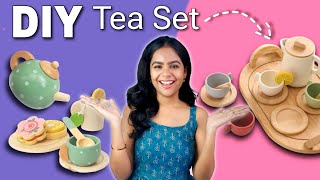

Recreating My Childhood Cup Set from Trash
47sRelatable childhood memory combined with a creative DIY hack draws viewers in.
▶ Play Clip"Title says '15 CUTE' but only six cups and plates are made; the number 15 is misleading. Content is solid DIY but oversells the quantity."
This video demonstrates how to create a cute, playable cup and plate set for dolls or pretend play using discarded plastic items like poster color bottles, plastic sheets, and ice cream sticks. The creator repurposes waste materials with minimal cost, adding clay handles, spray paint, and varnish for a polished finish.
The set includes cups, plates, a kettle, and a tray. The creator previously made a clay version but now uses waste plastic.
Empty poster color bottles are cleaned, cut with a pen knife, and clay handles are attached. The plastic left on the sides helps the handle stick better.
A plastic sheet is cut, heated, and pressed between two lids to form a plate shape. Six plates are made to match the six cups.
A plastic box is used as the base. A hole is drilled, and a clay spout is formed using a refill covered with plastic wrap for easy removal. Silicone glue secures it.
Coffee stir sticks (or ice cream sticks) are glued together with a plastic sheet underneath. Additional sticks crosswise for strength, and bamboo sticks form a border.
Spray paint is used for efficiency, followed by golden paint for decoration and glossy varnish to protect the colors and give a realistic look.
The finished set looks realistic and cute. The creator encourages viewers to like, share, and subscribe, and to comment on their favorite piece.
This DIY project transforms household waste into an adorable, functional tea set for children's play, proving that creativity and minimal tools can produce impressive results.
What material is used for the cups?
Empty poster color bottles (plastic).
00:34
How are the handles attached to the cups?
Clay is shaped into a handle and stuck to a small plastic protrusion left on the cup side.
01:21
What technique is used to shape the plates?
A heated plastic sheet is pressed between a small and large lid to form a plate shape.
02:01
How is the kettle spout made?
A hollow cylindrical shape is formed by applying clay around a refill wrapped in plastic wrap, then attached to a plastic box.
04:00
What is used to make the tray?
Coffee stir sticks (or ice cream sticks) glued together, with bamboo sticks for the border.
05:09
What finishing steps are applied to the set?
Spray paint, decorative golden paint, and glossy varnish.
07:15
Upcycling Poster Color Bottles
Shows a creative way to repurpose common waste into functional mini cups.
00:34Heat-Forming Plastic Plates
Demonstrates a simple DIY method to shape plastic without a mold.
02:28Functional Kettle from a Box
The kettle can actually pour water, adding play value to the set.
03:34Final Satisfying Result
The finished set looks remarkably realistic, highlighting the effectiveness of the DIY process.
08:56[00:02] But what will you play now? In my childhood, I had a very beautiful cup plate set and it was very cute. But mother picked it up and gave it to the relatives' children. So now will you go and ask them back? Oh no, you fool, now I will make the same couplet set
[00:18] Oh no, you fool, now I will make the same couplet set at home. so let's start. So what does a cup and plate set consist of? Cups, plates, kettles and trays. in my last video also but I had made it from clay. But this time we will
[00:34] make it with jugaad. So let's make the cups first. So you must have bought these colorful poster colors at some point in your life. If you have must have given it to you. And it always dries up before it's finished. So
[00:49] I have cleaned them. And looking at this I feel that this is the best option for making our cups. So first of all I will
[01:08] so I am cutting it with a pen knife. But if you are a child then get this work removed all its extra plastic. I have just left this little bit. But I will just left this little bit. But I will tell you why I left it.
[01:21] So now I'm taking some Itsy-Bitsy shaped clay and using it we're going to make handles for these. Now we have to make a handle from this and stick it on the cup. We will stick it on the little plastic that we had left on the sides of the end cup. stick it on the cup. We will stick it on the little plastic that we had left on the sides of the end cup.
[01:34] And these will not break easily. So we will attach the handle and leave them to dry. we will attach the handle and leave them to dry. We have to paint them now but we will do that later. But if the cups are so cute then the plate
[01:48] should also be cute. So let's make the plates now. I searched the entire house. I looked through the junk bags. But I could n't find anything shaped like a plate. So now, out of compulsion, we will have to make the shape of the plate ourselves.
[02:01] I don't know if it will actually happen. But let's try it. So I cut a sheet of plastic. And now we'll take a small lid and a slightly bigger lid. Now first of all we will heat the plastic a little and then
[02:14] we will place it on the small lid and place the big lid on top and press it. your plastic will get cold. Now since I have to explain it to you in the video, I am showing it in a little slow motion. But off the camera I did it very
[02:28] quickly. Only then this plate shape is formed. So the shape of the plate has been made quite well. And now we will cut all the shapes.
[02:42] six cups and six plates. Sometimes there are four as well. So I'm also making six here. But it is your choice, you can make more or less. If you want to play, do as you wish. Now we have made the plate with cups but I am thinking
[02:55] that there should be some ball or bowl for serving also. So I am using the lids of the cups that we made here to keep cookies etc. So these plates were not the easiest to make. And it didn't cost anything.
[03:07] So the next thing we have to make is a kettle and a tray. What to make first? Make anything. Why are you asking so much? Let's make a kettle. Now a few days ago I made this kettle which was very cute. You might be wondering
[03:21] why I am not using this same kettle in my set. So the truth is that this kettle does not work. We have to make a cattle that also works. Meaning we can actually serve water or tea in it. So to make this also
[03:34] I have used a plastic box. If you have any such small box of any shape, you can use it. And whatever extra elements there are, we will again make them from clay. Now look, if you do not feel like working hard and you are
[03:46] not feel like working hard and you are But if you want cattle in proper working condition then you should follow this process only. So for this we will have to make a beak like thing in front.
[04:00] So first of all we will make a hole in it. Now we will again use clay to make the beak. So we have to make a hollow cylindrical shape from the clay. So take any thin refill etc. We will apply clay on it. But to ensure that the clay easily comes out,
[04:15] I have pasted a plastic sheet over it.
[04:27] If we had not put this plastic sheet, it would have remained stuck in it. Then I would remember my grandmother while taking it out. So now let us paste it here in this manner. So I applied silicone glue on it and stuck it.
[04:41] But this alone will not suffice. This has to be made stronger. So I'm securing it once more with clay. And now we will just leave it to dry. Friend, I have tried using this kettle and it is working very well. But I will
[04:56] not show it to you now, I will show it to you directly in the final reveal. So let's get the cattle ready. Now the last thing left for us is the tray. Let's make that too. Now look, I had a lot of ideas coming to my mind to make the tray. I could
[05:09] n't understand which idea to make. So first of all you can take such a lid. You can make a tray from it. Like I have made before. Or you can make it using cardboard or MDF. But I am thinking that let me make this coffee
[05:23] using stir sticks. If you do not have this, you can also use normal ice cream sticks. So first of all we will you can keep its length according to the size of your cup plate set. Now
[05:40] we will take full care of strength in this also. So that all these sticks stick together properly, we will also place some sticks from the back side in the other direction. [Music] I put a plastic sheet underneath so
[05:55] it can be easily removed. [Music] Now I don't want this side design like this, so I'm going to cut it out. If you want to keep it, you can keep it. Now since we are making the tray from wood,
[06:07] I have used these bamboo sticks to make its border. And to make it using silicone glue. This silicone glue is also from Ed's Bitsy. So mostly today I am making all the things from waste material. But there are a few
[06:21] things that I have bought. Like this silicone glue, some colors and clay. if you also want any DIY product of art and craft then you can get it from Its Bit. And if you use my coupon code
[06:34] Mansi05, you will also get an extra discount of 5%. Rest of the details are in the description box. Get it checked. So our cute tray is also ready and man, it looks very beautiful. It looks good like this too. Meaning, even if
[06:48] we do not paint anything on it, it will still look good. But I don't know whether I should paint it or not. Let's see that later. Now all our things are ready. Now it's time to paint them. All these cute things are looking so lovely right now that I can't even
[07:01] describe them. But let's paint it. So the method of painting is going to be very simple. And it will look very nice. Trust me, I'm talking before I paint, but you just keep watching. Now
[07:15] I have started painting with so many small elements. But while painting it, I realized that it would take a lot of time to paint it. And you know I am busy with my wedding preparations. So to save time I ordered spray paint.
[07:27] And painted everything in one go. So look, everything has been painted very quickly. Now we have to do some art work on it. You can paint it however you want. But I am taking this golden paint. And
[07:40] But I am taking this golden paint. And which will give a very aesthetic look. And friend, just look, as soon as this golden element was added, this cup and plate set started looking exactly like the real cup and plate set. Now
[07:55] I don't want to leave the cattle even a little empty. So I am making some designs here in the middle. You can keep the design as you wish or not. You can simply make pole dots, it will do. And you know what to do in the end, right? We have to
[08:07] apply varnish because we have made it with so much hard work, so to ensure that all the colours do not fade away and it does not get dirty, we will apply varnish on it. And man, after applying this glossy varnish, it looks absolutely real.
[08:21] What can I say? I am not telling it myself. You can see the final look yourself. see the final look yourself. [Music]
[08:56] Man, this couplet set is so much more beautiful than the couplet set I had as a child. And this time I am not going to give it to anyone. Nor will I let mom give it to anyone. So now you guys comment and tell me what you liked the most from this
[09:09] ? Cuplet, kettle or tray. The rest you know what to do. Like, share, subscribe, do whatever you can. And I keep bringing short videos. And I keep bringing short videos. So let's meet again.
[09:26] Yes, Cattle, let's get started.

⚡ Saved you 0h 09m reading this? Transcribe any YouTube video for free — no signup needed.