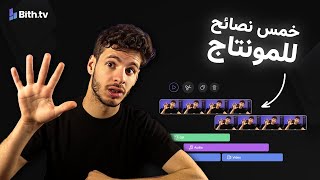

Why Editing Takes 1 Hour Per Minute
44sThe staggering ratio of editing time to final video length is a shocking revelation that resonates with creators and sparks curiosity.
▶ Play Clip"Delivers solid, actionable tips that match the title, though some sections feel padded with repetition."
This video offers five essential video editing tips for content creators, emphasizing the importance of preparation, organization, and smart workflows to speed up the editing process. The creator shares personal strategies for file organization, using audio waveforms, leveraging AI tools, simplifying the editing process, and mastering keyboard shortcuts.
Editing is one of the biggest struggles for content creators; every minute of a final video can take an hour to edit. It's normal to spend a whole day editing one video.
Two hours of editing done right is better than eight hours done stupidly. Preparation and a sharp mind are key to editing quickly.
Organize projects, files, and footage on your computer. Create folders for each year, channel, or topic. Organize footage into subfolders like Sound Effects, Ambient, Music, green screens, memes, movie clips, and images.
Saves time searching for assets, keeps your mind clear, and makes editing easier and more relaxing. You can find things quickly without going online.
Bath.tv is an easy editing website with everything needed: text, images, audio, videos. It has AI features like text addition and video resizing. Files are organized separately.
Look at the sound waves to know when speech starts and ends, making cutting easier. Also helps in timing images and text, and adjusting volume levels for balance.
AI tools like AI InCrop for images, video clarity enhancement, and Adobe Podcasts for audio cleanup. Bath.tv offers AI text that adds captions with correct timing in any language.
Simplify editing by breaking complex videos into sections. For simple videos, edit sequentially: cut, add footage, effects, text. Keep editing simple to focus on the message.
Shortcuts like Space (play/pause), S (trim), D (duplicate), Delete (remove), Ctrl+Z (undo), Ctrl+Shift+Z (redo), and arrow keys. They make editing faster and more efficient.
In Adobe programs, Ctrl+S saves projects frequently to avoid losing work. Enable autosave every 20 minutes. Bath.tv automatically saves everything.
The video concludes that by organizing files, using audio waveforms, leveraging AI, simplifying the editing process, and mastering keyboard shortcuts, content creators can significantly speed up their editing workflow and produce better videos with less effort.
What is the first tip for video editing mentioned?
Organize your files.
00:46
What are the three uses of audio frequencies in editing?
Cutting video, timing images and text, and adjusting volume levels.
03:48
What is AI InCrop used for?
It takes an image and increases its size by adding things that weren't there before.
05:39
What does Adobe Podcasts do?
It uses AI to clean up audio, removing noise and adjusting your voice.
06:05
What is the recommended order for editing a simple video?
Cut, add footage, add effects, add text.
07:24
What is the keyboard shortcut to save in Adobe programs?
Ctrl+S
10:37
Why is it important to use keyboard shortcuts?
They make editing faster and more efficient, saving hours of work.
08:58
Work smarter, not harder
Emphasizes efficiency over raw effort, a core principle for productivity.
00:29Bath.tv as an all-in-one editing tool
Introduces a specific tool that simplifies editing with AI features and cloud storage.
03:08AI in editing
Highlights the growing role of AI in automating tedious tasks like audio cleanup and captioning.
05:39Keyboard shortcuts save time
A practical tip that can drastically reduce editing time for professionals.
08:58[00:02] editing, especially for editors and content creators. Editing was one of my biggest struggles as a content creator, and it still is. This is because editing is so difficult that every minute you're watching right now of this video took a
[00:15] full hour to edit. So it's perfectly normal to spend a whole day of your life editing one video, and even several days on the same project. Since this is the case, you need to work smarter, not harder. Two hours of editing done right will
[00:29] be better than eight hours done stupidly. There's also a if you have six hours to cut down this tree, I'll cut down the axe. I mean, I'll spend the first four hours preparing the axe. So, in short,
[00:46] if you want to go... To edit a video, you need to be prepared, have a sharp mind, and work correctly to edit as quickly as possible. Now that you understand this, let's start with tip number one: you need to organize your files. By organizing your files, I mean projects, the files
[01:01] themselves, and even the footage you have. Everything on your computer needs to be organized, main Windows screen. All your files on it need to be well-organized. For projects, you need to create a file for each project period—a file for 2020, a file for 2021, and so on for future years.
[01:17] Or at least create a file for each channel, or a file for each topic, or at least one file for all the projects you've ever done so you can add more projects to it. Besides organizing all your files so you can access them whenever you want, you also need to
[01:32] know how to organize your footage—your photos, videos, audio, everything you have—it needs to be organized. 100%. For example, my audio file contains three sub-files. The first is a Sound Effects file, which includes sound effects like background noise and shock effects. I
[01:47] put all these sounds in a separate file called Sound Effects. There's also a second Sound Effects file called Ambient, which contains environmental and nature sounds like fire and winter. I put all these things in an Ambients file. And I also have a third file called Music, where I put the
[02:00] music and all the melodies. Similarly, for videos, I have a separate file for green screens, a separate file for memes, a separate file for movie clips, and a separate file for game clips. The same applies to images. I have reaction images, meme images, and even images of shapes like
[02:14] Xs, checkmarks, and arrows. I have all these shapes in one file. When these files are organized like this, I can easily access anything I want. My mind is straightforward, and I know where to find it, especially since I have another channel with tech content. I always have ready-made images of
[02:27] things I use, like PlayStations, computers, and phones. So whenever I want a picture of a phone, I can find one, and whenever I want a picture of a PlayStation, I can get one ready-made instead of going online and searching. That's the benefit of organizing files: you'll
[02:40] save yourself an incredible amount of time. You'll save yourself the time of going to Google, searching for the image you need, downloading it, and then putting it back in the file. Instead of doing all that, of the things you use most often. Another reason why you should organize your files is that
[02:55] everything will be clearer in your mind, you'll be more open, you'll be able to come up with better ideas, and you'll be able to find things more easily and efficiently. And most importantly, it will make editing much easier. It's easy and relaxing for you. Instead of hating editing, you'll start to like it a little. The great thing about this is that
[03:08] most of the files I use are on a website called Bath.tv, which is the easiest editing website in the world. It has everything you need for editing, like adding text, images, audio, and videos. You can even add text using artificial intelligence, convert
[03:20] videos from portrait to landscape or landscape to portrait, or any other format you want. On this website, you'll find images, audio, and videos all organized separately, each in its own way. So, if you want scary sounds, funny sounds, or silly sounds, you'll find them. Similarly,
[03:34] if you want memes, reactions, and other effects, everything is distributed correctly on the website. Don't forget that you can even upload your own footage to the site, just like your videos, images, audio, and files. You can organize them on the main screen. The website is designed so you can easily organize your files
[03:48] and learn how to edit. Comfortable at the same time. Now, the second piece of advice is that you must use audio frequencies, which are called sound waves. These are the shape of the sound itself, how it rises and falls. So, yes, exactly as I told you, you need to start
[04:00] looking at the sound with your eyes. These audio frequencies have three very important uses when you use them in editing. The first use is when you are cutting the video. When you are cutting, you look at the shape of the sound itself to know when the speech happened, when it started, and when it ended, so that you don't keep
[04:14] struggling by constantly listening to the sound and replaying it. You also learn when there was a crackling sound because the sound of the crackling sound is specific. So, you can tell from the sound when the crackling happened and when your friends were talking.
[04:27] Without it, you would never be able to cut your videos. So, it is very important to use a program with audio frequencies. Now, for the second use, it is to know when to choose the timing for images and text. When adding text or images, you need to know how to choose the right timing. To do this, you need to pay attention to the flow of the text,
[04:40] as this will tell you exactly when a word was spoken and when it ended. You can then adjust word was spoken and when it ended. You can then adjust
[05:00] original video, and the external sounds, you need to adjust the volume level. This ensures that loud and nothing too quiet. This is a common mistake: many people have a
[05:12] very loud intro, then add clips with low volume, creating a confusing situation where the video's volume is high, then low, then high again. Use these audio frequencies to achieve this balance. You know what the audio quality of the video is, and you can adjust the volume to balance it. These are the
[05:25] audio frequencies, which were used for proper sound quality, correct shot arrangement, and to determine the audio quality of the video. The great thing is that all of them are available on the Dotty website, and you can even raise and lower the volume directly from the site. Now, the
[05:39] third tip is that you should start using artificial intelligence. For example, there's something called AI InCrop, which takes an image and increases its size by adding things that weren't there before. It uses artificial intelligence to do this for images. As for
[05:51] videos, you can use AI to enhance video clarity. If your video is use AI to improve its clarity or even its colors. One of the best uses of AI is something called Adobe Podcasts, a website from Adobe where
[06:05] you upload your own audio. And with your voice, no matter where the sound is placed, even if it's jumbled or there's noise or people shouting, it takes your voice and adjusts it 100% with artificial intelligence. So instead of wasting hours of your life improving and adjusting the sound, start using
[06:18] artificial intelligence to adjust the sound, images, text, and everything else in your video. Even on the Bath.tv website, there are AI features like Video Resize, which takes the landscape video and converts it to portrait. Also on Bath.tv, there's
[06:31] AI text that listens to your video, every word you say, no matter what your accent is—Saudi, Egyptian, Jordanian, whatever your country and accent—it listens to your voice precisely and adds the text accordingly. It even works in all the world's languages. So
[06:44] instead of wasting your time typing word by word and adjusting the timing, it adds the text to the entire video with the correct timing, all with just one click. And you With a single click, you can add effects like changing the color of the words you're speaking or
[06:57] making all the text appear at once, like this effect called Pop-In. You can use artificial intelligence with text, voices, or explanations. There are many things you can use AI for. Now, tip number four: you need to organize your editing.
[07:11] By organizing, I don't mean organizing files or anything like that. I mean simplifying your editing as much as possible. If your video is complex and has many parts, and you can't keep going back and forth, at least organize the video into sections so you can work on it. But
[07:24] if your video is simple and clear, meaning you only need to edit one clip, you need to edit it sequentially. First, cut it, then add the footage, then add the effects, then add the text. You have to follow a specific order because a specific order is what
[07:37] opens your mind and makes you enjoy editing. For example, if If you want to edit a video like the one you're watching, the first thing you need to do is cut it completely. Then you add the main shots, which are the subject of the video. You don't have to edit them perfectly; just add more
[07:50] shots, effects, and text. After you've done all that, you can start looking at the arrangement and adjustments—the small details. This is one of the most important pieces of advice because when you complicate the video, your mind will become complicated too. So, you have to
[08:04] keep the editing as simple as possible. Besides preparing for the editing, organizing your work, and arranging the steps of the video editing process, you also need to have a mindset of simplification. Your editing has to be as simple as possible. In other words, think smart. Keep adding shots instead of constantly adding movement. And
[08:19] instead of adding moving characters, you can use static characters and change their images. Don't think that simple editing is worse than complicated editing; on the contrary, simple editing is a million times better. Once you've finished a video, it's complicated editing. Simple editing focuses
[08:32] more on your personality, making it easier for people to understand who you are. It also focuses on your topic and what you're talking about. When your editing is simple and clear, with good shots and everything else, people will easily understand who you are and what you're saying. But when editing is
[08:45] complicated, people start to lose track of the video's message. They stop understanding and even stop caring about who you are because you're so focused on the editing. Your editing needs to be simple because it truly focuses on the idea and the persona of the video. So always think smart, keep your work organized, and
[08:58] even keep it simple. And one last piece of advice: you must use keyboard shortcuts. The word "shortcuts" is very clear; they are keyboard shortcuts. Press Space to play and pause the video, press S to trim the video, press D to
[09:11] duplicate (make two of two things), and press Delete to remove anything you've edited. You can press Ctrl+Z to rewind time or Ctrl+Shift+Z to fast-forward. You rewind time or Ctrl+Shift+Z to fast-forward. You
[09:23] mouse wheel to zoom in and out on the timeline (the workspace). You can also use the arrow keys, like the right and left arrows, to fast-forward or rewind. In short, keyboard shortcuts will make editing incredibly easy.
[09:36] Instead of constantly moving the mouse and clicking keys, you can simply use the keyboard. This is the problem with phone editing – you have to click one key at a time. But with a keyboard and mouse, you can click keys simultaneously, making
[09:48] editing twice as fast. Instead of searching for keys, you can just press them all at once. It will definitely make your editing faster. You save hours of editing simply because you're using a keyboard. Plus, the editing feels like you're working with a mouse and
[10:00] keyboard because you can move around and have good control. Also, phone screens are too small for editing, while computer screens are much larger. That's why I personally prefer computers for editing. I recommend anyone used to phone editing to switch to
[10:12] computer editing because the larger screen is more comfortable, and the mouse and keyboard offer better control. Even computer editing software is a million times better. If you don't have the budget for a powerful computer or you only need very simple editing, use a TV streaming website. It's the easiest, simplest, and lightest website in the world.
[10:25] If you're editing on a computer but not using shortcuts, you're literally wasting half your life. It's absolutely essential to learn each shortcut key. If you're using a TV streaming website, they're usually located in the corner. If you're using Adobe... You can
[10:37] go to the two folders and find them. If you use Adobe programs, there's a very important shortcut you shouldn't forget: Ctrl+S. Ctrl+S saves your projects, and it's crucial to get used to it because sometimes the program freezes, crashes, or you lose
[10:51] everything you've worked on all day. If you're not used to pressing Ctrl+S frequently, you'll lose everything you've done if the program freezes, your computer freezes, or anything happens to it. So, it's essential to make this a Also, don't forget to enable autosave, which saves automatically every 20 minutes. As for streaming TV, you don't
[11:05] need to save anything because it's running on a website. Everything you do and every action you take is automatically saved by the website. The great thing about it is that since it's a website, you don't need to download any programs, and you can work from anywhere in the world, or
[11:18] even on multiple devices. If you're working from home and you go to someone else's house, you can open your account there and easily continue working on their computer since you already have an account. So, I've shared the five most important video editing tips for anyone using a computer. Don't forget
[11:30] to tell me in the comments how many of these tips you use, and if you have any other tips, write tips you use, and if you have any other tips, write them in the comments too.
⚡ Saved you 0h 11m reading this? Transcribe any YouTube video for free — no signup needed.