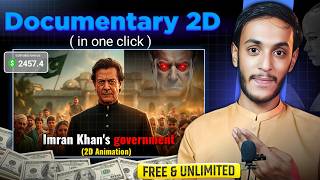

Documentary Channel Growth Proof
42sShows real channel success with few videos, motivating viewers to try AI documentary creation.
▶ Play Clip"Delivers the promised tutorial but padded with channel examples and repetitive motivation; solid but could be more concise."
This video is a comprehensive tutorial on creating 2D animated documentary videos using AI tools, aimed at growing a YouTube channel. It showcases successful channels with minimal videos but high view counts, then provides a step-by-step guide covering script generation, image creation, voiceover, and editing.
The fastest growing content on YouTube is documentary content, as stated by the creator.
Channel 'Enid' has only 29 videos but over 1,000 subscribers and millions of views, proving the success of documentary videos.
Channel 'Sketches of History' has only 9 videos and nearly 6,000 subscribers with high views.
Channel 'Doc Nix' uploaded 14 videos and reached 14,400 subscribers, with first video getting 56,000 views.
Channel 'Dog 2D' has 14 videos and about 8,000 subscribers, with second video reaching 23,20,000 views.
Channel 'Any File' uploaded 12 videos and has around 3,000 subscribers, with consistent good views.
Use ChatGPT to generate topic ideas for the documentary video if none is available.
Copy the provided prompt into ChatGPT, replace the topic and video length, and generate an engaging script.
Use a second prompt in ChatGPT to generate 20 image prompts corresponding to the script scenes.
Download Kota BW browser on mobile, search 'AutoViska', add the Chrome extension, and open the Viski AI website.
In the AutoViska extension, paste all image prompts, set ratio, and click Start to auto-generate images.
Add the Automata extension via Meta AI website, select images from gallery, write 'animate' as prompt, and generate video clips.
Use Google Voice (AI Voice) as recommended; avoid robotic voices for monetization. Paste the script and download the audio.
Import video clips in order, add voiceover, sync audio with visuals, add background music (10-12 volume), add channel name watermark, and export.
With AI tools like ChatGPT, AutoViska, Automata, and Google Voice, anyone can create professional-looking 2D documentary videos quickly. The key is to follow the steps carefully and focus on quality voiceover to ensure monetization.
How many videos did channel 'Sketches of History' upload?
9 videos.
01:50
What is the first step in creating a 2D documentary video according to the tutorial?
Find a topic; use ChatGPT if needed.
05:13
What tool is used to generate images from prompts?
AutoViska extension via Kota BW browser.
08:58
How do you convert images into videos in this method?
Use Automata extension on Meta AI website, select images, and write 'animate' as prompt.
12:44
Why should you avoid robotic voiceover for YouTube monetization?
Robotic voice can prevent channel monetization; use realistic AI voices.
15:16
What editing app is demonstrated in the tutorial?
VN Video Editor.
17:31
Documentary content growth
Identifies a trending niche for YouTube creators.
00:15Success proof with example channels
Demonstrates that channels with few videos can gain high traffic.
01:08Prompt-based script generation
Shows how to leverage ChatGPT for creating engaging narratives.
06:07Voiceover monetization requirement
Emphasizes the importance of realistic voiceover for channel monetization.
15:16Audio-video synchronization trick
Key editing tip: match visuals to corresponding narration for better engagement.
18:49[00:03] Five months ago, I taught you in a video many of you ignored that thing and did not start the work. and did not start the work. So, as of today, till this date, what
[00:15] I am telling you is that the fastest growing content on YouTube is documentary content. And in today's video I will also make you check out a clip which has been made in animation. Made in 2D animation. And I will make
[00:28] you visit not one but five such documentary channels which have gained a good number of subscribers on their channels by uploading just a few videos and the interesting thing is that they have also monetized their channels. So first of all let me make you visit the channel.
[00:43] After that, let me check out a demo clip to see how these 2D documentary videos will be made. And then
[00:55] with you. So please watch the video completely. If you want to do something sitting at home, then watch the video completely. If you want to do something sitting at home, then me make you check the channel. The purpose of getting the channel checked is to give you proof
[01:08] that people are actually working and they are getting response and results for their work. So I open YouTube. The first channel I opened was named Enid and I opened it. See here, only 29 videos have been uploaded on this channel
[01:22] and how many subscribers are there? 1,000. Now check their views. The video was uploaded 4 days ago. 300,000 views 12 days ago 355,000 views. See 800,000 views below. See below almost 3 million views,
[01:37] see below 1.5 million views and views in lakhs and you will not see any shortage of views here. Ok? You saw it here. Now let me make you check another channel here which is named Sketches of History. Let's open it.
[01:50] And he has uploaded only nine videos on his channel. And look at his subscribers, they are about to complete 6000. And if I talk about views, then here you can see 114000 views, 1000 views, 20,000 views, 7,000 views and around 1 million
[02:05] views, 52,000 views and a good number of views are visible on their videos. And how many videos are there? He has uploaded only nine. And here I open the third channel which is named Doc Nix. Let's open these.
[02:18] He has uploaded only 14 videos on his channel. And his channel has completed 14,400 subscribers. And if we talk about their views, then you can see them with your own eyes. 28,000 views, 178,000 views. After that you can see around 5 lakh
[02:33] views, then 3,53,000 views and a good number of views. And the interesting thing is that the first video he posted also got 56,000 views. Now here I am going to open the fourth channel which is named Dog 2D and let us open it.
[02:47] Look here, he has uploaded only 14 videos and he is going to have around 8000 subscribers and if you click on the videos then you will see here that he is getting a good number of views. And the video he uploaded first got
[03:00] 29,000 views and the second video got 23,20,000 views. There is no shortage of views. And after that I open the fifth channel here which is named Any File. And see here, he has uploaded only 12 videos
[03:13] and his channel is going to have around 3000 subscribers. And if we talk about views, then you can see here that you are getting good views on these also. And you are getting good views on these also. And
[03:27] means that his channel is growing quite well. These channels that I have shown you are the channels which are currently running in the growing phase. In future, it will go very high. On these channels you will see millions of views and millions of subscribers.
[03:40] So it's time to start this content , to start this work. So, if you also want to make 2D documentary videos , then in today's video I am going to share this method with you. With just one click your
[03:53] content will be ready and in this way your channel will start growing. So, you have checked all these channels. Now let me make you check a video clip. Let me show you a clip from the 2D documentary. Check how it is
[04:06] made. How his voice over has been done. What are its visuals like? You will be surprised to see it. What are its visuals like? You will be surprised to see it. where leaders from all over the world gathered for the SCO Summit. The atmosphere outside was absolutely calm.
[04:20] But inside there was a fire burning whose heat was going to reach straight to the heart of India. comes out of his room. His security is fully alert. As per protocol, his bullet proof car was standing ready. But then an incident happens which
[04:35] shocks intelligence experts all over the world. Modi ji definitely moves towards his designated vehicle but suddenly his route is changed. So you simply learn to make videos like this. Watch the video carefully.
[04:48] I will guide you properly on each and every thing and Insha Allah you will not face any kind of obstacle. If you see brother's hard work in the video then you must give it a like. Apart from this, if you want to see such videos in future also, then you have to subscribe to the channel.
[05:00] So without wasting any time, here I will teach you how to make 2D documentary videos using your mobile phone. Please pay attention. The documentary videos using your mobile phone. Please pay attention. The
[05:13] research the topic on which we have to make the video. If any topic is in your mind then it is a very good thing. If no topic is coming to your mind as to where and how to make the video, then you have to open Chat GPT and get
[05:25] your topic written from Chat GPT. How to get it written? Check it out here. I searched here, tell me some historical incidents that happened in Pakistan which are world famous. I wrote this thing and they gave us many topics. In
[05:38] you can see the Partition of India here. Look below, you can see the nuclear test. You are seeing the option of Malala Yousafzai. After that you can see APS Attack 2014. You will find many topics here.
[05:53] It will create as many topics for you as you ask for. If you say give them to you. You have to select the one which you like among them. So first of all you have to find the topic in this way. The second thing you have to do is
[06:07] I am giving you a prompt here. You have to copy and paste this. I will provide this to you in the description. Simply you have to copy this. Where we have written our topic, see this APS Attack
[06:19] 2014, here you have to change your topic. Rest you have to let it remain the same. And coming down, want to increase or decrease the length of the video, like here we have written that write us a story of 8 minutes and 1000 words, then you can increase or decrease it.
[06:34] Rest you have to let these things remain as it is. After writing this, you simply have to click on the send button. As soon as you click on the send button, it will write a great story for you in which
[06:47] we have added everything. We have designed it in such a way that look here, he has given us a wonderful story by writing it. We had told him in the press that you have to write the beginning of the story very well.
[07:01] You have to write suspensefully. Whatever you have to write, it should be engaging. After that, you have to write the entire story in such a way that the viewer remains engaged in the entire story. So he has given us a good
[07:13] story by writing it. Actually, this is basically a real incident from Pakistan. You might know. So here he has written the story for us that it was morning time. The children went to school just like every day, with books in their hands and smiles on their faces; no one knew
[07:26] that it would be the last day of their lives. And then within some time, that school which was a centre of education , became a battlefield. So he has written and given us a wonderful story. So our second task is done that the story i.e. the script has also reached us.
[07:40] Now our third task is to create visuals for this story and get their prompts written. So how to get them written? Here I have written another proposal and given it to him. I will try to give this prop also in the description. If you do
[07:53] n't find it here, I will mention it on my Facebook page. you will find the link of the Facebook page inside the description. So here we have also written another print. We have added a lot of details in it.
[08:06] With this, our video will be of excellent high quality. So we have added these things here and click on the send button. You simply have to copy and paste what I have written and your
[08:18] can see here, you can see our print. If you We have told him that we want to get 20 images made. So you write us 20 prompts. print below by writing it. And let me show you here. Look, he has
[08:33] written 20 prints and given them to us. What do you have to do now? From here I will tell you that all these prints that you are seeing will be used only once and your images and videos will be created from all the prints. You do
[08:46] n't need to get an image made from one print. So once the prep is ready, our slightly difficult process is starting. Now pay attention. If you are busy right now then save the video. When you get on the bed, watch this video because this
[08:58] is a little tricky part. Even if you make a mistake somewhere, please pay attention. You have to open Play Store. After opening Play Store, you have to search Kota BW here. Will search this. This type of interface will open in front of you.
[09:10] From here, you will see this application, simply download it and open it. As soon as you open it, this type of interface will open in front of you. and here you have to write Autovask. After writing this you have to click done. After doing this,
[09:25] you will see a website on the first number, you have to click on it. Because we are going to use the extension, so you have to click on it. If you click here, you will see a button called Add to Chrome. If you
[09:37] want, let me show you one more thing here. You have to click on the three dot mark. And here you see an option Request to Desktop Site. You have to enable this thing. If you enable this thing then look here, I will
[09:50] zoom in again and check it for you. Look, you are seeing an ad for Chrome. Simply you have to click on Add to Chrome and click OK here. So this extension will be added to your Chrome. When this thing is added.
[10:04] What do you have to do now? Here you have to open a new tab. After opening a new tab, you have to search VISK AI here, so here we write Viski and search. As soon as you search, you have to zoom in here. Then you will
[10:17] see their website which is visible to you on the first number. Simply you have to click on it. Click on it. There will be a little processing here. After that this type of interface will open in front of you. So what do you simply have to do
[10:29] ? You have to login here through any Gmail account. And here you will see an option of Enter tool. Simply you have to click on it. You will click on it, simply you have to click on the continue button.
[10:42] as soon as you click on Get Started, this type of interface will open in front of you. Simply you have to click on it. And if you look here, you will see a button of extension. Simply you have to click on it. As soon as you
[10:57] see an option of Auto Viska here. Simply you have to click on it. If you click on it, here first of all you will see the language. You have to And the first version you see is 7.6.0,
[11:13] you simply have to click on it. So after that, look here, you will What do you have to do here? I have to come back. After coming back, you have to open Chat GPT. And you have to copy all your prints.
[11:28] For example, if we have 10 points, then I copy all 10 from here. Whether you have more or less, you have to copy them all at once. you see the option to add prints
[11:40] , you have to add all the prints here. After that you can see the ratio here. After that you have to come down a little and here you will see a button of Start. Simply click on the start button and your images will start getting created. I have to
[11:53] wait a little bit. All the images will be created automatically and will also be added to your gallery. You don't have to do anything. You just have to wait a little bit. So brother, we waited here for one and a half to two minutes. After that,
[12:05] our 10 out of 10 images were created and went into our gallery. We didn't do anything. Here you will see a button called Done. When this appears, it means that your processing is complete. Now let me go to the gallery and let you
[12:18] check out these images to see how it has created these images for us. So look here, you can see this image. This second image is visible. This is the third, this is the fourth, this is the fifth, this is the sixth, this is the seventh, this is the eighth, this is the ninth and this is the tenth. Ok? So
[12:31] all these images have come here. Now the task is to convert these images into videos. So how to do that? You have to come back. You have to open Kota browser again. And here we open a new tab. In this way, after opening a new tab,
[12:44] we search one more thing here. Please pay attention. Here you have to search auto and write meta in front. After searching this thing, you have to click on the OK button. Let This is the first website you will see, you simply have to
[13:00] click on it. If you click on it, this type of interface will open in front of you. I zoom in. Again I will get it checked for you. So, look at the right corner , again you will see the Add to Chrome button. That means you have to add its extension also.
[13:12] So, we clicked on Add to Chrome. As soon as you click on it extension will be added. Like look at this, the ad has been done. What do you have to do now ? Again you have to open a new tab and here you have to search meta ai
[13:28] website that will open on the first number, you simply have to click on it. After clicking on it, you have to login through any Gmail account. And here you have to click on this extension which you are seeing.
[13:43] you can see this automata at number two. Simply you have to click on it. Look here, on the first number you can see a version of Automata. Simply you have to click on it. This type of interface will open in front of you. Look here,
[13:56] you can also see a button to add a prompt. And here you can also see the button for add image. Ok? So you simply have to click on the add image button. If you click on it, your gallery will open. You have to select
[14:08] all these in order according to their numbers. First, second, third, fourth, fifth, all your images, you have to select them all at once. It will convert all the images into videos in one go. So we have selected all the images.
[14:20] You have to click on the Done button. If you want to add any prop here, you can do so. Otherwise you simply have to write animate here. So, we simply wrote animate here. After that, if you come down a little, you will
[14:34] show it to you too. This start button is visible. Simply you have to click on it. you have to wait a little. Within a short time, all your images will be we waited a little and without any interruption all our images have been
[14:50] converted into videos. You are seeing all these videos. Look at this. This first thing will automatically appear in your gallery. If for example a video does not appear inside the gallery. Zoom in and you will see a download button at the top.
[15:03] Simply click on it and download one by one. Now we have to do one more small work. We have to bring the voice over. My recommendation is to use your voice. If you don't want to use your own voice,
[15:16] clone your voice. If you don't want to do this, then use a paid website and select a voice that is realistic. If you use robotic voice, your channel will not be monetized. So what do you have to do for that?
[15:29] You have to open Google. After opening Google, you have to search After opening Google, you have to search Google here. Next you have to write AI Voice and click on the search button in front. The website that will open on the first number,
[15:41] you simply have to click on it. Click on it. The voice you get from here has more chances of getting monetized. Because this voice is Robotics is rare. We will open this. You simply have to
[15:55] click on Get Started Free. Click on it. This type of interface will open in front of you. First of all, you have to click on Instant Speech. Simply we select all and cut this story. So here
[16:11] we have an option to paste the story. So simply here we have to bring our new story. Chat GPT has to be opened. This is the story. You simply have to copy this. You have to long available and copy it. After copying the story,
[16:25] you have to come again to the Google Voice area and after coming here, you have to After pasting, if you look below, you will see the generate speech button. Simply you have to click on it. As soon as you click on it, within seconds your
[16:38] Now it has given us the story. Check how it is recorded. Just like every day, books in hand, smiles on faces, no one knew that this would be the last day of their lives. So this is our voice over which has been generated.
[16:53] Look here, you will see a download button. You have to click on it. Click on it. Another download button will appear in front of you. You have to click on it and download it. Now videos have also been made. Your voice over has
[17:06] also reached you. Now let me tell you some brief editing here. is a brief editing. I will guide you through that. you can use any app to edit this video. You can use KineMaster. You can use Inshot. You
[17:19] can use capcut. Whatever you want to do, the method is the same. Ok. So here I am going to use VN. You can also use it if you want. You have to download VN application from Play Store. Simply open it.
[17:31] Look below, you will see the plus icon. You have to click on it. You will see a new project. You have to click on it and select your videos in order. Like our first video is this one.
[17:44] So simply we select the first video from here. This is the second video after that. This is the third one. This is the fourth one. This is the fifth, this is the sixth. Similarly, you have to select your videos in an orderly manner. So we selected the video.
[17:57] You have to click on the Next button. So your video will appear here. When the video comes here, now you have to bring the voice over here. So look here you will see the button of Plus Music. You have to click on it. Here
[18:09] Look up you can see My Music. You have to click on it. Look here, you can see the music library. Simply click on it. you just downloaded. As soon as you select the music, this type of
[18:23] interface will open in front of you. Simply the Done button will be visible below. You have to click on it. So, this music has been added here. After the music is added, By clicking on it, you have to increase the volume of the music to full
[18:36] and then click done. Now your music has been added. There is a small editing trick, let me tell you that. You have to play the video. After playing the video, play the video. After playing the video,
[18:49] For example, if school is being mentioned then you have to put the school clip here. And as soon as the topic comes to the classroom, there should be a clip of the classroom there. And as you move forward and look here, you can
[19:01] see the army, then this clip should be there. Let me tell you in short, you have to merge the audio and video together. Once you have done this work, now if you want to put some background music which sounds good in the background,
[19:14] you can put that too. Where will I get it from? You can also get it from the YouTube audio library and there are some channels on YouTube that provide it to you for free. So button. Again you have to click on Music and
[19:27] go to My Music and search for that music. Ok? For example, let me explain it to you here. Like let's say this one is that music. Simply what do you have to do ? You have to click on it like this and the use button will be visible here.
[19:39] You have to click on it and click on the Done button. When this music is added, the volume button will be visible below and you have to keep this music around 10 to 12 and click on the Done button. What will happen in this?
[19:52] Your music will play in the background with low volume. Your voice will be with more volume. You must have adjusted the visuals well. The video will be so amazing that you will be surprised. Once this is done, what do you have to do here
[20:05] ? You also have to write the name of your channel above. how to write? Look, on the second number you can see a plus button. You have to click on it. Click on Add a Heading. And here you have to write the name of your channel. Like the
[20:19] name of our channel is Syed Yasir Abbas. We wrote this down. After that you have to click on the Done button. After clicking on it, you have to scroll down a little further. You will see an opacity button. You have to click on it and
[20:31] reduce its opacity like this and click done. Now if you want, you can keep it in a corner. You can keep it on top. You can adjust wherever you want. So we adjusted it here and here you have to hold it like this and
[20:43] adjust it with the entire video. You have to adjust it according to the length of your video. Ok? So in this way your video will be ready. When the video is ready, a save button will appear above. You have to click on it. Have to
[20:55] export it. This video will be added to your gallery. So this is the method of creating 2D documentary videos using AI. So I hope saw your brother's hard work, then please give it a like. This is motivation for us.
[21:09] want to watch such videos next time, then subscribe to this channel and select the bell notification on all. Now if you want us to create a new YouTube channel for you or you already have a channel and it is not working, there seems to be some problem and you want
[21:23] us to check your channel, that too in the PDF result, then you can contact us on your Instagram account. Take great care of yourself. Allah Take great care of yourself. Allah Hafiz.

⚡ Saved you 0h 21m reading this? Transcribe any YouTube video for free — no signup needed.