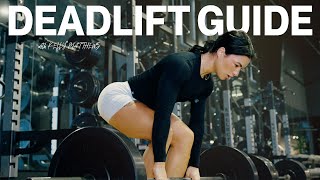

Deadlift Setup: Feet & Grip
45sClear, actionable setup tips for beginners that immediately improve form.
▶ Play Clip"The title is accurate; the video delivers a thorough beginner's guide covering form, stances, equipment, and mistakes."
This beginner's guide to deadlifts covers conventional and sumo stances, proper setup, grip options, breathwork, and common mistakes. It emphasizes pushing the floor away, using equipment like straps and belts wisely, and avoiding errors like early knee extension.
Feet hip-width apart, arms hang naturally, hinge hips back, bend knees. Grip: overhand or mixed. Take a big breath, brace core, push floor away, extend knees and hips together.
Wider stance with toes out, hands inside feet. More squat-like. Use same cues as conventional.
Flat-soled shoes (Converse, barefoot). Straps for grip when needed. Chalk for grip. Belt only after exceeding bodyweight; increases intra-abdominal pressure.
Early knee extension (butt rises first), not accelerating through the lift, starting in a lax position without tension.
Master the deadlift by focusing on proper setup, breathwork, and pushing the floor away. Use equipment wisely and avoid common mistakes like early knee extension.
What is the starting foot position for a conventional deadlift?
Hip-width apart, arms hang naturally, hinge hips back, bend knees.
00:25
What are the two grip options for a deadlift?
Overhand (both palms facing you) or mixed grip (one palm out, one in).
01:06
Describe the proper breathwork for a deadlift.
Take a big breath in, brace your core, hold the breath as you pull, then exhale at the top or as you lower the bar.
02:17
What mental cue helps with leg drive in a deadlift?
Think about pushing the floor away with your feet and driving your head straight up through the ceiling.
03:35
What is the sumo deadlift stance?
A wider stance with toes turned out, hands inside the feet.
05:24
What type of footwear is recommended for deadlifting?
Flat-soled shoes like Converse, deadlifting slippers, or barefoot. Avoid running shoes with thick soles.
07:16
When should you use lifting straps?
When your grip strength fails you, especially for high reps or heavy weight.
08:09
How does a weightlifting belt help with deadlifting?
It increases intra-abdominal pressure, acting like a surrogate ab, allowing you to lift more weight.
09:36
What is the general rule of thumb for when to start using a weightlifting belt?
When you can deadlift more than your body weight.
10:05
What are three common mistakes in the deadlift?
Early knee extension (butt rising first), not accelerating through the lift, and starting in a lax position without tension.
10:57
How do you avoid starting in a lax position?
Take the slack out of the bar by pulling slightly before lifting, so the bar is tight against the plates.
12:32
Push the floor away
Changes the mental approach from pulling to driving through legs, improving power.
03:35Perfect form doesn't exist
Acknowledges that slight back rounding is acceptable for heavy lifts, reducing fear of injury.
04:17Early knee extension mistake
Identifies a common error that turns the deadlift into an RDL, reducing effectiveness.
10:57Starting in a lax position
Explains how taking slack out of the bar prevents shoulder strain and improves starting strength.
12:32[00:00] What's up y'all? Welcome back to my YouTube channel. It's Kelly Matthews. Today we're going to talk all things deadlifting. I'm going to walk you through your form, different stances, setup, and common mistakes. Let's do it. We're going to
[00:13] talk about the conventional sandstead lift. First, this is how you'll see most people deadlifts. You also will see people in a Sumo sand switch. We'll talk about second. For a conventional sandstead, your feet are going to start about hips
[00:26] so it distance apart. From there, you just want to let your arms hang by your sides and then hinge your hips back and wherever your hands end up on the bar, that's probably about the ideal spacing for your hands to grip the bar. When
[00:44] we come into position, you want to think about pushing your hips back and bending into your knees. This is not an RDL, so you don't want your knees to be almost straight. You do want to get a decent bend and depending on the length of
[00:58] your femurs and the length of your tibios, your stance is going to look different based on that. So some people will be sitting really low. Some people in their hips will be a little bit higher. Once I come into position, I have a
[01:10] couple options for grips. Overhand grip, where both of my palms will face in toward me, or a mixed grip, where one palm will face out, one palm will face in. This will give you a stronger grip. So if you feel like you're losing your
[01:26] grip on the bar, you may want to play around with mixed grip, or adding some wrist straps, which we'll cover a little bit later in the video. Once we're ready to go, you're going to start at the top and I want you to think about pulling yourself
[01:41] down into your position. So unlike the squat, we don't have an eccentric loading phase of this exercise, which means we're just pulling the bar up off the
[01:54] ground. We're just like raw dogging it off the ground. So what you need to think about doing is activating on your way down so that you actually have a little bit of that mind muscle connection before you start. So push your hips back, bend your
[02:09] knees, feel your glutes and your hamstrings come to the party a little bit, find your grip. This is really important. You're going to take a big breath in, hold that breath in as you pull the bar up, and then you can either exhale at the top, or exhale
[02:26] as you drop the bar, hands on your breath. So big breath in, as you can see between
[02:41] reps, if I'm doing multiple reps, I do what's called a hip hump, where I kind of lift my hips, reload. That's kind of a way for me to like, eccentricly load before I start the deadlift. I find that to be really helpful. The breath work is something that everybody
[02:58] should get under their belt as they start deadlifting. And that goes for if you're deadlifting the bar, or if you're deadlifting, you're one rat max. So again, before you start, it's a big inhale, a brace through your belly, like you're trying to, you know, create a really
[03:13] strong core, hold that breath in, and then you can exhale as you come up to the top. And that's going to protect your back, it's going to make your lift stronger. And we'll talk about
[03:26] using lifting belts as a tool to increase that intra abdominal pressure, which will help you lift heavier. As you're coming up from the bottom of your deadlift, the biggest thing I want you to think about is pushing the floor away. I think a lot of times when we're
[03:42] approaching the deadlift, we think of it as a pull. And you'd be surprised what your mindset will do to the way that you approach the exercise. So if you're thinking about pulling, naturally,
[03:54] you're probably going to pull more with your arms instead of thinking about really driving through your legs. So think push the floor away and push your head straight up through the
[04:07] ceiling. Okay. And then with your upper body, you're not always going to have a perfectly flat back or neutral spine. As they say, you're going to see some people round a lot as they
[04:20] deadlift. And that might not be the right thing for you. But as you get heavier and heavier into your deadlift, you'll find that like perfect form just doesn't exist. You have to find
[04:33] the best position for you where you can find the best leverage to lift to the most weight. So generally speaking, we want to think about keeping a relatively neutral spine or flat back. But if you get a little bit of round, it's totally fine. Okay. It's not going to break
[04:49] your back. Let's go through a working set. And then I'm going to talk to you about Sumo stance. And then we're going to talk about some equipment and common mistakes.
[05:24] You also have the option to take a Sumo stance, which is going to be a wider stance with your toes turned out. You'll hear a lot of gymbros say that you're cheating. If you do Sumo stance, this
[05:39] is not the case at all. You want to find the stance the strongest for you. One thing to think about is why are you deadlifting? If you're deadlifting to lift as heavy as possible, you want to just find
[05:53] your strongest stance. If you're deadlifting to train your hamstrings, train your glutes, train your adductors, then that's a different story because what we're looking at when you Sumo deadlift is a lot more squatty than when you do a conventional stance. So essentially if you're
[06:11] Sumo deadlifting and you're squatting and they looked really similar, you're going to end up training the same pattern multiple times. So you may want to adjust your exercise selection or
[06:23] your stance based on what your goal is for your deadlift. But today we're talking about just lift and as heavy as we can. So for the Sumo stance, you're going to turn your toes out as much as it's comfortable for you. You want to make sure that you can get a good amount of leverage. Some
[06:39] people will go real wide, some people less wide. Again, a lot of this is just what feels most comfortable for you, but all the other cues are going to be the same. So your hips are going to go back. You're going to bend into your knees. You're going to take a big breath in. Your hands will file
[06:53] right in front of your shoulders, how they naturally hang. The difference here is they're going to be inside of your feet instead of outside of your feet. And then from there,
[07:06] you're going to pull up. All right, let's talk about our equipment. First thing you need to know is proper footwear. We need a non-compressive sole. So any kind of running shoe, anything with a thick
[07:18] sole is not going to be ideal for deadlifting. You're adding a deficit. You're basically making yourself lift the bar further. And you're also not allowing your foot to really feel the floor and
[07:32] generate as much strength and force as you could if you had a flat shoe. So I wear converse. You could also wear like a deadlifting slipper. You'll see people wear. They're like a velcro shoe.
[07:46] Any flat sole shoe like a Metcon or something of that similar nature that you see people wear for CrossFit will be a good fit as well. You can also go barefoot. It's entirely up to you. Other
[07:58] pieces of equipment that you may want to invest in as you get into your deadlifting journey. One is great to have no matter what. Lifting straps. These are Versa grips. These are a little bit more expensive than your regular lifting straps. But the regular ones you can get on Amazon for like
[08:15] 10 or 15 bucks. These will help if your grip strength is failing you. So if you're doing higher rep ranges or you're going really heavy weight, you may want to use some straps because we don't want to be
[08:27] limited by our grip strength. So if you're able to lift more with your legs but your grip is limiting you, put the straps on. It's going to help you get stronger. The next thing on that same vein is
[08:41] going to be chalk. This is liquid chalk. You'll also see like real chalk that's like powdery. This you put on your hands and it's going to help you grip the bar easier. In a powerlifting competition,
[08:54] you are not able to use straps. Okay, so you're going to need to be able to lift the bar. You can use chalk though. So getting in the habit of using chalk as much as you can when that doesn't work for you anymore, you can throw the straps on. Last thing is going to be your weightlifting belts.
[09:11] I get so many questions about when should I start using a weightlifting belt, what kind should I use? And if you're brand new in your fitness journey, you don't need a belt. You want to get a lot of reps
[09:24] before you even consider putting on a weightlifting belt. What this is going to do is it's going to give you some compression around your trunk. And when you breathe, when this is really tight on your
[09:38] belly, when you take a breath in, it allows you to increase that intro abdominal pressure. It almost acts like a surrogate ab almost. So you'll find that when you put the belt on, you're going to be able to
[09:51] lift a lot more weight. But like I said, if you're newer to your fitness journey, throwing on a belt right away is actually going to be a disservice to you. So a general rule of thumb is if you can't deadlift more than your body weight, don't put a belt on yet. But the way we're going to use this
[10:08] is when you take that breath, when we're here, you're going to take a big inhale, you'll feel your belly expand all the way around like a balloon and you want to hold that there. So I'm going to take
[10:20] a big breath in. And being able to push against that belt is going to allow me to lift a little bit heavier. This is a lever belt. There's also velcro belts. There's also ones that you just buckle
[10:35] like a normal belt. And you kind of just have to find the one that you like the best. I prefer the lever. But you want to make sure that there is a level of thickness to it. A really thin belt
[10:47] is not going to give you much help. Let's talk about common mistakes I see in the deadlift. The first one is going to be not extending at the knee in the hip at the same time or early knee extension. And what that looks like is coming up from the bottom, the first thing that's going to
[11:03] happen is your butt is going to stick up in the air. So when I try and pull this bar up, I get here and then I basically just turn it into an RDL. The goal with a deadlift, it's not going to be
[11:17] perfect every time, but your goal should be to stand up to the point where your knees and your hips extend at the same time. So what that looks like in practice is driving straight up to a stand.
[11:32] That's really all you need to think about. You don't have to over complicate it. Just think about standing straight up and sending your head through the ceiling. Second mistake I see is people don't accelerate through the lift. So you feel the bar come off the ground and you're like, oh,
[11:47] I did it. And you quit. This is something that will, as you get heavier, cause you to fail more and more lifts, especially a one rep max. So you want to think about accelerating all the way through the
[11:59] lift. Okay. So if the bar is sticky on the ground, give it a second. Keep pulling. Don't quit on it. And once it lifts, then you really have to accelerate and push as fast as you can. Every single deadlift
[12:16] you do on the way up outside of tempo work, you're going to want to push as fast as you can, regardless of how heavy the weight is. The last one is starting in a wax position. This is like one of the
[12:29] worst things you can do. Not only is it going to limit you with how much weight you can lift, but you're going to end up probably with some sore joints. So what that looks like is starting here
[12:41] with no tension in my upper body, not thinking about my breath, and just like yanky like this. Before you start, you want to take the tension, you want to put some tension into the bar. So
[12:54] there's a little space between the plate and the bar. So it doesn't, you know, slide on there completely snug. So the bar can move around. What you want to do is take that movement out before you
[13:08] start. So here I'm almost acting like I'm going to lift it before I start. So you'll see that bar gets really tight with the plates and that will just allow you to start in a much stronger position
[13:22] and you're not going to like jam up your shoulders and get stuck on the ground. If you ever decide to do a powerlifting neat, the one thing you need to know is the judges are just going to judge when you get to full lock out at the top. So as soon as they give you the go ahead,
[13:38] you can lift any time you want. You're going to come all the way up, lock your knees out, lock your hips out. They'll say down, bring the bar down to the floor and that's it. All right, y'all, that's it for the deadlift today. I hope you had fun. I know I did. If you want to see more fitness content
[13:53] from me, please subscribe to my channel or you can find me on Instagram and TikTok at Kelli L. Matthews. I'll see you guys soon.
⚡ Saved you 0h 14m reading this? Transcribe any YouTube video for free — no signup needed.