Deadlift Mistake #1: Skipping Prep
45sHigh engagement as it reveals a common overlooked step that can prevent injury and improve performance.
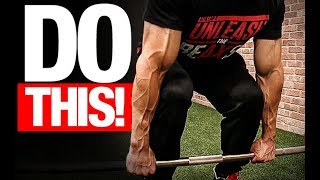
▶ Play ClipJeff Cavaliere from ATHLEANX.com presents a comprehensive deadlift checklist, breaking down the exercise step-by-step to ensure proper form and prevent injury. The video covers preparation, setup, grip options, and the two-phase movement pattern, emphasizing safety and effectiveness.
Jeff demonstrates a quick routine to loosen adductors and groin by using the plates for stretching, and then performs a hip-hinge movement to engage hamstrings and achieve anterior pelvic tilt.
He introduces a movement pattern drill: hip-hinge to knee level, then bend knees to drop hands, then reverse—leg press up to knees, then hip-hinge to finish. This grooves the correct mechanics.
Feet should be hip-width apart, with the bar about one inch from the shins. A cue: see your laces on the other side of the bar. Avoid rolling the bar; set it directly in position.
Three grip options: double overhand (balanced), mixed grip (stops bar rotation but may cause imbalances), and hook grip (strongest but uncomfortable initially). Hands should be just outside hip width to avoid shortening arms and increasing risk of bicep tears.
Drive chest forward and hips down to achieve a flat low back. Engage lats by thinking of a straight-arm push-down. The torso angle varies by individual anatomy, but the low back must remain flat.
The deadlift starts as a standing leg press: push the floor away until the bar reaches knee level. This prevents early hip rise and lumbar rounding. After the knees, the hips and back take over.
Once the bar passes the knees, drive through with hips and back. On the descent, reverse: hip-hinge to knee level, then bend knees. Keep the bar close to the body throughout.
The deadlift is a safe and effective total-body exercise when performed correctly. Jeff emphasizes that proper technique, especially starting with a leg press and maintaining a flat back, is crucial to avoid injury and maximize benefits.
"The title accurately promises a checklist to avoid mistakes, and the video delivers a detailed, step-by-step guide with clear cues and warnings."
What is the correct foot width for a deadlift?
Hip-width apart.
02:33
How far should the bar be from your shins at setup?
About one inch.
03:01
Name three grip types for the deadlift.
Double overhand, mixed grip, and hook grip.
04:08
Why does a wide grip increase the risk of bicep tears?
It shortens the arms, requiring a deeper position and often causing elbow flexion under load.
06:21
What is the key to avoiding lumbar disc issues in the deadlift?
Keeping the low back flat (not rounded) throughout the lift.
08:53
What should be the first movement when pulling the bar off the ground?
A leg press—pushing the floor away with your legs until the bar reaches knee level.
10:07
How do you engage the lats during the deadlift setup?
Think of a straight-arm push-down to pull the bar into your shins and keep the upper body tight.
09:09
What is the correct descent pattern for the deadlift?
Hip-hinge to knee level, then bend the knees to lower the bar straight down.
13:24
Deadlift as a Leg Exercise
Emphasizes that the deadlift must start as a leg press to protect the lower back, a key insight for safe lifting.
10:07Wide Grip and Bicep Tears
Explains that wide grip shortens arms and increases bicep tear risk, debunking the common belief that mixed grip is the main cause.
06:21Low Back Safety Cue
Provides a simple cue (drive chest forward, hips down) to maintain a flat back, critical for preventing injury.
08:53Grip Options and Their Trade-offs
Details three grip types with pros and cons, helping lifters choose based on strength and safety.
03:55[00:05] What's up, guys?
[00:06] Jeff Cavaliere, ATHLEANX.com.
[00:08] We're talking deadlift today.
[00:10] One of the best exercises you can do if you
[00:13] So we're breaking out the checklist so we
[00:17] sure that you do.
[00:18] Okay, any good deadlift starts with how you
[00:23] do the exercise.
[00:24] So a couple things that I do: there's two
[00:27] Number one: you've got to have the feeling
[00:31] do this exercise properly.
[00:32] So what I do is a quick, little routine to
[00:35] I put my feet up, against the insides of the
[00:40] in my groin because we know if you're going
[00:44] be, as you'll see when you press this bar
[00:48] – I say 'press'.
[00:49] That's the key difference, too.
[00:51] You're going to want to make sure that you
[00:54] adductors.
[00:55] The next thing I do is, I feel as if I want
[01:00] want to have my pelvis in the right position.
[01:02] So I lean forward where to grab the bar, and
[01:08] tilt.
[01:09] So I'm trying to rotate my pelvis all the
[01:14] All the way down.
[01:15] Point your junk down to the ground, keep your
[01:19] up.
[01:20] Look straight ahead and just feel the stretch
[01:24] in all those attachments to your pelvis that
[01:28] Once I do that – just for a couple minutes
[01:32] thing I'll do is this pre-deadlift movement
[01:37] That is, I stand here, I keep my hands on
[01:40] is very important in a second – and I let
[01:44] by doing nothing but hip hinging.
[01:46] If you just did what I showed you that hip
[01:50] So right down to here, no bending the knees.
[01:53] From here, once I get to the level of the
[01:58] let my hands drop straight down by bending
[02:01] Then I work on going back up and feeling the
[02:06] let press as I get to the level of the knees,
[02:11] the hips.
[02:12] So it's hip hinge to the level of the knees,
[02:17] hip hinge, and finish it all the way here,
[02:21] Just use that movement pattern until you feel
[02:25] ready to start lifting the bar.
[02:27] Now we're ready to actually approach the bar.
[02:29] There is something you want to focus on here.
[02:30] There are actually two things you want to
[02:32] First of all, how far under the bar are your
[02:36] And how far apart should your feet be?
[02:38] First of all, let's deal with the easy one.
[02:40] The width of your feet should be the width
[02:43] Now, for someone that doesn’t have a really
[02:47] narrow.
[02:48] You see mine.
[02:49] I'm actually inside the non-knurled areas
[02:52] For you, that could be a little bit wider,
[02:54] You just want to be hip width.
[02:56] As far as 'how far under the bar the feet
[03:00] I like to use here.
[03:02] I want to just see my laces on the other side
[03:05] So you can see right now I can't.
[03:06] My laces are actually being covered by the
[03:09] If I sneak them out, just to the other side
[03:14] for this bar.
[03:16] Which should be about 1" away from my shin
[03:22] will go forward to meet that bar, and that
[03:26] Now, a lot of people will try to roll the
[03:30] That's sort of a pre-lift ritual, but ultimately
[03:34] bar back to that position, and they're using
[03:39] with moving the bar to get it there, ultimately,
[03:42] If you're new and you're just learning this
[03:46] Get set to the bar and don’t change anything
[03:48] Get yourself about 1" away, get ready to perform
[03:54] Okay now, with the feet in the proper place,
[03:57] placement.
[03:58] There are two elements I want to cover here.
[03:59] It is the type of grip that we're going to
[04:02] of different grips being used on this exercise
[04:07] the bar when you perform the lift.
[04:09] So first of all, let's talk about the type.
[04:11] You have three different options here when
[04:15] Most commonly, you probably see this 'double
[04:19] There's a great advantage to this that we're
[04:22] performing the lift, but at the surface level
[04:27] distribution of your upper body, and how you're
[04:32] imbalances by gripping the bar.
[04:34] The second option that you'll see is often
[04:39] weak of a grip, because the bar starts to
[04:42] So what do we do?
[04:43] We see people do a mixed grip.
[04:45] The mixed grip is one under, one over.
[04:47] The one under and one over allows the bar
[04:52] fall out of this hand, it's actually turning
[04:55] So you're creating more stability.
[04:56] It's the same way you would grab a baseball
[04:59] Your dominant hand would be on the top here,
[05:03] bat, and turn it.
[05:04] That's what you're doing here, on the bar.
[05:06] However, in order to eliminate some of the
[05:11] from doing this – especially up in your
[05:14] the grips here.
[05:15] So you have a third option.
[05:17] This is the option chosen by more of the advanced
[05:21] That would be a hook grip where you take your
[05:25] your fingers over your thumb.
[05:27] So if you look at it here, they wrap their
[05:31] Now I'm going to tell you, if you're going
[05:34] uncomfortable.
[05:35] It's going to feel like you're snapping your
[05:36] But in order to alleviate that you want to
[05:40] That first knuckle right here.
[05:42] If you go on top here you're really going
[05:46] Okay, from here I still would advise – if
[05:49] to build up to this by starting with lighter
[05:54] that you might feel on this the first time
[05:57] your body is going to become resilient to
[05:59] It will be, overall, your most effective grip,
[06:04] lead to those imbalances that the mixed grip
[06:07] Now as far as the width, and how wide I want
[06:10] up a point from the last topic.
[06:12] That is, a lot of people think that the mixed
[06:16] bicep tears during the deadlift.
[06:18] A lot of people are scared about tearing a
[06:21] More so, it actually comes from what you're
[06:24] I'll show you why.
[06:25] First of all, people sometimes want to grab
[06:28] But what you're doing when you grab wide is,
[06:32] your arms.
[06:33] If we know that – if I let my arms hang
[06:37] hips, or just down at the side – they're
[06:41] To this point in my thigh.
[06:42] But if I widen them you can see that they
[06:46] 2", or 3".
[06:47] So the shorter my arms become – because
[06:52] and deeper I'm going to have to become on
[06:56] And I'm not necessarily concerned about that
[06:59] be a good thing.
[07:00] I'm more concerned about the fact that most
[07:03] extra 2", or 3" down.
[07:05] So you're causing yourself and increased likelihood
[07:09] going wider.
[07:10] So the ideal position here is to have your
[07:16] So just to the outside by about 1".
[07:18] Now you want to have enough room here for
[07:21] Number one: you don’t want to have your
[07:26] here.
[07:27] You want the bar dragging up your thighs,
[07:30] because the extra friction can make the exercise:
[07:34] B)
[07:35] just become a little more awkward.
[07:36] But more importantly, the tendency, as I said,
[07:41] want to have your legs pushing out.
[07:42] If your arms are too close, what happens is,
[07:48] here, as they perform the lift.
[07:50] No matter if you're doing it this way, or
[07:55] you might get some flexion here of the elbow
[08:01] degree of unnecessary tension on the bicep.
[08:04] That is what, more often, leads to the ruptures
[08:10] The same thing would apply if I were to go
[08:13] I could hold there for a very long period
[08:16] hang that time would be cut drastically.
[08:19] So we can actually become more efficient by
[08:24] keep the tension all the way through here.
[08:26] Even though it's more elongated it's less
[08:29] a more stable position.
[08:31] Okay, we've got the feet in place, we've got
[08:34] our body in place.
[08:35] If you've followed what I've said to this
[08:39] if your feet are the proper distance away
[08:43] with that bar.
[08:44] Now your grip, as you said – we've talked
[08:49] should have is to get your low back in the
[08:52] when people talk about the dangers of this
[08:56] wrong positioning of the low back, which can
[09:01] it right.
[09:02] So from here you only have two cues.
[09:03] You've got to drive your chest forward, up,
[09:08] So from here the chest goes out, hips go down.
[09:12] What you'll also find is that your arms will
[09:18] into that position.
[09:19] Think about doing a straight-arm push down.
[09:22] You're literally doing that straight-arm pushdown,
[09:26] with your shins, chest goes out, hips go down,
[09:31] Now the key, as I've said, the position of
[09:35] You don’t want that rounded low back.
[09:37] Don’t worry about how angled your torso
[09:41] As long as the low back is in the right position.
[09:44] You may see people that are really far bent
[09:49] upright.
[09:50] That's a factor of their leg length and torso
[09:54] As long as your low back is there, then you
[09:57] So now, when we get ready to actually pull,
[10:01] And it had better be a leg exercise first
[10:06] your low back that you could potentially run
[10:10] It has to start with a push of your legs off
[10:14] of the knee.
[10:15] So if you go back to that warmup that I was
[10:19] exactly what you're trying to do.
[10:20] I'm going to show you why, here.
[10:21] I'm going to break this down into, literally,
[10:24] From the ground to the knee, and then from
[10:27] So now when we get in this position here,
[10:31] out, and those arms are engaged, and the low
[10:35] here is do a standing leg press.
[10:37] I'll show you exactly why this is exactly
[10:40] You're going 'standing leg press' from here,
[10:43] Here, to here.
[10:45] Right from your hands, from there, from the
[10:48] Once they get to the knee, that's when the
[10:50] Then this will become a tremendous back exercise.
[10:52] But from here, to here you're doing all the
[10:57] the ground, as hard as you possibly can.
[10:58] I talk about, all the time, why this is a
[11:02] the exact same.
[11:03] If my hands were down here on the handles,
[11:08] away; all that is happening right there, from
[11:13] I do not bring my body closer to my thighs
[11:20] I take my feet and I push them away.
[11:22] So the same thing would apply here.
[11:23] You're not going to bring your body closer
[11:30] is, it lifts with the hips.
[11:32] The first move is hip.
[11:34] The first move is hip.
[11:36] Lifting with the hips throws your low back
[11:39] Which, again, is asking, and begging for a
[11:42] This is an incredibly safe exercise.
[11:44] One of the best exercises you can do, but
[11:48] So again, when we're in here the position
[11:53] going to do a leg press, straight to here.
[11:58] Down.
[11:59] Leg press, straight to here.
[12:01] I'm going to show you what happens to the
[12:05] So now, if we can get that bar to the knees
[12:10] those shins every inch of the way, staying
[12:14] If you start to see space between the bar
[12:19] what I said before, which is keeping that
[12:21] Keeping that straight-arm pushdown going to
[12:24] It's going to keep your whole upper torso
[12:28] So now when it gets to the level of the knees
[12:33] it up, now we let the whole rest of the back
[12:36] Now it becomes an incredible back exercise,
[12:41] through, using the strong muscles of the hips,
[12:47] to stabilize the bar.
[12:48] So we're going from here, and driving through.
[12:51] You'll notice if you do this right the timing
[12:55] as the visual cue of when to kick this in.
[12:58] As soon as your hands are at the level of
[13:01] The hips kick in and the bar will continue
[13:05] path.
[13:06] So right against your shins, and right against
[13:10] That should be the goal on every, single rep.
[13:12] So it looks like this.
[13:13] From here, down, set up, to here, drive through
[13:22] Here, engaged, drive through with the hips.
[13:27] Now, on the way down you want to reverse the
[13:32] Hip hinge, hip hinge, hip hinge.
[13:33] Right to the level of the knee, straight knee
[13:37] Very simple.
[13:38] So we're up here, down, and then on the way
[13:46] level of the knee, then let the knees bend,
[13:50] You'll see that the back stays right in the
[13:54] Guys, this lift has a lot of components to
[13:59] actually very, very simple.
[14:01] It should become a staple of your training
[14:05] Most of which, it's one of the best total
[14:08] Yes, you're training the legs.
[14:10] Most importantly, if you're training legs
[14:13] rest of the lift.
[14:15] And of course, a posterior chain.
[14:16] Overall, awesome exercise.
[14:19] There's none better than this.
[14:20] Guys, it's not the exercise.
[14:22] You can tell people "I'm deadlifting."
[14:24] And you think you're doing things right.
[14:26] It's doing the exercise right that matters
[14:29] Actually, in this case doing the exercise
[14:33] will keep you way from the gym for a long,
[14:35] I don’t want to see that happen to you.
[14:37] I want to make sure you get these all right.
[14:38] I hope you've found this checklist exhaustive,
[14:42] If you want me to cover more of them I'm happy
[14:47] Just leave your comments down below and let
[14:48] In the meantime, if you're looking for a program
[14:52] do, but more importantly how we do them – head
[14:56] Use our program selector, using the link below
[15:00] is best suited to your current goals.
[15:01] All right, guys.
[15:02] I'll be back here again for a future video.
[15:04] See you.
⚡ Saved you 0h 15m reading this? Transcribe any YouTube video for free — no signup needed.