What is Voicemeeter Banana?
40sExplains the powerful free audio mixer in a relatable spaceship cockpit analogy, hooking viewers who want better audio control.
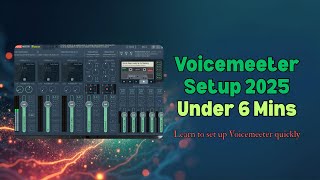
▶ Play ClipThis tutorial demonstrates how to set up a streaming-ready audio setup using Voicemeeter Banana, a free virtual audio mixer. It covers connecting your microphone, routing system and game audio, isolating apps like Spotify, and sending a clean mix to OBS Studio.
Download Voicemeeter Banana from vb-audio.com, run the installer, and restart your computer to activate drivers.
Hardware inputs (left) for physical devices like mic; virtual inputs (middle) for software audio; outputs (right) with A1-A3 for physical outputs and B1/B2 for virtual outputs to OBS.
In Windows Sound Settings, set default output to 'VoiceMeeter Input' to route all system audio into Voicemeeter.
Under Hardware Input 1, select your microphone. Enable the 'A1' button below the input to hear yourself in headphones.
Set Spotify's output to 'VoiceMeeter Aux Input' in Windows Sound Settings. In Voicemeeter, enable A1 on the Aux strip to hear it. In OBS, add an Audio Output Capture device set to 'VoiceMeeter Aux Input' so viewers don't hear it.
Voicemeeter Banana gives you full control over your audio routing, allowing you to separate what you hear from what your stream hears. This setup is essential for streamers and content creators who want professional audio management.
"The title promises a complete setup in under 6 minutes, and the video delivers exactly that with clear steps."
What is Voicemeeter Banana?
A free virtual audio mixer for Windows that gives full control over audio routing.
00:04
What must you do after installing Voicemeeter Banana?
Restart your computer to activate the drivers correctly.
00:53
What do the A1, A2, A3 buttons control in Voicemeeter?
They route audio to physical output devices like headphones or speakers.
01:36
What do B1 and B2 represent in Voicemeeter?
Virtual outputs used to send mixed audio into OBS Studio or other recording software.
01:44
How do you route all system audio into Voicemeeter?
Set Windows default playback device to 'VoiceMeeter Input' in Sound Settings.
02:46
How do you hear your microphone in your headphones?
Enable the A1 button below the microphone's hardware input strip.
04:07
How do you isolate Spotify so only you hear it during a stream?
Set Spotify's output to 'VoiceMeeter Aux Input' in Windows Sound Settings, enable A1 on the Aux strip in Voicemeeter, and add an Audio Output Capture in OBS set to 'VoiceMeeter Aux Input'.
04:45
Voicemeeter Interface Explained
Provides a clear analogy of the interface as a spaceship cockpit, making it less intimidating for beginners.
01:03Isolating Spotify from Stream
Demonstrates a practical technique for streamers to play music for themselves without viewers hearing it.
04:45[00:00] Hey everyone, welcome to my channel. In
[00:02] today's video, we are going to walk
[00:04] through setting up a streaming ready
[00:05] audio setup using Voicem Banana, a
[00:08] powerful and free virtual audio mixer
[00:10] that gives you full control over your
[00:12] sound. Whether you stream games, record
[00:14] podcast, create content on YouTube, or
[00:16] just want to separate your audio
[00:18] sources. Voice meter will completely
[00:20] change how you manage audio on your PC.
[00:22] We'll cover connecting your microphone,
[00:24] routing system and game audio, isolating
[00:26] apps like Spotify and Discord, sending a
[00:29] clean audio mix into OBS Studio. I've
[00:32] added chapters to this video so you can
[00:33] skip ahead or revisit any section
[00:35] anytime. Check the video timeline or
[00:37] description below. So, let's jump in.
[00:40] First things first, let's download and
[00:43] install the software we need. Head over
[00:45] to the vbaudio.com link in the
[00:47] description. Navigate to banana and
[00:49] click on the download link. After
[00:51] downloading, run the Voice Meter Banana
[00:53] installer. Then restart your computer.
[00:56] This is very important to activate the
[00:57] drivers correctly.
[00:59] Let's launch Voice Met Banana. Yes, it
[01:03] looks like the cockpit of a spaceship.
[01:05] But once you understand the layout, it's
[01:07] very logical. On the left side, there
[01:10] are hardware inputs. These are physical
[01:13] input devices like your microphone,
[01:15] audio interface or instrument line. In
[01:18] you see three channels. hardware input
[01:21] one, two, and three. Now moving on in
[01:24] the middle section, you'll see virtual
[01:26] inputs. These represent audio coming
[01:28] from software on your PC. Now on the
[01:31] right side, there are outputs. This is
[01:34] where the audio gets sent. There are
[01:36] three sliders A1 to A3 physical output
[01:39] device like headphones or speaker which
[01:41] can be controlled here. And there is
[01:44] also B1 and B2. These are virtual
[01:46] outputs used to send mixed audio into
[01:49] OBS Studio or other recording software.
[01:51] Think of voice meter as your virtual
[01:53] mixing board. It lets you control what
[01:56] you hear, what your stream hears, and
[01:58] what gets recorded separately. Don't
[02:01] worry if this still feels a bit
[02:03] confusing. In the next few chapters, we
[02:06] are going to walk through a step-by-step
[02:08] example setup that will make everything
[02:11] much clearer from mic setup to isolating
[02:13] Spotify and sending clean audio to OBS.
[02:16] Once you see it in action, the layout
[02:18] will start making perfect sense. Before
[02:21] we dive into the actual setup, let's
[02:24] make sure window route all audio through
[02:26] voice meter. This means setting voice
[02:29] meter as the default system playback and
[02:31] recording device. Now first of all open
[02:34] sound settings. To do that right click
[02:37] the speaker icon in your taskbar select
[02:40] sound settings or you can go to the
[02:42] settings system and then sound. Now set
[02:46] default output device. To do that under
[02:49] output section you have to choose voice
[02:51] meter input. This sends all system audio
[02:54] game YouTube apps into voice meter for
[02:57] full control.
[02:59] Now choosing input device. Under input,
[03:02] choose voice meter output B1 or B2. You
[03:07] can choose either. They do the same
[03:09] thing. Before setting up your
[03:11] microphone, make sure you have selected
[03:13] your headphones or speaker in one of the
[03:15] hardware output slots that is A1, A2 or
[03:18] A3. To do this, go to the top right
[03:21] corner of voice meter. Click the A1
[03:23] button. Choose your preferred output
[03:24] device like headphone, earbuds or
[03:27] desktop speaker. Optionally, you can use
[03:29] A2 or A3. If you want a secondary output
[03:31] device like routing audio to a speaker
[03:34] and headset at the same time. This
[03:36] allows you to hear everything voice
[03:38] meter is processing. Especially
[03:40] important once we connect your mic.
[03:43] Next,
[03:45] let's begin our actual setup by
[03:47] connecting your microphone into voice
[03:49] meter. Under hardware input one, click
[03:52] the label. Choose your microphone from
[03:54] the list. This could be a USB mic, XLR
[03:57] mic via audio interface, or even a
[03:59] headset mic. Talk into it, you should
[04:02] see the input meter bounce when you
[04:04] speak. To hear yourself, enable the
[04:07] event button below the input. This sends
[04:09] your mic audio to your headphones. Now,
[04:12] let's make sure you're capturing desktop
[04:14] audio and system audio like games,
[04:16] YouTube, and app sounds. Since we
[04:18] already set voice meter input as your
[04:20] Windows default playback device earlier,
[04:23] any sound your system produces is now
[04:25] routed into voice meter first virtual
[04:27] input strip. You can control its volume,
[04:30] mute it or direct it to different
[04:32] outputs like headphones, stream etc. by
[04:35] using the A1, B1 and B2 buttons. This is
[04:39] the foundation of routing. You now have
[04:42] control over your desktop sound. Now
[04:45] let's take it one step further. What if
[04:47] you want to play Spotify for yourself
[04:50] during a stream but not let your viewers
[04:52] hear it? First of all, open Spotify in
[04:56] the background. Now, open sound settings
[04:59] like I showed you before. Find Spotify
[05:01] in the app list. Set its output to voice
[05:04] meter ox input. Be careful. Do not set
[05:08] it to voice meter input only. Set it to
[05:11] voice meter ox input which is mapping to
[05:15] the second slider in that output
[05:17] section. Back in voice meter, find the
[05:20] ox input strip. Turn a1 on so you can
[05:24] hear it. Go to OBS. Add a new audio
[05:28] output capture device. Name it Spotify
[05:32] or whatever you want. Then select voice
[05:35] meter aux input. Now you can vibe to
[05:38] music and your viewers won't hear a
[05:40] thing. This method works for any app
[05:43] including Chrome, Discord, or a second
[05:45] browser for alerts.
[05:48] That's it for the Voice Meter Banana
[05:50] full setup tutorial for streamers. If
[05:52] this helped you, give it a like and
[05:55] subscribe for more tutorials. Thanks for
[05:57] watching and happy streaming.
⚡ Saved you time reading this? Transcribe any YouTube video for free — no signup needed.