
CS2 Mirage: Essential Utility in 10 Min
45sThe intro promises a complete utility guide, hooking players who want to improve their game.
▶ Play Clip"The title accurately promises a comprehensive utility guide for CS2 Mirage, and the video delivers exactly that."
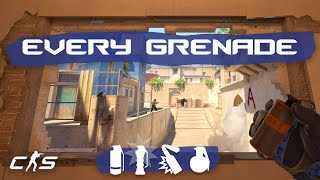
This video presents a comprehensive guide to essential utility usage on the CS2 map Mirage, covering smokes, flashes, molotovs, and HE grenades for both A and B sites, as well as mid. The creator demonstrates specific lineups and techniques to help players improve their gameplay.
Two essential smokes for A site are stairs and jungle connector. They can be thrown from the right side of the doorway near A main using jump throws or quicker left-click throws for faster landing.
From the trash can corner, you can smoke off deep cat, connector, and mid window. Specific lineups include a jump throw at a darker leaf for cat, and a jump throw with D key hold for connector.
All three B smokes (market door, market window, and short) can be thrown from the corner near B apps. Lineups involve aiming at specific points on buildings and windows.
The classic lamp flash blinds close positions but misses stairs and sandwich. An alternative jump throw from the slanted wall blinds all positions including sandwich and stairs.
From the trash can corner on CT side, a left-click throw at the diagonal roof part blinds the entire A site, useful for retakes.
From the corner along the table, a left-click throw at the top right of the wall pops a flash that blinds mid positions, allowing a safe peek.
A left-click throw at the top of a darker line from the corner near B site blinds the apps player, giving a teammate a free kill.
A run jump throw aimed at the bottom right of a window before hitting a bar blinds all common angles on B site without blinding teammates.
A jump throw at a piece of wood sticking out of a garbage pile from spawn mollies off the back area near apps, forcing Ts back.
A left-click throw at a dark spot on the top of the wall from the corner mollies off sandwich, useful during an execute.
A run throw from the left side of a pillar, aiming at the top of a slanted wall, mollies off the position under palace window, preventing CTs from hiding there.
From a position near CT, left-click throws can molly off Tetris or the area outside A ramp, forcing Ts out of cover.
From behind CT ticket smoke, a left-click throw at a piece of hay mollies off default, covering multiple positions.
After the default molly, a walking throw with the same lineup damages anyone on default. Another lineup from a different position damages Tetris.
From a corner, a run throw aimed at a white cloth before the steps damages the player behind bench for about 50 damage.
From Sniper Nest corner, a right-click jump throw on a plank lands an HE outside, breaking the smoke and allowing damage to mid players.
This guide compiles all essential Mirage utility into one video, providing players with reliable lineups for smokes, flashes, molotovs, and HE grenades to gain a tactical advantage.
What are the two most important smokes for A site on Mirage?
Stairs and jungle connector.
00:40
From which spot can you throw both stairs and jungle connector smokes?
From the right side of the little doorway near A main.
00:47
What is the fastest way to throw stairs and jungle connector smokes?
Use a middle-click jump throw at the T in the bricks for stairs, and a left-click throw at the top center of a brick for jungle connector.
01:26
Why is the old CT smoke from CSGO not as good in CS2?
Because CS2 smokes are shorter, the old smoke lands on the right side of a box, allowing CTs to jump on top and get an angle on A main.
01:50
How do you throw the improved CT smoke for A site?
From the sled portion of the wall, do a jump throw in the middle of a wooden plank on the wall.
02:05
What are the three B site smokes?
Market door, market window, and short (CT).
03:46
What is the 'god flash' for A site?
A jump throw from the slanted portion of the wall, aiming at the top right of the wall, which blinds all positions including sandwich and stairs.
04:55
How do you throw the retake flash for A site from CT?
From the trash can corner, do a left-click throw at the slanted diagonal part of the roof.
05:53
How do you throw the flash for B apps from CT?
From the corner near B site, do a left-click throw at the very top of the darker line on the wall.
06:27
What is the lineup for the B site entry flash?
Aim at the bottom right of the window and do a run jump throw before hitting the bar.
07:10
How do you molly off the back area near B apps from spawn?
Do a jump throw at a piece of wood sticking out of the garbage pile.
07:34
What is the most important molotov for A site?
The palace molly that mollies off the position under palace window.
08:08
How do you throw the palace molly?
From the left side of the pillar, aim at the top of the slanted wall and do a run throw when you cross the doorway.
08:13
How do you damage the player behind bench on B site with an HE?
From the corner, do a run throw aimed at the white cloth hanging from the window, releasing before hitting the steps.
09:55
How do you break the smoke in Sniper Nest with an HE?
From the corner, do a right-click jump throw on a plank to land the HE outside.
10:16
A Site Smoke Lineups
Provides two reliable methods for throwing essential A site smokes, including a faster variant.
00:38God Flash for A Site
This flash blinds all common defensive positions on A site, making it extremely effective for executes.
04:55Palace Molotov
This molotov denies a key hiding spot under palace window, crucial for A site executes.
08:08HE for Bench on B
A precise lineup to deal significant damage to a common defensive position.
09:55[00:00] how's it going everybody so today I want
[00:01] to show you what I consider to be the
[00:03] essential utility for CS2 Mirage that's
[00:05] going to be everything from smokes
[00:07] flashes and molotovs all the way to H
[00:08] grenades so before we jump into this
[00:11] video I want to thank today's sponsor
[00:13] skins monkey so skins monkey is an
[00:15] automated CS2 trading site that provides
[00:17] an instant way for you to get new skins
[00:19] all you have to do is select your old
[00:21] skins that you don't want anymore and
[00:23] then pick out some fresh ones to trade
[00:24] for it's as easy as that and right now
[00:27] you could get a free $5 if you use code
[00:29] t itics on the site and finally you can
[00:31] get up to a 35% deposit bonus when using
[00:34] my code so thanks again to skins monkey
[00:36] for sponsoring this video so starting
[00:38] off with smoke grenades we're going to
[00:39] take a look at the a site first I would
[00:40] say the two most important smokes for
[00:42] the site is the stairs and the jungle
[00:44] connector smoke so the easiest way to do
[00:47] that is to come right here to the right
[00:49] side of this little doorway and you can
[00:50] throw both of these from the exact same
[00:51] spot so if you want to get a teammate to
[00:53] drop you an extra smoke you can throw
[00:55] both of them for your team as they entry
[00:56] out so starting off you can just do a
[00:58] simple jump throw right here at where
[00:59] these coils uh where this kind of wire
[01:01] coils up just do a simple jump throw
[01:03] right here and then do another jump
[01:04] throw right up into the left of this
[01:06] corner of the roof and just like that
[01:09] both of these smokes are going to come
[01:10] straight down this one's going to go
[01:11] right here for Jungle connector and this
[01:13] one's going to go on the far side of
[01:14] stairs and smoke that off without
[01:16] spilling down into sandwich to where the
[01:17] sandwich players aren't able to hide in
[01:19] it since the only downside to those last
[01:21] two smokes are the fact that they take a
[01:23] little while since they're jump throws
[01:24] right at the sky the fastest way to get
[01:26] these to land is by coming right here
[01:28] into this position having a teammate
[01:29] drop extra smoke and you can do a middle
[01:31] click jump throw right here at this
[01:33] little T in the bricks for the stair
[01:34] smoke and then a simple left click throw
[01:36] right at the top Center of this brick
[01:38] for the jungle connector and that one
[01:39] lands a little bit faster so they don't
[01:40] have quite as much time to call out and
[01:42] say oh hey smokes are coming in you know
[01:44] that way the mid player isn't as in
[01:46] position and rotated by the time you
[01:48] start pushing out and finally since the
[01:50] CS2 smokes are a little bit shorter than
[01:52] the csgo ones the old CT smoke for csgo
[01:55] isn't quite as good because it lands
[01:57] right here on the right hand side of
[01:58] this box to where the CTS are actually
[02:00] able to jump up on top of this and get a
[02:02] decent little angle on the a main so to
[02:05] counter that you can come all the way
[02:06] here into this kind of sled portion of
[02:09] the wall here and just do a simple jump
[02:11] there right in the middle of this wooden
[02:13] plank on the wall and what that's going
[02:15] to do is it's going to go all the way up
[02:17] it's going to bounce off the floor and
[02:19] land on top of this box fully spreading
[02:21] into where there's no Gap whatsoever and
[02:22] the CT certainly can't jump on top of
[02:24] this and get any sort of angle from on
[02:26] top of the box and moving on over to Mid
[02:28] you can pretty much throw everything you
[02:29] could possibly want from this trash can
[02:31] corner right here you can smoke off deep
[02:33] Cat by just doing a jump throw right at
[02:35] this little darker Leaf right here right
[02:37] at the end of it you can smoke off
[02:38] connector by going up to the first
[02:39] little stair step on this rug and then
[02:41] you can aim right here towards the top
[02:44] right corner of this door and just up
[02:46] between this part of the wall and right
[02:47] here hold D for a couple of seconds and
[02:49] do a jump throw and just like that
[02:50] you've smoked off connector with no gaps
[02:52] coming out of the top You' smoked off
[02:54] cat just like this and the mid smoke is
[02:56] landed perfectly with no gaps out
[02:58] towards mid
[03:00] and now moving on to Mid there are quite
[03:01] a few smokes that you can throw you have
[03:03] a ton of options from back here so once
[03:04] that mid smoke is fading you can always
[03:06] remoke it by coming really anywhere back
[03:08] along this wall aiming at the top of
[03:10] this antenna and just doing a run Throne
[03:12] that's going to go right back here and
[03:14] should fully resmoke off mid window you
[03:16] can also go into this position right
[03:18] here and throw a ton of stuff like a cat
[03:20] smoke a jungle smoke and of course a CT
[03:25] boost smoke as you can see we fully
[03:26] smoked off cap fully smoked off window
[03:29] we've smoked off jungle and we've thrown
[03:31] a smoke that lands right here on top of
[03:32] CT boost so yeah obviously you're not
[03:34] going to throw all four of those in one
[03:35] round but hey if you have one or two of
[03:36] those that you're able to throw it can
[03:38] definitely make a huge difference as
[03:39] you're pushing towards a in the mid
[03:41] round on Mirage and for the final three
[03:43] smokes of this video we're going to be
[03:44] taking a look at all of the B smokes so
[03:46] you can throw all three of them from
[03:48] right here in this corner you can just
[03:49] aim right up into the right of this
[03:51] little window for the market door smoke
[03:53] you can aim at the very top of this tip
[03:54] of the building for the market window
[03:56] smoke and then you can just do a simple
[03:57] left click on the left hand side of this
[03:59] part of the uh Tower and that's going to
[04:01] be your short smoke so you've got Market
[04:03] window Market door and of course CT or
[04:07] sorry cat or short so a pretty good
[04:09] three smoke setup that you can throw um
[04:11] without leaving any gaps on any of the
[04:13] sides so let's go ahead and move on to
[04:15] flashbangs there's a couple of really
[04:17] good ones that you can throw for asight
[04:19] as your teammates are pushing out so
[04:20] starting out the classic one that
[04:21] everyone throws is by coming right here
[04:23] into the middle of this door and doing a
[04:25] simple left click throw right here onto
[04:27] the lamp most people call it the lamp
[04:28] flash as you probably expect and it
[04:30] destroys any of the CTS that are
[04:32] standing right here in this position
[04:33] holding close as well as anyone over
[04:36] here um towards default holding this
[04:38] angle but what you'll probably notice is
[04:40] there's one major issue with that flash
[04:42] and that's the fact that anyone standing
[04:43] up on top of uh Tetris here or sorry on
[04:45] top of stairs here as well as back here
[04:47] on Triple or you know tucked under
[04:50] sandwich any of these positions well
[04:51] they're not getting blinded by this
[04:53] flash so what I recommend doing instead
[04:55] is coming right here into this little
[04:57] slanted portion of the wall and just
[04:58] doing a simple jump there right at the
[05:00] top right of this portion of the wall
[05:02] here and that's going to go all the way
[05:04] up it's still not going to Blind your
[05:06] teammates as they're running out and
[05:07] it's going to absolutely obliterate all
[05:09] of these positions just as good as the
[05:11] other one except it's also going to get
[05:12] anyone standing here in Sandwich it's
[05:14] going to get anyone up on top of stairs
[05:17] and it's also going to get all these
[05:18] angles back here on site even if they're
[05:19] holding a super super tight angle like
[05:21] this right that flash is still going to
[05:22] come up and absolutely nuke them it's a
[05:24] really good flash it is pretty much the
[05:25] god flash for a sight and moving on to
[05:28] the flip side of that if you're a T and
[05:30] you hear the te start pushing out you
[05:31] can stand in this corner right here on
[05:32] your balcony go between this point of
[05:34] the wooden floor and this brick pile
[05:37] right in the dead center of it and do a
[05:38] simple jump throw with a flash that's
[05:39] going to pop all the way up here and
[05:40] it's going to f by anyone up here on
[05:42] Tetris and anyone walking out of a
[05:44] stairs or a ramp and boom just like that
[05:46] you're going to have a couple of free
[05:47] kills if they end up eating it and if
[05:50] you're ever stuck in a retake situation
[05:51] where the te's have a site you can come
[05:53] right here into this trash can corner
[05:54] and just do a simple left click right
[05:56] where this slanted kind of diagonal uh
[05:58] part of the roof is just simple left
[06:00] click throw it's going to pop right over
[06:01] super easy to peek off of and it's going
[06:03] to full blind anyone standing out here
[06:04] on the a site and now moving over to Mid
[06:06] if you're on CT and you want to peek out
[06:08] by yourself you can come right here into
[06:09] this corner along the table and just do
[06:11] a simple left click through right
[06:12] towards the top right of this little
[06:13] wall that flash is going to pop right
[06:15] down here you just turn from it and peek
[06:16] out and boom you have all these
[06:17] positions out in mid fully blinded off
[06:19] without too much time to react as you
[06:21] can see most of the travel time is up
[06:22] there and they just take that and get
[06:24] full blinded as they're running up
[06:26] whenever I'm playing B I love throwing
[06:27] this flash for my apps player I'll go
[06:29] right into this corner and just do a
[06:30] simple left click throw at the very top
[06:32] of this darker uh line here that's going
[06:35] to go all the way up into Apps and full
[06:37] blind this player right here and my
[06:39] teammate can be on either of these sides
[06:41] here whenever this pops he can swing and
[06:43] just have a very very very very free
[06:45] kill on anyone running up through apps
[06:47] and on the flip side of that if you ever
[06:49] want to exit apps you can go right here
[06:50] into this corner and do a simple left
[06:52] click throw at the very top left of this
[06:53] white stain on the wall that's going to
[06:55] go all the way out of this window and
[06:56] it's going to full blind anyone sitting
[06:58] here either in jail
[07:00] or if they're sitting right here in this
[07:02] position right there and you can use
[07:03] that to slip by and take a nice entry
[07:05] pathing as your teammates are jumping
[07:06] out of the windows and all the way out
[07:08] down there towards van and the best
[07:10] flash that you can possibly throw for
[07:11] bite as your teammates are running out
[07:13] is you aim at the bottom right of this
[07:15] little window here and do a run jump
[07:17] throw right before you hit this bar that
[07:19] flash is going to go super deep out here
[07:21] to where it's not going to Blind any of
[07:22] your teammates as they're running out
[07:24] but anyone in any of the common angles
[07:25] on site is going to get absolutely nuked
[07:27] by this flash even someone holding
[07:29] really close right here is not going to
[07:30] have any time to react whatsoever from
[07:32] that flash and now moving on over to
[07:34] Molotov this is one that carrian throws
[07:36] quite often you'll just go right off
[07:37] spawn right here into this position and
[07:39] just do a simple jump throw right at
[07:40] this little piece of wood sticking out
[07:41] of the garbage pile that's going to go
[07:43] all the way up here it's going to bank
[07:44] and fully Molly off this back area
[07:46] forcing any of the te's either back over
[07:47] here towards kitchen or all the way back
[07:49] on the outside here of apps and now
[07:51] moving on over to the a site one of the
[07:53] easiest and most effective mollies that
[07:54] you can throw is by coming right here
[07:55] into this corner and just doing a simple
[07:57] left click right at this dark spot right
[07:59] right on the top of the wall that's
[08:01] going to fully Molly off sandwich and
[08:02] burn out anyone in this position it's a
[08:04] really good one to throw as a part of an
[08:06] execute and moving on this is in my
[08:08] opinion the most important Molotov for
[08:10] as site Mirage every single time you
[08:12] want your Palace player to throw this
[08:13] you just go to the left hand side of
[08:14] this pillar aim at the very top of this
[08:16] slanted portion of the wall and you're
[08:17] going to do a run throw the second that
[08:19] you cross this portion of the doorway so
[08:21] you're just going to right here and
[08:22] release right about now and every single
[08:24] time it's going to go all the way down
[08:25] here and fully Molly off this position
[08:27] to where no CTS can stand under here
[08:29] whatsoever so moving on to the CT side
[08:31] of things there's a couple of really
[08:32] great molotovs you can throw from this
[08:34] position right here if you feel like the
[08:35] teas are going to start pushing out you
[08:36] can do a simple left click throw on
[08:38] anywhere along this kind of Darker spot
[08:40] on the wall it's going to go all the way
[08:41] up here and it's going to Molly off
[08:42] Tetris completely it'll spread all the
[08:43] way to this back corner forcing them out
[08:45] of the super safe position giving your
[08:47] teammates a pretty free Kill from that
[08:49] same exact position you can do a simple
[08:50] left click throw on the right hand side
[08:52] of this wooden plank and that's going to
[08:54] go all the way to here and it's going to
[08:55] spread from the far left corner all the
[08:57] way to the far right uh taking away in
[08:59] any of that cover that the te's may be
[09:00] sitting in right outside of a ramp and
[09:03] finally if you're ever stuck behind this
[09:05] CT ticket smoke you can come right here
[09:07] into this corner and do a simple left
[09:09] click through with the Molly right at
[09:10] this little piece of hay and that's
[09:12] going to go all the way up here and
[09:14] fully Molly off all of default from this
[09:16] position all the way to pretty much
[09:18] every spot that anyone would be planning
[09:20] in for this site and now moving on to
[09:22] our last piece of utility the H grenade
[09:24] right after you throw that Molly I just
[09:26] showed you can take a little bitty step
[09:28] with an h and absolutely nuke anyone
[09:30] that's standing here on default um by
[09:32] just doing a simple walking throw with
[09:35] an H in that same exact lineup similarly
[09:38] you can come into this position right
[09:40] here and just aim right at where this
[09:41] Shadow splits this plank in half and a
[09:43] simple left click throw with an h and
[09:45] that's going to absolutely eviscerate
[09:47] anyone standing here on Tetris it's a
[09:50] really good one to throw whenever you
[09:51] feel like the t's have taken that
[09:52] control right there moving back over to
[09:55] the B site if you go right here into
[09:57] this corner you can absolutely
[09:59] obliterate the player behind bench just
[10:01] by aiming right here at this little
[10:03] white piece of cloth hanging down from
[10:05] the window and doing a run throw right
[10:07] before you hit the steps and boom that's
[10:08] going to land right there doing right at
[10:10] 50 damage to anyone standing in this
[10:11] area uh you just want to make sure you
[10:12] release right before you hit the
[10:14] staircase and finally for the last H if
[10:16] they've ever smoked you off right here
[10:18] in Sniper Nest you can go right here
[10:19] into this corner and just do a right
[10:21] click jump throw right around here on
[10:23] this plank that H is going to land on
[10:25] that outside here fully break the smoke
[10:27] and allow you to obliterate anyone
[10:28] that's walking out here in mid so yeah I
[10:31] hope all of this utility helps you out
[10:32] in your next CS2 Mirage Premiere match I
[10:35] know you've probably seen quite a bit of
[10:36] this on my channel before but I just
[10:37] wanted to combine it all into one huge
[10:38] full Mirage utility guide video for
[10:40] everyone to see if you want to support
[10:43] me go ahead and click that skins monkey
[10:44] link down in the description below and
[10:45] use code tactics on the site I really
[10:47] appreciate all the support recently if
[10:49] you have any suggestions for me please
[10:50] leave them down in the comments below
⚡ Saved you 0h 10m reading this? Transcribe any YouTube video for free — no signup needed.