Double Smoke A Site from One Spot
47sThis double smoke lineup covers both stairs and jungle from a single position, saving time and ensuring perfect site execution.
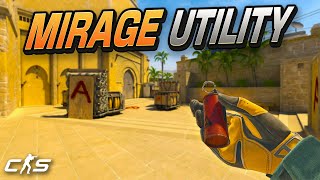
▶ Play ClipThis video is a comprehensive guide to essential utility lineups on the CS2 map Mirage, covering smokes, flashes, and molotovs for both T and CT sides. The creator demonstrates easy-to-learn lineups for A site, mid, and B site, aiming to help players win more games by improving their map control.
From outside A main, throw jungle smoke by aiming at top of block and left-clicking; stairs smoke by aiming at gap in bricks and jump throwing.
A flash from A main, lined up with the door grill and top of lamp, blinds enemies at default, triple, and even back on ticket.
A molotov aimed above the center of the piece above the ledge covers firebox, default, and ninja.
CT side molotov for A main: run back to boxes, aim above triple at pillars, throw off pillar while running to site.
Window smoke from T spawn: tuck into corner of stairs, aim at second pattern on rug, jump throw.
Connector smoke from T spawn: same position, aim at corner of pattern on rug, jump throw.
Flash for mid: tuck into corner, aim at top corner of building, left-click. Pairs well with mid smoke.
Late-round window smoke from top mid: crouch in corner, aim at corner, left-click. Molly: aim at second antenna piece, throw when it meets triangle.
CT side smoke for connector: stand near connector, look at corner, throw smoke into it.
From TV room, market window smoke: aim at first corner of building, jump throw. Market door smoke: aim at corner to right, jump throw.
Molly for van: line up in corner near van, aim at line in wall up to top piece, left-click. Molly for jail: line up on right wall, run, throw through window.
B site flash: tuck into right side of door, aim below brown area, jump throw. Blinds almost all positions.
"The title accurately promises a utility guide for Mirage in under 10 minutes, and the video delivers exactly that with clear lineups and explanations."
How do you throw the jungle smoke from outside A main?
Aim at the top of the block and left-click.
0:45
How do you throw the stairs smoke from outside A main?
Aim at the gap in the bricks and use a jump throw (left click + right click + jump).
0:58
What is the lineup for the A site flash that blinds default and ticket?
Line up in the middle of the door grill, aim at the top of the lamp, and left-click.
1:17
How do you throw the molotov that covers firebox, default, and ninja on A site?
Aim above the center of the piece above the ledge and left-click.
2:03
What is the CT side molotov lineup for blocking A main?
Run back to boxes near CT, aim above triple at the pillars, and throw off the pillar while running to site.
2:21
How do you throw the window smoke from T spawn?
Tuck into the corner of the stairs, aim at the second pattern on the rug, and jump throw.
3:27
How do you throw the connector smoke from T spawn?
Tuck into the corner of the stairs, aim at the corner of the pattern on the rug, and jump throw.
4:00
What is the lineup for the flash that pairs with the mid smoke?
Tuck into the corner, aim at the top corner of the building, and left-click.
4:46
How do you throw the late-round window smoke from top mid?
Tuck into the corner near top mid, crouch, aim at the corner, and left-click.
5:29
What is the lineup for the window molotov from top mid?
Tuck into the left corner, aim at the second piece of the antenna, and throw when it meets the triangle.
5:45
How do you throw the CT side smoke to fight off connector and mid push?
Stand in the general area near connector, look at the corner, and throw a smoke into it.
6:14
How do you throw the market window smoke from TV room?
Tuck into the corner in TV room, aim at the first corner of the building, and jump throw.
7:05
How do you throw the market door smoke from TV room?
Tuck into the corner in TV room, aim at the corner to the right, and jump throw.
7:15
How do you throw the molotov that covers top and under van on B?
Line up in the corner near van, aim at the line in the wall up to the top piece, and left-click.
7:35
How do you throw the molotov that covers the right side of jail on B?
Line up on the right wall, run, and throw the molotov through the window.
8:04
A Site Smokes from Same Position
Shows how to throw both jungle and stairs smokes from one spot, simplifying A site execution.
0:26Powerful A Site Flash
A single flash lineup that blinds enemies at default, triple, and even back on ticket.
1:17Versatile A Site Molly
Covers firebox, default, and ninja with one molotov, a rarely used but effective lineup.
2:03Reliable Window Smoke from Spawn
A simple jump throw lineup that works every time, even after updates broke other methods.
3:27Mid Flash Pairing with Smoke
A flash that pops inside the mid smoke, blinding enemies pushing mid and making control easier.
4:46B Site Smokes from TV Room
Two smokes from one position that cover market door and window, simplifying B site takes.
6:50B Site Flash Coverage
A flash that blinds almost every position on B, including cat, bench, and back sight.
8:35[00:00] So, Mirage is an absolute fan favorite
[00:01] map and one of the most played maps all
[00:03] across CS2. So, in today's video, I'm
[00:04] going to show off the ultimate utility
[00:06] that you need to know when you're
[00:07] playing Mirage to make your games a
[00:08] little bit better and hopefully should
[00:09] end up winning you some more games. But
[00:10] without any more yapping, let's [music]
[00:11] jump in. Just a quick shout out before
[00:13] we jump into the video. This video is
[00:14] sponsored by Advance. If you guys are
[00:15] interested in having good, clean energy
[00:17] and a product that I personally take
[00:18] every single day, feel free to use the
[00:20] referral code down in the description.
[00:21] Use code Tiger that I'll put up on the
[00:22] screen now for 10% off of everything.
[00:24] Now, that's enough for me. Let's get
[00:24] back to the video. So, first off, over
[00:26] at A, I'm going to show you how to throw
[00:27] these two smokes here to cover both
[00:28] stairs and the jungle area. Most people
[00:30] know the CT smoke, but a lot of people
[00:32] don't know how to throw both the stairs
[00:33] and jungle smoke. So, we're going to
[00:34] start there. In order to throw these two
[00:35] smokes, we're going to run out of spawn.
[00:37] Jump up on top of this ledge here. We're
[00:38] want to run all the way over until we
[00:40] meet the corner of this pillar here.
[00:41] Just tuck yourself all the way up in the
[00:42] corner of the wood until you stop
[00:43] moving. For the first smoke, we're going
[00:45] to throw for jungle. And for that, we're
[00:46] going to want to aim all the way up at
[00:47] the top of this block here. It doesn't
[00:48] have to be precise at all, as you can
[00:50] kind of see in the preview on the bottom
[00:51] left. Anywhere in this general location
[00:53] works. I tend to just go basically a
[00:55] little bit to the left of center and
[00:57] then just left click throw. And then for
[00:58] the stair smoke, we're going to aim all
[00:59] the way down, basically straight down
[01:01] from the jungle smoke. It's a little gap
[01:02] in the bricks here. Once again, doesn't
[01:04] have to be [music] all that precise. For
[01:05] this one, you're going to left click,
[01:06] right click, and jump through.
[01:10] As you can see, by the time it lands,
[01:11] both these areas be [music] covered
[01:13] perfectly. Now, moving on while we're
[01:14] still outside of a main, next is the
[01:16] only flash you're going to need to know.
[01:17] This flash is absolutely insane. But
[01:18] we're going to run all the way out. Look
[01:20] at this little door here. We're going to
[01:21] want to line up in the direct middle.
[01:23] this little [music] grill piece here.
[01:25] And then same all the way at the top of
[01:27] this lamp and left click.
[01:30] >> Flashbang out.
[01:33] >> As you can see, when it pops, it'll land
[01:34] here. And basically, if you want a quick
[01:36] and easy way to see what your flashbangs
[01:38] are going to hit, you can basically just
[01:39] follow the trail, line yourself up where
[01:41] it pops, and anything you're looking at,
[01:42] it's going to hit at least a little bit.
[01:44] But as you can see, we're playing
[01:45] towards the default area here. Flash
[01:47] will come over. [music]
[01:48] you get full blind playing triple
[01:52] full blind even if we're playing all the
[01:54] way back on ticket
[01:57] you get blinded albeit not that much cuz
[01:59] it's farther away but still crazy good
[02:01] flash next we're going to throw one of
[02:03] the best mollies that I know for a site
[02:04] we're going to look just above the
[02:05] center of this piece here all the way up
[02:06] above this ledge and then just left
[02:08] click throw
[02:10] >> as you can see it's land on firebox
[02:12] [music] and it spreads absolutely
[02:13] everywhere it'll cover all of firebox
[02:15] covers default and it covers ninja and
[02:17] this is a molly I don't see nearly
[02:19] enough people use. And now if you're on
[02:20] the CT side and want a good Molly, the
[02:21] absolute best Malle to throw is for a
[02:23] main. We're run all the way back to
[02:25] boxes [music] and CT. Want to aim above
[02:26] triple at these little pillars here. As
[02:28] we're running to sight, we're just going
[02:29] to throw it off the pillar.
[02:32] As you can see, this lines here and
[02:34] it'll completely block off all the
[02:35] vision from ramp. We're sitting here as
[02:37] a T-side and we're trying to look for a
[02:38] cross. You can see absolutely nothing.
[02:40] And it basically does its job stopping
[02:41] the push and it kind of acts like a
[02:43] smoke for a short time. So, this one is
[02:44] much better than just winging it and
[02:46] throwing a molly in the general
[02:47] direction. Also, this is one more tip
[02:49] for my CT players on it. If you're ever
[02:50] finding yourself getting smoked off like
[02:52] this pretty often, there's a super easy
[02:53] way to get yourself some more control,
[02:54] and that's just to throw a smoke in the
[02:56] middle of the site.
[02:59] Now, it seems kind of boring, I know,
[03:00] but as you can see, when we're walking
[03:02] out to block all of your vision and
[03:04] allow you to fight back [music] site and
[03:05] allows you to clear angles kind of
[03:06] incrementally, so as this is all smoked
[03:08] off, you make sure nobody's holding you
[03:09] here and kind of work your way out onto
[03:11] sight. And this will make getting
[03:12] yourself back in the round a little bit
[03:13] easier. Now, moving over to mid. This is
[03:15] where I get the most questions of what
[03:16] smokes to throw. And I know after a few
[03:18] updates ago, everybody's window smoke
[03:20] started breaking. I'm going show you a
[03:21] nice easy tip that doesn't require you
[03:23] to do absolutely anything but jump
[03:24] throw. Your window smoke will land every
[03:25] single time. So, to do that out of
[03:27] spawn, [music] we're going to run back,
[03:28] tuck ourselves in the corner of these
[03:30] stairs, aim all the way up under this
[03:31] carpet here. We're going to look at
[03:32] these little pieces. We're going to aim
[03:34] not at the first one, but the second,
[03:35] just right in the middle, and then jump
[03:36] through.
[03:39] >> As you can see, all this is flying. Got
[03:40] to bounce off this ledge here and it'll
[03:42] land perfectly in window. [music]
[03:44] Now, yes, there are instant smoke
[03:46] lineups from all different spawn
[03:48] locations, but this one is really easy
[03:50] for beginners to follow, and I tend to
[03:51] teach this one first before going into
[03:53] any of the advanced ones. So, if you
[03:54] guys do want the specific [music] spawn
[03:55] location ones, make sure to leave a
[03:57] comment down below and I'll be sure to
[03:58] go over that in the next one. Now, our
[03:59] next smoke we're going to show be
[04:00] showing off is for connector. There's no
[04:02] connector. Instead of running into the
[04:03] stairs here, we're going to want to run
[04:04] into [music] your garbage can. We're
[04:05] going to aim at the same rug. Instead of
[04:07] these little patterns here, though,
[04:08] we're going to aim all the way at this
[04:10] corner [music] of the pattern, right
[04:11] about here, and then just jump through.
[04:14] >> This one will be the perfect connector
[04:15] smoke. It lands on the second step,
[04:16] which means that if you're inside of the
[04:18] smoke, playing [music] on the CT side,
[04:20] absolutely no gaps. You can't see
[04:21] through unless you're shooting.
[04:22] Likewise, if you're on the T- side, you
[04:24] can see that there's absolutely full
[04:25] coverage. So, if your team throws both
[04:26] of these smokes, you can even throw both
[04:28] of these smokes on your own. Mid control
[04:29] becomes way easier. Then additionally
[04:31] from the same exact location, if we want
[04:32] to throw a top midsm smoke, all we have
[04:34] to do tuck ourselves in the same exact
[04:35] corner. Aim at the top of this down here
[04:37] and then just left click throw. This one
[04:39] will drop perfectly covering all of
[04:41] window and even a connector. No gaps
[04:43] here. Now, if we want to pair an
[04:45] additional piece of util with that,
[04:46] there's a crazy flash that I've seen a
[04:47] lot of broke teams using. All you have
[04:49] to do is stuck yourself in this corner,
[04:51] aim at the top corner of this building,
[04:53] and just left click throw a flash. This
[04:55] pairs especially well with the midm
[04:56] smoke because if you're throwing this
[04:58] flash while it's up, it pops almost
[05:01] inside the the smoke itself. And so
[05:03] teams are taking mid control on you
[05:04] pretty easy and the smokes just aren't
[05:06] enough. Throwing this flash is
[05:08] absolutely crazy. As you can see, it
[05:10] hits absolutely everybody. This works
[05:11] especially well for if you're struggling
[05:13] to take mid cuz people are pushing all
[05:14] the way up. As you can see, by the time
[05:15] it lands, you're fully hit. But if you
[05:18] want more additional util from top mid
[05:20] here, if you've ever been stuck in this
[05:21] situation later into the round when both
[05:23] of your smokes are faded, there's a
[05:24] really quick and easy way to smoke
[05:25] window and also a molotop that'll show
[05:27] after do the exact same job. But to
[05:29] smoke it, we're going to tuck ourselves
[05:30] in this corner here. Crouch and aim at
[05:32] the corner here. Load it off to the
[05:34] corner so you don't throw it into the
[05:35] box obviously. And just left click
[05:37] throw.
[05:38] You want to make sure you crouch for
[05:40] this one though. If you're not crouched,
[05:40] it will not land. As you can see, lands
[05:42] perfectly in window. Now next to do the
[05:44] same thing with a molly. We're going to
[05:45] want to tuck ourselves in the left
[05:46] corner though. back up until this little
[05:47] ledge. And for this one, I like aiming
[05:49] at the second piece of the antenna here,
[05:51] not the top one, but the middle one
[05:52] here. And then throwing rough roughly
[05:54] when it meets this little triangle. So,
[05:56] we're going to hold, run, throw.
[06:00] As you can see, perfect molotov. So,
[06:03] this one works really well if you don't
[06:04] have a smoke or for those niche
[06:05] situations where you would rather have a
[06:07] molotov. There are some situations like
[06:09] if you have a teammate in ladder room,
[06:10] you're trying to force a guy out of this
[06:11] corner, things like that. Then from the
[06:12] CT side, the best smoke that I know for
[06:14] fighting off connector and the mid push
[06:15] is after their smoke is faded or if they
[06:17] don't even smoke it, you know they're
[06:18] going to be pushing mid. You just want
[06:19] to stand in the general area here. It
[06:20] does not have to be perfect at all. Then
[06:22] you just want to look at this corner
[06:24] here and just throw a smoke into it. It
[06:26] really is that easy. And as you can see,
[06:28] it kind of gives you almost a oneway.
[06:29] And if T-side hasn't seen you do this
[06:31] whole game, it's a really easy way to
[06:32] catch them off guard, especially if
[06:33] they're pushing cat. [music]
[06:34] You can even play lower down on the
[06:36] stairs here. Wait for them to peek, kind
[06:39] of try and tap some meds. Not really the
[06:41] best piece of view tool, I would say,
[06:42] but I do notice a lot of connector
[06:43] players just getting completely caught
[06:44] [music] off guard and trying to hold
[06:46] this angle, this angle, and cat. If
[06:48] you're looking for an easier way to do
[06:49] that, this smoke will help you. Moving
[06:50] over to B, we're going to start off with
[06:52] two smokes for the B site. That's going
[06:53] to be these two smokes here. One for
[06:54] market door and one for market window.
[06:56] These two smokes, similar to the A
[06:57] smokes, are going to be from the exact
[06:59] same location. It's going to be super
[07:00] easy to get to. All we're going to want
[07:01] to do, though, is run out of TV room.
[07:04] Tuck ourselves in this corner here.
[07:05] First one's going to be for market
[07:06] window. You basically just follow this
[07:07] line [music] all the way straight up.
[07:08] Then we're gonna want to aim at the
[07:09] first corner of this little piece of the
[07:12] building here and then jump throw. And
[07:15] then for window, we're going to aim down
[07:17] to the right until we meet this corner
[07:18] here and then jump throw.
[07:21] As you can see, when they both land,
[07:22] they drop two perfect market smokes.
[07:24] This one does spread pretty deep inside
[07:25] of market window itself, so it really
[07:27] stops people from trying to push
[07:28] through. Same with the door smoke. As
[07:30] you can see, this [music] is absolutely
[07:31] insane coverage that you get from this.
[07:32] There's two really easy to throw
[07:33] molotovs that I'm going to show. First
[07:35] one is going to cover [music] both top
[07:37] and underneath by van. We're going to
[07:38] line ourselves up in this corner here as
[07:40] we're running out. You're going to aim
[07:41] at this little line in the wall and then
[07:43] just [music] up to the top to this piece
[07:45] here and left click throw. It really is
[07:47] that easy. As you can see, this covers
[07:49] all of the bal even into this corner
[07:51] here where a lot of people hide and it
[07:52] covers people jump spotting down below.
[07:54] So, it forces them into this position
[07:56] here where they're very easily seen and
[07:58] traded from your teammates. Then next,
[07:59] this one is super easy and there's a lot
[08:01] of leeway for it, which is why it's one
[08:02] of my favorites. As we're running up
[08:04] now, we know this area is molotovd. Down
[08:06] below is molotov so we can hold as we're
[08:08] scaling up. All you have to do is line
[08:10] yourself on the right wall, run, and
[08:12] just throw Molly over there right
[08:14] through the window.
[08:17] This covers all the right side of jail
[08:18] unless they're pushed up here, but in
[08:20] this case, pretty easily visible. Kind
[08:22] of covers all the bench except for the
[08:23] right side here. Overall, this pushes
[08:24] them into an incredibly vulnerable
[08:25] position on either side of the molotov.
[08:27] It might not be the best way to clear
[08:28] all the back of the bench, but this is a
[08:30] really easy one to throw and will force
[08:32] people into being traded out very
[08:33] easily. And now for the best flash that
[08:35] I've ever seen for B. This is going to
[08:37] be incredibly easy to throw. You're just
[08:38] going to want to run up, tuck yourself
[08:39] in the right side of this door, aim
[08:40] below [music] this little brown area of
[08:42] the wall, and then jump throw.
[08:44] As you can see, flies right over top of
[08:46] the apps. It's incredibly easy to
[08:47] reproduce, and it blinds absolutely
[08:49] everything. So, if you see here where it
[08:51] pops [music]
[08:53] it hits everywhere, even the cat
[08:54] players. Now, it does pop behind the
[08:55] player who's typically on get right. As
[08:58] you can see, if I throw it, doesn't do
[09:00] all that much. But for [music]
[09:01] everywhere else, even if you're in these
[09:04] corners,
[09:06] [music] hits them. If you're playing
[09:07] bench,
[09:10] still get hit. Playing back sight, still
[09:12] hits you a little bit. So, now for the
[09:14] CT side of B, there's a few mollies you
[09:15] can throw the exact same way as what I
[09:17] showed you earlier, but in reverse.
[09:18] There's really two ways you can do it.
[09:19] You can either look a little bit further
[09:21] to the right and mlly off the doorway as
[09:24] you can see
[09:26] or or you can up and to the left [music]
[09:28] more throw it right through the window.
[09:30] This will cover off deeper and just halt
[09:33] the push there before they can jump out
[09:34] the window. Either one of these is
[09:35] pretty good. It's completely personal
[09:37] preference on what you and your team
[09:38] want to do. And trust me, there's plenty
[09:40] of other ways you can monotop through
[09:42] here. These are just relatively easy.
[09:43] Now, with all that out of the way, I do
[09:44] hope you guys enjoyed this video. And if
[09:46] you did, make sure to leave a like,
[09:47] comment, sub, all your great stuff down
[09:48] below. It does help me out greatly and I
[09:49] do appreciate it. And as always, make
[09:51] sure to leave a comment. Let me know
[09:51] what map you want me to do next. And
[09:53] yeah, no more happening for me. Hope you
[09:54] guys enjoyed and I'll see you all in the
[09:56] next one.
⚡ Saved you time reading this? Transcribe any YouTube video for free — no signup needed.