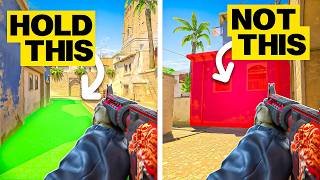
Fix Your CT Mirage in 45 Seconds
45sOpens with a bold claim and high-level strategy overview, hooking competitive CS2 players who want quick improvement.
▶ Play ClipThis video provides a comprehensive overview of CT-side Mirage in Counter-Strike, breaking down each position's responsibilities and optimal round starts. The creator emphasizes utility usage, positioning, and decision-making to maximize round win potential.
Start with a Molotov towards A ramp, a connector smoke, a player flashing over mid, one player running off cat, and one jump spotting upper B.
The hardest role. Always throw a Molotov at ramp start. Be aware of CT Molotov changes and manipulate it to cover gaps. Flash for mid early, but be cautious if you hear the Molotov extinguished.
The 'Chad' of the site. Helps A site while fighting mid. Use spawns wisely; path through window and vent if needed. Throw smokes at bottom connector and consider smoking Palace to prevent lurks.
Most impactful CT player. Know different nade lineups to pop window smoke. Use cat jump, ladder jump, underpass jump, and connector jump. Communicate for mid flashes. Rotate to ticket booth mid-to-late round for maximum map control.
Use good spawns for cat jump or ladder jump. Burn Molotov upper B early to counter rushes. Flash over cat and peek A if ambitious. Play ladder if team goes heavy mid. Support B player if struggling.
Least desired position. Focus on not losing the round. Let lurker be; they must jump down, giving audio cue. Push upper B with Molotov and smoke to gain control. Drop smoke on site to cut off vision and play hide-and-seek.
Mastering CT-side Mirage requires understanding each role's utility usage, positioning, and adaptability. Effective communication and map control are key to consistently winning rounds.
"The title accurately promises a fix for bad CT-side Mirage play, and the video delivers detailed role breakdowns and strategies."
What is the first thing you should do as the A anchor on CT-side Mirage?
Always throw a Molotov towards A ramp at the start of the round.
0:49
What is the role of the connector player on CT-side Mirage?
To help the A site player while simultaneously fighting mid.
2:44
What is the most impactful CT player on Mirage according to the video?
The mid window player.
4:31
What should the cat player do with their Molotov at the start of the round?
Burn it upper B to counter rushes.
8:30
What is the B anchor's primary goal?
Not to lose the round for the team.
11:10
What should the mid window player do if they get smoked off?
Rotate to ticket booth via CT spawn.
6:57
What is a key strategy for the B anchor when facing a lurker in upper B?
Let the lurker be; they must jump down, giving an audio cue.
11:39
What should the connector player do to prevent a lurk from Palace?
Smoke Palace.
3:53
What is the recommended position for the cat player if the team goes heavy mid?
Play in ladder.
10:55
What should the B anchor do when they hear a B rush?
Drop a smoke on site to cut off vision and play hide-and-seek.
13:53
A Anchor is Hardest Role
Highlights the difficulty and importance of the A anchor position, emphasizing utility usage and awareness.
0:35Mid Window Player Impact
Identifies the mid window player as the most impactful CT position, crucial for map control.
4:22Cat Player Utility Usage
Demonstrates effective Molotov and flash usage for the cat player to support B and mid.
7:45B Anchor Mindset
Emphasizes the defensive mindset of the B anchor, focusing on not losing the round rather than winning it.
11:06Hide and Seek on B Site
Introduces the concept of hide-and-seek as a core strategy for B site defense after smoking.
14:10[00:00] today we're going to be looking at CT
[00:01] side Mirage I'm just going to give you a
[00:03] nice little basic overview of each
[00:05] position and how the start round should
[00:07] look for every single round CT side
[00:09] Mirage to give yourself the best
[00:11] possible chance to win the round so
[00:12] overall in CT side Mirage the first
[00:14] thing you're going to want to see is a
[00:16] Molly towards a ramp you're probably
[00:17] going to want to have some sort of
[00:19] connector smoke early on in the round
[00:21] with a player flashing over mid
[00:22] supporting for that player to Peak
[00:24] window early and then simultaneously
[00:26] having one player running off cat and
[00:28] one person jump spotting upper B this is
[00:30] kind of what it should look like so
[00:32] first I'm breaking down CT side Mirage
[00:34] we're going to start with the hardest
[00:35] roll first the hardest roll don't care
[00:37] what anybody says is anchoring a your
[00:39] mid player is probably going to die
[00:41] you're going to get lurked from Palace
[00:42] some weenie is going to run out a ramp
[00:44] in the first 15 seconds and try to run
[00:46] you down through a Molly so as the
[00:47] dedicated a player on Mirage the first
[00:49] thing you want to do is always have a
[00:52] Molotov always always always just start
[00:54] the round dump a Molly you could figure
[00:57] out a couple different ones that land
[00:59] differently maybe that you can play
[01:00] around especially with the CT Molly
[01:02] changes they can always be on the back
[01:05] side of the wall and peing you towards
[01:07] triple you need to be aware of this as
[01:09] the CT player you can try to manipulate
[01:11] your Molly so it gets further back on
[01:13] the wall but then it's going to leave
[01:14] gaps on the other side where it's thin
[01:16] close to the wall and they can run out
[01:17] on you you have to be very careful the
[01:19] Molly is still incredibly good to throw
[01:20] at the start because one if somebody
[01:22] runs through it you're going to have the
[01:24] advantage of them running through a
[01:25] Molotov ideally taking some damage you
[01:27] get the audio Q if you can't afford a
[01:29] Molotov and a gun round you're an idiot
[01:31] and you need to buy a Molotov so figure
[01:33] it out now after you Molly ramp if
[01:35] you're a really good teammate and you're
[01:37] playing with people the next thing you
[01:38] want to do is Flash for Middle flashing
[01:40] for Mid you have to be careful cuz once
[01:42] again when you're flashing mid if you
[01:44] hear somebody run out your Molotov or
[01:46] they extinguish it you're going to be in
[01:48] a little bit of a compromised spot so be
[01:49] very careful of where you throw these
[01:51] flashers from so at the start of rounds
[01:53] you want to flash over and mid to late
[01:55] round you want to flash over connector
[01:57] instead and through connector
[01:59] positioning genuinely I don't really
[02:01] want to tell you too many spots because
[02:02] there are so many different positions
[02:04] that you can play you can play off angle
[02:06] you can play Under balk you can play
[02:08] default you can play triple you can play
[02:09] sandwich it really comes down to
[02:11] personal preference realize that if
[02:13] they're not rushing you you're playing a
[02:15] game of hide-and seek so you need to
[02:17] become the hideand-seek champion and
[02:18] make sure that you're never in a
[02:19] position where when that one weenie that
[02:21] decides to walk out on you doesn't know
[02:23] exactly where you're at to get a free
[02:25] kill if your teammates are going mid
[02:27] dying every round fighting in mid and
[02:29] just leaving you on an island a really
[02:31] great option in general is just playing
[02:32] ticket people are nasty and they're
[02:34] going to One Tap you from time to time
[02:36] in this position either coming out
[02:37] Palace or coming out ramp just be ready
[02:38] for that so be mobile play this box get
[02:41] comfortable with it this is your home
[02:42] now connector player the a connector
[02:44] player is the Chad of the site he
[02:47] basically ignores his teammate in the a
[02:48] bomb site but ideally if you're playing
[02:50] it well you want to be the guy that
[02:52] actually helps your teammate in a a
[02:54] little bit while simultaneously fighting
[02:56] mid and that starts with your spawns if
[02:58] you are all the way in the back and then
[03:00] you try to cross a ramp at the start
[03:04] just keep in mind there's a good chance
[03:06] that you're going to die and it's
[03:07] completely your fault don't be afraid to
[03:09] path through window later behind your
[03:11] mid mid window player come through the
[03:14] vent and enter connector this way in the
[03:16] mid round for the connector player
[03:18] things that you can do throwing smokes
[03:20] bottom Con in different ways and getting
[03:22] comfortable with how I to play around
[03:23] them is really strong sometimes you
[03:25] could throw one at the bottom and this
[03:27] one like that I just threw bleeds out a
[03:29] little bit right so you can come out
[03:30] here you can look for a guy walking up
[03:32] underpass there's little cheeky plays
[03:34] that you can do and dropping your smoke
[03:36] early in the round in mid especially if
[03:38] you know the other team likes to come
[03:39] out mid can be really powerful
[03:41] especially combined with your teammates
[03:43] Flash from a or your teammates Flash
[03:45] from cat you really want to try to keep
[03:47] track of your a player's Palace for them
[03:49] whether that's maybe you don't want to
[03:51] use it for Mid maybe there's no pressure
[03:53] in mid you can smoke his Palace to
[03:55] prevent the lurk and hold it and jiggle
[03:57] around here and then also maybe try to
[03:59] get a little cheeky kill and hit a
[04:01] timing on the a ramp fight if you Peak
[04:02] this and die though this is your fault
[04:05] but this is kind of the life of the
[04:06] connector player you really get to move
[04:09] relatively freely it's just all decision
[04:11] making and the only way you're going to
[04:12] develop that decision- making is by
[04:14] trying different things and dying a lot
[04:16] and getting yelled at by your teammates
[04:18] because that's the real Counter-Strike
[04:19] experience mid window player the star
[04:22] first off if you're the window player
[04:23] and you're not confident what you're
[04:24] doing or you're really not that great at
[04:26] it stop playing it go play B the mid
[04:29] window player Mirage is probably the
[04:31] single most impactful player on the
[04:33] entire CT side if you are playing versus
[04:35] players that have watched many Austin CS
[04:38] videos the nade guy and they have
[04:40] instant window smokes first thing you
[04:42] need to know is different nade lineups
[04:44] for how you want to n window to pop the
[04:46] smoke I'm sure you can find one lineup
[04:48] that's quote unquote better than others
[04:50] at the end of the day you need to know
[04:52] as the window guy how to n the window
[04:54] smoke your spawns matter probably the
[04:56] most being the window guy I'm talking
[04:58] about cat jump ladder jump underpass
[05:01] jump and connector jump and when you
[05:03] come up here you just want to make sure
[05:05] you communicate to your teammates that
[05:06] you need mid flashes and you hold right
[05:09] here and anybody coming out is basically
[05:11] a freebie if you get even closer to this
[05:13] it becomes incredibly hard for them to
[05:15] flash you because they have to throw
[05:16] them over or anything they throw out mid
[05:19] will come across your scope so you can
[05:20] duck out of the view and then rep peek
[05:22] your next option which is a little bit
[05:24] trickier is the ladder
[05:26] jump you can come here and you can come
[05:29] out post here now if you're oping please
[05:32] understand this angle is awful and you
[05:35] should only be here if you are
[05:36] absolutely certain they will not go
[05:38] underneath if you sit here with an op
[05:41] the mid guy with a rifle will just walk
[05:43] down here and pop you in the head like
[05:45] an idiot I prefer to come out with this
[05:47] and then hold further out so that way
[05:49] people can't transition into the midr
[05:50] ramp once again you need to have a good
[05:52] spawn because well yeah you can jump
[05:54] underpass if I jump underpass and I
[05:56] don't have a good spawn they're going to
[05:57] see me and I'm going to feel like an
[05:59] idiot as a Molotov and H flashes come
[06:02] out and I just get absolutely bombarded
[06:04] underneath one more option and the
[06:06] easiest one that you can do make sure
[06:07] you have your teammates flashing a jump
[06:09] out window and come out and path to
[06:11] connector this way you're catching
[06:13] anybody coming out early that's going to
[06:15] be crossing the boxes this is a very
[06:17] safe pick however the higher up in like
[06:20] ELO or matchmaking rating you go this
[06:23] will be harder to do people will start
[06:25] to Molly this a lot of annoying people
[06:28] will just double n this off the bat and
[06:31] you're just going to fall over like a
[06:32] pylon to start the round so to kind of
[06:34] wrap up the window position on Mirage
[06:36] you really are just the rotate King you
[06:38] are trying to predict where the other
[06:41] team is going and always be supporting
[06:43] your teammates and allowing your
[06:46] connector player and your C player to to
[06:49] just kind of be free because a lot of
[06:52] times you're going to be smoked in the
[06:53] mid rounds if you don't have good spawns
[06:55] what I would call your default boring
[06:57] rotation that is always powerful to do
[07:00] when you get smoked off or you feel like
[07:02] there's no more value you can get out of
[07:04] the window position leave window come CT
[07:07] spawn and go ticket ticket offers mid to
[07:09] late round are the most
[07:11] obnoxious people to play against and it
[07:14] is so hard to deal with one you're in a
[07:16] very difficult position for them to deal
[07:18] with two you have access to Palace you
[07:20] have access to a ramp you have access to
[07:23] connector and you have access to cat you
[07:25] can potentially basically look
[07:27] everywhere except for upper B in the mid
[07:30] toate round and if they make any mistake
[07:32] with their util and you make the correct
[07:33] choice there's a high probability that
[07:35] you're going to take people out in the
[07:37] mid round and you are very hard to deal
[07:39] with especially if you tell your
[07:40] teammate and yell at them to go play
[07:42] somewhere close a ramp so you can sit
[07:44] top ticket all right next up we're going
[07:45] to talk about the cat player so similar
[07:47] to the window player as a cat player if
[07:50] you have good spawns you should feel
[07:52] pretty confident in being able to one
[07:53] make the cat jump and two the more
[07:55] effective one for you as the cat player
[07:57] the ladder jump you can get in here
[07:59] early without them seeing and if you
[08:01] stay in here one you have cat very
[08:03] safely you you avoid all the youtil
[08:05] early and two if they were to go out mid
[08:08] quickly and try to do any sort of cheeky
[08:10] cat split they have no info that you're
[08:12] here and the chances of them expecting
[08:15] you are really low and clearing you
[08:18] could be really low as well depending on
[08:20] how fast they come out mid I try to make
[08:21] sure that the person that I randomly am
[08:24] playing with in these pickup games is
[08:26] set up for success as much as possible
[08:28] and that means I start every single
[08:30] round I just burn my Molly upper B it's
[08:32] not the best Molly in the world you just
[08:34] Chuck it up there Bounce It Off the Wall
[08:36] it just helps with the B- rush so much
[08:39] if they decide to do a crazy Rush you're
[08:41] going to hear them but also on top of
[08:44] that they're going to have to smoke the
[08:46] molotov which is a great indicator for
[08:49] your anchor that's on be with you to
[08:51] then Molly and then if you're ready for
[08:53] it and what what I'll get into next is
[08:55] when they smoke that Molly and you are
[08:57] over here you can just bounce this and I
[08:59] guarantee you you will need at least two
[09:02] players for 50 damage every single time
[09:04] they do a b rush now we kind of focus
[09:06] more on Mid if your connector player and
[09:08] your window player are not fighting you
[09:11] need to be mindful of that and
[09:13] understand where you can and can't be
[09:15] and where the enemies can and can't be
[09:17] for whatever reason window is smoked and
[09:19] your connector player cannot see middle
[09:21] te's can rush you immediately and meet
[09:23] you at bricks when you get around here
[09:26] you can hear everything you can hear the
[09:28] guy rushing underpass you can hear the
[09:29] people rushing up or B and most
[09:31] importantly when you get closer to
[09:32] Bricks you're going to hear anybody
[09:34] scaling up cat right here if you look at
[09:36] my radar you can see the audio queue and
[09:39] how far it goes anybody that is trying
[09:41] to scale up cat quickly you will hear
[09:43] them later in the rounds you're not
[09:45] going to have your Molly because like I
[09:46] said I like to use it for my upper
[09:48] player so really all you're going to
[09:50] have at your disposal is an H grenade
[09:52] and flashes and what I like to do is
[09:55] early on I like to flash over like this
[09:58] and maybe take a peek and a if I feel
[09:59] really ambitious or I'm feeling I might
[10:01] come out a little bit wider another
[10:02] version of this flash especially if you
[10:04] hear them coming up cat is you can
[10:06] bounce a flash here off this wall and it
[10:09] lands closer so that way anybody coming
[10:12] up cat is actually going to catch it
[10:14] just a little bit and if they try to
[10:15] swing you bricks they'll be fully blind
[10:17] but as rounds settle down you can one
[10:20] play Closer to the bomb site if your B
[10:22] player's been having a rough time you
[10:23] might want to be there more to support
[10:25] him or option two the other team just
[10:28] likes to kind of play in mid and this is
[10:30] the more popular option if you are
[10:32] playing and like you know just pick up
[10:35] games because everybody just sits in mid
[10:37] for 40 seconds and if you get inside
[10:40] ladder with those flashes and they don't
[10:41] know you're here it's really hard to
[10:43] clear you out most people drop a Molly
[10:45] it only burns the bottom you're an
[10:47] absolute menace to deal with just keep
[10:49] in mind if you put your back against the
[10:50] wall here they can see you underneath
[10:52] the window so kind of always stay close
[10:54] to this wall but in general playing in
[10:56] ladder if the team likes to go heavy mid
[10:58] is very powerful if your teammate B has
[11:00] been struggling maybe choose not to do
[11:02] that so that way you can be in a closer
[11:03] position to help them so last and very
[11:06] much the least the position pretty much
[11:08] nobody ever wants to play B you can't
[11:10] really like win the rounds for your team
[11:13] all you could do is not lose them
[11:15] hopefully your cat player is mauling for
[11:17] you if you're in a low ELO game or any
[11:20] sort of game maybe just ask your cat
[11:22] player to do that for you if he says no
[11:25] I guess you're out of luck so some
[11:26] things that you should be mindful of is
[11:28] the B players one is somebody lurking
[11:30] vers you all the time sometimes you have
[11:33] those games where there's a guy up or B
[11:35] every single round and that dude just
[11:37] loves being up there and honestly if he
[11:40] wants to be up there just let him be up
[11:42] there this is so important they cannot
[11:45] take the bomb site on the plat they have
[11:47] to jump down and when they jump down
[11:50] there's always an audio cue fighting the
[11:53] guy in Upper if you're feeling it go for
[11:55] it but if you're having a rough game
[11:57] there's no reason for you to have to
[11:58] give thisy guy kill if you're in one of
[12:00] those games where everybody just runs
[12:02] mid death balls and there's very few
[12:04] players up here get comfortable with
[12:07] pushing one let's say your homie Molly
[12:09] is for you early and then you that could
[12:11] set up you just bouncing a Molly off
[12:13] this wall here you don't need to get
[12:14] super fancy and while that Molly's up
[12:16] you can just come up here safely know
[12:19] that you can access this upper area and
[12:21] you have two options you can just let it
[12:24] burn and fizzle out and maybe you play
[12:25] up here or maybe you try to walk up
[12:27] further but what I like like to do is
[12:29] when I'm forced to play this spot cuz I
[12:31] would never willingly play here is Molly
[12:33] deep upper you come up here and you just
[12:35] get up here and drop a smoke now once
[12:37] you drop this smoke you've kind of cut
[12:39] it all off right you can do a lot more
[12:41] than just like sit and you know me
[12:44] telling you to jump spot up or B and you
[12:46] know try to make sure you're moving and
[12:48] not just going hey shoot me you do have
[12:50] options you are going to have to
[12:51] practice it you will probably die if
[12:54] you're doing stuff like this this is
[12:55] really powerful when your teammates lose
[12:58] mid if your cat player comes back and
[13:01] can even just do something as stupid as
[13:03] just toss a flash right here I'm going
[13:05] to tell you right now if your team loses
[13:07] mid but you get into this position right
[13:10] here and you just hold them coming into
[13:11] the doorway you are so valuable to your
[13:13] team because your cat player can maybe
[13:16] lean towards window your players can
[13:18] stack towards a you give your team so
[13:21] much map control by you being up here
[13:23] because they just don't have to worry
[13:24] about anybody coming up or B and two if
[13:26] they decide to split cat well great news
[13:28] if they put anybody up or B you're more
[13:30] than likely going to kill them and
[13:32] second when they take the bomb site now
[13:34] you have them Consolidated into the B
[13:36] bomb site and they don't have upper b
[13:39] control so last but not least the famous
[13:41] B- Rush your teammate's moling this for
[13:43] you and is a great person okay when you
[13:45] hear the other team smoke or you just
[13:47] hear a rush in general some really good
[13:50] things to do the first and foremost is
[13:53] Lally just dropping a smoke in this
[13:55] area there's some set ones and you can
[13:58] find different way to throw it so maybe
[14:00] you get a little bit more value out of
[14:01] the smoke so you can like look over it
[14:03] but throwing this smoke and then playing
[14:05] anywhere back of sight is really
[14:07] powerful don't run around though after
[14:08] you throw the smoke remember this is
[14:10] hide and seek you got to be the
[14:11] hideand-seek champion either hiding
[14:13] bench maybe you could come over here and
[14:16] you can wait for them to swing you on
[14:18] default you could back up and play like
[14:20] an off angle for them jumping down that
[14:23] you could do a lot of different things
[14:24] it's just to cut off the site and then
[14:27] the only way they can see you right is
[14:29] if they come up over which then if
[14:32] somebody's rotating they can clean them
[14:34] up easily and last but not least a very
[14:37] common spot when you throw the smoke is
[14:38] just sitting in this corner but you got
[14:40] to be careful even in this corner
[14:42] because decent players and decent teams
[14:44] will scale quickly and might wrap you so
[14:46] maybe even be really close to the smoke
[14:48] while you're blind so that way while
[14:50] you're getting flashed you're not just
[14:51] sitting in a corner while they run
[14:52] through it and getting killed if you
[14:54] have enough time because your teammate
[14:55] was really cool and you got the early
[14:57] warning system off dropping this smoke
[15:00] like this and then maybe dropping a
[15:02] Molly either on Plat or dropping it
[15:04] underneath the window are both very good
[15:07] options dropping on Plat forces them to
[15:10] jump out the window which means you're
[15:12] isolating where the te's can be for your
[15:14] team in the rotates and then dropping it
[15:16] on the ground means that anybody trying
[15:18] to jump out the window fast and move is
[15:20] going to tick and burn and you're going
[15:21] to know that as well I appreciate you
[15:24] guys watching the video please if you
[15:25] guys did enjoy the video don't forget to
[15:27] like comment subscribe hit the Bell all
[15:29] that good stuff let us know in the
[15:30] comments below what map you'd like to
[15:32] see next or maybe if you want me to do a
[15:34] tside for dust 2 or Mirage
⚡ Saved you time reading this? Transcribe any YouTube video for free — no signup needed.