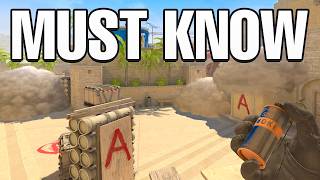

Master Mirage Mid Control in 45 Seconds
45sQuick, actionable utility guide that promises immediate improvement in high-level CS2 gameplay.
▶ Play Clip"Title is accurate; the video delivers a comprehensive utility guide for Mirage in CS2."
This video provides a comprehensive guide to essential utility usage on the map Mirage in CS2, covering smokes, flashes, and molotovs for both T-side and CT-side. It explains when and where to use each piece of utility to control key areas and win rounds.
The video covers the only utility that matters at high-level CS on Mirage, including what to throw, when, and why.
Establish presence with window smoke and top mid smoke. Five instant window smokes are demonstrated using W jump throw from specific alignments.
Top mid smoke thrown from right side of trash can aiming at antenna end. Con smoke thrown from first step with jump throw.
First player flashes into valley, second player flashes over boxes to avoid blinding teammates.
Bounce molly off wall to molly under, preventing CTs from peeking into mid.
Apply pressure with window smoke (run forward left click), top con smoke (from underpass), molly short, and ladder molly.
Smoke jungle and stairs using black dot alignment (left+right click jump throw) and brick alignment (left click throw).
Flash above palace to force CT back, and lamp flash from doorway to blind close enemies without blinding entries.
Molly under balcony from palace pillar, then flash down to blind default. Palace player clears top balcony.
After taking site, focus on one area (CT or jungle), communicate, and play for space. Recommend taking CT on execute, jungle on split.
Smoke market window (black dot jump throw) and deep short (left click). Isolates the B anchor.
First flash left side of building (jump throw), second flash right side to avoid blinding teammates. Entries flash into site.
Molly off back wall to force B anchor, molly bench from window, and molly back sight from corner.
MetaStack is an all-in-one CS2 workplace for lineups, used by pro teams and solo players. Link in description.
If smoked off window, jump on panel to blow up smoke, or molly top boxes from corner with white dot alignment.
Smoke out con from bottom of brim (left click) or with speed using top alignment (left+right click throw).
Molly ramp from first spawn using wood alignment (run forward left click). Flash into mid between two trees.
Smoke ramp from between two chimneys/pillars.
Flash for yourself by jump throwing roughly at mid. Molly under from dot alignment.
Deep molly to hear tick, pair with nade. Drop smoke if pushed to play around it.
Mastering these essential smokes, flashes, and mollies on Mirage can elevate your gameplay to level 10 and above. The video emphasizes simplicity and decision-making, and recommends MetaStack for storing lineups.
How many instant window smokes are there for T-side mid?
Five.
00:32
What is the key action for throwing instant window smokes?
W jump throw while staring at the corner of the pit.
00:41
Where do you aim to throw the top mid smoke?
At the end of the antenna from the right side of the trash can.
01:14
What is the purpose of the con smoke?
Allows you to get aggressive towards short or close con.
01:40
Why should you not spam the smoke when getting aggressive short?
It leaves you a sitting duck.
01:49
What is the recommended flash sequence for mid control?
First player flashes into valley, second player flashes over boxes.
01:55
Where does the molly bounce off to molly under in mid?
Off the wall near con.
02:21
What is the default decision after applying phase two smokes?
An A split.
04:10
Which two smokes are essential for an A execute?
Jungle and stairs.
04:40
What does the lamp flash do?
Blinds anybody close and does not blind your entries.
05:23
What area should you take on an A execute?
CT.
06:23
What area should you take on an A split?
Jungle.
06:27
What is the purpose of smoking deep short on a B execute?
Cuts off any short player that has gone aggressive mid.
06:57
How do you blow up a smoke as a CT window player?
Jump onto the panel after aiming high and right clicking.
10:16
What is the CT con player's default smoke lineup?
Line up with the bottom of the brim and left click throw.
10:54
T-side mid control phase 1
Establishes presence with window and top mid smokes, fundamental for map control.
00:15Phase 2 mid pressure
Applies pressure with smokes and mollies to force CTs into unfavorable positions.
02:49A execute smokes
Isolates site by smoking jungle and stairs, simplifying the take.
04:18B execute smokes
Smokes market window and deep short to isolate the B anchor.
06:33CT window player utility
Provides counter-play to being smoked off, maintaining vision and pressure.
10:08[00:00] In this video, I'm going to show you the
[00:01] only utility that actually matters at
[00:03] high level CS on Mirage. I'll show you
[00:06] what to throw, when to throw it, and why
[00:08] it will win you rounds. So, master these
[00:11] pieces of utility, and you'll be
[00:13] dominating Mirage like a pro. Let's
[00:15] start with T-side and taking control of
[00:18] mid. The first set of smokes we want for
[00:20] mid are phase one, so establishing
[00:23] presence. This involves the window smoke
[00:26] and the top mid smoke. The first thing
[00:28] you want to learn is the window smokes.
[00:30] So these are the instant smokes. We have
[00:32] 1 2 3 four and five. They are the back
[00:35] smokes that align with this or these
[00:37] back corners. For this smoke here,
[00:40] you're going to come in this corner and
[00:41] you're just going to W jump throw while
[00:43] staring at the corner of this pit. Wow.
[00:46] This smoke here is lining up with the
[00:50] bottom of this railing here. Wow. This
[00:53] smoke here is with the second one down.
[00:57] W jump through with this corner one
[01:00] here. This bit here. We see see the
[01:01] white here. W jump through. And this one
[01:04] here, a little bit harder. You kind of
[01:06] see there's like a mark here. Again, W
[01:09] jump throw to aid this. The second smoke
[01:12] you want to throw lands top mid. So to
[01:14] do that, you get the right hand side of
[01:16] the trash can. Once you're aimed at the
[01:17] end of the antenna, just left click
[01:19] throw.
[01:21] Now that you've done the top mid smoke,
[01:23] if the CTS decide to blow open the
[01:25] window smoke to peek into mid, you can
[01:28] still cross the boxes safely. The other
[01:30] smoke you can throw for here is the con
[01:32] smoke. So to do that, you line up with
[01:35] just the first step here and just jump
[01:37] throw. This lands incon and allows you
[01:40] to get aggressive towards short or close
[01:43] con if you feel so. The only thing I
[01:45] would say is if you are getting
[01:46] aggressive short, do not spam the smoke.
[01:49] That leaves you a sitting duck. Leave it
[01:52] and play for short. With those smokes,
[01:55] the first player into mid should flash
[01:57] into valley like so. And the second
[02:01] player will want to flash over boxes.
[02:03] The reason for that is the first player
[02:05] can get out as that pops. And then the
[02:08] second flash will not blind anybody
[02:10] getting aggressive. If you want to throw
[02:12] a molly as well, I wouldn't recommend
[02:14] throwing a molly towards con because
[02:16] most of the time a CT will smoke this.
[02:19] What you might want to do instead is
[02:21] bounce a molly off this wall here. This
[02:24] will molly under which means that the
[02:26] CTs cannot peek into it. And just a
[02:29] couple of pro tips from me. If you are
[02:31] an A player that tends to play towards
[02:33] palace or ramp, I'd recommend they
[02:35] either drop the smoke for the person
[02:37] doing the insta or do one of the smokes
[02:40] themselves. And if you're not planning a
[02:42] fast round, only do two of the three
[02:45] smokes and save your smokes for phase
[02:47] two. Phase two is about applying
[02:50] pressure at mid. So at this point, you
[02:53] probably have a player behind boxes, you
[02:55] might have a player towards underpass,
[02:56] and you might have a player in valley.
[02:58] So once you have this, the setup is
[03:01] simple. A window smoke as the other one
[03:04] is disappearing. So aim with this, run
[03:07] forward, and just left click throw.
[03:09] Gives you a nice smoke there. Now you
[03:10] want to smoke top con. Some people like
[03:13] to do it from here. So you just bounce
[03:15] off this wall here like so. But I would
[03:19] recommend doing it from underpass. The
[03:21] reason for this is you are more covered
[03:23] rather than in the open in valley. This
[03:25] one's simple as well. Just here run
[03:27] forward and just left click throw. Same
[03:30] as before. With this you want to molly
[03:33] short. So simply just pop a molly as you
[03:36] will. Just force the rifler back. And if
[03:39] you want, you can also pair it with a
[03:41] ladder molly. So if there's no smoke,
[03:44] just simply aim here. But if the smoke
[03:46] is up, come to the corner of this bench,
[03:49] aim with this black dot, move over, and
[03:52] just left click. This pops the top and
[03:54] the bottom and forces any player out
[03:57] into short. And a pro tip here. If
[03:59] you've got to this point where you've
[04:01] applied phase two smokes and you've
[04:02] applied the pressure, do not hesitate.
[04:05] You do not want to be stuck in no man's
[04:07] land with the smokes disappearing. Make
[04:10] a decision quick. And the default
[04:12] decision is an A split. So Molly short
[04:16] and fight for the A split together. And
[04:18] now talking about an A hit or an A
[04:20] execute. The idea of a good execute is
[04:23] you want to isolate the players on the
[04:25] site. What you want to do is get a
[04:26] teammate to drop a smoke for you here so
[04:28] that you are ready to do both smokes. So
[04:31] the first smoke you aim with the black
[04:33] dot here. Left and right click, jump
[04:35] throw. The second smoke, this little
[04:37] brick here, and just left click throw.
[04:40] This smokes jungle and stairs. And in a
[04:43] normal execute, that is enough. You can
[04:47] add a CT smoke if you would like, which
[04:49] you can do from here. Go to the corner
[04:51] here, jump throw, but it boxes you in.
[04:54] So, what I would suggest is just stick
[04:58] to these two. Now, you could be
[05:00] wondering about the CT player. Well, the
[05:03] way to get rid of that is to have this
[05:04] player flash above palace. So, come
[05:07] back, aim with this, just jump through.
[05:10] That puts a flash nice and high and
[05:12] forces the CT player back. The other
[05:15] flash you or your teammates might want
[05:17] to throw is to come into this part of
[05:19] the doorway here, aim at the top of the
[05:21] lamp. It's called lamp flash,
[05:23] >> and just pop it here.
[05:25] >> What it will do is it will blind anybody
[05:27] close and will not blind your entries.
[05:30] If you are in palace, you might want to
[05:32] help out. So, line up here on this
[05:35] pillar. Aim just slightly down, run
[05:38] forward, and throw. This throws a molly
[05:40] into under balcony, forcing the player
[05:42] out into the fight. Once you have done
[05:44] the molly, and no one has forced forced
[05:46] the fight, you can follow up with a
[05:48] flash that again pops down here,
[05:51] blinding anybody default. And then, as
[05:53] the palace player, it's your job to
[05:54] clear top balcony and be ready to assist
[05:57] on the site. Now, if you're doing an
[05:58] Aplit and you're in palace, a molly that
[06:01] Youngstar suggests from heroic is to
[06:03] molly Tetris. And that forces any CT
[06:06] player being a nuisance over here. And
[06:09] now that you have sight, do not over
[06:11] complicate it. You only need one area
[06:14] when you have A. It's either CT or it's
[06:18] jungle. Pick one, communicate it, and
[06:21] play for the space as a team. What I
[06:23] would recommend if you're doing an A
[06:24] execute is take CT. However, if you do
[06:27] an A split, take jungle and play for
[06:30] jungle. And for those rare B executes,
[06:33] make sure you have this right or your B
[06:36] hits will look like a bull in a china
[06:38] shop. First, we want to smoke market
[06:41] window. So, with this line here, find
[06:43] this black dot and jump through. You
[06:46] want to pair this with the smoke just
[06:48] off the side here with just a left
[06:51] click. This smokes market and smokes
[06:54] deep short with a second. This doesn't
[06:57] allow any rotator to help. And this
[06:59] smoke cuts off any short player that's
[07:00] gone aggressive mid. And as we talked
[07:02] about before, that isolates the banker.
[07:05] Now, paired with this, the flashes you
[07:07] want to throw are these. You want your
[07:10] first flash or high flash as I call them
[07:12] to go the left side of this building.
[07:14] So, jump throw with running forward. The
[07:18] reason you do it left on the first one
[07:20] is because it comes out and blinds
[07:22] anyone close. However, you don't want
[07:24] this to be the second one as you don't
[07:26] want to blind your teammates. So, for
[07:28] the second one, you want to come and
[07:30] flash the right hand side. That pops
[07:32] over the building and doesn't blind your
[07:34] entries. And for the entries that are
[07:37] running in, the flashes you want to
[07:39] throw are these. You might want the
[07:40] first or second player to flash like
[07:42] this. Come across here. Aim with this
[07:44] side of the wall. Run forward and left
[07:46] click throw. The reason you want to do
[07:48] that is it bounces into sight. You can
[07:53] adjust this slightly yourself for how
[07:55] far you want to run forward and how much
[07:57] it will pop down. But don't get it
[08:00] wrong, otherwise you'll be doing this
[08:03] and flashing your whole team. The first
[08:05] or second player might want to do this
[08:07] flash here.
[08:09] And the reason for that is it doesn't
[08:11] blind you as you jump down. So pathing
[08:14] is you want to come up here, flash, jump
[08:17] down, and take the fight across here.
[08:19] With this area smoked, you want your
[08:22] pathing to be towards sight. So you're
[08:24] clearing here and then clearing towards
[08:26] back sight. However, remember on a B
[08:28] execute, keep it simple because you
[08:30] don't want to be blinding your
[08:31] teammates. And now for mollies, you want
[08:34] to keep it simple as well. So you might
[08:36] want to bounce a molly off the back wall
[08:38] there and force any B anchor or player
[08:41] that is close and stops that awkward
[08:44] downward fight. The second molly that
[08:46] might want to be thrown is towards
[08:48] bench. So come across and just aim in
[08:51] the middle of this window and run
[08:53] forward. This will bounce and clear off
[08:56] bench. And if you're feeling confident
[08:58] and you're one of the last players, you
[08:59] can even molly back sight. So to do
[09:02] this, what you want to do is you want to
[09:04] come out, see the corner of this window,
[09:06] and just left click throw. This will
[09:08] bounce off the wall and molly this back
[09:10] corner. And again, my pro tip for the B
[09:12] hit is don't over complicate it. If you
[09:15] can keep control of short and apps, you
[09:18] have the round. B is a very hard site to
[09:21] retake. So don't over peak and don't
[09:23] give away easy kills. If you are looking
[09:25] for a place where all these lineups are
[09:27] stored without having to bounce across
[09:29] different browser tabs, then you are in
[09:31] luck. Metastat is an all-in-one CS2
[09:34] workplace for lineups and more. And it
[09:37] can be useful for anyone, whether you're
[09:39] a pro team like Arralis or 3D Max, or
[09:42] you're a solo Q grinder. MetaStack is
[09:44] trying to build this database out as
[09:46] well. So, if you feel like there's a
[09:48] smoke, flash, or a molotov missing,
[09:50] please don't hesitate to create your
[09:52] own. MetaStack also has an area for your
[09:54] playbook, so with your team, and even
[09:56] lets you look through each map so you
[09:58] can understand the call outs. So, if you
[10:00] haven't already, make sure you click the
[10:02] link in the description and join Meta
[10:04] Stack today. Now, back to the video.
[10:08] Now, as a window player, you might get
[10:10] smoked off window a lot. So, if you've
[10:12] got an orb or you're just feeling
[10:14] confident with the rifle, you can just
[10:16] Nate go onto this part of the wall, aim
[10:19] high, right click, and then jump onto
[10:21] the panel here. This blows up the smoke
[10:24] and gives you full vision. The second
[10:26] thing you might want to do is you might
[10:27] want to molly top boxes. But if you're
[10:30] smoked off, you won't be able to see. So
[10:33] to do this, if you're smoked off, come
[10:35] into the corner here, line up with this
[10:37] white dot here, and just run forward and
[10:41] throw. This will molly behind the boxes
[10:44] and prevent the TE's from getting that
[10:47] sort of space and establishing presence.
[10:49] If you're a con player, you might want
[10:51] to know how to smoke out con. The
[10:54] default one is to come here, line up
[10:56] with the bottom of this brim, and just
[10:58] left click through. This blooms nicely
[11:01] so that you can come out and fight
[11:02] underpass and gives you a lot of space
[11:04] to play around. However, as the com
[11:06] player, you might want to do this with
[11:08] speed. So, what I do is align with the
[11:10] top of this bit here, left and right
[11:12] click and throw. As I'm going forward,
[11:14] wait a second for it to pop, come out,
[11:16] and fight for under. And then you can
[11:18] have that room again. As the A player or
[11:21] con player, whoever has the first spawn,
[11:24] you will want to be mollying ramp. You
[11:26] want to be running up here. Get yourself
[11:28] aligned with this and as you hit the
[11:30] edge here, try and aim for this sort of
[11:32] bit of wood here. Then you just want to
[11:34] run forward and left click throw. The
[11:37] reason you want to do this is so that
[11:38] one, it pops nicely here. But the second
[11:41] thing is as it pops, which if I just do
[11:44] rethrow, the big part of the molly goes
[11:46] up here and you can't see if anyone's
[11:47] crossing. Then the second player or the
[11:50] a anchor wants to flash into mid. So,
[11:52] what I do is I usually aim between the
[11:54] two trees and just run forward and just
[11:57] left click jump throw. This pops nicely
[12:00] between the two trees and won't blind
[12:02] your teammates running out for the
[12:03] fight. And as an a anchor, you might
[12:05] still have a smoke. If you're playing
[12:07] CT, the default is to usually do this if
[12:09] pressured. However, you might want to
[12:12] smoke ramp. So, to do this, come here,
[12:14] aim between these two chimneys, pillars,
[12:17] and just smoke here. This pops nicely on
[12:20] ramp.
[12:22] As the short player, you only need to
[12:24] know how to flash for yourself. So,
[12:26] simply as you're running up, aim roughly
[12:29] here and just jump throw. That will pop
[12:31] nicely in mid and give you some space to
[12:34] breathe. You might also want to molly
[12:35] under, which I usually line up with this
[12:37] dot here. Run through that pops nice and
[12:40] deep and pair it with an aid after the
[12:42] molly's gone to get some nice damage. As
[12:45] the B anchor, you want to know this set.
[12:47] So,
[12:49] >> molly like this to get a deep molly so
[12:51] that you can hear a tick and you can
[12:53] even pair it with a nade as it clears.
[12:56] Then it's your job to stay alive and you
[12:59] might want to just drop a smoke here if
[13:01] pushed. That way you can play around it
[13:04] and live a bit longer. Those are the
[13:07] essential smokes for Mirage. Or at least
[13:09] that's what I believe. I think you can
[13:11] get to level 10 and above with just
[13:14] knowing those simple nades. But if
[13:16] there's anything you think I missed,
[13:17] please let me know in the comments and
[13:19] tell me which map you might want to see
[13:21] next. Also, if you're like me and you
[13:23] quite often forget the lineups or just
[13:25] want a refresher, do check out Meta
[13:27] Stack. So, I'll put a link below for my
[13:29] referral code and they have a whole
[13:32] database of the lineups that you will
[13:33] need. And thanks for watching. YouTube
[13:36] believes this video is something you'll
[13:38] enjoy. And I'll see you next week.
[13:41] Peace.
⚡ Saved you 0h 13m reading this? Transcribe any YouTube video for free — no signup needed.