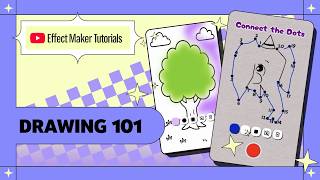

Turn Any Drawing Into a TikTok Effect
42sThis segment inspires creators by showing the endless possibilities of the drawing template, making them eager to try it themselves.
▶ Play Clip"Delivers a genuine step-by-step tutorial that matches the title, though it spends time on default template walkthrough before customization."
This tutorial walks through customizing the drawing template in Effect House Maker into a 'doodle reveal' effect, where users connect numbered dots to reveal a hidden character. It covers the template's built-in components, how to swap assets and adjust brush variables, and how to test and submit the final effect.
Users draw on the screen to connect numbered dots that reveal a hidden character; the tutorial turns the default drawing template into a custom 'doodle reveal' effect.
Open the drawing template from the Effect House template gallery; it already includes a drawing canvas, body segmentation, brush controls (size, feathering, color), and a visual script that handles all drawing interactions.
You can add the drawing component to any new or existing project via the image and video section → draw object → add with visual script, or right-click in the objects panel.
The workspace has an objects panel (with visible and hidden objects), assets panel, scene view, visual script panel, and preview panel for real-time testing.
The drawing effect works out of the box without triggers; you can change colors via the palette, adjust brush size, feathering, toggle body segmentation, and clear the canvas.
The template includes a background paper texture, an invisible button guide, body segmentation, the drawing object (canvas), camera toggle, brush size control, feather size options, color picker, selected outline, and clear canvas button.
Replace the paper texture in the assets panel, then add a connected-dots image, set its blend mode to Multiply so it blends with the paper background.
Use pre-made connect-the-dots images online or generate one with Nano Banana Pro in the Gemini app; 25 dots is recommended, up to 50 for a bigger challenge.
Set the default brush to small and precise, update the four brush colors, and set feather size to zero by editing the visual script variables and the feather size menu sub-graph.
The visual script has eight sections: drawing logic, default settings, color/brush/feather controls, color menu, main-menu reappearance, and camera overlay.
To trigger a reveal after all dots are connected, add invisible target objects, track the finger with a drag node, check overlap variables, then use a limiter and transition node to fade in the reveal image.
Preview on a phone via QR code, then submit the effect with a thumbnail, name, description, and instruction (e.g., 'drag').
By following this tutorial, you can turn the versatile drawing template into a polished 'connect the dots' effect and even add advanced reveal animations using overlap logic. The same template can be adapted for maze challenges, coloring games, and more.
What components does the drawing template in Effect House already include?
A drawing canvas, body segmentation, brush controls for size/feathering/color, and a visual script that handles all drawing interactions.
00:55
How do you add the drawing component to an existing project?
Go to the image and video section, select the draw object, and click 'add with visual script', or right-click in the objects panel.
01:10
What is the purpose of the 'button guide' object in the template?
It is an invisible image that acts as a touch buffer, preventing users from drawing when they try to tap UI buttons.
03:33
What blend mode should be used for the dots image to blend with the paper background?
Multiply.
05:41
What is the recommended maximum number of dots for a connect-the-dots effect?
25 dots for a standard effect, and up to 50 for a bigger challenge.
06:10
How do you set the default feather size to zero in the visual script?
Set the feather size variable to zero, delete the connection from feather medium, and update the default icon and assets to feather none.
07:47
How many sections does the visual script in the drawing template have?
Eight sections.
08:59
What does the limiter node do in the reveal logic?
It ensures the reveal animation only fires once.
11:54
How do you preview the effect on a physical phone?
Click the 'preview on phone' button and scan the QR code.
12:46
What information do you need to provide when submitting the effect to YouTube?
A thumbnail, the effect name, a description, and the instruction (e.g., 'drag').
12:59
Multiply blend mode instantly changes the feel
A single blend mode setting turns a plain canvas into a themed drawing surface, showing how small tweaks transform the effect.
05:41Use Nano Banana Pro to generate dot images
Leveraging an AI image model inside Gemini provides a quick way to create custom connect-the-dots artwork without manual design.
06:10Object overlap logic enables reveal animations
By tracking finger position and checking overlap with invisible targets, you can build interactive triggers beyond simple drawing.
10:15Limiter node prevents repeated animations
A simple guard node ensures the reveal fires only once, a key principle for clean state management in AR effects.
11:54QR code phone testing before submission
Real-device testing via QR code is the recommended final check, emphasizing the importance of verifying AR effects in actual phone conditions.
12:46[00:02] effect in Effect House Maker. In this effect, users draw on the screen to connect numbered dots that [music] reveal a hidden character. We'll be taking a look at the drawing template in Effect House Maker and customizing it
[00:15] into an effect called doodle reveal. By the end of this tutorial, you'll understand how the drawing template works, how to swap your background and assets, how to set up brush variables, how to test your effect, and finally
[00:28] submit your effect for YouTube. [music] You can use this template to build effects such as maze challenges, color the character, trace the shape, and more. Your imagination is the only limit. To get started, open Effect House
[00:42] the drawing template from the template gallery. Once you open the template, you'll see this card pop up that will tell you about the effect and ways to customize it. I'll click on got it. This template already includes a drawing
[00:55] canvas, body segmentation, brush controls for size, feathering, and color, and a visual script that handles all of the drawing interactions. With all these in place, we can simply focus on effect customization. You can also
[01:10] add the drawing component to any new or existing project by simply going into the image and video section. Here, select the draw object and click on add with visual script. Or, you can simply right click in the objects panel, go to
[01:23] image and video, here select the draw object. It will add the drawing component to that project. Here's your workspace. On the left, we have an objects in your effect. Here, some are visible and some are hidden. The hidden
[01:38] objects are the options that you have for each parameter like brush size, feather size, color, and selected outline. Next to that is the assets panel where your images and other effect assets are
[01:52] Besides the assets panel, we have the scene view where we can see the visible objects. Below the scene view is the visual script panel. This is the brain of your effect. Also houses the variables for different parameters.
[02:06] And finally, on the bottom right side, we have a preview panel, where we will test the effect in real time. I'll hide the visual script area for now by clicking on the change layout button. Before changing anything, let me show
[02:19] you the default effect first. I'll scale up the preview area and I'll start drawing. The drawing effect does not need any additional trigger like tap or record press. It directly works right out of the box. I can simply start
[02:33] cursor, you can see the drawing component in action. In addition to drawing strokes, I can change the color by clicking on this color palette button here. And I can select from one of these four colors. I
[02:47] can also adjust the brush size by clicking on this brush size icon. And I can also change the brush feathering by clicking on this feather button and change the feathering here. Apart from this, I can enable or disable my body
[03:02] button. And finally, clear the canvas with this Now, let's look at what's happening inside this template. I'll scale down objects panel. Here in the objects panel, the first
[03:18] object we have is the background. This is the paper texture image that sets the visual tone for your drawing surface. We'll be replacing this in a moment. Next is the button guide. This is an invisible image that acts as a touch
[03:33] It prevents users from actually drawing when they're trying to tap one of the UI It's crucial for a smooth user experience. Then we have body segmentation. This lets the user see themselves in the frame reacting to
[03:48] their drawings in real time. Below that, we have the drawing object. This is where the magic happens. It is the canvas that paints brush strokes as screen. For controls, we have the camera on and
[04:04] off button that shows or hides the body segmentation. Next, we have the brush size control with brush size options such as with brush size options such as extra small, small, medium, and large.
[04:18] Next, we have brush size asset. Below that, we have the feather size, which has options for how soft or hard your brush edges appear. your brush edges appear. Feather none, small, medium, and large
[04:32] give you control from sharp edges to all the way to a soft and diffuse look. Then, we have the color picker, which opens the color palette. It has four options, color one through color four.
[04:47] All are individual colors. Next, we have the selected outline. It highlights a white ring around the selected color. It is only visible when option. And finally, we have a clear canvas
[05:01] button that erases the entire drawing when tapped. Now, let's customize this template into our doodle reveal effect. Step one is to customize the background. To do that, I'll go to the assets panel, right click
[05:13] on the paper texture, here select replace, and choose my new paper texture. Once uploaded, it will be automatically applied to the background object. Next, we need to add an object to add our connected dots image. To do
[05:26] that, I'll go to the objects panel, right click, go to add object, image and video, images, image. Click on upload file and select my image. Once uploaded, I'll change its blend mode to multiply so that it blends with the background
[05:41] paper texture. The whole feel of this effect changes instantly. Now, users have numbered dots to follow rather than an empty canvas. This is just one example of connect the dots. You can find a lot of these online, or
[05:56] you can also use Nano Banana Pro model inside the Gemini app to generate a custom one. For the number of dots, I would recommend starting off with the images which have a maximum of 25 dots, or if you want to make it a bit more
[06:10] challenging, you can go up to 50 dots. Just make sure that these dots are big enough to be visible on a phone screen. Step two is to add the title at the top of the screen. To do that, I'll right click in the objects panel, go to add
[06:25] click in the objects panel, go to add object, and here select text. In the properties panel, I'll set the content to connect the dots. And I'll select the color to be something bold and readable like deep purple.
[06:40] I'll choose a rounded playful font to match the sketching vibe. Then, I'll use the screen. I will also adjust the position of our dots image to make sure
[06:52] it is clearly visible and is not being covered by any of the UI buttons. Step three is to fine-tune the brush settings and the color palette. For this effect, users are tracking numbered dots, so I want the default brush to be thin and
[07:07] precise. To do that, I'll first enable the visual script area by clicking on this change layout button, and here I'll open the variables panel and scroll to the brush color variables. I'll update the primary color to be
[07:22] purple and the other three colors to be red, blue, and yellow. For the size, the default is already set to small, which gives users precise control for clean
[07:34] strokes. Next, I'll update the default feather size to be none. So, our brush strokes are clearly I'll first navigate to the section where the feather size is controlled in the
[07:47] visual script area. Here, I will set the feather size variable value to zero and delete the connection from the feathered medium because feathered medium is the default selected feather size right now. Next, I'll open the variables panel and
[08:03] change the variable for select feather size to zero. And now you can see when I draw on the screen, the strokes have no feathering. But, the default icon in the preview area still shows feather medium.
[08:18] We need to change that as well. To do so, just select the feather size object and here change the asset to feather none. But, it is still not getting updated. That is because we also need to make
[08:31] some changes in the visual script. I'll navigate to the feather size menu sub-graph and open it. Here, we need to update the feather size icon variable to feather none. And finally, we need to set the feather
[08:44] none object asset to feather none image. Also, change the feather medium asset to feather medium unselected. So, that it shows feather none as the selected option. Now, let's quickly take a look at the visual script and understand how
[08:59] everything connects together. It has eight sections. Section one is the drawing logic. This captures the fingers position frame by frame and paints strokes on the canvas. You can open this drawing sub-graph to
[09:13] understand how exactly each node connects and makes all of this work. Next is this section which declares the default drawing settings such as brush size, feather, and color. And then we have section three, section
[09:29] four, and section five. Each of these control color, brush size, and feather options and they map it to the right button, both their selected and unselected states. Next, we have section six, which is the color menu subgraph.
[09:45] It sets the correct color picker buttons, so they visually match the selected brush color. Next, we have section seven. This makes sure the main menu UI reappears every time any option is chosen. So, whenever
[10:01] you select any new brush option or any new feather option and come back to the main menu, this subgraph is making sure that main menu is shown properly. And section eight is the camera overlay subgraph
[10:15] that controls the visibility for body segmentation in the effect. That is the complete logic. Now that we have built the core effect, here is one way to take it further. You can use the object overlap logic to
[10:28] trigger a reveal animation once the user has connected all the dots. You can set this up by adding invisible target objects over alternate dot positions. The visual script then checks for overlap between the drawing canvas and
[10:42] those targets. Let me quickly walk you through how the reveal is built. Well, first, a drag node tracks your finger's position as you draw. This position is set to an object called dot follow. It follows your finger as you draw on the
[10:56] screen. Next, I have created 11 target objects, which are placed over every alternate dot. On every frame, I'm checking is dot follow overlapping any of the number dots. I have also set up a debug logic, so when it is turned on,
[11:11] these dots are visible. When I turn it off, the opacity of these dots goes to them. The moment your stroke passes over one of these, it turns green and saves that result in a variable called overlap dot
[11:26] followed by the dot number. The set color to green is just for debugging. It is not visible to the user. Finally, I'm combining all of those variables and checking if all of them are true. Inside this sub graph, the end node is asking,
[11:40] "Have all the dots been covered?" Once the answer is yes, and the reveal animation is not yet triggered, the condition becomes true and the signal goes through. A limiter node makes sure this only fires once. Then a transition
[11:54] node fades the guide dots out and brings the reveal image up to full opacity. It also sets the reveal trigger variable to true and that's the complete reveal logic. This is an example of more advanced build that you can do with the
[12:07] drawing template, which takes you beyond just a drawing canvas. Now, let's preview the effect. I'll first close the visual script area and increase the preview window size. I'll draw on the screen.
[12:20] You can see that the line is thin and sharp. This works. And then, if I click on clear canvas button, it resets everything clearly. If something isn't right here, you can
[12:34] always head back to the variables panel and the visual script to adjust the relevant variables and the logic. Everything is looking good in the preview panel. Now, I'll test it on the actual phone. To do that, click on this
[12:46] preview on phone button and scan this QR code. Once you're happy with your effect, click on this submit button and it will ask you to upload a thumbnail. Here, click on upload image, select
[12:59] file, and open. Click continue. For the name, I'll type doodle reveal. For the description, you need to write what your effect does. For this effect, I'll write draw and connect the dots to
[13:13] reveal a surprise character. I'll set the instruction as drag. Click submit and that's it. Your effect goes to YouTube for review and once YouTube channel. Congratulations, you have successfully created your custom
[13:28] drawing effect. For more information on using Effect Maker, check out the links in the description below. Thank you so much for watching. Don't forget to hit the subscribe button, and I'll see you in the next one.
[13:40] in the next one. >> [music]
⚡ Saved you 0h 13m reading this? Transcribe any YouTube video for free — no signup needed.