Only 5 Buttons You Need in FL Studio
43sImmediately reduces intimidation for beginners by breaking the complex interface down to just five essential buttons.
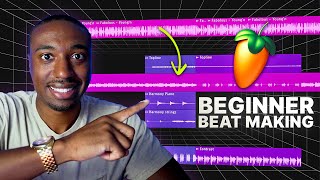
▶ Play ClipThis tutorial teaches absolute beginners how to make their first beat in FL Studio. The instructor, Game from Busy Works Beats, simplifies the interface to five essential buttons and walks through a complete beat-making process: setting up the project, creating harmonic layers, adding drums, and applying mixing effects. The video emphasizes that sound selection and organization are critical for success.
Only five main buttons need to be learned: Playlist (puzzle piece assembly), Piano Roll (melodies), Channel Rack (sound design), Mixer (effects), and Browser (finding sounds).
The Playlist is where you arrange all the musical elements together like puzzle pieces.
Always maximize the Piano Roll (click the maximize button or double-click the top banner) to avoid struggling with tiny note grids.
The Channel Rack is where you shape the character of each sound (like puzzle piece edges), while the Playlist arranges them.
The Mixer is used to add effects like reverb and compression to individual sounds. The instructor demos adding effects to his voice to sound like a 'man' instead of a 'child'.
The Browser is where you find drum kits, samples, and synths. Without good sounds, beat-making is impossible.
Finding high-quality drum kits and samples for your genre is the most important task. Stock sounds are not enough for modern hip-hop, EDM, or R&B.
Labeling each track (e.g., melody, harmony, bass, drums) from the start ensures you can find projects later and stay successful.
Every beat has four layers: Topline (memorable melody), Harmony (chord structure), Contrast (bass or different sounds), and Rhythm (drums).
Build chords first using a piano (a stringed instrument). Download free Essentials packs from the 'Get' tab.
Enable the 'Typing keyboard to piano keyboard' option (click the keyboard icon) to use your computer keyboard to play notes.
Stretch a pattern to four bars, turn on the metronome, and build the beat while listening to the click to develop a good workflow habit.
In the Piano Roll, enable 'Ghost channels' to see other parts and set 'Keyboard labels' to 'All notes' so every key is labeled.
A minor chord is built using the pattern 0-3-7 (root, minor third, perfect fifth). This applies to any note as the root.
Use the Channel Rack to add individual drum hits. The snare typically lands on beats 3 and 7; the kick follows the 'seal' pattern (basic trap/hip-hop kick pattern).
Go to Options > File Settings to add external folders to the Browser, then refresh to see new sounds.
If a sample sounds weird, turn off 'Use loop points', set resample mode to 'Resample', right-click and hit 'R' to reset, and check the volume envelope.
A quick way to add hi-hats is to right-click and 'Fill each 2 steps' in the piano roll, creating a steady 8th-note pattern.
Add Fruity Wave Shaper on the master with mix ~50% and convex curvature for harmonic distortion. Then add Fruity Soft Clipper with threshold turned right for hard clipping to control peaks.
Channel volume adjusts the sound before all effects; mixer faders adjust after effects. Use channel volume first, then faders only if needed.
Set the hi-hat sample's Time shift (or Time offset) to a small positive value to push it slightly off-grid, creating a more human feel.
Use the piano roll to change the pitch of the 808 to match the key of the beat. Lower velocity notes create a stutter effect.
Set up a reverb send (e.g., Lux Verb), then add Gross Beat with the 'Half Speed' preset and reduce the time knob to create a slowed-down reverb effect.
Turn dry level to 0, feedback to 0, delay time to 0, and disable tempo sync. Then twist the time knob to create a wobbly modulation effect.
You only need four layers and proper sound selection to make a full beat. The video took 35 minutes but provided pro-level sound design sauce.
This tutorial effectively transforms a complete beginner into someone who can create a full beat in FL Studio by simplifying the interface to five buttons, teaching the four essential layers of a track, and providing advanced mixing tricks. The core takeaway is that sound selection and organization are more important than any single feature.
"The title promises a beginner-to-pro tutorial, and the video delivers a complete walkthrough from opening FL to advanced mixing tricks, but the 15-minute claim is exceeded (actual runtime ~35 min) and some pro techniques are only briefly shown."
Busy Works Beats Free FL Studio 21 Course
link
Busy Works Beats Music Theory Essentials Course
link
Busy Works Beats Melody Mastery Course
link
Busy Works Beats Premium Membership
link
FL Studio
tool
FLEX (stock plugin with Essentials packs)
tool
Fruity Wave Shaper
tool
Fruity Soft Clipper
tool
Lux Verb (Reverb plugin)
tool
Gross Beat
tool
Fruity Delay 3
tool
What are the five essential buttons in FL Studio that a beginner must know?
Playlist, Piano Roll, Channel Rack, Mixer, Browser.
0:48
What is the recommended Snap to Grid setting for the Playlist when starting out?
Set the magnet icon to 'Bar' so everything lines up to whole bars.
2:19
What are the four layers of a beat?
Topline (melody), Harmony (chords), Contrast (bass/different sounds), Rhythm (drums).
5:57
Why should you start with string instruments (like piano) when writing music?
Because string instruments help you hear pitch and harmony more clearly than other sounds.
7:41
How do you create a minor chord using the chord code (integer notation)?
The pattern is 0-3-7 (root, minor third, perfect fifth). For example, starting on E (0), count up 3 semitones to G (3), then up 4 more to B (7).
13:38
What is the purpose of the 'Ghost channels' feature in the Piano Roll?
It shows midi notes from other channels in the same pattern, helping you see relationships between parts.
10:31
How do you send a sound to the Mixer automatically and name it?
Press Ctrl+L on the selected sound in the Channel Rack. This will create a mixer track and name it after the sound.
8:43
What is the difference between Channel Volume and Mixer Fader?
Channel Volume affects the sound before any mixer effects. Mixer Fader affects the sound after all effects on that channel.
27:12
How do you add a simple delay to a hi-hat to make it sound more human?
Open the hi-hat sample in the Channel Rack, go to the wrench tool, and increase the Time shift (or Time offset) parameter slightly (e.g., 3-6 ms).
27:46
What two effects does the instructor add to the Master channel to polish the beat?
Fruity Wave Shaper (with mix ~50%, convex curvature, 4x oversampling) and Fruity Soft Clipper (with threshold turned right for hard clipping).
25:29
How do you create a slowed-down reverb effect using Gross Beat?
Add Gross Beat to a reverb send, choose the 'Half Speed' preset from the momentary category, and reduce the time knob.
32:20
What is the 'seal' pattern for drums?
A basic kick pattern: kick on beats 1, 3, 5, 7 (or similar) – the instructor describes it as 'boom boom boom' and says it's the foundation of trap, drill, and other hip-hop genres.
23:52
Five Buttons Simplify FL Studio
Provides a clear starting point that reduces overwhelm for complete beginners.
0:48Sound Selection is 99.7% of Production
Emphasizes that having good drum kits and samples is more important than any technical skill.
3:17Four Layers of a Beat
A simple yet powerful framework for structuring any beat, applicable to all genres.
5:57Chord Code 0-3-7 for Minor Chords
A practical shortcut that lets beginners create chords without memorizing music theory.
13:38Master Chain with Wave Shaper and Soft Clipper
A professional mixing recipe that can instantly improve a beat's clarity and punch.
25:29Gross Beat Half Speed for Unique Reverb
A creative effect that adds a distinctive, atmospheric quality to vocals or instruments.
32:20[00:01] all right so you just opened up FL you're like
[00:05] anything is you're looking around you're like what
[00:09] icons the answer is no and I got some bad news for
[00:14] is that I'm going to make this super simple for
[00:18] game from busy Works beats.com we trained over a
[00:23] to work with Drake Kanye West Post Malone Ariana
[00:27] little baby Kendrick Lamar jcole list of other
[00:34] so what I'm going to show you guys today is if
[00:38] show you how to make your first beat probably in
[00:43] show you how cool it is so the first thing in FL
[00:48] of your screen you don't have to memorize those
[00:52] these five buttons here so if you click around
[00:56] you'll get the hang of like opening and closing
[01:01] all the puzzle pieces together this is called the
[01:06] is where we add in puzzle pieces and we remove
[01:11] we call the piano roll in my opinion as a beginner
[01:17] so if you guys ever struggle with midi notes and
[01:21] roll looks like this you're going to struggle for
[01:26] for a long time because the screen is too small so
[01:31] small it's going to be a very hard process so to
[01:36] the top to make the screen nice and full piano
[01:41] the piano roll it's always full screen okay and
[01:46] the channel rack like how we build out the puzzle
[01:50] have curves and some have indentures and then some
[01:55] edges on them so Channel rack is where we design
[02:01] where we put the puzzle together and I usually
[02:05] to do it is just double click on the little top
[02:09] puzzle pieces in here couple you know kind of
[02:14] um playlist here go to the top left this little
[02:19] drop down we're going to go to the magnet icon
[02:23] Snap to grid so anytime I'm doing something in the
[02:28] this on anything and I just click around I'm going
[02:33] it's going to be a headache so let's go to snap
[02:37] simple for you and all right let's get started so
[02:42] the mixer is where you add effects like if I take
[02:47] like you know I sound like a little child when I
[02:52] that okay so that's what we can do in the mixer
[02:56] synthesizers our microphones our drums Etc etc etc
[03:04] get to separate the sounds um and then this fifth
[03:09] is where you browse for dope Bas sounds any really
[03:17] first and this is a part that I can't do for you
[03:22] like in depth go to busy Works beats.com slfl
[03:29] guys there but in short is that whenever you guys
[03:38] becoming a music producer like until you get your
[03:44] going to be making beats that sound like it but
[03:48] as a beginner I'm going to say this probably five
[03:54] producer as an R&B music producer as a EDM person
[04:00] for your genre they're not going to come with
[04:04] it's Reddit whether it's somebody's drum website
[04:09] I don't even know people with kits anymore drum
[04:14] find all of the dope sound designers and find
[04:21] really can't do much and I'll give you guys
[04:25] trying to like memorize everything all right so
[04:30] me firstly what we're going to do is label these
[04:35] mode um if you haven't logged into your FL make
[04:40] to where it says about and then that's how you log
[04:44] going to save this let's go to where it says file
[04:48] isn't all the way we're going to save as let's
[04:54] for 5 minutes so I promis to be under 15 let's see
[05:00] drive let's go to projects I have a folder called
[05:06] the day so today's October 16th you want to stay
[05:13] I'm telling you guys in the future four years
[05:16] can't find my project where I did a little Uzi
[05:20] these projects just to find one project so let's
[05:27] organized you are the more successful you will be
[05:34] done so far is to save a project congratulations
[05:39] project saved I'm going to turn on my keyboard
[05:44] I turn on my syns my syn that don't come with the
[05:49] to the track all right so next step is creating
[05:57] up the playlist this screen here let's close clows
[06:01] right click where this track one and let's label
[06:06] a Topline layer this is the memorable Melody
[06:11] chord structure like where you add the you know
[06:16] layer is called the contrast layer this is where
[06:22] different from the top line and then you have your
[06:27] I'll label this for you guys so we have the Top
[06:32] of a track you have the harmony section contrast
[06:37] four sections you could stack this up infinitely
[06:42] beat everything becomes easy my favorite place
[06:48] let's go to What's called the Channel rack to
[06:52] musical ideas let's go to the channel rack we're
[07:00] all right so if you followed along so far you have
[07:04] first plugin in FL Studio smash the like if you
[07:11] go ahead and do it all right take the time I'll
[07:16] let's go to the get button here and we're going
[07:22] under the get you want to download yours should
[07:26] strings essential winds essential bass guitar I've
[07:30] git Tab and make sure you download the free packs
[07:34] piano now whenever you're struggling with music in
[07:41] instruments piano is a stringed instrument it has
[07:47] uh a guitar is a string instrument orchestral
[07:53] instruments they're string instruments okay so
[07:58] out the sounds if you to okay so here we're going
[08:03] to takeoff Reverb takeoff limiter takeoff Master
[08:10] if you can't figure out how to make sounds click
[08:15] make sure this is on and now you can use your
[08:20] make stuff okay so you can right click to switch
[08:24] just right click hit reset in short it basically
[08:33] C octave 4 so that's what it does in those steps
[08:38] that like button we have seven more minutes to
[08:43] that we have our sound open we need to first hit
[08:48] name it for us if you don't see this number on
[08:53] to reveal that first thing we need to do is create
[09:00] a pattern okay I like to build inside of um as
[09:06] the metronome on we're going to turn blend overdub
[09:10] turn the 3.2.1 on if you guys don't see this view
[09:16] the drop down go to view go to behind Clips switch
[09:21] but I'll reset it back to normal for you guys okay
[09:28] bar it's just playing the metronome sound and
[09:32] as we're listening okay it's going to that's going
[09:36] going to stretch this out for about four bars
[09:41] time okay so even though we're at 140 we're really
[09:47] number four it's really two we're not trying to
[09:51] song structure master classes on my Channel for
[09:57] four let's hit control B this is latch paste latch
[10:03] the bar and you have something like this where
[10:08] contrl B it will paste it right there which is
[10:14] contrl B is not copy and paste it's latch paste
[10:20] we have this now we can we have it laid out the
[10:25] and we can rightclick go to piano roll and now we
[10:31] know why FL comes without this turned on but it
[10:36] roll let's go to view let's go to where it says
[10:41] just yet um and then we're going to go to where it
[10:47] on all notes because by default it only turns on
[10:52] how to make music this way it's impossible okay
[10:57] view keyboard labels all notes okay turn that on
[11:04] make something easy here let's do uh let's start
[11:11] snap the grid to one half beat I'd recommend this
[11:16] hit contrl L it will truncate the note and make it
[11:22] note control left click is Select okay and then
[11:28] going to hit control down that will pull that note
[11:34] octave okay so now what do we do from here we
[11:42] going to highlight this hit control we're going
[11:48] we're going to go up a half step to f a half step
[11:52] above or below and I teach all this music theory
[11:59] it's the foundation of everything I teach just
[12:04] I'll leave all the links below but that's the
[12:09] okay so here's e and then we have [Music] F
[12:20] layer so if we remember we were building out the
[12:26] playlist view let's highlight all these notes
[12:32] What's called the contrast section so contrast
[12:38] to create a Harmony do we create the Harmony
[12:42] we go to a new puzzle piece so let's go to
[12:46] go to pattern two and on the left side you'll see
[12:50] and drag it in and we need to make it long
[12:57] but there's no midi information in here there's
[13:01] add stuff to it let's right click go to piano
[13:07] of pattern one but we don't have anything in
[13:12] add a note here at e then add a note at F and
[13:20] control left click highlight and hit shift left
[13:25] hit shift up seven times one two 3 four five six
[13:38] fifth now that we have that what we can do is take
[13:52] theory but we'll just kind of keep this short
[13:57] and hit shift left click and then we're going
[14:04] now we're creating a minor chord okay so a minor
[14:10] about music right now the root note consider this
[14:16] all the music theory snobs out there this called
[14:21] to build any chord so basically this is the root
[14:29] 5 6 7 so we count note by note until we fill
[14:34] 0 3 4 5 6 7 so 03 7 always makes the minor chord
[14:41] chords now the second chord feels wrong so what
[14:47] note hit shift up so we hit control to highlight
[14:56] now that feels more correct so usually chords
[15:00] why we start with the minor chord first okay
[15:05] to do is just go back to the playlist make sure
[15:09] and uh we're going to left click drag that in
[15:14] comes to the playlist uh and now let's move into
[15:18] pattern three so we're going to left click switch
[15:23] how do you make Melodies well in my opinion the
[15:29] note of your chords so let's right click go to
[15:35] e it was down here e and then we went up to B so
[15:41] this B hit control up to go up an octave and we're
[15:47] rules with Melody I can't explain everything
[15:51] guys What notes we can add here but I explain
[15:55] to busyworksbeats.com SL music theory Essentials
[16:02] have a new course called Melody Mastery which goes
[16:07] Counterpoint counter Melodies advanced stuff
[16:14] we're just going to give you guys some shortcuts
[16:17] really need to remember is the number seven okay
[16:23] shift left click make that duplicate note and
[16:31] okay and then we could raise that note up one half
[16:33] step okay so we're going to copy this
[16:40] Vibe and we're going to hit shift
[16:46] going to change is this root note so
[16:58] [Music] actually I might change
[17:00] [Music] it let's change that top note so sounds
[17:07] better let's do actually [Music] a
[17:15] rules there we go going for like a Travis Scott
[17:23] the playlist here we're going to left click and
[17:28] we have the Harmon section we have the contrast
[17:31] add our drums so beat making really comes down
[17:36] Target cuz I was trying to explain everything but
[17:41] program how to save your program how to open up
[17:46] your panel roll look nice I showed you guys how
[17:52] the four layers of your beat so you've learned a
[17:57] years to figure this out so I've crystallized it
[18:02] let's add the Rhythm like I said in the very
[18:06] you guys have to go hunt some sounds I'm going
[18:11] guys go to busyworksbeats.com flstudio I'll give
[18:17] to find some stock sounds but again you're not
[18:22] if you guys got a packs you guys can mess with the
[18:28] this is a Rolland tr808 drum [Music] kit so it
[18:36] to find modern hip-hop stuff in FL Studio stock
[18:41] a rabbit that doesn't exist um so that's where
[18:47] you could mess with different packs for different
[18:51] rack we want a kick which is like we want a high
[18:58] so okay and then we went an 808 which is Boom
[19:05] browser let's open up the browser right here
[19:12] added my own hard drive so if you guys do collect
[19:18] to how to uh save your files go to where it says
[19:26] says file settings here you can import different
[19:32] folders it will show up on your browser like
[19:37] icon you find your folder on your computer I'll
[19:43] friend sounds where is it at friend sounds okay
[19:47] we'll call this friend Sounds new just so you guys
[19:53] sounds cuz one's already the friend sounds folder
[19:58] refresh button in the top left of the browser and
[20:05] so it's the same location but I'm just showing you
[20:10] didn't do a lot of like finessing with the midi
[20:14] minutes nextly let's go to pattern four because
[20:19] so let's go to pattern four here left click go to
[20:24] so we're going to go to Metro's kit here where
[20:33] guys got to chase down these sounds there's no
[20:37] stuff that you know it just has a ton of stuff
[20:45] with snares first we're going to right click and
[20:51] sound to our puzzle piece shaping thing called the
[20:57] as an option here let's find a high hat and close
[21:02] now that's added to our Channel rack uh let's go
[21:11] now one thing about samples if you're a beginner
[21:14] turn off where it says use the loot points or else
[21:18] samples are like weird it says Auto and all this
[21:24] time and hit R to reset and also check under
[21:30] the root note okay because some samples are kind
[21:35] sampler uh that's for more intermediate to advance
[21:43] hat right click open a new channel so far we have
[21:51] we need to find an 808 now the most popular 808 is
[21:57] one of the most used 808s on the planet uh we
[22:03] going to right click open that up again you guys
[22:07] to memorize like everything I'm talking about now
[22:12] you guys could use your own sounds if you're
[22:15] channel rack here left click and highlight all
[22:21] to hit contrl L that will send the sounds to our
[22:27] saturation d Distortion whatever okay so now
[22:31] four to the playlist under song mode remember
[22:36] the left side drag it in so nothing's happening
[22:41] now we need to fill in the puzzle pieces like AKA
[22:45] here to open up pattern four and here's where
[22:50] just click somewhere over here and then right
[22:54] high head so fl's kind of hard to like judge how
[23:01] two steps this is a great place to start because
[23:07] okay now the snare goes on What's called the
[23:11] back on I'm going to count and every time the
[23:15] snare four five six snare 8 1 2 3 4 5 6 7 8 1
[23:27] goes one 2 one two one two t 1 two one two one
[23:34] little high hat I added in here is that Metro
[23:41] so say okay now let's add the boom boom the
[23:52] add this now there's a pattern in Hip Hop and
[24:00] ta that's the only pattern you need
[24:06] from Mob music in the west coast
[24:12] beon it's all the seal okay so so just get used to
[24:18] that pattern okay so it goes boom boom
[24:22] can move that around if you guys want to
[24:30] boom boom bo so I'm going go and call out 3
[24:41] bounce so now you're like okay I I can kind
[24:48] go to the Steinway we're going to turn down
[24:52] we want to turn sounds down at the source
[24:55] here in the channel volume so now the piano
[25:01] 808 now I'm not going to use a kick for this
[25:09] could a simple way is just click on your 808 hit
[25:15] timing as your 808 kind of a cool blend here but
[25:25] last thing we need to do in this beat is mix and
[25:29] right so here's where we're going to get a little
[25:33] if you guys are copying every single step let's
[25:37] we're going to go to our plugins and let's add the
[25:43] called harmonic steer track to make it sound more
[25:47] the bottom right turn your mix level to about
[25:52] and crank this up to 4X I like to hit the high
[25:57] curvature to make it more of a convex curvature
[26:01] start to sound a little bit more Buzzy so that's
[26:04] a buzz to it a subtle Buzz next plugin in slot
[26:10] like what the heck is going on um go to here
[26:15] which the default one is I keep mine on Compact 2
[26:20] this I don't like this view so let's go back to
[26:25] click these two icons here to show the plugins
[26:30] here if you don't see that section at the bottom
[26:35] make it bigger like that all right so I forgot
[26:41] the drop down let's go to fruity soft Clipper and
[26:47] over zero we're going to turn the threshold to
[26:51] me hard clipping uh soft clipping would be to
[26:55] the right now we're our beat sounds a lot bigger
[27:02] up so what I did here in the mixer is I turned
[27:12] everything so me turning this up is after all
[27:18] turn the 808 up at the source like before all
[27:23] rack level very important cuz a lot of people
[27:27] mixer and they're wondering why they're not
[27:33] is like the fader is like the last thing I would
[27:38] jumping so let me show you guys a couple tips
[27:46] the high hat just click on it go to the wrench
[27:52] FL Studio 11 or below it's called time offset and
[27:57] the time shift up like that now the high hat will
[28:04] sound so right on the grid it's called now the
[28:09] volume now I want my kick to be
[28:17] turn the kick up with the channel volume
[28:34] so let's say my 808 tone is in like right it
[28:39] tonality to our 808 let's right click go to
[28:43] notes and we're starting to create unique notes
[28:48] roll so now I can see the note values for my
[28:53] up and you can hear the tonality right now it's
[29:01] hit shift down now it's more in key remember in
[29:10] the same thing here this is basically doing that
[29:28] [Music]
[29:28] let me again show you guys how to make your
[29:32] notes here and I'm going to turn the velocity down
[29:37] a ghost channel so if you click in the top left go
[29:42] that off you guys won't see that so basically
[29:48] puzzle piece you'll be able to see where the
[29:52] stuff so now I'm adding in this this lower
[30:01] grab the ellipses here left click pull
[30:07] go to where it says note velocity and that's
[30:14] graph so now we're adding a little stutter
[30:18] step let's go to our snare let's
[30:30] if you ever want to fade out
[30:31] out parameter here to fade or shorten a [Music]
[30:38] sound same with the high head click
[30:45] you guys can trim the high hat to get
[30:49] then hit Fade Out trim some of that
[30:56] head let's go to the wrench tool turn
[31:01] grid all right now I'm going to show you guys
[31:09] the piano I'm trying to decide how I want to do
[31:13] let's open up the mixer so remember the mixer is
[31:18] blank area called insert 8 let's right click call
[31:24] let's do Lex verb I forgot we have Lex verb now
[31:29] to Lux verb shout out to Lex Luger and we're
[31:33] where it says feedback and I'm trying to decide
[31:39] okay so let's turn up what's called the gain and
[31:44] I'm going to send my piano to that Reverb to do
[31:50] give it a color so you guys can see we're going
[31:54] the bottom to send a signal to that channel and
[31:59] it down like that now my piano's going to this
[32:06] sound and it's filling out the sound now if you
[32:13] let's open up gross beat so if you guys see this
[32:20] you know They're copying off your boy go to gross
[32:24] claims they made this up cap okay go to gross
[32:29] let's go to half speed and then let's pull back
[32:34] Reverb and we have the original Reverb creates
[32:47] crazy let me show you guys something you could
[32:54] showing you guys sauce just to inspire you guys
[32:58] you please subscribe I don't want to have to
[33:03] okay if you go to Steinway piano open up fruity
[33:09] now here's the technique turn your dry level
[33:14] way down turn delay time all the way down okay and
[33:21] becomes an effect just start twisting knobs and
[33:25] time if I turn this up creates that wobbly sound
[33:36] we have a really creepy [Music] Vibe I'm going
[33:48] what it sounds like with soft clipping I'm just
[34:06] so you guys don't need a bunch of sounds to
[34:10] all those steps remember a beat is really
[34:16] your chords the contrast layer which is like
[35:15] [Music]
[35:16] only took 35 minutes but you guys just made your
[35:21] pro Lev sound design sauce and you guys will
[35:25] busyworksbeats.com St name a better deal name
[35:33] you up subscribe if you're new um I will have
[35:39] to tell yall if you want the foundation of like
[35:43] song go to busyworksbeats.com slm music theory
[35:49] where I go through like how to song structure how
[35:54] From Scratch how to make chords from scratch how
[35:59] explain moods behind music then move into what's
[36:04] that goes into really deep science about what how
[36:09] from there I go into Melody Mastery and that's
[36:14] order to really comprehend Melody Mastery so all
[36:21] you're new it's completely free and guys I want
[36:24] you have these drums go to busyworksbeats.com FL
[36:29] just going to leave everything below subscribe
[36:32] make it in 15 minutes but you did learn some
⚡ Saved you time reading this? Transcribe any YouTube video for free — no signup needed.