Get 10dB More Loudness Without Distortion
45sShows a dramatic before/after audio comparison that instantly hooks producers.
▶ Play Clip[00:00] For some people, getting loud and clean
[00:01] music seem to be impossible. But there
[00:03] are five steps that I have never seen
[00:05] anybody talk about in a single video
[00:07] that will get your music to sound as
[00:08] loud as you wanted to while making it
[00:10] cleaner and crisper. My name is Max.
[00:12] Welcome to Mix Elite Academy. And how
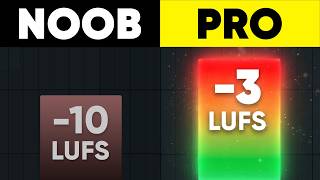
[00:14] come this track here we get [music]
[00:19] about minus 10 LFS. We are even peing 1
[00:22] dB and I cannot push it harder [music]
[00:26] because it just start distoring. But the
[00:28] same track with different processing
[00:30] applied. I can push to plus 17.
[00:36] You're getting -5 - 6 LFS. [music] We
[00:39] are not picking
[00:42] and it sounds clean and crispy. Louder
[00:45] equals better. Like literally
[00:46] psychologically and physiologically.
[00:48] Docs hate it. We love it. But here is
[00:51] not just louder. It's crispier,
[00:52] punchier, and glued together. The very
[00:54] simple way to achieve this loudness is
[00:56] by playing our song through a limiter
[00:58] that doesn't allow the audio to get
[00:59] above zero dBFS threshold, which is the
[01:02] limit for your speaker to play music,
[01:04] and turning on the gain. So, we shave
[01:06] off the peaks of the sound, making the
[01:08] [music] louder parts quieter and the
[01:10] quieter parts sound louder.
[01:13] [music] And this is exactly what I've
[01:14] just done to this track. is a cardinal
[01:16] sin VDM right here
[01:17] >> that you should never ever do. So,
[01:19] what's going on and what should you do
[01:21] to get the crispy masters? First, let's
[01:23] clear up that the PQC on the meter
[01:25] inside your door has nothing to do with
[01:27] how loud your music is actually
[01:28] perceived. We measure this with LUFS
[01:31] instead. It's a separate metering plugin
[01:33] you have to use. If you don't have one,
[01:34] just click the link in the description
[01:35] below. As electronic music producers, we
[01:38] want this number to be as high as
[01:39] possible, ideally to at least minus 8 to
[01:42] -6 integrated LUFS. Scril X goes minus
[01:45] three. We'll get to how in a moment.
[01:47] Second, why did you just say louder
[01:49] equals battery max when Spotify tells me
[01:51] that recommended is minus4 LFS or they
[01:53] will lower it? Because people are
[01:55] confused between distribution target and
[01:57] playback threshold. Spotify uses minus14
[01:59] LUFS as playback settings. Is their
[02:02] target for average integrated LUFS of
[02:04] your entire song? If your drop is
[02:07] hitting minus1 LUFS and it still sounds
[02:09] great, that's amazing. No streaming
[02:11] platform is going to be applying limiter
[02:13] on your song. People will just turn up
[02:15] the volume as they want it on their
[02:17] studio Bluetooth speakers and Spotify
[02:19] might just change the volume. So, we
[02:20] always master our tracks as loud as
[02:22] possible without it starting to sound
[02:24] worse. Full stop. Next, before we start,
[02:26] fundamentally, your muscle will suck and
[02:29] not be crispy. Not because of what you
[02:31] do on the master mainly, but what you do
[02:33] while mixing. If you want a clean and
[02:35] loud mix before we get to mastering,
[02:37] your friends are right click delete
[02:39] button. You cannot make 50 misins loud
[02:41] because they're fighting for the same
[02:43] pixel of headroom. Selfish low end
[02:45] because low end is carrying the most
[02:46] energy but least loudness. That's why if
[02:48] you listen closely, protras actually
[02:50] don't have as much sub frequencies as
[02:53] you might think. Frequency masking, a
[02:55] lot of side chaining, not only from kick
[02:57] to bass, but to make space for whatever
[02:59] is the priority in your mix. Clipping
[03:01] individually and groups to control the
[03:03] peaks and everything below 100 htz is
[03:06] mono. These guys will give you 80% of a
[03:08] clean mix. that we now can get to making
[03:10] loud and crisp. So, let's start from the
[03:12] loudest part of our rendered mix.
[03:19] This applies to every genre, ADM, trap,
[03:22] hip-hop, etc. First, on your master,
[03:25] since low frequencies are the heaviest,
[03:27] we always apply a low cut to cut
[03:29] everything that's unnecessary. So, I'll
[03:31] apply Fruity Parametric EQ2. And
[03:33] unnecessary starts just under the lowest
[03:36] note that your song plays. that
[03:38] shouldn't be lower than 30 Hz. For
[03:40] example, D1 or D2 in FL
[03:43] place at 36 Hz. In FL, there's this
[03:47] preset you can apply. And I will take it
[03:49] a little bit higher because my track is
[03:51] in E. It hits at around 41 Hz. So, I'll
[03:54] just start rolling down after it. You
[03:56] should not turn on linear phase or
[03:58] oversampling. Linear phase and
[04:00] oversampling will leave for the final
[04:02] limiter.
[04:13] You can hear it's getting worse within
[04:15] our face and over something applied.
[04:17] Some people like to also use shelf
[04:19] instead. That would look something like
[04:21] this. You use this shelf if you feel
[04:23] like after the low cut your track became
[04:26] boommy, right? There are some phasing
[04:28] issues. Then we don't need any lows from
[04:30] the side channels because side channel
[04:32] is everything that's different between
[04:34] left and right ear. Side is what creates
[04:37] stereo width effect. And serial width in
[04:40] low frequencies is bad. Very bad. Want
[04:42] to know why? Right? Because they
[04:44] oscillate in lower frequency. And if two
[04:46] play the exact opposite signal, you'll
[04:48] hear silence. Not in your headphones,
[04:51] but when you listen back to it on mono
[04:53] speakers or there will be blind spots in
[04:56] clubs with no bass audible at all. I
[04:58] will use a free midside EQ preset for
[05:01] Patcher that you can download for free
[05:02] below and just start increasing the side
[05:04] low cut.
[05:18] So this is how it looks like from two to
[05:20] 300 Hz. We're starting to roll off
[05:23] everything so that at 120 Hz everything
[05:26] down is only mono. There's no side
[05:28] signal and this is what we are cutting.
[05:30] Take a listen and notice how the phase
[05:32] shifts. So the bass is inaudible every
[05:35] couple of seconds.
[05:43] So it's also really inconsistent and it
[05:45] will screw up our face a lot. That's why
[05:47] we do it like this. And if you worry
[05:48] that we are losing a little bit of this
[05:50] punch and bass, we'll be adding the good
[05:52] one back in a moment after we would get
[05:55] into dynamics. take a look at our
[05:57] waveform, how many weird little peaks we
[06:00] have. That's why we would usually apply
[06:03] a clipper just after the EQ. If we
[06:06] wanted to really push the loudness, I
[06:08] really like this small plugin, literally
[06:10] very small, called the G-Clip, you push
[06:13] it until you just barely hear it change
[06:15] the knock of your drums, then back it
[06:18] off 10%.
[06:33] And now we also turn on the over sample.
[06:40] We do not turn on softness. We keep it
[06:42] at 0%.
[06:48] So I had it started to distort and then
[06:50] I backed it off. So I don't hear it no
[06:52] more. Take a look at what waveform looks
[06:54] like with and without it.
[07:05] >> We're cutting the unnecessary peaks that
[07:07] don't really make it sound different,
[07:09] but we'll screw up our limiter in a
[07:11] minute. Technically, even better way
[07:13] would be if we applied multiband
[07:14] clipping. So you would not be limited by
[07:16] the whole waveform and you'll find a
[07:18] whole niche for multiband clipping on
[07:21] YouTube. But ideally instead you don't
[07:23] do multiband clipping on your master
[07:25] when mastering but do it on individual
[07:27] groups of instruments when mixing. This
[07:29] is what for example Skrillex does to
[07:31] achieve this minus 3 LFS. That's why
[07:33] some mastering engineers will want you
[07:35] to send stems of your track for
[07:37] mastering so that they can do stuff like
[07:39] this. But this is basically mixing
[07:40] already. We are not doing that today.
[07:42] Now, why did we use hard clipping before
[07:44] compressors or a limiter? Because our
[07:46] limiters are trying to be smart. Their
[07:49] goal is to be as transparent as possible
[07:51] without adding distortion. If you have a
[07:53] huge snare hit like that upcoming, this
[07:55] smart brain of this thing will soften
[07:58] the hit to fit the snare under the
[08:00] ceiling we set over here. On the other
[08:03] hand, clipper is damp and that's why we
[08:04] love it. It just chops all the waveform.
[08:07] That's why the next step after we got
[08:08] our signal clear from this weird harsh
[08:11] peaks is multiband compression. You can
[08:13] do this in Maximus or something like Fap
[08:16] Filter Promb MB. Inside Maximus, I think
[08:18] it's pretty easy to see. I like to set
[08:19] the preggain of each band by like 7 to
[08:22] 10 dB so we have more [music] room to
[08:25] work with.
[08:35] Our goal here is just to lower the
[08:37] dynamic range of every single band
[08:39] individually instead of at once. And at
[08:41] the same time, very important, make up
[08:43] for that. So if we are going down from
[08:45] plus 8 dB to around five, we would add
[08:49] about 3 dB of gain to the lows like
[08:52] that. Then do the same for mids
[08:59] [music] and highs.
[09:08] And now we can get to limiting and
[09:10] maximizing. This is the most important
[09:12] part. If you were to watch just one
[09:13] minute of this whole video, this is the
[09:15] one. I really like to use this one from
[09:16] Ozone because it has all the features we
[09:18] really need. First, before we even tweak
[09:20] anything, we turn on always true peak
[09:23] and set the output level to start at
[09:26] minus0.3
[09:27] dB ceiling. Why this is important?
[09:30] Because when audio leaves your computer,
[09:32] it goes through digital to audio
[09:34] converter DAC from PC to speakers. It
[09:37] basically takes the dots and draws a
[09:39] smooth curved line between them to send
[09:41] to your speakers. If two dots are too
[09:43] high, the curve can get about zero dB
[09:46] causing distortions. So speakers try to
[09:49] play signal that's technically
[09:50] impossible for them to play and it's
[09:52] called inter sample peing because the
[09:54] signal is peing between the samples.
[09:57] When you turn on true peak, it over
[10:00] samples the audio to create more dots to
[10:02] make sure they won't go above the
[10:04] thresholds you've set after converting
[10:06] to the signal that speakers can read.
[10:08] You will not hear these issues inside
[10:10] your DA because your D works in 32-bit
[10:13] float at least. But this all only
[10:15] applies to lossless file, meaning a wave
[10:18] file that nobody will be listening to.
[10:20] Actually, everybody will be listening to
[10:22] something like MP3 versions of your
[10:24] file. Like maybe DJs on festivals play
[10:26] wave files, but usually this would be
[10:28] Spotify converting your file to MP3. And
[10:31] this settings don't fix this. Your
[10:33] limiter even in true peak mode doesn't
[10:35] care about MP3 or any other codec.
[10:37] That's why inside of ozone you have this
[10:39] codec so that we can preview how it will
[10:42] sound and what will be the true peak
[10:44] after converting to MP3. And this is
[10:47] key. Okay, we don't even start turning
[10:49] on the gain before [music] we do that.
[10:51] So we have true peak minus 0.3 is a good
[10:54] starting point. And now I'll start with
[10:55] the chaotic off so we can hear the
[10:57] difference. And we'll start turning on
[10:59] the gain up until I hear audible
[11:02] distortion. No LFS [music] matters for
[11:04] now.
[11:13] All right.
[11:17] So [music] you can see we are under
[11:20] minus 6 LUFS. This is crazy. And we are
[11:23] picking at minus0.1
[11:25] even if you have output level set to
[11:27] minus0.3 with crooic on. Okay. And now
[11:30] let's turn on codec. go to for example
[11:33] AAC because that's what Spotify for
[11:35] example uses for their web player and
[11:37] set it to 256 and we'll be looking at
[11:39] this peak to see if we are clipping
[11:44] [music] and immediately we're clipping
[11:52] even though with no [music] codec light
[11:55] we are pretty much at the true peak Go.
[12:02] Now this plus one shouldn't be outable
[12:04] at all. But if we go lower in codec,
[12:12] it's getting much worse. That's why so
[12:14] many people will tell you to go lower in
[12:17] the true peak ceiling. Spotify tells you
[12:20] to go minus 2 dB true peak ceiling just
[12:23] because of this codec. If we go minus 2
[12:26] dB,
[12:30] we only have half a dB of headroom after
[12:33] converting it to AAC 128 kilob. I would
[12:37] personally before limiting apply some
[12:39] kind of imager to make the stereo width
[12:43] of our track a bit more rich. I would do
[12:46] something sort of like that where we
[12:48] have lows fully in mono and mids to
[12:51] highs a bit more stereo. This will also
[12:54] increase a little bit of our headroom.
[13:02] The problem I see here is that our
[13:05] [music] peaks are still a little bit too
[13:08] high even though we've applied clipper
[13:10] already. If you seen something like
[13:11] this, what I would do after our
[13:13] multiband dynamics, I would apply
[13:15] another G clip just to make sure we are
[13:18] controlling those tiny little peaks that
[13:21] don't really bring anything. But
[13:23] unnecessary volume peaks.
[13:36] As you can see, now [music] we are much
[13:37] more in control environment. Now, if I
[13:40] just apply a limiter and apply the same
[13:42] amount of gain we've added, this is how
[13:43] it would sound.
[13:49] And this is after everything we've done
[13:51] today.
[14:02] >> [music]
[14:02] >> Even though I'm trying to give you my
[14:04] best here on YouTube, there's just so
[14:05] much that I can cover. That's why inside
[14:07] our Mix Elite Academy, you get lifetime
[14:09] access to all of our premium courses,
[14:11] all of our samples, presets, song
[14:13] templates, including this one, and
[14:15] weekly live group coaching, unlimited
[14:17] one-on-one feedback on your music,
[14:19] discounts on thousands of plugins. So,
[14:21] if you want a foolproof way to start
[14:23] making professional sounding music,
[14:24] check the first link in the description.
[14:26] And remember that the best way to get a
[14:28] loud master is to make music that people
[14:30] want to turn up. Quality is the best
[14:32] volume booster. That's why in this video
[14:34] you can see here, I'll take you through
[14:36] the start to finish process of mixing
[14:38] your track. So click over and I see you
⚡ Saved you 0h 14m reading this? Transcribe any YouTube video for free — no signup needed.