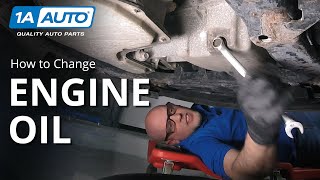
Why You Should Change Your Own Oil
40sThe humorous interruption about upsells at an oil change shop is relatable and highlights the peace of mind of DIY.
▶ Play Clip 1A Auto: Repair Tips & Secrets Only Mechanics Know
"A practical guide that genuinely delivers on the promise, only its 'ANY vehicle' claim oversells slightly — and the promo banter costs a few points."
This video is a practical, step-by-step guide to changing your vehicle's engine oil at home. The creator walks through the required tools, safe vehicle prep, the drain and filter-swap process, and how to verify the finished oil level. The core message: DIY oil changes buy peace of mind and protect you from dealership upsells.
You won't save a ton of money, but DIY gives you peace of mind and lets you avoid service-drive upsells (shown via a humorous dealership skit).
Oil, an oil filter, an oil filter socket/cup or strap wrench, a wrench or socket and ratchet for the drain plug, plus gloves and rags.
Determine which side of the engine bay the engine sits on (especially in FWD cars). The engine is on the passenger side here and the transmission is on the driver side, so it's easy to confuse fluid pans.
Drain the oil pan, not the transmission. Check the fill cap for the correct oil type; this vehicle uses 5W-30.
Use the proper jacking locations on a solid, level surface. Low vehicles require enough height to access the drain plug comfortably.
Turn the drain plug counterclockwise. Inspect the threads and the gasket; replace a torn or crushed rubber gasket, and consider replacing metal gaskets regularly.
Reinstall the plug until snug then add a small twist. Over-tightening can damage the oil pan.
Filters live underneath near the front, near the rear, or on the wheel well side. Vehicles use either a canister/twist-on filter or a cartridge filter.
For canister-type filters (and seals), oil the exterior seal so it won't lock itself on the next change. Once snug, give the canister-style another small turn.
Check the owner's manual for amount and grade (5W-30 here); the presenter prefers synthetic. Then start the engine for 10–15 seconds to circulate the oil.
Shut off the engine, wait 2–3 minutes, wipe the dipstick, reinsert, and pull it out. Oil should sit between the hash marks, up near the top after a change.
If the level reads low, add more oil and recheck the dipstick.
A correct oil change boils down to a controlled sequence: safe lifting, correct drain, careful torque, and verifying the dipstick. Follow the manual's oil spec and avoid over-tightening, and the whole job takes under 30 minutes.
What is the main benefit of doing your own oil change, even though you won't save a lot of money?
You gain peace of mind and avoid the dealership's upsell-up service pitches.
00:15
In which direction do you turn the drain plug to remove it?
Counterclockwise.
02:06
What type of engine oil does the example vehicle in the video use?
5W-30.
01:22
When can you reuse a rubber drain plug gasket?
When it still looks OK; replace it if it looks torn or crushed.
02:20
What are the two main styles of oil filters?
Canisters (twist-on) and cartridge filters.
02:50
Why should you lubricate the seal of a new canister-type oil filter?
So it doesn't become a struggle when, it'll be very difficult to remove the next time.
03:10
After adding fresh oil, how long should the engine run to circulate it?
About 10–15 seconds.
04:07
How long should you wait after shutting off the engine before checking the oil dipstick?
About 2–3 minutes.
04:07
What indicates a correct oil level on the dipstick after an oil change?
The oil level sits between the hash marks and close to the hash-the-top line.
04:20
Dealership upsell cautionary skit
The humor drives home why DIY matters: avoiding surprise charges and unnecessary service flushes.
00:15Never drain the transmission
Calls attention to a beginner's worst mistake, distinguishing engine pan from transmission pan.
01:22Counterclockwise & the gasket check
Reinforces a nearly universal fasteners rule and exposes the need to inspect the soft partss before reassembly.
02:06Snug, never too tight
The simplest safety tip for the drain plug writes into the exact cause of many stripped oil pans.
02:34Lube the filter seal
Few mins-of-silent maintenance hacks that save the next person 20 minutes of wrenching.
03:10[00:02] Changing the engine oil in your vehicle is one of the most important and necessary procedures Whether you have a car, a truck, a van, or an SUV, the basic principles are the same
[00:15] Why would you want to do it yourself? You're not going to save a ton of money, but doing it yourself, you're going to have peace Excuse me, sir.
[00:28] Your oil change is almost done, but we did notice a few other things. The steering wheel does get hard to turn at times and it makes noise, so we could flush And since we're doing that power steering fluid flush, we could also include a transmission
[00:41] Items you're going to need are oil and oil filter. Based on your vehicle, you may need an oil filter socket, cup, or strap wrench. To get the drain plug off, you're going to need a wrench or a socket and ratchet.
[00:56] Also, gloves and rags. If you need any of these tools, check out 1aauto.com.
[01:08] We're going to want to look at our engine and determine which side of the engine bay the engine is on, especially if you have a front wheel drive vehicle. The engine is more on the passenger side on this vehicle, the transmission is on the driver's
[01:22] So when we're underneath the vehicle we're going to make sure we drain the oil from the Don't drain the transmission by accident. The fill cap is right there and it says what kind of oil to use, 5W-30 for this vehicle.
[01:39] If you have a truck or a Jeep or something that you can get underneath, you don't have But if you have a vehicle that's really low, something like this, you're going to have
[01:53] When raising the vehicle, you want to make sure you use the proper jacking locations on the vehicle and you want to be on a solid level surface and you don't want to be in Make sure you remove the drain plug counterclockwise.
[02:06] You do not want to tighten it by accident and damage the pan. So you're going to want to look at your drain plug, make sure the threads look pretty good. And also keep in mind the gasket.
[02:20] If the gasket looks like it's torn or crushed at all, you're going to want to replace it. Sometimes you'll have a metal gasket and it's a good idea to replace the metal ones every But with the rubber ones, as long as it looks okay, you can just reuse it.
[02:34] Take our wrench and once the drain plug is snug, I'm just going to snug it up a little You don't want to over tighten it or you could damage the oil pan.
[02:50] Some filters are underneath the car near the front of the engine, some of them are in the rear of the engine, and some of them are on the side near the wheel well. You have the canister or twist-on type filter, or you have the cartridge filter.
[03:10] With the canister type filter, you're going to want to make sure you lubricate the seal on the outside with oil, otherwise it's going to be very difficult to remove the next time And when you're installing these types of filters, once it's snug, you give it another
[03:25] This is where you're going to use your oil filter removal tool. You're going to either use the oil filter socket tool for the cartridge style. Sometimes you'll need a cup for the cartridge style.
[03:39] Also for the canister style, if you have the correct cup, that will work for that as well, Now that you've drained the oil and changed the filter, it's time to add the oil. I prefer synthetic oil.
[03:55] Check your owner's manual for the amount and the type. Now we're going to start the car for about 10 to 15 seconds and get the oil where it
[04:07] After shutting the engine off, let it sit for about two or three minutes and then we're We're going to wipe off the dipstick first, reinsert the dipstick, and then pull it out,
[04:20] So you want to make sure the oil level is in between these hash marks if you just changed it, and then you want it up closer to the top of it, which it is. We don't have to add any.
[04:35] If the oil level is a little low, you can add some more and then recheck it. I hope you enjoyed this video and it gave you the confidence to do it yourself.
[04:47] And as always, if you need any parts for your vehicle, check out 1aauto.com.
⚡ Saved you 0h 04m reading this? Transcribe any YouTube video for free — no signup needed.