
Prius Hybrid Battery Replacement: Save $4,000!
58sThe massive cost savings and DIY aspect hook viewers immediately, appealing to budget-conscious car owners.
▶ Play Clip"Delivers exactly what the title promises: a detailed, hands-on guide to replacing a Prius hybrid battery with an upgraded pack."
This video provides a comprehensive, step-by-step guide to replacing a failed hybrid battery in a third-generation Toyota Prius (2013 model) with an upgraded aftermarket battery pack. The presenter demonstrates the entire process, from diagnosing the battery failure to installing the new pack and testing the car, emphasizing cost savings and improved performance.
The presenter introduces the project: replacing the hybrid battery in a 2013 Prius. The car was purchased for $2700 due to a bad battery. Replacing it with an aftermarket battery from Electron Automotive costs about $2200, saving $1000 over OEM, and doing the labor themselves saves another $1000. The upgraded battery also offers better regenerative braking and a 3-year/45,000-mile warranty.
The presenter emphasizes the importance of choosing a reputable aftermarket battery company. He shares his positive experience with Electron Automotive, having used their battery in a Gen 2 Prius over four years ago with no issues. He recommends them based on his personal success.
Symptoms of a failing hybrid battery include a red triangle warning light on the dashboard and reduced fuel economy. The definitive diagnosis is done with an OBD-II scanner, which revealed codes P0A80 (replace hybrid battery) and P3011 (Block 1 weak). These codes confirm the battery needs replacement.
The hybrid battery is located in the rear of the car. To access it, the trunk liner and cargo tray are removed. The presenter also removes the 12V battery negative cable for safety before working on the high-voltage system.
Several interior trim panels must be removed to access the battery. The presenter shows the location of hidden bolts and clips, including a 10mm bolt behind a plastic trim piece. He also notes the importance of checking for a battery cooling fan filter, which can become clogged and cause overheating.
The presenter demonstrates how to remove and clean the battery cooling fan filter. It is located on the side of the battery and can be pried out with a tab. Cleaning it with running water and reinstalling it helps prevent the battery from overheating.
Before removing the battery, the presenter applies epoxy to a plastic clip that was broken, and uses a non-porous surface to spread it. He clamps it to hold it tight while it cures. This ensures the clip will be ready for reinstallation.
The presenter removes the battery cover, which houses the electronics. He emphasizes the importance of removing the safety plug first to disable the high-voltage system. He also disconnects the orange high-voltage wires and the temperature sensor harness.
After disconnecting all electrical connections and removing the 12mm bolts, the battery is lifted out of the car. The presenter notes that the battery weighs about 90 lbs and suggests using a helper or a jack for safety.
The presenter mentions that you can either replace the entire battery with new cells preinstalled (costing about $500 more) or replace just the cells. He chooses to replace the cells to save money and show the process.
The battery case is opened by removing four nuts on each side. The presenter notes that if the battery hasn't been opened before, there will be a plastic plug in one of the holes that needs to be popped out.
The busbars (metal connectors) and their covers are removed from the battery cells. The presenter uses a power tool to speed up the process but shows it can be done by hand. He also removes the orange high-voltage wires and the temperature sensor harness.
The battery case is flipped over to access the bolts holding the cells in place. All 14 bolts on each side are removed, allowing the case to be separated from the old cells.
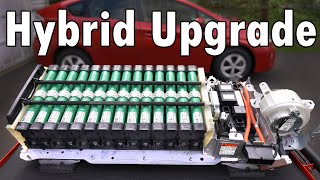
The presenter installs the new prismatic cells, which are numbered 1-14 and must be installed in order. He uses a piece of wood to elevate the case for easier access. The new cells have an air gap for better cooling, which is important because heat is the number one killer of hybrid batteries.
Before installation, the presenter wraps the battery posts with electrical tape to prevent shorts. He also mentions that the new battery includes protective wire loom.
The cells are installed in order from 1 to 14, with the wider ones on the bottom. The presenter emphasizes that the cells are matched and balanced, so they must be installed in the correct order.
The cells are locked together with metal rods, and the case is placed over them. The presenter notes that the bolts should be torqued to 54 in-lb, not ft-lbs, to avoid damaging the battery.
The presenter uses a torque wrench set to 54 in-lb for the case bolts and 66 in-lb for the cover nuts. He emphasizes the importance of using the correct torque to prevent damage.
The presenter connects the new busbars and wiring harnesses. He explains that each cell is about 15.7V, and the total voltage is around 220V. He also connects the voltage acquisition wire and the safety switch wiring.
The busbar bolts are torqued to 54 in-lb, and the busbar covers are installed. The presenter also installs the temperature sensors on the top of the battery.
The temperature sensors are placed on the battery cells, with one on cell 8 and one on cell 13. The presenter clips them onto the metal rail and connects the wiring harness.
The battery case is put back on, and the four nuts are torqued to 66 in-lb. The presenter also reminds viewers to check the cooling fan for dust and clean it if necessary to prevent overheating.
The presenter demonstrates how to clean the cooling fan, emphasizing the importance of not letting it spin while cleaning, as it could generate electricity and cause damage. He uses a vacuum and a brush.
The battery is carefully placed back into the car, using cardboard to slide it into position. The presenter applies thread locker to the bolts and torques them to 14 ft-lbs.
The presenter reconnects the inverter wires and torques them to 80 in-lb. He also connects the three connectors and the safety plug, ensuring they click into place.
The presenter reinstalls the interior trim pieces, including the side panels, vents, and floor tray. He also reconnects the negative battery cable.
The presenter starts the car and observes that the dashboard shows no warning lights, and the battery is charging. He takes the car for a test drive and reports excellent performance, with fuel economy around 50 MPG.
The presenter summarizes the costs: $2700 for the car, $2200 for the battery, and $100 for hubcaps, totaling $5000. The car is now worth about $8000, providing a significant profit. He encourages viewers to like and subscribe.
Replacing a Prius hybrid battery is a challenging but rewarding DIY project that can save thousands of dollars. With careful attention to safety and proper procedures, an upgraded aftermarket battery can restore the car's performance and fuel economy, making it a worthwhile investment.
What are the diagnostic trouble codes that indicate a bad hybrid battery in a Prius?
P0A80 (replace hybrid battery) and P3011 (Block 1 weak).
02:47
What is the approximate cost of an aftermarket hybrid battery for a Gen 3 Prius?
About $2200, saving $1000 over OEM.
00:44
What is the first safety step before working on the high-voltage battery?
Disconnect the 12V battery negative cable.
03:57
What is the function of the safety plug in the hybrid battery?
It opens the circuit to prevent voltage flow when removed.
12:03
What is the torque specification for the battery case bolts?
54 in-lb, not ft-lbs.
25:13
Why is it important to install the new battery cells in order from 1 to 14?
Because the cells are matched and balanced.
22:30
What is the approximate voltage of the entire hybrid battery pack?
Around 220V.
25:52
What is the number one killer of hybrid batteries?
Heat.
21:26
What should you do to the cooling fan before cleaning it?
Hold it in place or use a vacuum to prevent it from spinning and generating electricity.
32:03
What is the total cost of the project including the car, battery, and hubcaps?
$5000 ($2700 car + $2200 battery + $100 hubcaps).
39:12
Cost Savings with Aftermarket Battery
Shows a significant cost reduction compared to OEM, making the DIY project financially attractive.
00:44Diagnostic Trouble Codes
Provides specific OBD-II codes that clearly indicate a failed hybrid battery, enabling accurate diagnosis.
02:47Safety Plug Design
Highlights an important safety feature that prevents electric shock during battery service.
12:03Heat is the Number One Killer
Emphasizes the critical role of thermal management in hybrid battery longevity.
21:26Torque Specifications
Stresses the importance of using correct torque values to avoid damaging the battery.
25:13[00:00] the entire process of how to replace on my Generation 3 Prius. and this is my 2013 Prius I just purchased.
[00:15] because, well, it has a bad hybrid battery. the car will be fixed and it'll be worth about $8000, Now, this Generation 3 Priuses are getting up there in age
[00:30] these batteries to fail. And when they do fail, from a local dealership to replace the hybrid battery So we're talking a lot of money here.
[00:44] an aftermarket battery pack from Electron Automotive. This is about $2200, saving us $1000 over OEM, with common hand tools ourselves, saving us $1000 in labor,
[00:58] And the best thing is, this is an upgraded battery pack. and also, when you're using the regenerative breaking, Plus, we have a 3-year 45,000 mile warranty
[01:12] Now the most important thing when getting an aftermarket And I've actually used this company before. the hybrid battery on over four years ago
[01:27] It's a Gen 2 Prius, so 2004 to 2009, to that video below. to bring the car by real quick is because the proof
[01:39] no hybrid battery issues. So I've used this company before with good results recommending them to you guys.
[01:53] and making these high quality battery packs That way, we could fix these cars instead So all these tools and products I used
[02:06] that way you could easily find it. and let's go get started. let me show you real quick how to tell
[02:18] is it clearly lets you know that the battery is bad. at the dashboard, Additionally, you'll notice that the fuel economy
[02:32] but with the new battery, I bet we could get over 60. And finally, the best for sure way to know an OBD-II scanner like this, that way we could scan
[02:47] into this port right here. just open up the app on the phone and scan the codes. we have P0A80, that says to replace
[03:02] P3011, saying Block 1 is weak, So if you see codes like this, you could be pretty confident So now we know for sure the hybrid battery is bad.
[03:15] Now, the hybrid battery is located in the rear And just to give you an idea, the hybrid battery First, let's remove the trunk liner,
[03:30] followed by the cargo tray. our hybrid battery right here. But before we do anything else, once I could see
[03:44] So all you have to do to remove it, and that comes right out just like that. so now the battery is safe to work on.
[03:57] So with that removed, now let's go So pop this tray out, as well as this little side panel Now I'm using a 10mm wrench to loosen up the negative cable.
[04:10] And with this loose, we could disconnect it So with our battery disconnected, So remove the lid, and then there's a plastic nut
[04:24] With that out, now let's head over This just pops out. And that quickly, we almost have access
[04:37] We have this interior piece right here But before we do that, there is a hidden bolt And then we have our side interior piece,
[04:50] So let's get this top piece off first, and let me show you where that hidden bolt is And this is a 10mm bolt, so let's break this loose,
[05:03] So now with our rear bolt removed, and we could pop this plastic trim piece out. under the plastic and you want one good strong pull.
[05:17] So now you could clearly see the battery this side panel here. we're going to sneak around to the passenger side
[05:29] And to do that, it's going to be hard to see, and there is a bolt down there that you need to remove. with an extension,
[05:43] the rest of the way so you don't drop it right here with the vent, we're going to lift upwards at the top outwards like that,
[05:58] So with the trim piece removed, you could see we have If you have a Prius, check to see if you have And if you don't, all this stuff
[06:10] into your electric fan and it could cause That's expensive. make sure you check and see if you have a filter.
[06:25] in the description to where you could find one. your battery getting hot. it's worth checking to make sure it's not clogged up
[06:38] Now on the side of the filter is a little tab, you could carefully pry the filter out, Now to clean the filter, just use some running water.
[06:51] and hit it from the other side. And once this is clean, just give it a good shake So just reinstall it the same way it came out.
[07:05] Just get that filter tab into the hole. Beautiful! and now we could remove our side trim piece.
[07:19] to pop off this trim piece. And now we could remove our side panel, We have one right down here, we have one right there,
[07:33] So let's get those removed. and loosen this 10mm bolt and remove it Then, right above that is the cargo net tie down
[07:45] And with that removed, let's remove the fastener into the hole here and pry it out like so. is this tie down right here.
[08:00] And then, we could loosen it the rest of the way now we could pop this panel out, So now we just have to peel back
[08:14] we could work our fingers behind. So that's the plastic clip right there and not on this material because you could rip it off.
[08:29] Somebody on this and rip that clip off. has been in here. or something or tape, whatever this is,
[08:45] So I think somebody might have been inside So we're going to have basically But I'm curious to see what's inside,
[08:57] Now just work your way along the top of this panel, and the seatbelt slides right out. And with that removed, now we have plenty of room
[09:12] But before we remove the battery, to our interior trim piece, that way we give it'll be good to go.
[09:25] And always use a non-porous surface like that, until it's one uniform color, which takes about 10 seconds
[09:37] because this hardens pretty quickly. and sprea it out like so. So let me get this on the same position,
[09:50] And finally, clamp this down to hold it tight So as we let that cure, let's go back over and we'll start right on this side.
[10:02] this clip right here. and then pry up until it pops out. Next, we have this white plastic piece
[10:15] So push the plastic off the clip, and it'll come right off. that we need to remove from this cover.
[10:29] so you're going to need to use an extension a stick magnet makes this really easy. And then finally, there's one last nut right here.
[10:43] And all that's left is this right here, It cannot be removed without a special tool. are exposed wires.
[10:57] without your safety plug removed. all the voltage to the battery. right there, you could see there's a peg.
[11:09] that way we could remove the safety fastener. then you give it about a quarter of a turn So that's a really good design to make sure
[11:23] And now's probably a good time for me to explain the nuts, the bolts, when I go to reinstall them This is just the beginning and we already have a bunch.
[11:36] with a note card in it and just label everything. and then I'll put it right in this bag. to reinstall everything where this goes.
[11:50] So now we could remove our cover, which is all the electronics for our battery. are these two wires.
[12:03] from our battery and bring it to the inverter Now normally, these two wires have a lot and when our safety plug is plugged in.
[12:17] it opens the circuit here so there's no voltage flowing And just in case you want a little bit of extra piece of mind you could grab your multimeter and you could take
[12:32] you could take your positive lead right here, there are no volts at all running through the system. So break both of these 10mm nuts loose
[12:47] of the way by hand, they could touch metal without any problem So tuck them out of the way like that,
[12:59] So with our high voltage wires disconnected and tucked off this black duct work that connects to our fan here, There's also a couple of wires that go over here
[13:13] and then we have some wires with pigtails to remove our battery. and pry it apart,
[13:25] Next, we have two retaining clips right here. And then, next clip right here has a little tab and then that clip could slide right off like that.
[13:38] And the easiest way to remove this the two ends of the clip, and that makes it pop out now let's disconnect them from the connectors.
[13:51] Same with the connector here, So with those wires removed, all that's holding this battery in There's two in the front, there's one right there,
[14:05] in that corner. So all of these are 12mm bolts, So break it loose, and then you could remove it
[14:19] So break that loose. Now, the next two bolts are in the back corner here. the rear seat down and the bolt is different
[14:33] for when we go and reinstall these later on. And you could see, the shorter one is the one So with these two bolts removed, let's come over
[14:46] Again, both of these are 12mm And to remove them, a stick magnet works wonders Now we have our last bolt right here.
[14:59] Now, the battery is completely disconnected First, let's get all six of those bolts we just removed Good.
[15:13] that way it's easy to slide the battery out. Then, go to the other side and pull it out a little more. this 90lbs battery.
[15:27] if you really need to. all the old cells that we'll pull out Once the new cells back in, we'll wire it back up,
[15:43] Now real quick, I do want to mention, with brand new cells preinstalled, It does cost more money about $500 more,
[15:58] you're uncomfortable with digging into the battery I'm about to show you how to do it right now So there are four nuts on this side of the case
[16:10] Now real quick, something that I noticed and in this hole should be one of these somebody's been in this battery
[16:23] So in your battery, if it hasn't been touched, so just pop it out. of the battery and remove the other four nuts.
[16:36] and four. Okay. So with the cover removed, that makes the entire hybrid battery.
[16:49] the busbar. on this side. and just pry it at the top like that and it should come
[17:03] So with the covers removed, you could see onto each individual battery cell, And if you have power tools, now is the time to use them
[17:17] really quickly with this. to show you could get it done with just this. And again, if you have power tools,
[17:30] But as you could see, you could still get in your used nut and bolt jar So now let's pull the orange busbars
[17:44] from this side of the battery. We're going to remove that completely in a second. So pry off all the busbar covers
[17:56] And again, remove all 28 8mm nuts. to do this by hand and only about a minute So now we could remove the busbars.
[18:09] so just pop it out. So with the busbars removed from both sides of the battery, we could just tuck this off to the side
[18:23] And then, we want to take our old busbar wiring, So just use a small flathead screwdriver Same for the other one.
[18:37] and remove both of the orange wires. So depress the tab and pull it out. our high voltage busbars.
[18:52] with the new battery. from the battery. there is one right there, there is another one
[19:04] And to remove the sensor, just pinch each side inwards and save this 'cause we're going along with the other wire holder.
[19:18] could be removed, again, with its wire holder. And then, this top wiring harness So let's remove the top one to get easier access.
[19:31] And then, there's one more temperature sensor And now the whole temperature sensor harness from our battery.
[19:45] And to do that, we need to flip this case over. so carefully flip this. And just flip this over completely like this.
[19:59] this bracket right here which is covering So remove all eight fasteners holding this bracket in. to all 14 bolts on this side, as well as the 14 bolts
[20:17] So let's remove those. and you want to crack each bolt loose use them so it's quicker.
[20:30] grab your Phillips head screwdriver So unscrew all the bolts on this side. So with all the bolts on this side removed,
[20:44] So quickly unscrew these bolts as well, So with our battery removed, now what we're going to do and slide in our new cells.
[21:00] A trick here is to use a piece of wood to elevate loose back here. So crack all four of these bolts loose,
[21:12] the end cap off. and the old prismatic cells. and the cylindrical cell technology is current.
[21:26] is you could see the air gap in here. and that allows it to cool better Now, heat is the number one killer
[21:39] which is a big benefit. charge quicker with regenerative breaking So now remove all the old cells
[21:52] of the bracket. so we could get our core charge back. of protective wire loom and this is included
[22:04] The reason why you want to do this that way it doesn't cost any shorts just in case it's a little sloppy so grab some electrical tape
[22:17] So just get a couple of wraps around the end All right. on all four of these posts. They're all nicely taped up
[22:30] So let's go and install our brand new battery pack. from 1 all the way to 14. because these batteries are matched and balanced
[22:43] So with that said, let's get these installed. our bracket properly. We want the wider ones on the bottom
[22:56] that way it's easier to slide the batteries in All right. So we're going to start or drop them because you can damage
[23:10] Next, we have batteries 4, 5, 6, and 7. And finally, we have 12, 13, and 14.
[23:22] We just want to make sure they go from 1 all the way So you could see, here's the two metal rods. It's even through the whole battery pack,
[23:36] So all the cells are flushed against each other, So the rib side goes up against the battery And we want to torque each one of these down
[23:51] So with the battery cells locked together, Then we could get the battery case that goes on the open end of the case.
[24:05] on the computer side of the case. Okay. So with our case on our battery, in the battery line up with the holes in the case,
[24:17] you could shift the case around to get them and then the rest of this will line up as you thread in And if we take a look at the other side,
[24:30] all those bolts. If you want to do this job without any problems at all, where everything goes and keep it in order
[24:45] you're not trying to figure out which nut or bolt So we have our case to battery bolts, Now I'm going to quickly speed through
[24:58] but just make sure you hand tighten them all Let's come to the other side and let's get these bolts in. And now we want to get our torque wrench
[25:13] and set it to 54 in-lb. Not ft-lbs, in-lbs. and also make sure, again, it's 54 in-lbs, not ft-lbs, right out and that'll damage the battery.
[25:27] and I have this baggie so I could stay organized And just get these hand tightened in there to 66 in-lb.
[25:40] so we could finish up the install, So next, what we want to do is connect So each of these cells is about 15.7V,
[25:52] it's around 220V. brand new busbars, and they go right up and on the other side.
[26:04] the new bolts that came with the kit. you don't want to tighten down the bolts all the way just yet And right here we don't need a busbar
[26:17] But we do need to get this last busbar in right here. now we could come around to the other side Now both of these ends don't get busbars
[26:30] So just connect the busbars to all the other batteries the reason why we kept them loose is which are these right here. They connect to each
[26:42] if the battery's depleted, if it's fully charged, So this wiring harness plugs right into the computer in the wire holder on the bottom,
[26:57] Now, there are two main wires here, The shorter one stays on this side which is closer, So for the voltage acquisition wire
[27:09] of the battery, we don't want to just run it that overtime could cause issues against this metal bracket. through the white wire loom protector,
[27:22] and run it around the corner to the other side grab the small orange wire that we removed before The shorter wire goes here. They can't fit in
[27:37] And then, let's put this in this white wire holder. Now the other orange wire is still connected So you could see it right down here,
[27:51] And then we could separate it, keep our wire here, So let's connect this wire right here. Good.
[28:06] to our first battery right there, and our long one runs So let's get this all wired up. on the bolt, and then bolt up
[28:20] And we'll torque this down in a second. And notice how I'm holding the wire Keeping this pointed down will help keep everything nice
[28:33] for each busbar, on either side, just make sure And finally, we have our last blue one right here
[28:47] And now we could torque each of these down to 54 in-lb. But first, let's tuck the acquisition wire harness
[28:59] so it's neat and organized. as well, that we could push it into. and then the wider ones go on the rest of these.
[29:12] So get all the busbar covers on. It's covered with the busbar covers Let's flip over to the other side and finish wiring
[29:28] Each wire end goes on one of the busbars, And now for the safety switch wiring, And now the two wires line up to the batteries like this.
[29:42] and then get that acquisition wire And that's all there is to wiring our safety switch. And now we could torque down all the busbar bolts
[29:55] And then, we could get the busbar covers And just like that, we are done wiring in our temperature sensors which go on the top,
[30:10] and get this battery back in the car and test it out. no. 8, and no. 13. that way when you push it on the battery,
[30:25] Now get the other two sensors on. and this clip right on to the metal rail So let's get the other two clips in place
[30:39] Good. So now there's one last temperature sensor So get it down there and push it in to the bottom spot on the computer,
[30:54] Then finally, let's connect the other connector Now our case could go back on. that way we don't forget to tighten anything.
[31:07] that get torqued to 66 in-lb. from the case. Let's real quickly come around to the other side
[31:20] Again, these four nuts get torqued to 66 in-lb. our brand new battery in our car. check your fan to make sure it isn't covered in dust.
[31:34] that filter so we don't have any dust in here, you're going to ruin your brand new battery that's clogged up, I grabbed this fan
[31:49] and check this out. So you need to make sure you clean that out. might overheat.
[32:03] Now, when you're cleaning this out, it's very important, because if you let this fan spin, You could actually do a core exchange
[32:17] or if you want, just hold the fan in place or use a vacuum. Something like that. Okay. So let's carefully get our brand new
[32:30] making sure we don't damage anything. just walk the battery back and forth along the cardboard And once in place, remove the cardboard pieces,
[32:45] Get some medium strength thread locker on the bolt And do the same thing for the other bolts as well. we have two more bolts in that corner
[32:58] And remember, the shorter bolt goes And the longer bolt goes into the other bolt hole and get these two bolts in.
[33:11] and just hand tighten both of these bolts down. to 14 ft-lbs. and we want to grab the wires that go
[33:25] then we'll attach the wires down here. and then we'll test this out. Then we could get the inverter wires on the posts
[33:38] and torque them down to 80 in-lb. these three connectors. a nice click.
[33:51] and grab your baggie with all the fasteners for this. securing the cover to the battery and torque them all down to 66 in-lb.
[34:03] And now we're done. and start installing interior pieces and vents We have the cover on here, we have our safety fasteners in,
[34:16] and it just pushes in, then you close the lever, And one thing I want you to keep in mind, so the unlock disappears.
[34:31] So with that safety plugged in, I also connected All right. Moment of truth.
[34:43] I'm going to hit that start button, turning the battery on and we should see So let's give it a try.
[34:57] or anything on the dash which is good. it's charging up the battery which is great. meaning, the battery is charged up enough
[35:10] And we know everything is working, right? So let's go install the rest of the interior. to remove this if we don't want,
[35:22] around the battery. Now let's go get some of the vents installed So first, get the wire harness clips
[35:35] Then, let's add that fan filter and vent Then, we could add our white cover And then push it right here to snap it into the battery.
[35:49] And finally, with all the vents and everything installed, And if you remember, we did epoxy that plastic clip and our clip is good to go.
[36:03] So just push in at the top of the panel around the panel, getting it in place like so. for the interior.
[36:17] we have the silver tie down, we have the plastic piece, another silver tie down there. and snug it up.
[36:29] Then under the seatbelt, push that plastic clip in. snugged up. now let's come around to the passenger side here
[36:42] So get the vent in place like this So now we need to install this black 12mm bolt, in our socket like this, the angle we have
[36:56] behind the seat. If it falls out down here, and just put it over the end of the socket closed off.
[37:10] Just like that. Now the bolt is Then, we could carefully get the bolt in the hole Perfect.
[37:24] So get the floor tray lined up and push it down that way all the clips snap in. to tighten down right about here.
[37:39] Then, let's get bolt seats back up so let's get this in. Now snug up the negative battery cable
[37:53] and it just snaps into place. followed by this bucket in the corner here Then, the battery cover in the other corner.
[38:06] followed by our floor lid. Let's go for a quick test drive and see what kind Okay. So for the test drive, I'm taking a trip down
[38:19] to all the red lights and stop signs. I'm going full electric mode as much as I can as well, This trip to the beach is a little over 20 miles
[38:34] we have city driving, so it's a good mixture And this car is performing amazing. That slipping in the transmission
[38:46] Also, you remember when the engine shut off, It's nice and smooth. And check this out. You're not going
[38:58] which is incredible. but typically expect to get between 40-50 MPG and we have no more trouble codes,
[39:12] And that's everything you need to know We got this car for $2700, we spent $2200 and we put about $100 in hubcaps
[39:27] So for $5000, we have a car that's worth We could easily get $8000 for this if we find and they'll have an amazing car that gets great fuel economy,
[39:41] Just look at this car. If it was, remember to give it a thumbs up. And as always, all the tools and products
[39:54] so you could easily find them.
⚡ Saved you 0h 39m reading this? Transcribe any YouTube video for free — no signup needed.