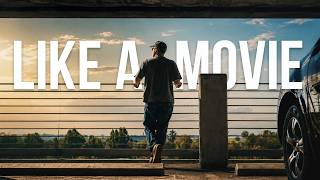

Why You DON'T Need a Big Camera for Cinematic Vlogs
40sChallenges the common belief that expensive gear is necessary for cinematic quality, surprising viewers.
▶ Play Clip"Delivers exactly what the title promises with concrete, actionable steps and minimal fluff."
This video provides a five-step guide to filming cinematic vlogs solo using the compact Insta360 Luna Ultra. It covers thinking in scenes, obtaining proper coverage, using key accessories, optimizing camera settings, and encouraging experimentation.
The host explains that compact cameras like the Insta360 Luna Ultra can produce cinematic results, replacing bulky mirrorless setups.
Instead of random clips, plan sequences of shots that tell a mini story. Show examples of random vs. intentional sequences.
To build sequences, capture wide shots (establish scene), medium shots (add detail), tight shots (focus on specifics), and creative angles (add energy).
SmallRig suction cup mounts to smooth surfaces, a sturdy tripod provides stability, super clamps with articulating arms offer versatile rigging, and ND filters (ND64, ND16, ND4) control light for proper shutter speeds.
Shoot in 4K at 24fps (or 25fps for PAL). Set shutter speed double the frame rate (e.g., 1/50 for 24fps). White balance at 5600K, exposure compensation at -0.3, and color mode I-Log for maximum grading flexibility.
Focus on composition and coverage rather than gear. Get a wide, medium, tight, and creative shot for each activity to instantly improve cinematic quality.
By following these five steps—thinking in scenes, ensuring coverage, using minimal accessories, setting proper camera parameters, and experimenting—you can create cinematic vlogs with a compact camera like the Insta360 Luna Ultra.
What are the four shot types needed for cinematic coverage?
Wide shot, medium shot, tight shot, and creative angle.
02:36
What shutter speed should be used when shooting at 24fps?
1/50 second.
09:46
What is the purpose of ND filters in video?
ND filters reduce light entering the lens, allowing you to use the correct shutter speed (double the frame rate) even in bright conditions.
07:39
What color mode does the host recommend for maximum flexibility in post-production?
I-Log, a flat picture profile that retains highlight and color information.
10:36
Think in Scenes
Shifts mindset from random clips to intentional storytelling, a fundamental principle of cinematic editing.
00:55Coverage with Four Shot Types
Provides a practical, structured approach to capturing sufficient footage for a sequence.
02:36ND Filters Enable Proper Shutter Speed
Explains why ND filters are essential for achieving the cinematic look in bright conditions.
07:39Use I-Log for Color Grading
Highlights a pro-level technique for maximizing image quality in post-production.
10:36Experiment with Compositions
Encourages creative exploration beyond technical settings, emphasizing artistry.
11:17[00:15] >> So, how do you film cinematic vlogs by yourself? Let me show you. >> So, over the years if I wanted to film a cinematic video, I would have to bring a full-on mirrorless camera with a super big and bulky lens on the end of it and
[00:30] a full-on tripod just to get anything that resembles cinematic in any way. But, now what's wild is these really tiny portable cameras, even as something as simple as the Insta360 Luna Ultra, which is what I'm using for this entire
[00:43] video today, can produce incredible cinematic results. So, in this video, I'm going to show you how to film cinematic vlogs by yourself in five easy cinematic vlogs by yourself in five easy steps.
[00:55] to do is start thinking in scenes instead of just random shots. And one of they start vlogging is they start just filming a bunch of random clips that are maybe kind of fun and even might look really beautiful and cinematic, but the
[01:10] about how those shots are going to relate to each other to create sequences inside of your edit. For reference, let's watch this sequence of just some random shots that I compiled together. >> [music]
[01:33] really tell a story. They're just random individual clips that don't really mean back-to-back. Now, let me show you a few scenes, which are actual sequences of multiple kinds of shots that you can play back together in your timeline to
[01:47] create a story. >> [music]
[02:09] of them feels intentional, like the shots relate to each other, and the other one feels kind of random. So, if I'm trying to make my vlog cinematic, the first thing I will do is ask myself, what are the kinds of scenes or
[02:21] inside of my edit, and make sure I get a handful of shots to build a mini story. videos, the next step is to think about coverage. And coverage is really just
[02:36] capturing enough different camera angles and shot composition types to be able to fill out your sequences in your editing timeline. So, there are four kinds of shots I try to prioritize when I'm out filming to get myself enough coverage
[02:50] for post-production. The first shot type is called the wide shot. And really, wide shots just establish your scene, and it gives the viewer context for where you're even filming in the first place. Wide shots are great for
[03:03] capturing those nice landscape shots, and honestly, for me, wide shots are shots you can get if you do it right and set up your camera properly. The second shot type is the medium shot, sometimes called the mid shot. And these kind of
[03:16] add a little bit of extra detail from what a wide shot isn't able to capture. really well. The typical focal length for this is somewhere between like 35 mm or 50 or 60 mm. Like on the Luna Ultra, there's a 3x zoom telephoto lens, and
[03:33] just having the camera in 3x is like the perfect kind of mid shot right at 60 mm. The issue with mid shots though, or it's really easy to capture a ton of these, bunch of mid shots to work with, and that's not ideal. You want to have a
[03:47] variety of really wide shots, and also some even tighter shots, and not just focus only on mids. Now, the third shot type is called a tight shot and this little bit more. So, maybe this is you physically moving your feet closer to
[04:00] objects to get tighter compositions or even using zoom. So, like the Luna Ultra has two cameras, one of the lenses can zoom in pretty tight up to like 12x zoom digitally to capture this tighter details. And the fourth type of shot I
[04:14] try to get when I'm vlogging are what I call creative sorts of angles. Just a little bit of creative flow or energy to them are really important to capture. camera through some foregrounds or a doorway where you're actually moving
[04:29] nice about the Luna Ultra is it's on a gimbal. So, you're actually able to move get some really beautiful push-ins or pull-outs. There's also tracking shots which are cool because the Luna Ultra has built-in AI tracking. I can just
[04:43] click on the screen and tap my face and now the Luna Ultra is tracking me kinds of shots with a traditional setup like this with a mirrorless camera and a tripod would be impossible because I don't have a camera operator with me if
[04:56] I'm filming myself. But, the Luna Ultra can do it because it's on a gimbal that swings around left and right and has that built-in AI tracking feature. So, cinematic, try using these different shot types to get better coverage for
[05:09] your videos. Now, let's talk about some gear that's more cinematic as you rig out your camera in different ways to get better didn't start the video talking about gear because honestly, if you just had a
[05:22] camera like the Luna Ultra or your smartphone even and you use these setting up scenes, your videos are going to look fantastic. But, there are some tools that really do help you rig out your camera and position it in new ways
[05:35] first item that I've been using a ton lately is this SmallRig suction cup is. It's a suction cup and it can mount to smooth surfaces. So, tables or bedroom, or your living room, or even like stop signs, street signs, all these
[05:51] things. If it's a flat, smooth surface, it's able to mount directly to this. All you do is you push down on this little lever, and it will create suction. And it as well that you can mount the Luna
[06:03] been my go-to rigging solution lately. As long as there's a smooth surface around, like it doesn't work super well on really textured surfaces, like walls They do have like some motorized versions of this that do work with
[06:17] particular, it's really affordable, and it's really designed for only smooth surfaces. Now, the next thing you absolutely need is a basic tripod, and the Luna Ultra actually has some built-in tripod feet to its base plate,
[06:29] you get that combo kit. Both of those options will have a built-in tripod to like almost like little paper clips. It's not the most sturdy thing, so I would purchase maybe a second mini dedicated tripod. These things are
[06:43] really affordable. There's just a little quarter 20 thread you can screw onto the have a more sturdy base. Another interesting accessory I find myself using pretty often are these super clamps from SmallRig, and they have
[06:56] styles as well. Sometimes they're called just regular clamps, C clamps, or super and figure out which one is right for you. But, the way I use these is because clamp onto really any surface. And then a lot of times they'll come with an
[07:12] articulating arm, and then at the end of that arm it has a quarter 20 thread. And end if you want to. Or you can attach an additional clamp to the end of the clamps, and you can rig your accessories or your cameras in a variety of ways
[07:27] that a regular tripod or just one clamp wouldn't allow you to do. Another thing I use all the time are ND filters, which stand for neutral density. All that is is basically a little darkening mechanism, piece of glass that you put
[07:39] that blocks out light from hitting your camera sensor, so you can shoot at the settings in just a minute, but just know it's really great to have some ND filters on hand at varying intensity levels as well. Like right now, I'm
[07:53] actually filming with an ND64 cuz it's a very bright sunny day outside today, but sometimes you want a lower ND level like ND16 or ND4. Both of those are pretty common. And the NDs I'm using for this video is a three-pack from Insta360.
[08:07] below. And honestly, my goal when I'm vlogging is to have as few of bringing out with me because first of all, it just makes your bag super heavy. around all those accessories. And then secondly, it reduces decision fatigue
[08:22] the 17 different ways I can rig up my camera right now. That's kind of annoying to me. I'd rather just have it simple. One tripod or one little suction cup mount with an ND filter, and I'm good to go.
[08:36] for filming cinematic vlogs are the basic camera settings that are important that cinematic look and feel. And there's just a few that I'm going to put kind of screenshot and understand these are my exact camera settings that I use
[08:51] in the Insta360 Luna Ultra to achieve all of the results that you've seen in resolution, and pretty much all the footage in this video is actually only 4K resolution even though the Luna Ultra can shoot in 8K resolution. Oftentimes,
[09:04] resolution for most people. So, I didn't want to shoot the whole thing in 8K because especially if you don't have a computer that's capable of editing 8K footage, it really slows down your system. So, 4K is fine for most people,
[09:18] if you would prefer that higher resolution. Now, for frame rate, this is the amount of frames your camera is recording every second. And kind of the cinematic looking footage, choose 24 frames per second. And then if you're in
[09:32] frames per second. And then if you're in a country that has 25 frames per second This next setting might be the most important for getting cinematic footage, your shutter speed, if possible, to be double whatever your frame rate is that
[09:46] you're shooting. So, if I'm shooting in 24 frames per second, my shutter speed would need to be set to 1/50, and that's a proper shutter speed for recording videos. And this is where ND filters come in because a lot of times, if
[09:58] you're shooting at 1/50 of a second shutter speed, your image will look too filter to the front of your camera lens to reduce the amount of light hitting those proper shutter speeds. Next would be white balance, and I almost always
[10:11] just set my white balance to 5600 Kelvin, so it's not shifting around in my image. If I'm outdoors, that'll give me a really nice natural look. And if I'm indoors, most of my studio lighting is actually set to daylight temperature
[10:23] at 5600 Kelvin. Now, sometimes, if I'm wanting to preserve more detail in my highlight information, I will set my exposure compensation to -.3. That will just reduce my overall exposure by about a third of a stop of light to better
[10:36] then for my color mode for the Luna Ultra, I chose I-Log. Now, if you're not familiar with color grading, maybe this will be kind of overwhelming, but if you water of color grading, I-Log is a really cool way to shoot in a very flat
[10:50] picture profile that retains the most highlight information and color information so that you can correct your footage in post-production and just have literally, all of the footage you've seen today was shot in the I-Log color
[11:03] corrected that inside of Premiere. So, these really are the most important camera settings if you want to maximize the image quality out of the Luna Ultra. >> Now, the fifth and final step is to simply just experiment. So, all of the
[11:17] tips that I've given you about coverage and building scenes and sequences and using ND filters, all of that is great, but ultimately, it comes down to you experimenting and trying to find creative angles to make your videos feel
[11:30] cinematic. The easiest place to start is to just figure out some day-to-day basis. Maybe it's cooking breakfast in the morning or going to a coffee shop to order a coffee, going for a walk with your dog. All of these things can
[11:44] actually be filmed in beautiful cinematic ways if you just take the time to slow down and think about the activity that you're doing. How could >> [music] >> that just captures that activity in a
[11:57] your videos. And you really don't have to worry too much about accessories or all the different settings. Just set up your camera, hit record, and focus on your compositions, and make sure you get good coverage. So, get a wide shot, a
[12:09] medium shot, and a tight shot, and then experiment maybe with a creative shot or two. And by doing this, you'll instantly be creating more cinematic videos. Now, up your Insta360 Luna Ultra, you can click or tap the screen right here to
[12:22] watch our Luna Ultra beginner's guide. It's a great video, and I'll see you It's a great video, and I'll see you over there.

⚡ Saved you 0h 12m reading this? Transcribe any YouTube video for free — no signup needed.