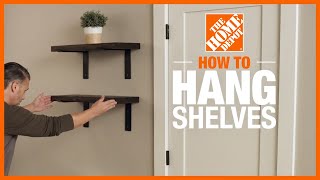

Secret to Hanging Shelves Perfectly Level
45sThis segment packs practical, step-by-step advice for a common DIY struggle, making it highly shareable for home improvement enthusiasts.
▶ Play Clip"The title exactly matches the video — a clean, honest step-by-step DIY tutorial with no detours or exaggerated claims."
This DIY video from The Home Depot covers the correct procedure for securely installing a wall shelf. It walks through evaluating stud vs. anchor placement, marking a level reference, drilling pilot holes, fitting drywall anchors when needed, and fixing the shelf with the void of a debris cleanup.
Wall shelves are presented as a stylish and practical way to maximize storage, provided they are properly secured to the wall.
For sturdy mounting, position brackets over the wall studs, especially if the shelf is heavy or will hold bulky items. A file means fallback to wall anchors.
Hold the shelf in place and draw a light line along its underside. Use that line as the reference to position each bracket and mark the hanging hardware spots.
Use a drill set to low speed (or a manual screwdriver) to create starter holes at the marked locations before securing the brackets.
After drilling, back out each screw and, if necessary, put in a drywall anchor — this is dismally important when there is no stud behind the hole.
Position each bracket against the wall and tighten the fasteners into place, seating hardware correctly before proceeding.
Center the shelf on the mounted brackets, then, for added security of your home security, fasten the shelf directly to the brackets as a final step.
Hanging a shelf correctly takes only a few extra minutes — verify studs or anchors, drill on low speed, and secure the shelf to the brackets. This attention to preparation prevents sagging, wall damage, and late-night accidents.
When must shelf hardware be installed directly into wall studs?
When the shelf is heavy or you plan on storing bulky items on it.
00:19
What should you use if no wall stud is available?
Install appropriate wall anchors for the job.
00:33
What is the purpose of the line drawn along the underside of the shelf?
It serves as the reference for positioning each bracket and marking the location of the hanging hardware.
00:33
How should starter holes be drilled (speed and tool)?
Using a drill on low speed or a screwdriver.
00:47
When should you install a drywall anchor during bracket installation?
After backing out each screw, if necessary before attaching the bracket.
01:02
What is the final step for adding security to the shelf?
Center the shelf atop the bracket and fasten the shelf to the brackets.
01:29
Heavy shelves need studs
The rule to anchor into studs whenever a shelf carries bulk prevents sagging and wall breakdown over time.
00:19The level reference trick
Drawing the underside line is a simple, repeatable technique that keeps brackets level without extra measurement tools.
00:33Anchor as a stud substitute
Explains why backing out a screw and setting a drywall anchor is the safe method when a stud is missing.
01:02Secure shelf to bracket
A final fastening step beyond placing the shelf guarantees the item cannot slide off or become a hazard.
01:29[00:05] wall shelves are a stylish practical way to maximize storage in any space here's what you'll need to properly secure one to the wall
[00:19] want your new shelf to be sturdy and level so proper placement is key if the shelf is heavy or you plan on storing bulky items it's best to install the hardware directly to wall studs if a stud is unavailable you'll need to
[00:33] install appropriate wall anchors for the job next pull the shelf in place and job next pull the shelf in place and make a light line along the underside then using the line as a reference position each bracket and mark the
[00:47] position each bracket and mark the location of the hanging hardware now using a drill on low speed or a screwdriver make starter holes into your
[01:02] screws to secure the brackets you'll need to back out each screw and set it install a drywall anchor if necessary before attaching the bracket now place
[01:14] the bracket in position and fasten it to the wall the wall [Music] finally Center the shelf atop the brackets then for added security fasten
[01:29] brackets then for added security fasten the shelf to the brackets good luck and thanks for shopping at the Home Depot
⚡ Saved you 0h 01m reading this? Transcribe any YouTube video for free — no signup needed.