
E85 vs Gas: Save $3/Gallon?
54sThe dramatic price difference between E85 and premium gas at the pump immediately grabs viewers' attention, especially with rising fuel costs.
▶ Play Clip"Delivers a thorough, step-by-step installation guide as promised, though some sections are padded with repetitive details."
This video is a comprehensive DIY tutorial on installing a flex fuel E85 conversion kit in a car. The host, ChrisFix, explains the benefits of E85, demonstrates how to check vehicle compatibility, and provides a detailed step-by-step installation process, including wiring and testing.
Three main benefits: saving money (E85 is cheaper than premium), more horsepower for boosted/high-compression engines (octane over 100), and environmentally friendly (lower emissions).
E85 absorbs water, so it shouldn't sit in the tank for more than six months. Also, fuel economy drops by 15-25%.
Use the e-flex fuel website to check if a kit is compatible with your car by entering make, year, model, and engine.
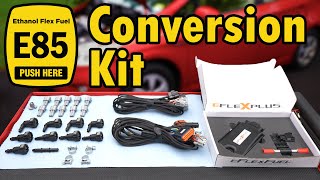
The e-flex plus kit includes a computer, ethanol sensor, wiring harness, and connectors. The computer connects to the harness, which has branches for ground, temperature sensor, ethanol sensor, and injector connectors.
The host tested the kit on two vehicles over three years, including a turbocharged car on a track and a car that sat for over a year, with no issues.
Before disconnecting fuel lines, ensure the engine is cool and relieve fuel pressure by removing the fuel pump fuse and cranking the engine.
Remove the wiper cowl and under tray to access the fuel lines. This involves removing wiper arms, clips, and bolts.
The sensor is installed in the fuel line. The host had to create custom hoses and fittings to route the fuel line safely away from the exhaust.
The host draws a diagram to plan the hose routing. Uses 90-degree fittings and straight hoses to connect the fuel rail to the sensor and back to the original line.
Lubricate fittings with motor oil to prevent O-ring damage. Use specialized fuel injector hose clamps that don't pinch the hose.
Zip tie the sensor and add wire loom protector to the hose for extra safety. Modify OEM connector holders to fit the new connectors.
Disconnect fuel injector connectors, identify positive side using a multimeter (continuity test), and connect the harness wires accordingly.
Mount the computer near the car's ECU, away from heat sources. Run wires neatly, use wire loom, and connect the ground wire to a stock grounding point.
Reinstall all removed parts, start the engine, check for fuel leaks, and use the app to verify sensor readings and injector operation.
Mount the computer with Velcro, install a bypass plug for gasoline-only operation, and add an E85 sticker. Fill with E85 and drive.
The video successfully demonstrates a complete E85 conversion, emphasizing safety, proper installation, and testing. The host provides practical tips and confirms the kit's reliability over years of testing.
What are the three main benefits of running E85?
Saving money, more horsepower for boosted/high-compression engines, and environmentally friendly.
00:13
What is the octane rating of E85?
Over 100 octane.
01:08
What is a major con of E85?
It absorbs water, so it shouldn't sit in the tank for more than six months.
01:51
How much fuel economy do you lose with E85?
15 to 25 percent less fuel economy.
02:04
How do you check if your car is compatible with an E85 conversion kit?
Use the e-flex fuel website and enter your make, year, model, and engine.
02:16
What is the purpose of the ethanol sensor?
It detects how much ethanol is in the fuel from 0% to 85%.
03:47
What safety precautions should you take before disconnecting fuel lines?
Ensure the engine is cool and relieve fuel pressure by removing the fuel pump fuse and cranking the engine.
05:39
Why do you need to lubricate fittings before installation?
To prevent O-rings from getting pinched.
14:35
How do you identify the positive side of a fuel injector connector?
Use a multimeter in continuity mode; the positive side should have continuity with other positive sides.
20:33
What is the purpose of the bypass plug in the kit?
It bypasses the computer so you can run on normal gasoline.
31:13
E85 octane over 100
Explains why E85 allows more boost and horsepower.
01:08Dyno results: 454 to 672 hp
Concrete example of power increase with E85.
01:23Three years of testing
Builds trust in the kit's reliability.
04:15Exhaust proximity warning
Highlights a critical safety consideration.
10:53Ground side switched injectors
Technical detail crucial for correct wiring.
20:33[00:00] Hey guys ChrisFix here and today I'm going to show you how to install an E85 gasoline that you're used to or you could run on ethanol let me show you now
[00:13] mid-grade and premium fuel but sometimes there's a yellow nozzle like this and this is for E85 and ethanol based fuel made from corn now you might be wondering what's the point of converting your car to E85 what's the benefit and
[00:28] I'd say there's three main reasons first it's all about saving money and here's a perfect example of that at this gas station you can see premium is $6.30 and E85 is $3.30 so that's a three dollar savings per gallon here's another
[00:41] station you can see premium is four dollars and forty cents and E85 is $2.60 so you're saving a dollar eighty per gallon now let's just say for whatever reason you can't save money at the pump running E85 don't worry the second
[00:54] benefit of running E85 is if you have a boosted engine such as a supercharged engine or a turbocharged engine or you have an engine with a high compression ratio you're able to make more horsepower the reason why is E85 is
[01:08] always over a hundred octane let me show you so my buddy Tavares took his Supra to do a Dyno run on 93 octane and that made 454 horsepower next they filled her up with E85 and did another run and since the octane is over 100 they're
[01:23] able to increase the Boost and look at how much more power could be made 672 horsepower that's a huge increase and now the third and final benefit of E85 is it's environmentally friendly so if you're running E85 you're emitting
[01:39] less carbon monoxide nitrogen oxides and Benzene as well as other particulates that are poisonous plus if you have a race car that doesn't have cats it smells way better than just straight gasoline
[01:51] all right so those are all the pros and like anything else there are a couple of cons for example E85 absorbs water so you don't want to let the E85 sit in your gas tank for more than about six months
[02:04] problem is you get about 15 to 25 percent less fuel economy it all depends on the car so those are some cons now I will go over more pros and cons and more
[02:16] information about E85 in general in another video but this video is focused install this on my car I want to get an E85 conversion kit is it compatible well let me show you how to easily find out just do a quick Google search for e-flex
[02:31] fuel and it takes you to this site right here and at the top you can enter your make year model and engine then hit enter and now it'll either show you a compatible kit for your car like this or let's go back and plug in a car that's
[02:44] not compatible then hit enter and you'll see it says that you can't run the kit so once you know your car is compatible here's everything you need to get it we have a multimeter we have a fuel line disconnect tool some safety glasses and
[03:00] kit is from e-flex fuel it's called the e-flex plus it comes with a computer ethanol sensor a wiring harness and a bunch of connectors you're not going to use all this they give you more than you need and although this might look a
[03:15] little complicated it's really not that bad let me show you so here's the kit understand how this works installation is easy so first we have our computer which connects right to the main harness now the main harness has a couple of
[03:30] branches and again very simple we have our ground which will go right to a chassis ground in the engine bay we have our temperature sensor which will zip or cold then we have our ethanol sensor this detects how much ethanol is in the
[03:47] fuel from zero percent all the way up to 85 percent and anything in between so we could run a mixture of E85 and your normal gasoline and then finally we have connectors if you have an eight cylinder you have eight connectors I think you
[04:02] get the idea and each one of these connects right to a fuel injector and don't worry about the order the computer figures out the order for you so you can put in any order you want and that's all you need to be able to run E85 now I'll
[04:15] down in the description so you could easily find them and I do want to mention this company sent me out a couple of these kits over three years ago because they're hoping I'd make a video but I didn't know enough about E85
[04:29] the last three years testing out this kit on two different vehicles to make sure the fuel pump wouldn't go out the fuel injectors wouldn't go bad the fuel so unfortunately there's no local E85 pumps so in order to test this for you
[04:47] guys I had to buy a bunch of these five gallon cans and keep them around but multiple times with this kit but this is my first time drifting the go-kart track and it's a little tight but a lot of fun [Music]
[05:08] and there are no issues at all running E85 even on the track turbocharged engines love E85 because the high octane now this car was a great
[05:26] test as well because it sat for over a year and when I had to go start her up E85 I have no complaints so after years of running E85 I've had no issues and I
[05:39] fuel for supporting the video and sending me out these kits that way I could show you how to get your car to run on E85 so let's get started and the to the rubber fuel line now before you go disconnecting any fuel lines there
[05:55] are two very important things we need to do one you need to make sure your engine is cool do not work on a hot engine if you leak any fuel on a hot engine it could catch fire and that wouldn't be good and two fuel systems are usually
[06:07] disconnect it it doesn't squirt fuel everywhere and the easiest way to do pressure will slowly bleed off now in this car the battery's in the trunk so
[06:19] after you remove a couple covers use a 10 millimeter wrench to disconnect the pressure bleeds off now if you don't want to wait overnight a quick way to then find your fuel pump fuse and remove it and to find the correct fuse to pull
[06:37] fuse box diagram you can see right there is the fuel pump fuse which is that one right there so you want to carefully get your pliers and pull that fuse out
[06:49] install or it might not start at all but just crank that engine over a couple times so the fuel injectors fire and bleed that fuel pressure off and that'll remove most if not all the fuel pressure so you could safely work on the fuel
[07:03] go in there and disconnect the fuel line now in our case the fuel line is buried all the way back here of course it's underneath this wiper cowl so we're the windshield wiper arm which is held in by two 14 millimeter nuts and then
[07:21] the wiper arm comes right off now we could get the other wiper arm off and this has a cap hiding the nut so pop that off and then break the nut loose remove it the rest of the way now we need to fold the wiper upwards a little
[07:33] we can pop the plastic cowl off and to remove this it's held in by some clips lift up like that so now you want to pop out all the clips holding this in and
[07:47] then the entire cowl is free but in order to remove it this part at the end screwdriver in there and pop this out good and now the cowl could be completely be removed so with the cowl removed you can see we have a metal
[08:02] back under here in order to remove this tray we need to remove the wiper assembly right here and that has four bolts one here one here and then we have one there and one back in that corner and this could come right out so first
[08:18] connected right here to the wiper assembly so use the panel clip pliers to harness so let's remove those as well good and now our wiring harness is free
[08:31] from that metal under tray so now let's remove these four 10 millimeter bolts so and three and finally our fourth and last one good and now the wiper assembly
[08:43] comes right out and now we have easier access to our under tray which we need there another one back there it's probably one yeah there's one underneath all that so let's clean up all this and then let's remove these bolts and remove
[08:58] the tray so we can install the ethanol sensor so vacuum out all the debris and so let's get all these out and then we could slide over to the other side and then we can remove the last six bolts holding this in
[09:14] out and then the whole wiper tray could be carefully removed and the last thing to do is pop off the engine cover I removed check this out we have a ton of room to work back here here is our fuel line right here comes from the fuel
[09:29] tank we could disconnect it from this black box so this will come off and if we follow the fuel line down it goes right back here let's see if I could fit you in here you can see the fuel line coming into this quick disconnect and
[09:41] then that goes into the fuel rail and if we want to remove this all we have to do is disconnect it from there but before we do that what I say we do is disconnect it from here and see what we have to work with now before you go and
[09:53] you don't get any fuel in your eyes okay so all we need to do is pry this clip back a little bit and now you can just pop this door open like so and then the towel below this to soak up any residual fuel that comes out of the line and then
[10:11] line give it a pull and it should come right off like that it's also a good idea to cover the fuel line so nothing Falls in it and clogs your injectors so you're going to place your flex fuel sensor originally I thought this was a
[10:27] line right about there but the problem is if you take a look here this actually isn't a rubber hose it is a plastic hose with a rubber coating to protect it so
[10:39] we can't cut into this so the next idea I had let's run the hose right here and take a look down here this hose is incredibly close to the exhaust it's actually touching the exhaust right now even if we try to move it over like that
[10:53] it's way too close for comfort because exhaust and gasoline does not mix that's how you start a fire so what I think what we're gonna do is we'll just go and we'll disconnect the hose from the fuel rail right back here and run our own
[11:05] hose which comes with the kit so let's pop off this fuel connector holder and we're going to be using a metal fuel line disconnect tool so get this around towards the fuel line to release the fuel line now this is easier said than
[11:21] done sometimes you need a little more leverage but don't worry I have a trick this works amazing for getting fuel lines off and then we can get our pliers behind the fuel line tool and then use the pliers for leverage to push the tool
[11:36] outwards just like that perfect and now we can pull the fuel line off the fuel rail and don't forget about your fuel line disconnect tool all right so with our fuel line removed now what we could do is use our conversion kit and all the
[11:49] adapters in here to make our own setup to run our ethanol sensor now if you it in this case it is 7.89 7.95 those are weird numbers because it's a metric
[12:03] size for 5 16 of an inch so this fits a 5 16 of an inch fuel line now the kit gives us two different size fittings we have the 7.89 which is the OEM size this is what's going to fit onto our car and then we have the 9.49 which fits onto
[12:19] you why so so at the car's URL if we try to put on these 9.49 size fittings that fit onto the ethanol sensor you can see how loose it is you can actually see
[12:31] doesn't fit but then if we get our 7.89 sized fitting it clicks right in place and there's barely any side to side movement just a little bit of front and connect the hose directly to the fuel rail if it's not designed for it this is
[12:49] way this hose could still come off if it's under pressure now I always like to draw a quick diagram because it helps me visualize how I'm going to install this right here at the fuel rail that connects to the engine and then work our
[13:05] to that ethanol sensor and the best way to do that would be a 90 up and a 90 at the ethanol sensor now we could easily connect those two with a straight hose now from the ethanol sensor to this fuel line We'll add a straight and we'll have
[13:21] another straight and then we'll have a slight Bend in our fuel line there's a be the basic setup now we'll grab the connector from the fuel rail and let me show you how to properly connect it to our fuel line okay so the first thing we
[13:35] need to do is Slide the hose clamp over the hose before you do anything else and is fine but some do like this one and if there's an O-ring make sure you that hose right onto our connector dry so press the hose onto the fitting so it
[13:53] clamp on leaving a little space at the end of the hose and then tighten this down so it's snug you don't want to over tighten this because the connectors just use the hose clamps that come with the kit these are specialized fuel injector
[14:09] hose clamps or fuel line hose clamps that don't loosen easily they don't pinch the hose and they tighten down evenly compare that to a regular hose clamp which could definitely pinch the hose it could definitely damage it they
[14:21] don't tighten down as evenly and this can could come loose and any of those injector hose clamps that come with the kit it's a small detail but pretty important so now let's go get this installed and we'll install this fitting
[14:35] the car so you always want to lubricate where the fitting slides onto with some motor oil that way the O-rings in the fitting don't get pinched when you install them then you want to just push the fitting on until it clicks just like
[14:49] fuel line up here and this is where our ethanol sensor is going to go so let's 90 degree fitting right onto that ethanol sensor until it clicks good and
[15:02] that's locked on there now with a paint pen let's mark where we keep this cut as straight as possible then get your hose clamp on the hose and
[15:14] lubricate that with a little bit of oil and now we can push it in all the way just like that and then tighten down the hose clamp so it's snug good now we can
[15:26] get the dust cap off the other side of the sensor lubricate the tube and slide on the connector until it clicks then lubricate the O-ring on the connector and slide that fuel line all the way onto the connector like that and
[15:39] snug up that hose clamp good finally let's get the towel out of the way and our fuel line will go pretty much right there so lubricate the end of the metal fuel line and we're using a straight connector on here
[15:51] and now we just need to line up our fuel line and that looks pretty good so let's mark it then cut it and don't forget the hose clamp then we can remove the connector from the hard
[16:03] all the way and then finally let's tighten down the place good
[16:15] and just like that our flex fuel sensor is installed all the connectors clicked are tightened down so they're snug right over here we don't have a tight radius
[16:27] this is more than a three inch radius which is what you need at least three inches that way it doesn't Kink and then over here we're not touching anything is this right here right on the hose clamp it's slightly touching the plastic
[16:43] piece here and to fix that what I'm going to do is just turn this so just grab your pliers and let's squeeze the clamp and slide it over then do the same thing to the other clamp good and now the plastic piece is free to turn and
[16:55] now let's get these hose clamps back in place and for this side I'm going to remove this connector it's just going to give me a little bit more room to slide that clamp back good and then now we can just reconnect it and the last thing to
[17:10] do is to zip tie the ethanol sensor so it doesn't move around as you're driving although there is space and it's not touching I'm going to add some wire loom protector to this hose Overkill probably but you can never be too safe especially
[17:26] totally worth it and just like that now the fuel line is extra protected and let's get this wire loom on here good now you guys know I like doing
[17:40] everything 110 these are the OEM connectors that held each of these in place you guys remember we took these off and unfortunately because of the shape of the new connectors they don't fit but I think we could cut some of
[17:53] now if we try to fit the fuel line in there you can see it fits but the latching and you can clearly see how the hose clamp is getting in the way so
[18:05] let's remove the fuel line and let's mark where the hose clamp is so we could try to clearance it and to do this I'm using a rotary tool knife through butter so let's finish removing all the green then let's blast
[18:19] it with some air to remove the dust and now we can test fit and see how we did okay well that fits in there nice and snug but will the door close and latch beautiful now that's what I'm talking about you can see how well that's
[18:31] clearanced for the hose clamp now let's go get this installed oh man this is can push this onto the connector and now let's close that door so it clicks
[18:43] perfect so let's go try to get the other one to fit as well so this one's going material on this holder but let's see what we could do so if we take a look at the connector you can see our connector here is just too fat to fit in here but
[18:58] I think we can make it work if we shave down the edges so I'll mark the spots what we could do first let's cut off this end piece because this is way too small to fit on our new hose anyway and then now let's use a rotary tool to
[19:13] and then to remove the sharp edges I'm using a deburr tool that way we don't well that definitely fits so let's see if it works with our fuel line and the
[19:27] cutting did the trick and check it out that works perfect now fuel connector holders it works perfectly fine without them I just like
[19:42] pretty good it's almost OEM so now our ethanol sensor has been completely installed we are ready for our next step and that is to install our wiring
[19:54] located right here so there's one there's another there's another and our last one is right there so let me show you how to connect the harness to the injectors so first let's disconnect each connector from the fuel injector and to
[20:09] and do that for the second injector and the third injector and finally the last injector is hard to get to so I'm using the hose Grip Pliers which work
[20:21] great to help pop this connector off okay so with all the fuel injector connectors disconnected now what we need to do is we need to figure out which side of the connector is the positive side and which side is the negative side
[20:33] another thing is with fuel injectors they are ground side switched so the check for continuity with the ground instead what should happen is all of
[20:48] these the positive side should be connected so we should have continuity positive side if this doesn't make sense don't worry it will in a second it's super simple so let me show you so now you need to grab your multimeter and
[21:02] you're going to have to set it to the continuity mode where it beeps so set it just touch the two leads together and it'll beep oriented in the same direction we could start with two right here and I bent a
[21:21] sides and then we could get one of the leads on there and then now we want to test the other side you could hear it's beeping so that if we test the other one there is no continuity so this is the positive side
[21:40] now just to verify just to make sure let's test the other side and if we touch here there's nothing and if we touch here there's nothing so if we go back okay we know for sure these first ones
[21:52] are the positive side so I'm just going to get a marker and mark it red that way I know for sure this is the positive side now I'm going to keep this connected and I'm going to test the other ones just to double check
[22:06] orientation and then we could test it positive positive positive and just double check and there's no beep there so we're good to go these two are
[22:19] positive as well so let's mark these as well that way we don't mess this up then finally once we know all the positive sides we could disconnect this find the positive side that's because all the connectors we're going to
[22:36] connect to the fuel injectors they each have one of these open connectors that we need to make our own connector for so this one right here this will plug right into the fuel injector but this one right here has to plug into these and we
[22:49] these all we have to do is find the correct orientation for this make sure it clicks in mark it so we know it's positive
[23:03] we're gonna have to flip this around just makes it so much easier to mark it so our red wire here goes on the red the positive side so just push that in all the way until it clicks good give it a tug make sure it doesn't come out and
[23:18] we're good and then the other wire could just go on the other side again make good give it a tug and we're good to go here beautiful so that is one harness
[23:30] completed now just follow the same process for the other harnesses Mark the the connector until it clicks then push the other wire into the other side until it clicks and that's all there is to it so wire up the third harness again
[23:45] making sure both wires click in and then wire up the fourth and final harness good and now the wiring is completely done now you just want to make sure you connect one harness to one injector it doesn't matter which order you could mix
[23:59] connect to one of them this one is going to connect to another one you don't want to like cross like this that would be bad now instead of connecting the stock to our aftermarket one that we just made that snaps in just like that and then
[24:17] our other side of the aftermarket one will connect to the fuel injector so push it all the way down until it clicks now do the same thing to the other three harnesses we wired up connect one side to the stock harness and the other side
[24:29] to the fuel injector same for fuel injector number three screwdriver to push the injector in because there isn't much room here and sticking out okay so all our wires are connected to the fuel injectors I kind
[24:46] what we need to do is run our wiring harness and this wiring harness is a organized but before we do that we need to figure out a spot to mount our
[25:00] engine we don't want it near the exhaust and we don't want this near any high or an alternator in a regular car so I think the best spot is going to be right
[25:14] here right next to the car's computer and with that we could run our wire and make sure it's neat and organized so let's go do that now the best way to computer and we're going to just move that off to the side and then we're
[25:29] going to start our hand here at the fuel injector wires and just run them down just like that and any loose wires will just move out of the way so now we have a nice set of wires that are organized now what you could do is use a wire loom
[25:42] do have that temperature probe that we need to put on the engine so this we're wires are so just bury it down there and this will let the computer know if it's
[25:55] doing a cold start or a hot start okay so now we can get all the wires into a wire loom which will not only organize them and make it look like a factory installation but this will also protect them from chafing so push the wires into
[26:07] the loom and Slide the Loom all the way down to the end of the harness okay so pretty good like that so I'm going to pop off this connector so the harness forget then we could grab the end of the harness and let's snake it underneath
[26:24] the brake master cylinder here and also pull through the ethanol sensor wire and the ground wire which will connect in a second but first let's connect the main harness to the computer so it clicks in good now let's install the ground wire
[26:36] perfect because it reaches right to the stock grounding point and you can see right here where the stock wires are grounded and we could add our wire right to this so let's unscrew the grounding bolt and then run our ground wire
[26:50] between the two stock ones to keep that factory look and then just add the good so with the ground done now all we have left is our ethanol sensor
[27:02] loom protector on it so we're good to put that back there and then we're going to run this right to our sensor make sure it snaps in
[27:14] good that's connected and then any extra wire you have left over just neatly group up like this and then we could zip tie it off just to keep it neat and with this neatly wrapped and set aside we are almost done the last thing I want to do
[27:27] is make sure that this is zip tied so it stays organized I don't want this flapping around so I'm going to zip tie it right here and once you've secured all your wires the last thing we need to do before we
[27:40] test this kit out is make sure you install all the parts that you remove so before I remove that connector but I already reinstalled it just make sure everything is reinstalled because we're going to start the engine and see if
[27:54] that wiper shroud we're going to keep that off so if there is a problem we can easily see it for example the first thing and the most important thing we're we need to make sure that the fuel lines are not leaking both up here over here
[28:12] and down there so it's very important right as you start the engine you check battery cable and just make sure there's no gas fumes because this will spark and start the car okay starter up all right so right away let's check the
[28:31] see any leaks at all so next we could check over here at this connection and again I don't see any leaks and finally let's come over here at the fuel rail
[28:43] and we are dry and leak free down here which is great now besides a visual inspection another thing to check is the app so if we go to the app we can make sure everything is working properly you can see we have RPMs up here we have 10
[28:56] ethanol in our fuel right now which is normal we're at 120 degrees Fahrenheit from our temperature sensor which means the sensor is working and all four of our injectors are orange down here which means they are all working if one wasn't
[29:08] working it would be grayed out and then we could go to this right here and then check the device status and you can see everything's working properly so we did a good install all right so we know the engine starts up perfectly we know there
[29:21] are no fuel leaks at all and our system is completely installed so now let's get that wiper cowl on and then let's go fill her up with E85 and go for a drive so first let's get the metal under tray in but wait a second this isn't clean
[29:33] now that's much better amazing what a little bit of soapy water could do now 10 millimeter bolts so they just need to be snugged up
[29:45] assembly in and then we have to tighten down the four bolts that hold this in but they only get tightened down to four foot pounds so not very tight good next let's get the wiring harness and snap in all the clips that hold it
[29:59] in place and there's one last one right here and then finally we could plug this into the wiper motor now we can get the plastic cowl on which snaps in place and then we could get the first wiper arm in place and torque it to spec which is 17
[30:11] foot pounds now we can get the other wiper arm on tighten down the nut torque it the spec and then put the little cover back on let's also get the plastic about the engine cover which just pops into place and then the last thing to do
[30:28] is to come over here and secure the computer now you could use the bolt hole you want in this case it's going on this fuse box so I want to be able to set going to use some Velcro so let's get some alcohol in a towel and just wipe
[30:46] velcro from sticking and you're going to want to wipe down the back of the computer and this has VHB tape which is very strong so you don't have to worry
[30:59] aligned easily is to just connect the velcro to the other velcro pieces then down onto the fuse box and with the VHB tape make sure you put a lot of pressure
[31:13] so that it sticks so let's give it a try perfect and now the computer is mounted now real quick you probably saw this in the kit and it's this little block now you have to do is pull this out and then plug this in and this just bypasses
[31:30] everything so there's no more computer you can run on your normal gasoline you what your problem is it's a good thing to keep in your glove box just in case I've never had to use it but it's a good idea to have in the kit and then the
[31:45] they're capped off on the end that's just so if you have a six cylinder or a have that so they just sit off to the side like that so with our computer
[31:57] mounted we are completely done and look at how amazing this looks it basically looks stock it looks Factory you can't even see that we did anything I mean maybe if you peek back there you might be able to see the flex fuel sensor the
[32:10] probably put that back there if you don't want anything visible in the engine bay and that's all there is to it so now let's go fill it with some E85 but first let's fix this gas cap because now we can actually run E15 to E85 no
[32:25] problem and just to be sure we're clear let's add this E85 sticker onto the fuel said there are no E85 stations in my state so I have to use these cans of E85
[32:37] instead and this is a 112 octane which is kind of funny pouring into a stock Prius now I did run the fuel tank down so there's only about four gallons left concentration of E85 and there we go let's get the cap in place and let's go
[32:53] for a ride all right and check it out we are now driving around using E85 and if you take a look at the app you can see the ethanol concentration is about 60 because we mixed it in with some fuel
[33:05] ethanol sensor so that's all there is to it that's how you convert your car to run on E85 and if you have any questions at all feel free to comment below and it a thumbs up if you're not a subscriber consider hitting that
[33:22] subscribe button for more videos on how to fix and modify your car and as always description so you could easily find them
⚡ Saved you 0h 33m reading this? Transcribe any YouTube video for free — no signup needed.