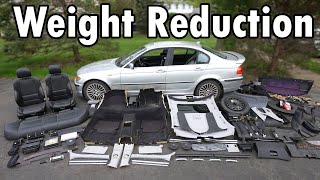

From 3370 to 2940 lbs in one video!
45sThe dramatic weight loss goal and before/after hook immediately grabs viewers interested in car mods.
▶ Play Clip"Delivers exactly what the title promises: a detailed, step-by-step weight reduction with real numbers and performance tests."
The video documents the process of stripping a BMW 330xi of unnecessary weight to prepare it for a 16-hour endurance race. The host measures the car's baseline performance (0-60 mph and braking distance), then systematically removes seats, interior trim, carpeting, sound deadening, headliner, sunroof, and dash components, weighing each part. The final result is a weight reduction of over 430 pounds, leading to improved acceleration and braking.
The host is preparing a car for a 16-hour endurance race. Two main reasons for weight reduction: less weight improves braking and acceleration, and a cage builder needs the interior gutted. The video will show the weight of different parts and the total weight removed.
Before removing weight, the host tests the car's 0-60 mph time and braking distance from 60 mph using a GPS unit. The car achieves consistent 0-60 times around 6.8 seconds and braking distance around 170 feet.
The car's initial weight is measured at 3,370 pounds with a quarter tank of fuel. The host sets a goal to get the car under 3,000 pounds.
The front and rear seats are removed. The driver's seat weighs 65 pounds, passenger seat 65 pounds, and rear bench 50 pounds, totaling 180 pounds removed. The car's weight drops to 3,190 pounds.
The battery is disconnected and replaced with a lighter one (25 lbs vs 45 lbs). The trunk is emptied of spare tire, jack, tools, and sound deadening, totaling 75 pounds removed.
Plastic trim from A-pillars, B-pillars, C-pillars, door sills, and rear deck is removed. Seat belts, speakers, and sound deadening are also taken out. This step removes 50 pounds, bringing the weight to 3,043 pounds.
The carpeting is removed, including the gas pedal and styrofoam. The carpet weighs 45 pounds, bringing the weight down to 2,998 pounds, hitting the milestone of under 3,000 pounds.
Sound deadening is removed using dry ice to freeze it, making it brittle and easy to break off. This removes about 25 pounds, bringing the weight to 2,973 pounds.
The headliner (8 lbs) and sunroof (32 lbs) are removed, totaling 40 pounds. A lightweight sunroof delete kit (2 lbs) is installed, netting a 38-pound loss. Weight is now 2,935 pounds.
Airbag, wood trim, climate control, and other dash parts are removed, saving 15 pounds. The dash is left ready for removal by the cage builder.
The final weight is 2,940 pounds, a reduction of 430 pounds (over 10% of original weight). The 0-60 time improves to 6.17 seconds and braking distance to 140 feet.
Removing over 430 pounds from the car significantly improved its performance, with 0-60 time dropping from 6.8 to 6.17 seconds and braking distance from 170 to 140 feet. The video demonstrates that substantial weight savings can be achieved by removing seats, carpet, sound deadening, and other non-essential components.
What was the initial weight of the car?
3,370 pounds
03:31
How much weight was removed from the seats?
180 pounds
05:37
What is the weight of the driver's seat?
65 pounds
05:51
What is the weight of the carpeting removed?
45 pounds
12:43
What technique is used to remove sound deadening?
Using dry ice to freeze it, making it brittle and easy to break off.
13:38
What is the weight of the sunroof?
32 pounds
19:31
What is the final weight of the car after weight reduction?
2,940 pounds
23:07
What was the 0-60 time before weight reduction?
6.8 seconds
01:57
What was the 0-60 time after weight reduction?
6.17 seconds
24:46
What was the braking distance before and after?
170 feet before, 140 feet after
25:39
Seats weigh 180 pounds
Shows that seats are a significant weight source, often overlooked.
05:37Dry ice trick for sound deadening
Provides a practical, effective technique for removing stubborn sound deadening.
13:38Over 430 pounds removed
Demonstrates the potential for significant weight reduction in a street car.
23:070-60 improves to 6.17 seconds
Quantifies the performance benefit of weight reduction.
24:46Braking distance drops to 140 feet
Shows weight reduction also improves braking performance.
25:39[00:03] i'm turning into an endurance race car and today i'll be stripping this car of reasons one weight reduction because it's a race car less weight while braking less weight while accelerating and it's a 16 hour
[00:17] race so every pound counts and two we have a cage builder who's fabbing up a cage and needs that entire interior gutted so so i thought it'd be cool to show you guys how heavy different parts of the
[00:30] are and how much weight you could actually pull out of a car and to do i have these really nice race scales each one of these scales goes underneath and that'll give us an accurate reading of how much this car weighs
[00:42] we remove weighs now not only do i want to get a before much quicker this car accelerates from 0 to 60 before and after our weight reduction and breaks from 60 to 0 before and after
[00:57] and to do that i have a gps unit that will accurately track our results it'll give us our zero to 60 we could check our breaking from 60 to that way we could see the acceleration before and after our weight reduction as
[01:11] well as our braking before and after so let's head to the track and put our okay so we're at the track and we're gonna line up in the same exact spot for and to keep it consistent every single time i'll drop the clutch at 4500 rpm
[01:27] all right and this is so easy to launch because of the all-wheel drive that was because of the all-wheel drive that was an awesome shift in the second and it took us 6.79 seconds let's do that again
[01:43] well that was a little weird not the best launch good shift and 6.88 seconds one last time good launch
[01:57] one last time good launch good shift into second nice and consistent with all three launches taking about 6.8 seconds
[02:10] from 0 to 60. now let's test the braking all right for the braking i'm going to accelerate to 60 miles an hour and then i'll hold it there until i hit going to slam on the brakes and we're gonna get a measurement i'm using a gps
[02:23] gonna get a measurement i'm using a gps to be accurate so let's see what we get
[02:35] braking distances at around 170 feet but at least we're could compare this to the car after we got it so now let's head home and see how much weight we could pull out of it
[02:49] all right i'm back from the track that acceleration blew me away that is way better than i expected for this 250 000 mile car but that braking well that braking was pretty bad my hummer breaks quicker than this car and that
[03:01] worn out and old tires that are worn out so don't right now let's go see how much weight we could remove from this car first we need to get the scales under each tire so let's
[03:15] then we can slide the scales under the front tires and carefully let the car down onto the scales good and same with the rear slide the and then carefully let the car down onto the scales
[03:31] my car actually weighs accurately okay so it's a 330 xi we have a quarter tank of fuel remember this is the all-wheel drive what are your guesses what do we think and this is brand new so we're gonna do
[03:44] turn it on we want to see our total weight and we have 3 370 pounds and i have a goal of getting this car gonna be possible but let's get started and see so here's
[03:59] first we're going to see how much all the seats weigh then how much everything all the plastic interior trim and see how much that weighs then we'll see how weighs then we'll see how much the headliner
[04:12] dash much they weigh so enough talk let's get started and start removing going to remove are the front seats and the back seats
[04:26] are pretty heavy so to remove a seat it in there's two in the front and two in the rear so let's slide the seat all nuts located right here and yes i know i'll
[04:39] through all this because there's tons of fasteners to get the whole interior good and then we need to lift the seat up to get access to one last bolt good and with that removed we could tilt the
[04:54] under the seat and then we need to disconnect this harness like so so we can remove the seat from the car and man oh man is this thing heavy now you ready saw how to do this so and what a mess hidden under those seats
[05:10] once we remove the carpets now let's remove the rear seats and check out our the bottom bench seat pops out just like that and then it could be removed from the backrest and they just pop right out as well
[05:23] and then to get the two back pieces out fold them down and then we need to these two seat backs together and now each of these pieces will come heavy and just like that we shed 180 pounds
[05:37] just by removing the oem seats and oem seats from all makes and models are very heavy that's just how it is there's a lot of safety items in there don't just bend in an accident and electric motors for the power seats
[05:51] so 65 pounds for the driver's seat 65 pounds for the passenger seat and the rear bench seat is 50 pounds so we removed 180 pounds in just seats bringing us to 3 190 pounds and the good thing is our
[06:05] install and all the brackets only weighs 30 and it looks like we might hit that under 3 000 pound mark so now let's move disconnect the battery and gut the trunk so let's pop the trunk
[06:19] and there's a lot of junk in this trunk to remove but first let's go disconnect the battery and you always want to remove the negative then we could remove the positive terminal and let's get this heavy old
[06:32] which still works pretty good and is valuable it weighs over 45 pounds and i already sold it to buy this battery it's a used battery i picked up off a prius in a junkyard for 25 dollars plus it only weighs 25 pounds a small
[06:45] we're removing most of the electronics and we really just need this to start disconnected and swapped out now we could get all this junk out of this and that was 25 pounds right there but wait there's more
[06:59] we have a trunk floor which is made of wood and then we have our very heavy spare tire which we're not going to need as well as a heavy jack and this light piece of plastic but every pound counts and since every pound counts there's
[07:12] that we need to remove and this stuff is what gives bmws of this error that crayon and waxy smell that you get every time you get in one all right and then finally all this spaghetti here look at these wires
[07:25] tapped this is a mess here hopefully that doesn't cause any issues but this right here is our factory amp this is what we need which is gonna bring us good money and this also weighs a good
[07:38] and don't forget about the back of the trunk good and with that we removed little bit of sound editing here here and right back there but we'll the sound ending after we get that carpet out you have to
[07:52] once i'll show you that trick in a little bit so everything we removed from the trunk right here weighed 75 pounds which is of plastic a little bit of sound deadening some
[08:05] carpets and then we have about 50 pounds worth of a spare some tools and also some fluids because this is a bmw you always need some extra oil so with our trunk completely gutted now let's move on to our next step
[08:17] interior and we're going to start from the a-pillar up here there's a ton of plastic in this interior so it's going to be interesting so this a pillar trim is held in by three torx screws and with those screws
[08:31] now we can remove the door sill plastic by pulling up hard and for once none of next let's remove the plastic trim under the steering wheel which also just pops now down here we want to keep our hood pull working but first we need to remove
[08:46] then we could pull the trim out and then we could screw that hood pole back in good next let's pop out the outside door sill plastic and now we're on to the b-pillar plastic starting with this down here
[09:00] and the trick for all these plastics is using a hard jerking motion that way it pops right off and you don't break anything if you pull slowly clips holding it in now we can remove the seat belt since we're not going to
[09:12] and these are actually pretty heavy so moving to the back door we have our inner dorsal plastic and then the outer door silk plastic deck and c-pillar and then for the c-pillar trim we need
[09:25] harness and then this trim comes right out as well now to get this rear deck out first we need to remove the speakers so pop then unscrew the three screws holding in the speaker and then the speaker trim
[09:39] whatever reason the wires to these speakers were already disconnected to remove the rear deck beautiful and then we can remove all the heavy seat belts back here as well as the plastic trim this
[09:54] insulation and the crayon smelling sound deadening when you add it all up it is a good it adds up quickly all right so with everything removed
[10:06] from the rear deck i removed all the plastic trim on the passenger side the b pillar and the a pillar now let's go and remove the center console it's in good shape and we're going to be selling it to recuperate some of the
[10:18] so remove the rear tray and disconnect the harness and then under there there and this plastic trim comes right off now at the front we need to get under boot unscrew the two screws holding the trim
[10:31] giving us access to two more screws holding the center console in can lift it out like that actually there's one more harness for the hazard so let's disconnect that and now it's free and finally there's two bolts
[10:45] holding in the armrest then that could be removed good and now bolts so the e-brake is held in place good all right so everything we have here weighs a total of 50 pounds bringing our weight down to
[10:59] 3043 pounds we're getting really close to that 3000 pound mark i think we're mostly plastics 25 pounds worth of plastics to be exact plastic piece at around 8 to 10 pounds and that's
[11:13] very light there's just a bunch of them so it adds up and then the other 25 pounds comes from our seat belt pre-tensioners from our speakers and our sound deadening from that rear deck that we
[11:26] pieces removed from the car now let's move on to the next step and carpets i'm not even going to bother vacuuming i'm going to try to pull it just save me some time now we're going to start up here in the front
[11:40] remove the gas pedal and then we can take the carpet out so first we need to remove our gas pedal and to do that there is a tab here so get a flathead screwdriver and push down on the tab and then that will slide
[11:53] then we can disconnect the harness from the pedal and this plastic bracket has a and then finally we could carefully pry this from the bottom of the bracket and pull on it without breaking it perfect and then that'll pop out just
[12:05] now we have this one fastener that needs to be unscrewed holding in the front of the carpet and a plastic fastener on the side that we have to pop out over here but don't cut deep just on the surface because there's
[12:17] wires under here and then that'll allow us to remove the front driver's side and then under that we have a piece of styrofoam that needs to be removed as well good now let's remove the rear section of the carpet by pulling it up
[12:29] sheesh this is a lot heavier than i expected for just some piece of carpet so get this carpeting out of the car good and now we have one last piece left so we could pull it right out like that and don't forget that piece of styrofoam
[12:43] and we might as well remove the rear vent as well and check that out we hit our milestone by removing 45 pounds worth of carpeting that is crazy how heavy this carpeting is but
[12:57] and just take a look at this look at how thick this carpeting is look at the heavy so carpeting 45 pounds removed and we're not done yet we still have to remove the sound ending that's bonded to the metal
[13:11] see to the untrained eye but we have a bunch of sound ending in this car you can see right here this darker gray that is all sound deadening that dark deadening sound deadening sound deadening all that
[13:24] all that in there sound dangling that all has to be removed flammable once there's a fire also the welder who's putting the cage metal to weld to so it all needs to be taken out
[13:38] and in order to do that because this is very tricky to remove this is glued on there it's not coming off easily but the trick is to use some of this dry ice so that is 30
[13:51] pounds of dry ice and that is going to be enough to do the we have a lot of sound deadening look at all work to do so let me show you how to do this now
[14:05] before we begin make sure you open up all the windows and all the doors dry ice is carbon dioxide carbon dioxide is heavier than oxygen to work inside a closed vehicle make sure all the doors are open you'll have
[14:18] suffocate very important otherwise wear gloves so you how to do this all right so the first step is to dump a layer of dry ice onto the sound deadening so it covers it completely
[14:31] grab a couple of sheets of tin foil and cover the dry ice and this gets that sound deadening even colder now after about 15 minutes this panel should be frozen so remove the tin foil and expose that sound deadening
[14:44] mallet and just hammer away at that because it's so cold it becomes brittle and it should break off in chunks then you could use a scraper actually in this case we don't even need
[14:56] a scraper all this broke off so we can just pick up the pieces and throw it out move over to the next side and follow the same process up the chunks that break off like so now for whatever reason in the
[15:11] sealer is the sound ending sticks to it and it takes a lot more effort to scrape it off but nonetheless it still comes up and then finally we're done with this to the next part of the car so there you go it's that easy to do let
[15:25] ice do all the work for you let it sit for 10 15 even 20 minutes make sure it's you can't get it too cold the colder the better loosen it up with a hammer scrape it and pull it all up comes up in big clumps if it's not coming up
[15:38] it's not cold enough but you saw how easy that came up and that's all there i have a lot of sound deadening to do because this is a bmw they put a ton in i'm gonna get to it you guys don't need to watch me do all this that'll be very
[15:50] tedious so with the magic of editing boom all of the sound deadening has been removed from the trunk to the midsection to the all the way to the front the only spot that wasn't removed
[16:03] is this right here and the same thing on the other side i ran out of dry ice and so i just need to get this car ready and get it to the cage builder that's not in there once the cage is in but all the other sound deadening has
[16:16] weighs and at 2973 pounds and at 2973 pounds we have removed about 25 pounds of sound still a little bit more left to do so you figure about
[16:29] 30 pounds of sound deadening total so now with that let's move on to the next step and remove the headliner and sunroof now similar we'll start at the front removing the
[16:41] sun visors and you'll need a little pick to disconnect the electrical connector disconnect that as well and finally we need to use a pick to that hold in the visor clip and then just unscrew them and that
[16:55] the passenger side removed i also removed everything from the center part in the middle here we need to remove the so disconnect both switches from the
[17:08] map light and disconnect that and finally there's here so let's remove it so with everything at the front of the headliner now we need to start working on the side of the headliner
[17:21] and the sides of the headliner are held in by grab handles so pop off the covers and unscrew the two screws holding the handle in good with some editing magic the other one is removed as well and with everything on the side removed
[17:33] as well now we can move on to the last step which is the rear cover that pops off and then there's a plastic fastener holding the rear of the so pop it out and then finally we need to remove the motion sensor in the
[17:46] pop off the cover and disconnect the wire harness and we're good to go now the last thing to do is to remove the trim around the and with that out the headliner is completely free to be removed
[17:58] it's basically just a giant piece of cardboard you could easily bend it and and if you need to recover your headliner that's definitely not what you so carefully remove the headliner and with that we just removed 10 pounds
[18:10] and not only was that 10 pounds but it's 10 pounds up high so that's pretty sunroof and we have to remove the sunroof because in a rollover it could everywhere which is definitely a safety hazard
[18:23] it's made of glass which is heavy it has a lot of metal and there's electrical motors in there all of which are heavy and it's heavy up so let's remove it so removing a sunroof is actually pretty
[18:35] front that we need to remove and then there's bolts that go along the that we need to remove and this should come right out so let's first remove the sunroof next at each of the corners we have a
[18:50] drain tube for when it rains this drains the sunroof so if the interior of your carpets maybe the roof check these sometimes and leaves and stuff and then get water backing up into the car
[19:03] we can unscrew the four bolts holding one side of the sunroof in potentially damaging the roof use something to prop up the sunroof or them hold up the sunroof as you unscrew the last four bolts on the other side
[19:18] and on this last bolt go nice and slow so you don't drop the sunroof carefully lower it down and this is actually pretty cumbersome and heavy so so with our headliner and our sunroof removed we just lost
[19:31] 40 pounds our headliner is eight pounds and our sunroof because that's weight that was way up top at the top of the car and that's gravity now the only problem is now we have a large gaping hole in our roof
[19:45] but don't worry we have a lightweight sunroof delete kit that fits right in so let me show you how to install it now before we go and install this it's very with an adhesive sealant so when adding sealant it's important to
[19:58] sure there are no gaps i'd rather it be too thick going around want to make sure this seals all the water out the sunroof delete panel good now before you go and just install
[20:12] the panel it's very important that you clean the mating surface with a solvent grease so the caulk bonds to the car properly you clean this area very well and check out all the dirt we removed
[20:25] now with that all cleaned up let's carefully get our panels seated in this just like that beautiful and then we're going to use the stock bolts to hold the large washer to distribute the load evenly on the fiberglass that way it
[20:38] so let's screw in the four bolts in the front then we can get our two bolts on the driver's side and that bolt in the rear and finally the two other bolts on the passenger side and that last bolt in the
[20:51] sunroof delete kit now our big gaping hole is sealed and this only weighs two pounds it's made of fiberglass so it's pretty light so in total we lost 38 pounds from our roof which is huge
[21:05] reduction is going to be to remove major parts of the dash remove this airbag it's going to be very heavy also we have this wood trim some of the cost of the car so we need to be extra careful not to damage this
[21:19] and get the tool under the trim and pop it out good the vent in and then the vent comes right out next let's pop open the air bag cover and in here there are four bolts holding
[21:31] get those out and then we can carefully remove the airbag followed by the airbag cover good next let's remove the wood trim over the radio so we need to unscrew both of those
[21:45] like that and the last thing holding it in is the wire harness so pop the clip up and pull that harness right off next we can get the climate and disconnect all the connectors on the back of this and there's a bunch here
[21:59] and then below that there's a tray that pulls right out and then below that to the shift knob and then the bezel around the shifter holding it in now let's carefully pull it out good and
[22:13] and for right now i'm going to keep it like this because it holds the window lightweight all right so with all those pieces taken out we removed 15 more pounds from our car and we're
[22:26] bit more i'm not doing it right now but we can remove the glove box i have there which we'll need for trailering the car wheel but again we're going to wait just because i need to do the 0 to 60 test
[22:40] trailer when you have an actual steering wheel but right now the dash is ready to be removed with just four nuts we have a nut here and a nut there and then a nut there and a nut on the other side
[22:52] dash will come out so the cage builder could weld up the cage and get it in and the last thing to do is install our racing seat perfect okay with our racing seat in that looks absolutely incredible let's go find out
[23:07] what our final weight is and it looks like we our final weight is and it looks like we are at 2940 pounds remember we started at 3 370 pounds which means we removed
[23:19] over 430lbs from this car which is incredible that's over 10 of this car's original weight gone and i cannot wait to see how this now we didn't remove absolutely everything there are other things in
[23:33] that can be removed for example the door cards part of the rules for the race says that when your windows are rolled down you have to have door cards to breaks in an accident it won't go into the driver's
[23:46] compartment so these are going to stay here i will probably end up removing pretty heavy another thing is the airbags so i didn't remove the side come out for me to remove those so after the cage
[24:00] airbags and then one last thing excess wiring there's tons of it we took a lot of stuff out you don't need all this i don't want to cut it right now because i know my luck i'll cut it and the car
[24:14] cutting out the wiring that we save you some weight so let's head to the track and go test this car out car feels completely different i cannot wait to see how much faster
[24:29] 0 to 60 test okay moment of truth
[24:46] good launch good shift yeah yeah baby 6.17 seconds okay run number two
[25:09] seconds 4 500 rpms
[25:25] we are below 6 seconds for that zero to sixty sixty yeah yes to zero brake tests and all three of them were right around 140 feet which is
[25:39] a lot better than 170 feet from before i think losing the weight helped but i also think we bedded in these brakes during the before tests which gave us a brakes are so worn out either way this is a good improvement
[25:53] definitely helping now back from the track and all i could say is holy smokes what a difference not lugging around 430 pounds worth of parts makes this car feels so much lighter and
[26:08] i mean acceleration wise we saw it's quicker breaking wise we saw it break and it just feels absolutely nimble what a difference 430 pounds makes and i huge difference and it just it blew me away i mean it
[26:22] kind of makes sense the seats alone 60 pounds each the carpets 45 pounds all the fasteners that holds all this stuff in five pounds you're not carrying that around this thing is a rocket so there you go
[26:38] that is how much weight you could remove from your car and that's being pretty couple more pounds and i will eventually but this car is ready to go to the welder i can't wait to get that roll cage welded in
[26:50] the video i hope you learned something new if you did remember to give it a free to comment below i'll do my best to answer them hitting that subscribe button and as always all the tools and products
[27:03] description the race is coming up soon so stay tuned
⚡ Saved you 0h 27m reading this? Transcribe any YouTube video for free — no signup needed.