Why You MUST Acclimate Laminate Flooring
40sThis beginner mistake causes huge issues, and the warning is crucial for DIY success.
▶ Play ClipThis video provides a comprehensive, step-by-step guide on installing laminate flooring throughout a house, geared towards beginners. The host, Josh, covers everything from selecting materials and prepping the floor to cutting planks, handling transitions, and finishing edges for a professional result.
Josh introduces his DIY channel and the Stain Master laminate flooring (12 mm thick, waterproof padding attached, 23.69 sq ft per box) from Lowe's. To calculate material, measure room length × width, add 10%, then buy enough boxes.
Let flooring sit in the room for 48 hours to acclimate. Clean the subfloor, fill depressions with leveling compound, and sand down bumps.
Pull from multiple packs to blend shades. Required tools: tapping block, pull bar, spacers, rubber mallet, miter saw, circular saw. For the first row, remove the tongue on both the long side and the short side (first piece only) to create a square edge against the wall.
Use spacers (3/8 inch) against the wall. Start on the left side, working right. To mark floor vents, measure from the wall, verify duct size, add 5/8 inch offset, then cut with a circular saw and oscillating tool.
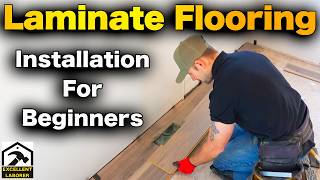
Lift the new plank's tongue into the groove of the installed piece, push and tap with a tapping block. Check alignment by measuring from a reference line (e.g., subfloor seam or chalk line) every few rows.
Use leftover from the first row as starter if it's at least 12 inches long. Stagger joints at least 12 inches apart. Click the second row into the first, then tap it down.
For the last piece of a row, use a pull bar to close the gap because you can't get a tapping block in. Drive it with a regular hammer.
To keep flooring aligned between rooms, install a full piece temporarily at both ends of the junction, mark a chalk line, then measure back 12 rows × 7.5 inches (exposure) to set the starting line for the new room.
Stop laminate flooring under the door slab to install a transition strip. Adjust for thickness difference (1/4 inch) by notching the door jam. Install a 4-in-1 transition kit (T-mold + reducer) with silicone adhesive.
Measure pipe positions, drill holes 1/4 to 3/8 inch larger. For the last row, rip the plank to width, leaving 3/8 inch gap, then use a pull bar to seal the joint.
Tuck 3/8 inch backer rod around the edge to allow expansion/contraction, then apply a bead of 100% silicone for a waterproof seal. Baseboard or quarter round will cover the gap.
Laminate is a floating floor (no fasteners), so expansion gaps are critical. Mistakes happen – order 10% extra. Quarter round covers gaps if baseboards are already installed.
This thorough guide equips beginners with all the steps to install laminate flooring like a pro: from acclimation and subfloor prep to cutting, clicking, and finishing transitions. Key takeaways include allowing expansion gaps, staggering joints, and using pull bars for tight spots.
"The title accurately reflects the content: a step-by-step beginner-friendly tutorial covering the entire process of installing laminate flooring in a whole house."
What is the minimum length for a leftover plank to be used as a starter for the next row?
At least 12 inches.
13:52
How long should laminate flooring acclimate in the room before installation?
At least 48 hours.
1:09
What size expansion gap should be left around the perimeter of laminate flooring?
3/8 inch.
5:16
What tool is used to close the joint of the last plank in a row when there is no space for a tapping block?
Pull bar (driven with a regular hammer).
16:49
When installing laminate over concrete, what must be placed first?
A 6 mil vapor barrier.
16:41
How do you calculate the number of flooring boxes needed for a room?
Length × width to get square footage, add 10%, then divide by the square footage per box.
0:52
For the first row of laminate, which edges of the first plank must be removed?
The tongue (long side) and the short side (end lip).
2:53
What is the purpose of using backer rod and silicone around the perimeter of the floor?
To allow for expansion and contraction while providing a waterproof seal.
34:23
What does 'floating floor' mean in the context of laminate installation?
No fasteners (nails, glue) hold the floor down; it is held by its own weight and the click system.
35:48
When transitioning between rooms, how do you ensure the planks line up correctly?
Snap a chalk line using temporary pieces, then measure back the number of rows × 7.5 inches to set the starting line.
18:32
Material Calculation Formula
Provides a simple practical formula (length × width + 10%) that viewers can immediately apply to any room.
0:52Vapor Barrier Requirement Over Concrete
Crucial moisture protection tip prevents future floor damage; often overlooked by beginners.
16:41Perimeter Sealing for Waterproofing
Explains how to use backer rod and silicone to allow expansion while waterproofing – essential for kitchens and bathrooms.
34:23Minimum Starter Length 12 Inches
A clear, hard rule (12 inches minimum for starters) that ensures proper staggering and structural integrity.
13:52Quarter Round as Alternative Baseboard Cover
Provides an easy solution for existing baseboards: install quarter round over the expansion gap instead of removing baseboards.
36:36[00:00] In this video, I'm going to show you how
[00:01] to install laminate flooring step by
[00:03] step for beginners throughout a whole
[00:05] house. And if you're new to this
[00:06] channel, my name's Josh's all about DIY
[00:09] to save a ton of money. So, be sure to
[00:10] subscribe, ring that bell so you get
[00:12] notification every time we release a new
[00:13] video and hammer that like button for
[00:15] me. It's all I ask return for making
[00:16] this video. So, we got a lot to go over
[00:18] today. So, let's get started. Here's the
[00:20] laminate flooring that we'll be
[00:21] installing in this video. The great
[00:23] thing about this laminate flooring is it
[00:26] comes with the padding attached to the
[00:27] bottom. So you don't have to worry about
[00:29] placing it on the floor first. And this
[00:31] is by Stain Master. This can be found at
[00:34] Lowe's and I'll put a link to it in the
[00:35] description below if you want to check
[00:36] it out for yourself. And this stuff is a
[00:39] 12 mm thickness and it's also considered
[00:43] waterproof according to the packaging
[00:45] here. And it contains
[00:48] 23.69 square ft per package. So you can
[00:52] calculate your room's material by doing
[00:55] the length times width. add 10% and then
[00:58] that's going to give you how much square
[00:59] feet you need and then you can buy
[01:01] however many boxes it takes to get that
[01:03] square footage. So you already
[01:05] calculated your floor you're getting it
[01:07] delivered. Now what's the next step? The
[01:09] next step is going to be lay your
[01:11] flooring into the rooms that they're
[01:13] going to be installed and let them sit
[01:15] there for at least 48 hours. It allows
[01:18] the flooring to acclimate to the room's
[01:20] temperature and moisture content. So
[01:23] that way when you install it, it's not
[01:25] going to move as much. Let's say it came
[01:26] from a 50°ree truck and then it gets
[01:29] installed immediately. Well, it's going
[01:31] to expand once it starts warming up. So
[01:33] always let your flooring acclimate.
[01:35] Second thing, make sure you prep your
[01:37] floor. Clean it really well. Fill in any
[01:40] depressions in the floor with leveling
[01:42] compound or sand off any humps or bumps
[01:45] that's on the floor. You're going to be
[01:47] thankful later down the road for that.
[01:49] Then the next thing we need to do is
[01:51] pull from multiple packs of flooring as
[01:54] we install it. That way it blends the
[01:56] shades from different colors along with
[01:59] your basic carpentry tools. You're also
[02:01] going to need a tapping block, a pull
[02:04] bar, and spacers. And this came as a
[02:07] kit, and I'll put a link to it in
[02:08] description below. But this is
[02:10] everything you'll need to install
[02:12] laminate flooring as far as any
[02:14] specialized tools. And another thing
[02:16] you're going to want to purchase is a
[02:18] rubber mallet. This is going to be
[02:20] helpful whenever you're placing your
[02:22] laminate flooring together. So, you
[02:24] definitely need to purchase these things
[02:26] before installing your laminate
[02:27] flooring. I'm out here in the garage. I
[02:29] have my miter saw set up to do the cross
[02:32] cutting and I also have my circular saw
[02:34] to do the ripping and my oscillating
[02:37] tools here as well. So, that way I can
[02:39] cut out for floor vents and whatnot.
[02:42] This is where I like to do most of my
[02:44] cutting when I'm installing floor. That
[02:46] way, most of the dust is out here in the
[02:47] atmosphere instead of where I'm working,
[02:49] and it keeps the work environment
[02:51] cleaner. I first have to prepare the
[02:54] first piece of flooring by removing
[02:56] these sections that are on the back of
[02:59] the flooring where the padding is not
[03:01] exposed. This area is also not
[03:04] supported. So, we must remove this first
[03:06] before installing it for our first row
[03:09] only. So, I'm going to use the miter saw
[03:12] to cut this off and then use a circular
[03:14] saw to cut this lip off. The overhang on
[03:17] the short side on the first piece of
[03:19] flooring is the only piece that needs
[03:21] the short side removed. Using a circular
[03:23] saw, I'm going to use it to rip this
[03:25] edge off of the
[03:29] flooring. If you have the ability to get
[03:31] your hands on a table saw in order to
[03:33] rip down the pieces of flooring for your
[03:35] starters, you definitely should. It's
[03:38] really going to save a lot of time and
[03:39] it's also going to be helpful for the
[03:41] finishing up process too later on this
[03:43] video. So, this will definitely speed
[03:45] things up, but the circular saw is fine,
[03:47] but this is definitely what I prefer. I
[03:50] am outside making this cut, but it is
[03:52] recommended that you wear a dust mask
[03:54] when cutting the laminate flooring.
[03:56] Yeah, that's much quicker. You can see
[03:57] that the first piece is now square on
[04:00] the edge that's going to butt against
[04:02] the wall. And that's what we need to do
[04:04] to begin the flooring. Our first piece
[04:06] is to start at the left side of the room
[04:08] and work towards the right. And this is
[04:11] going to be something much easier to do
[04:13] if you have knee pads on. So, I highly
[04:15] recommend purchasing a set of knee pads.
[04:17] You will be thankful in the long run.
[04:19] And also, we have a few shims here to
[04:22] start out with. And I'm going to show
[04:23] you how to set this first one into place
[04:25] and how to mark out for this vent
[04:27] because we need a cutout for that as we
[04:29] go as well. When starting your first
[04:32] row, your drywall is either going to be
[04:33] up high enough to where the flooring can
[04:35] slide up under it, or it's going to be
[04:38] down low enough to where you can butt up
[04:39] against it. It's actually easier to
[04:42] start off of if the floor is able to
[04:44] butt up against the drywall because we
[04:47] can shim our 3/8 right off the drywall
[04:49] that way. But in this case, as you can
[04:52] see, because our floor is going to slide
[04:55] under it, which will give you a better
[04:58] finish lookwise, but it's going to be
[05:00] harder to space off of because our shims
[05:02] won't fit in there, right? So, what I
[05:04] found best to do here is just place our
[05:07] shim like so, and then just put it on an
[05:11] angle and butt up to it like that.
[05:14] That's going to give us our 3/8 inch
[05:16] gap. So, I'm going to do that at both
[05:18] sides here.
[05:20] I'm then going to take one and place
[05:22] that at the very end. Here we can shim
[05:25] off the drywall because our drywall is
[05:28] cleared down to the subfloor. To mark
[05:30] this floor vent that needs cut out, I
[05:32] need to mark the edges. I'm going to
[05:34] begin by marking this very edge here.
[05:38] And I know this is a 10x4 vent. I'm
[05:41] going to come over 10 in just to make
[05:44] sure we are cutting it at the right
[05:46] width.
[05:48] And take note that sometimes this duck
[05:50] work is not perfectly square or the
[05:52] perfect size. So always double check the
[05:55] actual measurement that you need here.
[05:58] And I know that this duct is for a 4x10
[06:01] vent. So because of that, I know I need
[06:04] to allow this much here whenever we cut
[06:07] this out is another 5/8. So whenever we
[06:11] mark our distance back here, we need to
[06:14] remember that 5/8 is still coming up out
[06:17] of here. I'm now going to take this out
[06:19] to the garage to cut it. This is one
[06:21] edge of the vent. Here is the other. I'm
[06:23] going to use a speed square and just
[06:25] make a square mark off that mark that we
[06:29] made while it was on the floor at both
[06:33] areas. I'm now going to allow the 5/8
[06:36] that we measured that's going to be left
[06:39] onto this side to be cut out. I'm going
[06:42] to mark right at 4
[06:44] in. Do the same over here.
[06:47] I'm going to use that to scribe a line.
[06:51] I'm now going to cut that out for the
[06:53] floor vent. I'm just going to use the
[06:55] circular saw to cut down each line and
[06:58] then oscillating tool to finish out the
[07:03] corners. To cut this out, a plunge cut.
[07:06] Or you could run your oscillating tool
[07:08] down the whole line, but it's going to
[07:10] be quicker to plunge cut.
[07:15] To finish out these corners, I'm just
[07:17] going to use the oscillating
[07:22] tool. And that's all there is to cutting
[07:25] out for the vent. I'm going to place
[07:26] this back where it was sitting. And
[07:28] again, we want 3/8 off the wall around
[07:31] all edges of the
[07:34] flooring. As you can see, the floor vent
[07:37] is cut out really nice. We're now going
[07:39] to continue running to the right side of
[07:42] the room. Notice the seam where the two
[07:44] subfloor rows come together. I can use
[07:47] that as a reference from this wall to
[07:50] make sure we are running square with the
[07:51] wall as we run our rows. I got 36 1/2 in
[07:55] off the tongue. And I checked this
[07:58] before we started. If I didn't have this
[08:00] seam to go off of, I could also just
[08:03] measure up 4 foot off each side of the
[08:05] room and chalk a line on the floor and
[08:07] use that as a reference line to go off
[08:10] of. So, as we're running our rows, we
[08:13] can make sure that they're running
[08:14] square with the wall. It's a good little
[08:17] tip. While pulling from a few open
[08:19] boxes, I'm going to take pieces and butt
[08:22] them tight to each other to get our
[08:24] total length. So, we can actually precut
[08:27] all of our starters. And that includes
[08:29] ripping off this back section. So, that
[08:32] way we don't have to run back and forth
[08:34] so many times. So, I'm just going to
[08:36] take this and butt it tight to this one.
[08:39] and then continue the run until we get
[08:42] to the wall so we can cut it. You could
[08:44] also take a measurement of the rest of
[08:46] the length of the row that you need.
[08:48] Then divide it by the length of the
[08:50] laminate flooring, which is a little
[08:52] over 50 in, to let you know how many
[08:54] full pieces you need to rip down to
[08:56] start your first row. Just so I'm very
[08:58] clear here, you only rip the long side
[09:01] off, not the short side for all the rest
[09:04] of them for your first row. The very
[09:07] first one, we had to rip this off as
[09:08] well because it was up against the wall.
[09:11] Just want to make sure that was very
[09:12] clear. In order to connect these
[09:14] together, it's very simple. I'm going to
[09:16] lift up the side that needs clipped into
[09:18] the one that's already existing on the
[09:20] floor. And then we're going to place
[09:22] pressure towards the one that's already
[09:25] on the floor. Then we're just going to
[09:27] lay it down. And it's going to hook
[09:29] together like so. And you can see here
[09:32] that it is not lined up together, which
[09:35] we want to make sure they are. We're
[09:37] going to use the tapping tool. And then
[09:39] we're going to lay it right against this
[09:40] edge. And then we're just going to tap
[09:43] it until it's
[09:47] flush. Okay. And that feels really good.
[09:50] And now again, if this seems like it's
[09:52] separated a little bit, we can take our
[09:53] tapping tool from the other side of the
[09:55] flooring to tap that a little tighter.
[09:57] If you do have to make the joint a
[09:58] little tighter, you could come from this
[10:00] end, tap it a couple times, and that'll
[10:03] tighten that joint right up. That looks
[10:05] really good there for our joint. Using
[10:07] more spacers, we're going to make sure
[10:09] that we are spaced appropriately from
[10:12] the
[10:14] wall. And it doesn't hurt to check with
[10:17] your tape measure to make sure you're
[10:19] running about the same off the wall if
[10:21] your wall is straight.
[10:24] I then rinsed and repeat that process
[10:26] until I get to the next one that needs
[10:28] cut. Something I like to do is put
[10:30] spacers close to the butt joint. That
[10:32] way, it helps keep that butt joint flush
[10:34] with each other at the front. So,
[10:36] whenever you do your next row, you're
[10:38] going to have less issues that way. With
[10:40] the first few pieces down, I'm going to
[10:42] double check to make sure I'm running
[10:44] parallel with the wall. Going to take a
[10:46] measurement here. And I got 36 1/2 in
[10:50] just like my starter. So, I know I'm
[10:52] running parallel, which is very
[10:53] important. And then our distance off the
[10:56] wall is still about 7 in. So, that's
[10:58] looking really good. And if you're
[11:00] wondering about how much coverage we get
[11:02] with each plank, each plank has a length
[11:05] of 50 and 5/8 inch. And the width is 7
[11:09] and 1/2. So, the exposure of 7 and 1/2
[11:12] will give you a lot of coverage per run.
[11:15] That's something I really like about
[11:16] this stain master flooring. This next
[11:19] piece has a vent in it. We need to cut
[11:21] that out. I'm just going to butt this
[11:22] right up to this piece. And now we have
[11:26] a place to go right off of to mark for
[11:28] our vent. Again, I'm going to mark right
[11:30] on the edge and then measure off 10 in
[11:34] to make sure we are going to be placed
[11:36] correctly. And that looks good. And now
[11:40] we can use our same measurement that we
[11:42] used on our first one because this wall
[11:45] has the same measurements for the vent
[11:47] like the first vent. So, that's going to
[11:49] be helpful. I can use my speed square
[11:52] and mark that exactly what the last one
[11:55] was with the distance off and then make
[11:57] a square line. Then do it here as well.
[12:01] I can then just scrub my
[12:06] line. And we also have this door jam we
[12:09] need to cut around. I'm going to measure
[12:12] off the pre-existing piece on the floor
[12:16] and then take off 3/8. That puts me at
[12:20] 38 and
[12:23] a4er. We're going to place that mark on
[12:26] the
[12:28] board. I'm going to measure the
[12:30] thickness here. And that's what we're
[12:32] going to have to take off so that we
[12:34] don't have this part hitting the door.
[12:38] That's 6 and
[12:40] 5/8. I'm now going to scribe that
[12:45] line. This needs cut out. And this needs
[12:48] cut
[12:51] out. All right, we're going to snap this
[12:54] into place and see what we
[12:56] got. So far, it's looking good. Now, I'm
[12:59] going to tap it
[13:01] back. And something you're going to
[13:03] notice, it's going to be a fight to keep
[13:04] this where it needs to be as you're
[13:06] tapping it. You just got to readjust the
[13:08] road that's already there. Just the
[13:10] nature of the
[13:12] beast. Everything looks good here. Here
[13:14] we got to place our spacers and continue
[13:16] the
[13:18] run. For the last piece of the run, I
[13:21] just got to get a total length and
[13:23] subtract 38 of an inch. And then we just
[13:25] got to cut it. Then cut around this
[13:27] door. And it's as simple as
[13:31] that. And this is the final piece in
[13:34] this row.
[13:39] Now that we are finished the first row,
[13:41] this is a scrap that was cut off in
[13:44] order to finish up this row. And this is
[13:46] going to be our starter for the second
[13:49] row. And a very important note here, if
[13:52] this scrap is shorter than 12 in, it
[13:55] cannot be used. It has to be at least 12
[13:58] in. If I take a measurement, we got 12
[14:02] and 3/4 in. So, this is perfect for a
[14:04] starter. And we want to make sure that
[14:06] it isn't too long to where we are within
[14:09] 12 inches from the joint. So let's say
[14:12] this piece was 45 inches. We'd only be
[14:15] about five inches away from the joint.
[14:17] That's too close. We'd have to cut it
[14:19] down. So that' be shorter. So we are
[14:21] going to use this as our starter for the
[14:23] second row. To install the first piece
[14:25] of the second row, it's just like we did
[14:27] with the first piece of the first row.
[14:29] We just got to space 38 inch off the
[14:32] wall using a spacer. and then just click
[14:35] it right into place. After snapping the
[14:37] second row into the first row, I take
[14:39] the tapping block and rubber mallet and
[14:42] tap it into the first row to seal up the
[14:44] joint. And we definitely have to cut
[14:46] around our vents to finish up this edge.
[14:49] To mark for the rest of this vent, I'm
[14:50] just going to lightly lay it into place
[14:53] and not click it down all the way. And
[14:55] then I'm going to mark the vents
[14:59] edge. And then we're going to pull that
[15:01] right back up. And I'm just going to get
[15:04] my total distance here. If we measure, I
[15:07] got about three and a half. So, we need
[15:10] to just take a half inch out of this in
[15:12] order to complete for our cut. And most
[15:16] floor vents, you can get away with a
[15:18] little bit bigger. Let's say 4 and 1
[15:19] eigh by 10 and 1 eigh because there's a
[15:22] flange that goes around the vent cover.
[15:24] And I'll show you that here in a
[15:26] minute. I'm going to cut this out. We
[15:29] now have the tongue here and the tongue
[15:31] here. we got to clip into. I find it
[15:34] best to clip it into the long side
[15:37] first. So, we're just going to place
[15:39] this together like we typically
[15:42] would. I'm going to tap in towards the
[15:46] first
[15:49] row. Now that we're snapped into this
[15:52] row, we need to tap it into this piece.
[15:56] So, we're going to go to this very end
[15:58] here. Going to take my tapping tool,
[16:00] place it right against this, and drive
[16:02] it towards that
[16:06] joint. And it has closed this joint up
[16:08] all the way. That's how you install the
[16:10] rest of the pieces in this row. So, you
[16:13] can see what the floor vent's going to
[16:15] look like when it's finished. If you set
[16:17] that into place, that gives us a nice
[16:19] finished look. And now we can control
[16:22] the airflow up out of the vent. to
[16:24] finish the rest of the second row and
[16:26] the remaining of the rows in this room.
[16:28] We literally rinse and repeat those same
[16:31] principles until we get up to the area
[16:33] where we intersect another room. And I'm
[16:35] going to show you what to do once we get
[16:37] to that point. Because I installed this
[16:39] over a subfloor that is dry, I did not
[16:41] need a vapor barrier. Now, if I was
[16:43] installing this over concrete, I would
[16:45] install a six mill vapor barrier first
[16:47] before installing this flooring. For
[16:49] this last piece, we'll have to use the
[16:50] pull bar to close up this joint. So, I'm
[16:52] going to show you how to do that. So,
[16:54] we're going to go ahead and snap it into
[16:57] place here. And now, we're going to use
[16:59] the pull bar. And this is going to lace
[17:01] back into this gap. We're going to take
[17:04] our regular hammer cuz it will tap
[17:07] better with a regular hammer versus the
[17:09] rubber mallet. I'm going to hold this
[17:11] end down. We're going to tap it to close
[17:13] up that
[17:15] gap. And you can see that closed up the
[17:17] gap really nice. And that last piece
[17:19] looks good. We need to make sure we put
[17:22] our spacers in here. If you have ever
[17:25] installed tile or hardwood floor, you
[17:27] will be amazed on how much quicker
[17:29] laminate flooring is compared to those
[17:31] products. Here's a word of advice.
[17:33] Whenever you get your first three rows
[17:35] done, check your reference line and make
[17:39] sure that you're running the same and
[17:41] that you're still parallel with your
[17:42] wall. And readjust your shims if you
[17:45] have to to make sure you're running
[17:47] correctly. because these first three
[17:50] rows move a lot while you're installing
[17:52] the flooring. And also, we're going to
[17:55] keep running this room. And if you have
[17:57] a helper, it's really good to have him
[17:59] hand you the pieces and cut them as you
[18:01] install them or vice versa. Two men will
[18:04] make this job go three times faster or
[18:06] two women. Just a good little tip. If
[18:08] you are enjoying this type of content,
[18:10] you may enjoy my free PDF. I'll put a
[18:12] link to it in description below. A quick
[18:14] way to mark the end to cut. Flip the
[18:16] tongue around to where tongue is facing
[18:18] the tongue of the previous row. Then
[18:20] mark for your 3/8 spacing and that's
[18:22] going to be where we cut
[18:23] [Music]
[18:32] it. We're up as far as we can go before
[18:35] we have to start this room. In order to
[18:37] start this room to line up with this
[18:39] room really well, it's a very simple
[18:42] process. I'm just going to take a full
[18:44] piece and I'm going to clip it in. And
[18:47] I'm not going to keep this as a final
[18:49] install, but we're just going to tap
[18:51] this into place for now and then do one
[18:53] at the other end of the
[18:55] run. I'm here at the very end of the
[18:58] run. We're just going to snap this
[19:00] in. I'm then going to mark the very edge
[19:03] here and then pull that back up. And
[19:07] this stuff unsnaps really easy if you
[19:09] have to, by the way. And then I'm going
[19:11] to take a nail and nail it right onto
[19:13] that mark. I'm now going to use my chalk
[19:16] line, hook to that nail, and I'm going
[19:19] to run it by that first piece that we
[19:21] installed at the other end of the run
[19:22] and continue it into the following room.
[19:25] I'm going to continue running the chalk
[19:27] line into this room. And we need to make
[19:30] sure that we go right by the tongue of
[19:33] the first piece we put
[19:36] down. And we're going to strike our
[19:39] line.
[19:40] As you can see, that gives us a great
[19:42] reference line to go off of to start our
[19:44] first row. I can now take up the first
[19:47] piece we put down. I now need to
[19:49] calculate how far to measure off this
[19:52] red line to start our first row. If we
[19:54] count the number of rows here, we got 1
[19:57] 2 3 4 5 6 7 8 9 10 11 12. So, if we have
[20:02] 12 rows, we need to measure back 12
[20:06] times the exposure. So, it would be 7.5
[20:09] * 12, which gives us 90 off this red
[20:12] line to our first row. Here is the red
[20:15] line coming into the room. I'm going to
[20:17] hold on that red line and measure back
[20:19] 90 in. I'm going to make a mark right at
[20:21] 90 in on the floor. Okay, we do the same
[20:24] on this side of the room. Mark
[20:26] 90. I now need a chalk line from mark to
[20:29] mark. And that's going to be the chalk
[20:31] line we go off of to start our first
[20:33] row.
[20:38] Here is the chalk line to start with.
[20:40] What I recommend you do is measure off
[20:42] the wall here and we got about 7 in. And
[20:46] then we need to measure off down here as
[20:48] well. Just make sure we're still running
[20:50] fairly square with this room. And we
[20:52] are. So that's going to be great. You
[20:54] can manipulate this some if it's way off
[20:57] for your starter row. I'm now going to
[21:00] start this room just like I did the
[21:01] first room, except I'm going to line up
[21:05] the tongue against that red line so that
[21:08] we know we're going to run true to the
[21:11] other room so we can intersect
[21:14] [Music]
[21:26] properly. I'm now at the point where I
[21:28] need to transition from this room into
[21:30] this room with one seamless row joining
[21:32] the two. Make sure the piece that you
[21:35] start off of on this row that joins
[21:37] these two rooms together that the brakes
[21:40] do not break to where you're too close
[21:42] to a joint out here. So, if you're
[21:44] running this room to where the joint
[21:45] looks good, you may jump over into this
[21:47] room and realize, oops, I'm too close to
[21:50] the joint once I enter into this room
[21:52] because these do not come in various
[21:54] sizes. They're all 50 and 5/8 inch long
[21:57] roughly. So, because of that, you
[21:59] definitely need to make sure when you
[22:00] start out at the back here. It's a
[22:02] measurement that works for this room and
[22:04] this room to make sure this all comes
[22:06] out right. I got a full piece here that
[22:09] I'm going to just touch right where it's
[22:11] going to be installed. And I know this
[22:14] piece I cut down 23 in. And reason why
[22:16] that is once it is installed into place,
[22:20] it's going to break out evenly for the
[22:22] next row. So, that's an important
[22:23] concept to note whenever you're
[22:25] transitioning from room to room. So, I'm
[22:27] going to install these couple pieces,
[22:29] then bring this row with
[22:35] it. Something I've learned from
[22:36] experience, you don't want this too big
[22:39] around this corner, just because your
[22:41] door trim will not cover this up if it's
[22:44] too big. Just keep note of that. Yes,
[22:47] it's a little bit tight right here, but
[22:49] to me, I have to do that. If not, after
[22:52] the doors installed, you're going to see
[22:53] a gap here. Just so you know, that's
[22:55] what I've learned through experience
[22:57] after I go to hanging doors. You can see
[22:59] we transition from that room to this
[23:01] room seamlessly. Looks really good. Now,
[23:03] we're going to continue running the rest
[23:04] of this room we started in. Using the
[23:06] chalk line method, we tied in the
[23:08] bedroom that's after the first bedroom
[23:10] we just installed in. And I also tied in
[23:13] the master bedroom behind the camera as
[23:16] well. So, everything is coming together
[23:18] really nice. I now need to show you a
[23:20] transition from this laminate flooring
[23:23] to a different type of flooring. So that
[23:25] way you know how to use a transition
[23:27] strip and when to use it. I'm here in
[23:29] the master bathroom and I need to
[23:31] transition from the master bedroom to
[23:33] the master bathroom from the laminate
[23:35] flooring to the luxury vinyl cuz the
[23:37] luxury vinyl flooring is going to be
[23:39] more appropriate for a wet area like a
[23:41] bathroom because it's not near as
[23:44] susceptible to water damage like
[23:46] laminate flooring is. Even though this
[23:48] is ready to be waterproof, I'm going to
[23:50] feel better about having some type of
[23:52] vinyl in this bathroom. I now need to
[23:55] stop this flooring somewhere in an area
[23:58] to where the transition strip will be
[24:01] underneath of the door slab. So, this is
[24:04] going to be a end swing door here. The
[24:06] slab is going to be right in this area.
[24:09] So, after we install the rail for our
[24:11] transition strip, we need the
[24:13] appropriate expansion gap here. So, I'm
[24:15] going to show you where to calculate
[24:17] that. In this door opening, the door
[24:20] slab comes flush with this drywall on
[24:22] the bathroom side since it's in swing
[24:25] and it's an inch and a/4 thick.
[24:27] Technically, the slab's going to be
[24:29] right here, but we don't want our
[24:31] transition strip to go past this
[24:33] drywall. So, we want to stop our
[24:37] flooring just enough to be halfway the
[24:40] thickness of the rail for the transition
[24:42] strip. And then we need an expansion gap
[24:45] here, 38, just like we've been doing. So
[24:48] if we stop our floor roughly right in
[24:50] the middle here, the opening that's
[24:52] going to give us the appropriate
[24:54] distance. And when we cut our luxury
[24:56] vinyl, we're going to come in about this
[25:00] far once it's to be installed. So we
[25:02] need to stop this flooring right here.
[25:05] Measuring off the exposed side of the
[25:07] last row, I'm going to measure up to
[25:09] that mark. That gives me just about five
[25:12] inches, four and seven8s. And I'm going
[25:15] to take the piece that I cut down to go
[25:18] around the opening and place that mark
[25:22] on here coming off the finish
[25:26] side. I'm now going to rip this off to
[25:29] make the piece to go under the door.
[25:32] Some installers would simply install the
[25:34] transition strip right in the middle of
[25:35] the door opening for simplicity sake.
[25:38] Just so you know, we can now install the
[25:40] luxury vinyl in the bathroom. Even
[25:42] though I'm installing luxury vinyl here,
[25:44] I wanted to show you how I cut around
[25:45] this toilet flange because you can use
[25:47] the same method with laminate flooring
[25:48] as well. I first found the center and
[25:50] marked it onto the luxury vinyl. I then
[25:53] tacked a nail on that section of the
[25:55] flooring. I then measured the diameter
[25:57] of the toilet flange and then add 3/8 to
[26:00] 1/2 of the measurement and then marked
[26:03] that on the flooring. Use my chalk line
[26:06] to hold on that mark. and then went in a
[26:08] circle around that nail and that's what
[26:11] marked it onto the flooring. I then
[26:13] scrubbed around with my utility knife
[26:14] because this is luxury vinyl with
[26:15] laminate I would not have to do that. I
[26:17] took a coping saw to cut around and
[26:19] snapped it out and you can see it gave
[26:21] me a nice finished cut around the toilet
[26:23] flange. I made a detailed video
[26:25] installing luxury vinyl. If you'd like
[26:27] to check that out, I'll put a link to it
[26:28] in description below. The transition
[26:30] between the laminate flooring to the
[26:32] luxury vinyl is just about a/4 in.
[26:35] Here's the thickness of the luxury
[26:37] vinyl. And here is the laminate. And if
[26:40] we take a look, it's about a/4 in
[26:42] difference. This is an eighth. This is
[26:43] 3/8. And here's our door here. It's a
[26:46] split jam door. So, it pulls apart. So,
[26:49] what we need to do is notch just about
[26:51] a/4 in off this side of the door so that
[26:55] it steps down onto this luxury vinyl.
[26:57] And what you could do here is is put a
[27:00] quarter inch plywood underneath of this
[27:02] luxury vinyl and it could have been
[27:04] flush that way. But this homeowner did
[27:07] not want that. So, we're just going to
[27:09] step it down. So, I'm just going to
[27:10] notch that out of the door before
[27:12] installing it. This was a very simple
[27:13] process. We first took the split jam
[27:15] door apart and then placed it in the
[27:17] opening. And I marked where the laminate
[27:18] flooring met the jam. And I did that on
[27:21] each side of the door because we're
[27:23] going to have to notch around that to
[27:24] settle down on top of the luxury vinyl.
[27:27] We then placed the door on saw horses. I
[27:30] placed a quarter inch mark in order to
[27:32] go down below the laminate floor, then
[27:34] notch it out with my oscillating tool. I
[27:35] could have used a circular saw as well.
[27:38] I then placed the door into the opening
[27:40] and installed it. You can see it looks
[27:42] really nice where we have it installed.
[27:44] I then removed the panel off the door
[27:46] jam so that way it wasn't in the way as
[27:48] we installed the transition strip. And
[27:50] you can see after notching it, it
[27:51] settled down where we needed it. To
[27:53] transition from the laminate flooring to
[27:55] the luxury vinyl, we're going to have to
[27:58] install this transition strip. This is a
[28:00] 4 in one. So, it comes with the T- mold.
[28:02] It comes with the hard surface reducer.
[28:05] It also comes with the transition down
[28:07] to carpet. So, all that is all in this
[28:10] kit. So, whatever transition you have is
[28:13] going to be in here. And this came from
[28:15] Lowe's, and I'll put a link to it in the
[28:16] description below as well if you'd like
[28:18] to pick it up. Here is the metal piece
[28:20] that's going to be screwed down to the
[28:22] floor. And this also came with the
[28:24] screws. And it also came with anchors
[28:26] for concrete. So, we're only going to
[28:28] need these screws for our install. This
[28:31] is the T- mold. This is the hard surface
[28:33] reducer. And this is the transition to
[28:36] like a carpet. And we are going to be
[28:38] using this in conjunction with the T-
[28:41] mold. Now, if we were only going to
[28:43] install the T- mold, if it was a level
[28:45] surface, it would snap right in the
[28:48] center here for it to secure properly.
[28:51] But because we are going to be
[28:53] installing it with this strip, we're
[28:56] going to actually install it here like
[28:58] so. And then this will install on the
[29:01] other side. So, it' be something like
[29:05] this. That would be the transition we
[29:08] would be going with for this install.
[29:10] We're going to install the metal piece
[29:12] first. I'm first going to get the length
[29:14] in which I need to cut the metal strip
[29:16] to be installed. We have
[29:19] 23 and 1/2 in. I'm just going to mark
[29:23] that and then cut it using my tin snips.
[29:29] I'm going to place this strip down here
[29:32] just to make this flush after it's
[29:34] installed with this strip because it's
[29:38] going to be flat with this floor once
[29:40] it's clipped in. So, I do have to space
[29:43] this. You may or may not have to put the
[29:45] spacer to match the floor like I am
[29:47] here. I'm going to make sure I have my
[29:49] 3/8 gap for my laminate flooring. And
[29:52] this is going to be gap for this luxury
[29:55] vinyl appropriately as well. So, we're
[29:57] going to place a screw right
[29:59] here. I'm going to pre-drill through
[30:01] that spacer that I put down because it
[30:03] does want to split it. Just to be clear,
[30:05] the spacer is just a strip of luxury
[30:07] vinyl to space it evenly with the luxury
[30:12] vinyl. You want to get the measurement
[30:14] between the jam here. And this is going
[30:17] to be 24 and 1/4 in. That's going to be
[30:22] for the hard surface reducer. First, I'm
[30:24] going to lay this in here like so. And
[30:27] I'm just going to mark here to where it
[30:30] has to go right around this section of
[30:32] the
[30:34] door because that's going to snap in in
[30:37] this area. Because of that, we need to
[30:40] take out this
[30:43] notch. Just go around this part of the
[30:46] jam. Okay. And I just notched that with
[30:48] the oscillating tool. This is laminate,
[30:50] so it cuts pretty easy. We're going to
[30:52] snap that down on this side first. So
[30:55] now we are flush with the laminate
[30:58] flooring. We're going to cut the T- mold
[31:00] to cut right around this part of the
[31:03] door. And it's going to snap into that
[31:05] part of the track to finish the
[31:07] transition. Okay, this is cut to length
[31:09] to fit in between just like we did here.
[31:11] But we got to place it where it's going
[31:13] to be installed to mark where to notch
[31:16] around. This really needs a little notch
[31:19] right here around that. And over here,
[31:23] same idea. Just little notch
[31:30] here. Before applying silicone, I'm
[31:33] going to dry fit this into place to make
[31:34] sure it's going to
[31:37] fit. And before I snap that in, it feels
[31:39] like it's going to go fine. So, we're
[31:41] going to place silicone in here to hold
[31:44] everything into place.
[31:48] I'm now going to place a bead here to
[31:51] secure the T- mold to the strip. We're
[31:55] going to snap this into
[31:56] place. All right, I'm going to take the
[31:58] rubber mallet just to tap it down all
[32:00] the
[32:01] way. All right, the transition is
[32:03] complete. And that looks really good.
[32:05] After installing the transition strip,
[32:07] we could continue installing the rest of
[32:09] the flooring. We're now entering into
[32:11] the kitchen and we have pipes to cut
[32:12] around. Whenever we got up to these
[32:14] pipes, we simply just measured back how
[32:17] far we got to drill the hole for them.
[32:20] And then we marked the flooring to where
[32:22] the pipes are going to hit. And then we
[32:24] used a speed square to mark that onto
[32:27] the laminate floor. And that's going to
[32:29] give us our exact position to drill the
[32:32] hole out. We took a paddle bit and made
[32:34] sure we have at least a/4 to 38 inch
[32:37] around the pipe. And you can see the
[32:39] holes are cut out really nice. We then
[32:41] placed the flooring right over the pipe.
[32:44] After we placed flooring over the pipe,
[32:45] we installed it. And you can see that
[32:47] gives us a nice cut around for the
[32:49] pipes. I'm now at the point to where I
[32:51] got to finish up along the wall where
[32:53] the flooring is ending. And this is
[32:55] where we're going to have to use the
[32:56] pull bar to finish up. And we need to
[32:59] get a measurement in order to rip down
[33:01] the last row that goes up along the
[33:03] wall. To rip down this last row, I'm
[33:05] going to get my measurement from off the
[33:07] drywall right up to the previous row,
[33:11] which is right at 6 in. And then we need
[33:14] to subtract the 3/8 off of that. So that
[33:17] would put us at five and 5/8 we need to
[33:20] rip this down to. The reason why we
[33:22] don't want to tuck this under the
[33:24] drywall is we need to have enough room
[33:26] to get our pull bar behind it to seal up
[33:29] against the previous row so we close the
[33:31] gap. And that is something we're want to
[33:34] do using the pull
[33:40] bar. We'll begin installing this just
[33:42] like we would any other piece in a
[33:46] row. We're now going to snap it
[33:49] in. We're then going to use the pull bar
[33:52] and then we're going to drive it into
[33:55] the previous row. We want to place a
[33:58] spacer here just to make sure we are
[34:01] spaced correctly. And then we're going
[34:03] to drive this
[34:08] tight. All right. And that's really the
[34:10] key is just make sure you use the pull
[34:12] bar on this last row to get it to seal.
[34:15] Then to finish up this last row, just
[34:17] continue that process until we get to
[34:19] the end of the wall. That was the last
[34:21] row of the floor install in this house.
[34:23] Now that all the flooring's installed,
[34:25] we need to address the perimeter of the
[34:27] flooring using what's called backer rod.
[34:31] We're going to take the backer rod and
[34:32] tuck it in around the edge of the floor.
[34:35] So that way it keeps the flooring
[34:37] contained and it gives us a place for
[34:39] expansion and contraction. And after we
[34:42] tuck this in the corner, we're just
[34:44] going to use a 100% silicone. Just place
[34:46] a light bead over this so that way we
[34:48] have a waterproof floor install. That's
[34:51] really important, especially in a
[34:52] bathroom and kitchen. So, I'm going to
[34:54] show you how to address this area around
[34:57] the perimeter. I'm going to begin by
[34:59] taking a shim to help me tuck the backer
[35:01] rod in behind the flooring and up
[35:04] against the wall. There are different
[35:06] widths of backer rod you can get. This
[35:08] is 3/8 backer rod. After the backer rod
[35:11] is tucked in, we're going to take 100%
[35:13] silicone and just caulk right over that.
[35:20] Then make sure you smooth out that
[35:24] silicone. And that's really the best way
[35:26] to have a waterproof seal yet allow for
[35:28] expansion and contraction around the
[35:30] perimeter. This is why it's essential to
[35:32] order 10% extra. I made a mistake
[35:34] cutting this floor vin out. Now, this
[35:36] piece is scrap, but that's okay. You're
[35:38] going to make mistakes, especially if
[35:40] this is your first time doing flooring.
[35:42] So, it's okay. It's part of the process.
[35:44] Just keep moving forward and you'll get
[35:46] the floor done. Okay. Couple things I
[35:48] wanted to mention. This flooring is
[35:50] considered a floating floor, meaning
[35:52] there's no fasteners holding it into
[35:54] place. So, you must allow for the
[35:56] expansion contraction around the edges.
[35:58] And if you're wondering how this is
[36:00] going to look once the base is on, you
[36:02] can see that's going to cover that up
[36:04] and give you a nice finish. But
[36:06] something else I wanted to mention, if
[36:08] you're doing a remodel or something of
[36:09] that nature where the base is already
[36:11] installed on the wall after you remove
[36:13] carpet or something, when you install
[36:15] your flooring, you would do essentially
[36:17] the same thing, just gap it
[36:18] appropriately. And you can keep the base
[36:21] on and not remove it. And then you would
[36:23] install what's called quarter round to
[36:24] cover up that gap. And that's going to
[36:27] give you a nice finished look. So if
[36:28] you're curious about that, that's how
[36:30] you would address that. If you'd like to
[36:32] see a detailed video on how to install
[36:34] luxury vinyl, check out this video.
[36:36] It'll help you out.
⚡ Saved you time reading this? Transcribe any YouTube video for free — no signup needed.