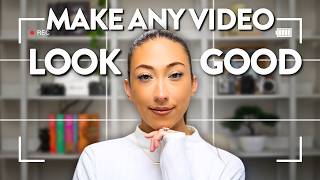

Why I Never Use Instagram's Camera
40sCalling Instagram's in-app camera 'trash' is a hot take that will make commenters argue in seconds.
▶ Play Clip"Genuinely practical, delivers on its promise of gear-free video improvement, though the sponsored segment and subscribe ask add filler."
This video offers a practical, gear-free guide to making your videos look more professional using just a phone. The creator shares two mental checklists — one for talking head shots and one for B-roll — plus essential camera and platform settings that protect video quality from filming to posting.
For consistent quality, camera settings, mobile editor export settings, and social platform upload settings must all be aligned. Failure to check all three can cause quality loss.
For social media, 30 fps is standard. 4K/30fps if you have storage; 1080p/30fps is great for everyday creators and is hard to distinguish from 4K on social media.
Turn on enhanced stabilization, turn off HDR, enable grid/level, mirror front camera, and choose 'Most Compatible' format to avoid editing software issues.
In your mobile editor, ensure export resolution and fps match what you filmed. Example: Premiere Pro mobile app may default to 1080/24, which must be changed to 1080/30.
Instagram: Media quality > Upload at highest quality. TikTok: Allow high quality uploads. YouTube: Upload quality > Full quality.
Before filming a talking head, run through: location, lighting, framing, aesthetic, and test shot.
Use the grid to keep the camera level; ensure it's parallel to wall lines, cabinet lines, and countertops to avoid tilted, unprofessional shots.
Place your eye line at the top third of the frame and leave headspace above your head to reserve space for hook text and captions.
Remove clutter, cords, crumbs, and harsh colors from the frame. Your background shouldn't compete with you. Wear solid brand colors or neutrals.
Press record, stand in frame, speak a few lines, then review for centering, eye contact with the correct camera lens, shadows, and overall comfort.
B-roll is supportive/alternative footage cut into your video to visualize what you're saying and keep viewers engaged. A-roll is your primary talking-to-camera footage.
For each B-roll shot, decide on camera (1x, .5x, 2x), static vs dynamic movement, framing/focus, aesthetic, and variety of angles.
Tap the screen to set focus on the main subject; tap again if you move the tripod. Mind composition, lines, and whether tilt is intentional.
Get multiple angles (full body, medium, overhead, close-up) of the same action to give yourself editing options and make content more dynamic.
Adopt a playful, experimental mindset. There's no right/wrong settings or shots — explore options, grow your comfort zone, and learn through action.
What frame rate is standard for social media video?
30 frames per second.
02:30
What two camera settings does the creator recommend toggling when filming on a phone?
Turn on enhanced stabilization and turn off HDR.
03:52
What should you do in Instagram to avoid blurry uploads?
Go to Media Quality and turn on 'Upload at highest quality'.
06:09
What is B-roll?
Supportive or alternative footage that you cut to throughout your video to visualize what you're saying.
15:43
According to the video, what are the five items on the talking head mental checklist?
Location, lighting, framing, aesthetic, and test shot.
07:55
When framing a talking head shot, where should your eye line sit?
Roughly at the top third of the frame (on the rule of thirds line).
10:31
What trick does the creator use to make editing easier with brand colors?
Wearing their brand colors instead of using them as text, so text can be white in edits.
13:05
What should you do if you keep the camera rolling while moving a tripod?
Tap the screen again to refocus, as the focus will lock blurry.
22:07
How can you lower exposure for a moody aesthetic on iPhone?
After tapping to focus, drag your finger down on the camera screen.
23:28
What tripod height does the creator recommend?
At least your eye height, or taller, for talking head shots.
20:30
Phone settings that protect video quality
Turning on enhanced stabilization and disabling HDR are simple, actionable tweaks with immediate quality payoff.
03:52Platform upload quality settings
Many creators overlook that each platform compresses uploads unless you opt into highest quality — a rare, concrete fix.
06:09Framing with purpose: rule of thirds and headroom
Explains exactly where to place the subject to keep space for captions and hooks — a practical composition principle.
10:31Filming as experimentation, not perfection
Reframes intimidation as growth, making content creation more approachable for beginners.
24:22[00:01] videos, but tech, gear, or equipment completely overwhelms you, you are in you can make your videos look better than they actually are. And I mean, even if you have no idea what you're doing, no fancy cameras, confusing tech, or
[00:16] into thinking you actually know what you're doing. And before you think, Millie, let me tell you this. I don't know what I'm doing half the time. Even after six years of being a full-time content creator, I am still that person
[00:29] that gets intimidated by picking up my camera. So, if I can film from the camera. So, if I can film from the comfort of my own phone and feel like I have confidence to make quality videos for social media, I'm going to do that.
[00:41] So, in this video, I'm going to share with you the two mental checklists that I go through every time I film for both talking head shots and B-roll so that you have a low barrier to entry solution and still get highquality content. Plus,
[00:54] at the end, I'm going to share with you one of my biggest tips for making filming and content creation not as intimidating as you think it is. As if you need them. And let's jump into it. Starting with our camera and phone
[01:09] settings. Now, I say camera and phone settings because not only do you need dialed in for quality, but you also need to check whatever mobile editor that you're using to make sure those settings match your phones. And whatever social
[01:24] media platform you upload your content to, you also need to check the settings on that platform to make sure everything matches. If you are not checking all three of these places, it's possible your video quality is getting lost along
[01:36] the way before you even post your content. So, to be sure our video's quality stays consistent from the time you film it to posting, we got to get these all checked. Starting with our phone, because yes, most of our footage
[01:50] we're going to be recording, we're going to be using our phone's native camera. This is going to give you the best quality. We're especially not using Instagram's native app because let's be honest, their camera is just trash. Tik
[02:03] Tok's not bad, but again, best quality. We're just using our phone's native camera. Opening up our settings. We're just going to go to camera. Now, the settings that you choose here will vary depending on what sort of iPhone storage
[02:17] you have. For example, if your phone has plenty of storage, let's say two completely comfortable transferring footage to an external hard drive when you're done using footage, then you can absolutely choose 4K. I mean, 4K is
[02:30] going to be the highest quality. So, under record video, you could do 4K at 30 frames per second. 30 frames per second is just standard for social media. If you're going for more of like a cinematic look in terms of like motion
[02:42] blur and having motion blur match what our eyes truly see, then you could do 4K at 24 frames per second. But if you're just an everyday content creator, uh 30 frames per second is absolutely great. Now, if you don't have phone storage or
[02:57] simply just like again an everyday content creator, you're doing daily vlogs, you're not trying to get like absolute quality cinematic crazy videographer status content, then you could do 1080p at 30 frames per second.
[03:13] Anytime I'm filming on my phone, I'm using 1080p at 30 frames per second. across platforms. For short form content, the recommended size is 1080p, and most people consuming content on social media usually can't visually tell
[03:27] the difference between 1080 and 4K. So, this is why 1080p at 30 frames per second will still be fantastic. Plus, if you don't have the rest of your settings dialed in across all the other apps, which I'll talk about in a second, most
[03:40] automatically compress your video to fit the 1080p size, which will then make your videos look more blurry than it actually was when it was 4K. So, here,
[03:52] just choose what is best for you. Then we're also going to make sure enhanced we're also going to make sure enhanced stabilization is turned on, HDR is turned off. And then going back, you can adjust like slow-mo or cinematic to your
[04:07] preferred settings as well. Again, if you're going for that like cinematic look, videographer status, you would probably do 4K at 24 frames per second. If you want high quality and you have phone storage, but you're like an
[04:21] everyday content creator, 4K at 30 frames per second. Now, if you don't have lots of phone storage or you simply like, you don't want to think about about it. You don't want to think. You literally are like, "Tell me the easiest
[04:35] brain." 1080p 30 frames per second. That's pretty much the rule of thumb I use in my head. Now, we're going to go back and then down here, we're going to back and then down here, we're going to make sure our grid and level and mirror
[04:48] front camera, those are all turned on. Under formats, this is where you're will just allow you to use the footage for whatever video editing software that you decide to use. High efficiency might
[05:00] complicate things if you're just looking for a more simple solution. So, we're going to do most compatible. Now, this is where we need to pay attention to ensure our quality is staying the same throughout the entire editing process.
[05:12] We're going to open up our preferred mobile editor and open up any project that you already have going on. Now, depending on which app you're using. I'm using the Premiere Pro mobile app. When you go to export it, this is where you
[05:27] want your camera settings to match whatever you filmed on. So, as you could see here with my videos, I'm filming them at 1080p and 30 frames per second. But when I go to export, it says 1080 at 24, which was not true. So, we're going
[05:43] to switch this over to 30 to make sure it matched the settings that we recorded. And now, this would be ready for export. If you had your settings at 4K, 30 frames per second, just make sure everything matches. Now, we're not done
[05:55] yet because we also need to make sure our settings are updated on Instagram, YouTube, Tik Tok, whichever your main posting platform is. We need to update that. So, opening up the Instagram app, if that is your main posting platform,
[06:09] we're going to go to your main profile and then choose the three lines on the top right hand side. You're going to scroll down to where you see media quality and make sure it's set to upload at highest quality. Media quality. Then
[06:26] turn on upload at highest quality. That way, if you're uploading a video that is larger than 1080, which is the standard size that Instagram will allow you to video if it's not already that. That way, if you're filming in 4K, you're
[06:42] allowed to upload in 4K as well without your video then turning blurry. So, make sure that is turned on. Now, jumping over to Tik Tok. This is going to be found in a different place. So, before you go to upload a video under more
[06:58] options, when you scroll down, you want to make sure allow high quality uploads to make sure allow high quality uploads is turned on. That one is pretty simple. is turned on. That one is pretty simple. Then for the YouTube app, going to your
[07:12] profile on the bottom right, then choose the gear icon on the top right, you want to scroll down to uploads and then where it says upload quality, click on that and select full quality. That way again when you're uploading from your phone,
[07:27] you're filming on. Okay, now that you have your settings all squared away, it's time to actually start using our camera, filming, and creating high quality content. First, we're going to talk about setting up like talking head
[07:41] videos. And then I'm going to go through B-roll. Starting with talking head, this one's usually the quickest because for me, I only have like one setup and then B-roll, typically you're getting multiple shots, multiple angles. So,
[07:55] that'll take up a little bit more time. But when I go to set up a talking head form when I'm using my phone, this is the mental checklist that I go through before I press record. Location, lighting, framing, aesthetic, and then
[08:12] finally our test shot. Location and lighting sometimes go hand in hand, especially if you don't have lighting that transports with you, like a ring light or soft box. So, when you're looking for a location, you might be
[08:25] looking for something with natural light. Sometimes I'll literally just walk around with my phone until I find lighting that I feel looks flattering for me. When utilizing natural lighting, I'm always facing the window. My back is
[08:39] never to the window. And if the sun's out, I'm usually not like directly in the sunlight. I feel like that makes it very harsh. So cloudy days for me are it's more of like a diffused soft lighting. When you're in your house,
[08:55] typically I try to avoid any like overhead lighting. It can make you not look that great. It makes me not look that great. Or any sort of like mixed lighting where it's maybe the natural light window here and then like a lamp
[09:08] they're different hues where the natural light it's kind of cool tone and then the lamp is like warm tone and you have two different colors covering your face. We usually want to avoid situations like that. After you have your location and
[09:21] lighting set, now it's time to set up the shot. The first thing that I look for when setting up my shot is making sure the camera is parallel to any lines
[09:34] that are happening in frame. This is kind of what I'm paying attention to. If my camera is filming you, one, I'm making sure it's not tilted. It's level and that's what the grid is for, or that's what the level line is for. But
[09:47] also, let's say I'm filming this direction. I also want to make sure the camera is parallel to the wall. It's not like this or tilted this way or even tilted this way or this way. Especially if I'm trying to have like an aesthetic
[10:02] straight on shot. try to keep it as flat to the surface as possible. When I'm looking in the camera, for example, at my coffee counter, I'm checking to make sure the cabinet lines or the wall lines match the grid lines. At least they're
[10:17] parallel to them. Even the counter is nice and level and flat to the grid lines on my screen. Nothing's tilted or angled in a weird way. Then, I'm paying attention to like the rule of thirds or where am I standing within this shot.
[10:31] Ideally, I'm trying to have my ey line roughly at like the top third of the frame. I leave a lot of room for head space because I personally feel like this is the best place to put your hook text or closed captions. So, I'm leaving
[10:47] text or closed captions. So, I'm leaving lots of space above my head and definitely not getting my head close to the top of that frame because where else text? It just gets really busy. So, I try to keep my ey line right there on
[11:00] that rule of thirds line or even a little bit lower if I need extra space above my head. Now, for aesthetic, this I just mean is like the overall vibe of your shot. And this one is huge and often overlooked. There's a lot that
[11:13] goes into aesthetic. For example, having a clean background behind you. Clutter can distract. So, unless it's like part of a point you're making, if you're talking about like, hey, it's okay if like the house is not completely
[11:28] perfect, you know, that's kind of what your purpose of the video is. Ideally, you or anything that might be distracting. Moving random objects out of frame, closing cabinets. Avoid using busy or unorganized shelves as your
[11:44] backdrop, which is funny cuz busy and shelves are behind me, but it's aesthetic. It's clean. I tidied it up. You're keeping an eye out for like random pieces of articles of clothes, right? A sock or laundry piles, cords if
[11:59] you're filming in the kitchen, even like the counter if there's crumbs or a clean. Even harsh colors in the background that could be competing with the shot are good to remove from frame. For example, in my kitchen, we have a
[12:12] cast iron pan and the handle of it, the silicone attachable handle is red. And that does not look good when I'm doing my aesthetic coffee videos. So, I'm like pan out of the way. Basically, your background shouldn't be competing with
[12:27] you. It should be working with you or just not even noticed at all. After you just not even noticed at all. After you have things mostly tidied up, also to go with aesthetics, the next step is to wear colors that work with your
[12:40] aesthetic. This could be solid colors, neutrals, black, white, beige, gray. If tone, wear the earthy tones, muted colors. Ideally, you're avoiding busy
[12:52] patterns like lots of tiny stripes. For me, this is like the biggest hack that I learned years ago, and I just never stopped doing it. and it was to wear my brand colors instead of using my brand colors as like text throughout the
[13:05] everything so much easier when I went to edit. I was just editing my text would be all white because the clothes I was wearing and the shot that I created and set up, the shot was my brand colors. Do what makes sense for you, your location,
[13:20] and your personal brand. And then finally, we have one test shot. I do the test shot before I film the actual thing. I press record. I stand in frame. I talk, I say a little blah blah blah, and then I watch it back. When I watch
[13:33] it back, some things that I'm looking for is making sure that I'm centered. And to mark your spot, you could like mark your spot with shoes, or you can mark your spot like where your feet were with anything around you. So that way
[13:45] just stand right in front of where that spot was. I also make sure that I'm looking at the correct camera because with like the new iPhone, there's like camera is the correct camera. So, I'm making sure I'm like giving good eye
[13:59] contact to the camera. I make sure that when I walked into frame, there weren't any weird shadows hitting my face that I hadn't noticed before because I was focusing on like the background. And also, I just make sure that I feel
[14:11] also, I just make sure that I feel comfortable on camera. Your setup is all what you have going on. You want lighting where you're like, "Oh, wow. I actually kind of look pretty good." Or you want an angle where you're like,
[14:24] "Ooh, I really like this angle for me." That way you could talk on camera a little bit more confidently. And a confident creator filming on just a confident creator filming on just a phone beats an awkward, uncomfortable,
[14:36] hesitant creator on a $5,000 setup. With the audio, don't worry about it. You could adjust that later when you're editing. For me, when I'm editing to make it sound as crisp as possible, I'm using the Adobe Premiere mobile app, and
[14:50] I just use the enhance speech setting. That way, I could film literally with no good. Here's an example. This is a before I was coming outside to hear the this video, I literally just ran it through the Adobe Premiere Pro on my
[15:04] phone and pressed enhanced speech, exported it, and it sounded so good, so crisp. No, not sponsored. I just literally used that feature every single ding-dong day of my life. Okay, now if you've learned something new so far, be
[15:17] because it's just going to tell YouTube that other creators like yourself will learn two new things by the end of this video, consider subscribing since it's a free way to support me, my content, and it allows me to continue to create free
[15:30] videos like this for you every single Wednesday. All right, let's talk about B-roll. Getting aesthetic B-roll. It's my favorite thing to do because then I That's exhausting sometimes. You know what I mean? What is B-roll? That's
[15:43] for new and upcoming creators. Basically, what we just filmed talking to the camera, that's our A- roll. It's our primary footage. like this YouTube to the camera. This is our A roll. If you're doing a vlog, anytime you're
[15:57] talking to the camera or telling portion of your vlog, that's the A- roll. Now, B- roll, this is the showing of your video. This is the supportive or alternative footage that you cut to throughout your video. Like, let's say
[16:09] if I say something like, if you're a creator grinding hours away on your computer, feeling exhausted and looking for some more efficient editing solutions. While I was saying that, you may have noticed that my video editors
[16:22] added in other clips while I was talking just to help you visualize what I was saying. Utilizing B-roll in your content is one of the ways to make your videos Literally, just by starting to utilize B-roll and throw it in while you're
[16:37] talking automatically levels up the overall feel of your video quality because it's keeping people engaged. It's visual storytelling. It's utilizing high-quality clips to visually support what you're talking about. Now, I'm
[16:51] going to show you how you can film your own B-roll of yourself doing things clips throughout the day and make them look high quality. But if you don't have time to be filming yourself or filming all of your own B-roll, you can actually
[17:04] access B-roll on websites like Story Blocks, which is what I'm using for this video. I personally love Story Blocks as a resource for B-roll. I've talked about personally have been using them since 2021. So to be able to partner with them
[17:18] on this video and show aspiring content creators a really impactful resource that you can use to save time and automatically uplevel your video quality just feels surreal. For those of you who don't already know, Storylocks is a
[17:32] offering unlimited access to high-quality stock videos, images, music, sound effects, and more. helping creators and businesses enhance their projects without extra costs and more peace of mind. Like for me as a new mom
[17:48] now, I don't necessarily have the extra time to be able to film B-roll for all my videos anymore. Like I only film talking head content like this when I'm lucky I have a minute. So being able to have instant access to what feels like
[18:01] endless media that I could use to make my videos feel more elevated while saving myself time, sign me up. One of my favorite things as someone who has been using Story Blocks for years is that their stock library always feels
[18:13] fresh and new every time I'm logged in. They keep their stock library refreshed with commissioned content based on the latest trends and what members are actually searching for to ensure that you'll have curated fresh content that
[18:27] keep your videos relevant that day. And now they have their AI toolkit which works alongside the Storyblocks library giving you another tool in your tool belt to create polished professional videos faster. Again, I'm somebody who
[18:42] stands by B-roll being one of the best ways to improve your video quality. So, if you'd like to get access to an unlimited source of content, definitely check out Story Blocks. You can choose either a monthly or annual plan with no
[18:55] hidden or extra fees to basically unlock an unlimited source of content that gives you freedom to test, experiment, and create more effective videos. To get started with unlimited Storyblock downloads at one set price, head to
[19:08] storyblocks.com/modernilly or click the link in the description. Now, on the days that you are filming B-roll, again, I have a mental checklist that I go through every single time I'm capturing a shot. camera, static or
[19:21] dynamic, framing and focus, aesthetic, and variety. Starting with camera, this is basically deciding which camera you want to use to record. I'm not talking like phone or DSLR or like which camera you're going to use. I mean like on your
[19:35] phone, they have the regular camera, they have cinematic, there's slow-mo, or even on the regular camera, you could be like 1x.5x, like 1x.5x, 2x, macro. So, which camera do I want to
[19:48] use before I film? I'm gonna be honest. I only really use the main camera. Never really switch to cinematic mode often unless I'm like filming something for a collab, but mostly I'm just using my regular camera and just alternating
[20:01] regular camera and just alternating between the zooms of like.5, 1, or 2x. Next is static or dynamic. Do I want the shot to be still on a tripod, or do I want it to be more dynamic where I'm holding it and adding motion? A tripod
[20:15] might be the only other piece of gear or equipment that you could invest in that I think would be a huge help if you're doing a lot of hands-free content. When shopping for a tripod, really all I look for is does it have a mobile adapter?
[20:30] So, it's an actual tripod for your phone. And two, the height of the tripod. You want it to go up to at least your eye height in case you're filming talking head stuff. So, whatever your height is, try to find a tripod that
[20:43] goes up to that height or taller. For me, I love static shots. I prefer to just plop my tripod, press record, get the shot, move the tripod angle, press record. Like, I love being able to do static shots, and then add movement in
[20:58] post, aka when I'm editing, you could use key frames to zoom in and out. So, that's usually the vibe I go for. But again, it's going to be each person's own preference. If you want to do a more dynamic shot, some easy ways to add
[21:12] movement is just like swaying side to side going in and out. I like to do like peekab-boo where you have something in the foreground and then it goes to the side. It has the main image in focus and then you have a blurred background. So,
[21:25] I like to kind of think about the foreground main background when getting those dynamic shots. And if you're getting B-roll of yourself just like the camera and you're just looking down and you're going out on a little walk.
[21:39] that's like, "Okay, this is how to make filming and deciding all these things "Okay, but which one do I do?" Like, don't worry. It's okay. I'm just showing little bit about like deciding which one's right. The next thing on my
[21:53] checklist is framing and focus. First of all, what's the main focus and purpose of the shot? Is it my espresso being pulled? And if that is the main focus, tap on the screen. Make sure it's in focus. If you're going to keep the
[22:07] camera recording as you're moving the tripod around, so you get the shot of the espresso being pulled. It's tapped, it's in focus, and then you move the tripod to like, okay, now I'm going to pour my milk and it's still recording.
[22:19] You need to tap the camera again to readjust the focus because it'll lock blurry after that. So, if you keep the camera rolling, just make sure to tap whole video. And then again, just like the overall framing, I'm thinking of the
[22:33] composition of this shot. I'm looking at lines. I'm making sure things aren't tilted or wonky. Of course, there's intentional tilt. You know, we have like overhead shots or kind of like up angled shots. So, there's intentional tilt, but
[22:46] again, I'm intentionally thinking, is this intentional or do we need to level some things out? Is it looking a little wonky? Do I want to pay attention to focus centered or am I going to position it on one of those intersecting lines in
[23:01] the rule of thirds? Then we have aesthetic. Again, we're just cleaning up the space, cleaning up the background. Especially for me, oh my gosh, for me, it's my espresso machine. I need to make sure I wipe that bad boy down every time
[23:14] I'm trying to film aesthetic content because it could get a little messy and aesthetic. If you're going for more of like a moody aesthetic, when you tap to focus, you could actually drag your finger down on the camera to lower the
[23:28] exposure. And I love doing this to kind of like set a mood and a tone, especially for my coffee videos. I feel like it gives it a whole vibe, a whole aesthetic. And then the final thing on my checklist is variety. Can I get
[23:41] multiple angles of the same thing that day or even over a period of time? Like if you're just getting B-roll of yourself doing the dishes, get a variety of different angles. Do a full body shot, a medium portrait shot, maybe an
[23:55] overhead shot, and a close-up or over-the-shoulder shot. If you're pulling espresso, that's obviously like a oneanddone thing. You're probably not making multiple drinks that day. So, just think about different angles you
[24:07] can use each day you film pulling your espresso or pulling your shot. So maybe espresso machine, the next day is more again, I'm just playing with different angles, variety, experimenting. Which
[24:22] brings me to my biggest tip. Content creation can feel intimidating, especially the filming side of things. I would know because I still feel that way. People all the time say, "Oh, quality over quantity, quality this,
[24:34] quality that." And you're like, "Yeah, but I have no idea what I'm doing." So, I want you to think about the filming process as it's a test. Everything is for fun. The phone and all the settings, it's kind of like a playground and you
[24:49] get to play with all of the settings. You get to test all of the options. You get to find ways to find joy in what you're doing. We're not looking at it as, oh, right or wrong, or I should have done this. This is supposed to be the
[25:02] right settings. This is supposed to be the right shot, the right angle. We're not looking at it as right or wrong. We're looking at it as discovering and learning about all the options so that when you know the options when the time
[25:14] comes, you could choose the one that you prefer. That's what all of these great creators are doing. They're not just doing shots because they're the right way to do it. They got to experiment and play around with it. And now they're
[25:26] filming stuff that excites them. It's fun for them. It's the option they prefer. It's the angle they like. And so you get to do that with filming as well. And if you are in it for the long haul, you want to be a content creator and you
[25:40] see yourself doing this in the long run, experimenting every time you film over the next month, 3 months is nothing compared to the 1 3 5ear career that you
[25:52] are embarking on. Every time you feel a little uncomfortable or you feel this resistance of intimidation, that's you teetering the edge of your comfort zone. start feeling like I don't know this is hard. But every time you push that past
[26:08] that and you take action, you're growing your comfort zone. You're growing as a creator, as a person, you're growing your skill, you're growing your knowledge. So, anytime you choose to take action anyway, growth is happening,
[26:22] and that's an exciting thing. Now, I'm curious. Some of you may have seen my step-bystep how to become a full-time content creator. Now, would you be interested in a masterclass style video similar to this one, but I show you in
[26:37] real time what it's like to film and edit content? If so, if you think that what you want me to cover down in the comments below. Thank you so much for watching. I'll see you in the next one. Follow your joy. Bye. Oh. Oh. Oh, wow.
[26:51] Follow your joy. Bye. Oh. Oh. Oh, wow. Really slippery. Really slippery.
⚡ Saved you 0h 26m reading this? Transcribe any YouTube video for free — no signup needed.