
Fix Game Audio Missing on Mac OBS
56sSolves a common Mac-specific streaming problem that instantly resonates with frustrated OBS users.
▶ Play Clip"Delivers exactly what the title promises with two practical methods — no fluff, just clear steps."
This video provides a step-by-step guide to recording and separating desktop audio sources in OBS Studio on macOS. The creator demonstrates two methods: using OBS's native audio capture features and using the free Elgato Wave Link audio mixer. Viewers learn how to route game audio, microphone, Discord, and Spotify into separate tracks for complete control.
The video covers two ways to separate desktop audio (game, mic, Discord, Spotify) into distinct tracks in OBS on macOS.
Go to Settings > Audio and select your microphone (e.g., Elgato Wave 3) from the drop-down to capture your voice.
On Mac, video capture devices don't include audio. Click the plus button, choose Audio Input Capture, name it, and select your capture card (e.g., Elgato 4K X) to get game audio.
Enable the headphones icon next to the audio source to hear game audio through the Mac while recording.
Use the macOS Audio Capture source to add individual application audio like Discord, Spotify, or Chrome. Make sure the app is open and not minimized.
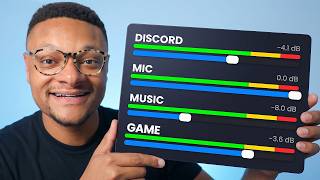
Adjust audio levels and group related sources in OBS (e.g., create an 'audio' group) to keep the mixer clean.
Elgato Wave Link is a free audio mixer that works with any microphone as of version 3.0. It offers advanced audio routing without needing multiple OBS sources.
Wave Link has three output mixes: personal mix (what you hear), stream mix (what your audience hears), and chat mix (what voice chat participants hear).
Create channels for your microphone and capture card as input devices. Any connected mic or capture card can be used.
Add apps like Discord, Spotify, and games as separate audio channels within Wave Link for flexible routing.
Assign each source to the personal, stream, or chat mix. For example, the stream mix can include game audio and mic, while the chat mix includes only your mic.
In OBS Settings > Audio, select 'Elgato Wave Link Stream mix' as a microphone/auxiliary device. This captures all mixed audio in a single source, simplifying setup.
By following either the native OBS approach or the Wave Link method, you can cleanly separate and control all audio sources on macOS. The Wave Link method offers more flexibility and reduces the number of sources needed in OBS.
What are the two methods shown to separate audio in OBS on Mac?
OBS native audio sources and Elgato Wave Link mixer.
00:01
How do you add a microphone in OBS?
Go to Settings > Audio and select the microphone from the drop-down.
00:15
Why do you need an Audio Input Capture source for a capture card on Mac?
Because macOS doesn't include an audio source with the video capture device.
00:58
What does the headphones icon do in OBS?
Enables monitoring so you can hear the audio source while recording.
01:27
Which OBS source captures audio from a specific application on macOS?
macOS Audio Capture.
01:40
What is Wave Link?
A free audio mixer from Elgato that works with any microphone as of version 3.0.
02:51
What are the three output mixes in Wave Link?
Personal mix, stream mix, and chat mix.
03:45
How do you send audio to different mixes in Wave Link?
Assign each source to one or more mixes via the routing controls.
04:52
How do you delete a routing in Wave Link?
Use the three-dotted icon and select delete routing.
05:17
What device do you select in OBS to use Wave Link?
Elgato Wave Link Stream mix as a mic/auxiliary audio device.
05:45
Mac capture card audio quirk
Highlights a common pitfall for Mac OBS users and the simple workaround.
00:58Wave Link free for any mic
Opens advanced audio routing to all users, not just Elgato owners.
02:51Three-mix routing system
Provides granular control over what each audience hears.
03:45Single-source integration with OBS
Simplifies OBS setup by consolidating all audio into one stream mix.
05:45Grouping audio sources
Emphasizes organization for efficient audio management.
02:37[00:01] game audio, microphone, Discord, Spotify, all on separate tracks inside this video, I'm going to be showing you guys two different ways you can accomplish this to get complete control of your audio. So, jumping right in,
[00:15] Studio's native features. [music] What we're going to do first to add our microphone is go to our settings, go to audio, and then for one of our mic want to select the drop-down and choose the microphone connected to our
[00:30] computer. In my case, I am using the Elgato Wave 3 here, so I can go ahead and select that. Once I do that, just go ahead and select okay. And as you can middle, my voice is being picked up here, which means when I go live or I
[00:44] start a recording, it will be captured. Now, as you guys can see, I have my gameplay picture up on screen. Everything is working and it is active, but we don't have any audio to go along with it. And that's one of the issues
[00:58] with Mac as it doesn't come along with the video capture device source. So, in going to select the plus button here and we're going to add an audio input capture source. I'll name it Elgato audio, select okay, and then we're going
[01:13] then we're going to find our capture card, which is the Elgato 4K X plugged into my Mac computer. And when we do that and we go ahead and select okay, you can see that audio now coming through as a part of our audio mixer to
[01:27] be captured. In case you guys need to hear your game audio coming through the Mac, you guys can enable the monitoring option by selecting this headphones icon to hear it while recording it at the same time. The next thing we can add is
[01:40] our application specific audio sources. So, to do that, we're going to want to go to the plus button here, and you're going to want to find the Mac OS audio capture. Once you select that, you can name this. Let's go with Discord, but
[01:52] this can also be for Spotify or if you're playing a game on your Mac, it'll method drop-down, instead of doing the desktop audio capture, let's go ahead capture. And after you do that, select the application drop-down, and then find
[02:09] audio from. So, in this case, we can go with Discord, select okay, and now you're going to see another audio source within your mixer here for that audio. looking for here, make sure that it's not minimized and that it's open. Let's
[02:24] add Spotify too, and then Chrome as well. But once the sources are added, you're good to go. As you can see, I am playing audio through all of these sources right now. Everything is working. I highly recommend balancing
[02:37] tune a lot of these down so that everything sounds nice. And then just to organize your sources in OBS just a little bit better, you can group these together. You can call it audio, for example. That way, all of the sources
[02:51] that you added that are audio related are together. Moving on to method two, we're going to be using a free audio mixer from Elgato called Wave Link. In that you could use without an Elgato audio product. Now, anybody can use it
[03:05] with any microphone as of version 3.0. So, you guys can head over to their website. I also left the link in the description below, and then just press get the app. Go ahead and launch the DMG file and just drag the app into your
[03:17] need to give Wave Link the proper permissions in order to capture audio you should be able to get into the application and it should look something like this. I'm currently on Wave Link 3.1 as of filming this video, but other
[03:32] variations should be pretty similar to follow along here. Staying within the the different channels that you can add, which can be your microphone or application specific audio. Across the top are going to be the outputs to those
[03:45] mixes. So, your personal mix is the audio that you're hearing. Stream mix is what you want the stream to hear, and then the chat mix is what you want the like through Discord, for example, to have them hear specific audio. So, let's
[03:58] go ahead and create a channel. I'm going to go ahead and add my Elgato Wave 3 microphone. Here it is. When I select that, you can see the audio coming to add any other microphones that are connected to your computer just by
[04:12] selecting the input device here. The next input device I'm going to add in here though is my Elgato 4K X. It does not have to be an Elgato capture card to work here, but whatever capture card you have, you can select it and it will
[04:25] too, so we can just go back to create channel. Let's scroll down here, and as you can see, we have the full list of apps that I have running on the computer. Let's go ahead and select Discord as an audio source, and then we
[04:38] can go back into our channel. Let's add Spotify, create another one, let's make you're playing a game on your Mac and it's coming from a specific window or app. Now, we can go to our personal mix
[04:52] hear. So, I want to hear my game audio. I want to hear Discord. I want to hear Spotify. I want to hear anything coming through Chrome. And you know what? I want my stream to also hear the same, but in addition to my microphone. For
[05:05] the chat mix, I want obviously the people that I'm chatting with to be able microphone here, but the other sources need to delete an audio route under one of your mixes, just go ahead and select
[05:17] the three-dotted icon here, and you can select delete routing. If you need to delete a source altogether, then just go ahead and right-click it, and then just need to set up in Wave Link is if we go to personal mix, we need to set an audio
[05:32] output. So, select the add output option and then choose the device that you want to use. In my case, I have a pair headphones plugged into my Mac, so I'm headphones. And then I'm just going to want to make sure that the main output
[05:45] up here lines up with what I am listening from. So, now with Wave Link all good to go, let's head back over to OBS Studio, and within here, we're going to head back to our settings, go to audio, and then for one of our mic
[05:59] auxiliary audio devices, we're going to select that drop-down, and we are going to want to choose the Elgato Wave Link stream mix. That would be right here. So, when we select that, go ahead and select okay. And now, as you can see
[06:12] here, all of the audio that's coming through Wave Link is being picked up here. So, we don't need multiple audio sources anymore like we had configured in OBS Studio. Now again, once you have all of your audio flowing through,
[06:24] guys have it. Thank you so much for staying to the very end of the video. If up. Subscribe if you're new around here. Watch this video if you would like to know the best settings to use on your Mac computer to be able to record the
[06:39] highest quality gameplay possible. Catch you in the next one. Peace.
⚡ Saved you 0h 06m reading this? Transcribe any YouTube video for free — no signup needed.