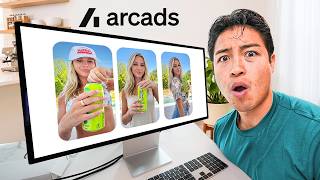

None of That Was Real
44sThe clip plays a believable ad then reveals it was 100% AI-generated, instantly shocking viewers and making them want to see the process.
▶ Play Clip"The title oversells the 'factory/autopilot' angle, but the walkthrough delivers a genuinely reusable AI ad pipeline."
This video demonstrates how to build an AI-powered UGC ad workflow using Arc Ads, a node-based automation platform. The creator shows how to go from a single product image to multiple AI-generated creator videos featuring realistic actors, scripts, and even translations — without casting or shipping products.
Every creator shown in the intro was AI-generated from a single product image, eliminating casting, briefs, and shipping entirely.
Arc Ads provides a drag-and-drop workflow builder that connects AI tools (LLMs, image models, video models) to automate ad production.
Start by naming the workflow and uploading a clear product image, e.g., a gua sha, which will be used throughout the ad generation.
A super-detailed LLM prompt acts as a creative director, generating consistent scripts and scene directions based on the product and target customer.
Use Pinterest with an ideal-customer prompt (e.g., 'morning skincare routine creator picture') to find photos of real-looking people instead of fully AI-generated faces.
Connect the product image and creator image through Nano Banana Pro to make the actor hold the product in multiple angles.
SeaDance 2.0 delivers the most consistent video results; connect the edited image and script prompt to generate short ad videos with adjustable duration and resolution.
Duplicate the workflow for translation, different actors, longer durations, new resolutions, and script tweaks, then assemble the final edits in CapCut.
Traditional UGC costs about $100 per video and takes 2–3 weeks to produce two angles; this workflow runs in minutes and produces 5–8 variations to test.
The core takeaway is that AI can compress UGC creative testing from weeks to minutes. The workflow is best used to quickly find winning angles, which can then be scaled with real human creators.
What tool is used to build the node-based workflow?
Arc Ads.
00:28
Which image model makes the actor hold the product in generated images?
Nano Banana Pro.
04:13
Which video model does the creator recommend for the most consistent results?
SeaDance 2.0.
05:22
Where does the workflow source realistic creator photos from?
Pinterest, using an ideal-customer prompt.
03:12
What role does the LLM play in the ad workflow?
It acts as a creative director for high-converting UGC ads, generating scripts and directions.
02:31
What settings are used for the SeaDance video in the example?
10-second duration and 1080p resolution.
06:17
What is the recommended method for getting consistent script results?
Generate each line of the script one by one.
08:05
How much does traditional UGC video production cost, and how long does it take?
About $100 per video and two to three weeks, yielding roughly two angles.
11:18
How many angle variations can the AI workflow produce quickly?
Five, six, seven, or eight different variations in minutes.
11:31
Full AI-generated UGC
A single product image produced a complete creator ad with no casting, briefs, or shipping.
00:14Node-based automation
Arc Ads turns multi-tool AI workflows into a drag-and-drop visual pipeline, making the process replicable.
00:40LLM as creative director
A single detailed prompt systemizes scriptwriting and scene direction, ensuring consistency across ads.
02:31Real creators still win
Use AI to find winning angles fast, then scale with human creators for final production.
11:02Cost-time comparison
AI workflow delivers in minutes what traditionally costs $100 and 2–3 weeks per video.
11:18[00:01] face, but you refuse to pay $100 for a lymphatic facial, this little green stone is about to be your best friend. >> So, none of that was real. Every single creator you just saw AI generated from one product image. No casting, no
[00:14] briefs, no shipping the product to anyone. I built one workflow that pretty you exactly how to build it. All right, so the first thing that you want to do that you're currently watching, and you want to click on this link right here.
[00:28] This tool is going to make this all possible for us. So, I'll leave that link below for you guys to get access to it. It's called Arc Ads. Once you signed up, this is what your main dashboard should look like, but in order for us to
[00:40] automates all of this, we have to go right here into workflow. So, what they've built here is a node-based workflow builder. So, if I double-click right here, it's going to allow me to insert various tools, drag and drop
[00:54] various tools. So, you can see I've set up Nano Banana as a tool right here. If I double-click, I can set up an image model, for example, C Dance 2. And then what we can do is connect the two just like this and hit run, and this will
[01:09] create an outcome for us. Now, the final product of what we're building today looks like this. So, I'm going to show you exactly how this whole thing works. I know it looks super complex and probably a bit messy, but I'm going to
[01:23] everything. We're also going to build it you how to start producing ads extremely quickly and efficiently for whatever product that you're selling. So, this is what our blank canvas should look like.
[01:36] We can just name this test workflow or whatever is going to help you best identify this workflow. Then we want to insert our product. So, for this, I'm going to go and do upload, and I want to upload a clear image of my product. So,
[01:50] example, this is the product that we're going to be using. It's a gua sha, so I can simply just screenshot like this, go back into Arc Ads. All right, so I'm going to upload my product image right here. The next thing that I want to do
[02:04] is create that LLM that we were talking about. So, this is going to be like our about. So, this is going to be like our chat GPT or our Claude. So, from here, I'm going to insert this prompt, which is a super detailed prompt that's going
[02:17] to allow us to get very consistent scripts and essentially directions for what is going to be happening. Now, I'm going to give you guys access to this. I built out an entirely free Notion guide for you guys to basically just copy and
[02:31] see, super detailed, act as a creative director for my high-converting UGC ads, and then I insert my product right here along with my target customer, and then it has all the requirements for it to build out a solid prompt for us. So, I'm
[02:44] just going to paste that into here, and then I'm going to press generate. The next thing I want to do is upload pictures of our actors. So, simply just do upload, and I'm going to duplicate this a few times. Can do uh let's just
[02:57] do five. Okay, so we have a bunch of different variations for our actors. different actors, but I'm just doing this to get some variety for the video. So, what we want to do next is go into Pinterest. Now, the reason why we want
[03:12] going to get people that look like actual real people instead of us generating it with Nano Banana or, you know, any AI software. So, what I've done here is I've inserted my ideal customer profile. So, someone that looks
[03:28] most similar to the person that's likely going to buy the product. So, in my case, I did a bit of research. You can also use the LLM note in here to ask it what's a good prompt to give Pinterest, but in my case, it's morning skin care
[03:41] routine creator picture. So, from here, I want to find a few people that I think then I'm going to save them and then upload them to our workflow. All right, so we have our product image right here. We have our LLM that has gone ahead and
[03:58] created our prompt that we're going to use to bring this creator to life. And then we have all of the creator images that we sourced from Pinterest. The next thing that I want to do is use Nano Banana to basically make it so that the
[04:13] creator is holding our product. So, all we have to do is double click right here. And then I'm going to choose the image model Nano Banana Pro. So, I'm going to create two for each of these creators. And I'll get back to you guys
[04:26] once I've done that. All right, so I made two duplicates of Nano Banana Pro because I want to show you what two different outputs look like. So, for the first one, I'm going to simply say, "Show the actor holding the product to
[04:39] the camera." Simple as that. And then in order for it to do that, we need to then connect the image model with Nano Banana Pro. And then we also need to select our creator right here and then connect her to this image. You'll see that that's
[04:53] what the connection looks like. And then once I press generate, it should populate her holding this product right here. Now, I'm going to connect another one right here, just like this. Connect the product as well, but this time I'm
[05:09] can kind of play around with it. So, for this second output, I can change the setting and do show the actor holding the product to the camera while leaning hit generate. And so, while that's working, the next thing that we want to
[05:22] do in order to bring this image right here to life is create a video model. So, we're going to go in and we're going to choose SeaDance 2.0. This right now is what gets the most consistent results from everything that I've been testing.
[05:37] we're going to do SeaDance. We're going to create one more duplicate for the other one. And then we're going to drag this right here. And then we simply just connect this image. and then we'll do the same thing with this one. All right,
[05:50] so now that we have connected the image of her holding the product to the video model C dance right here, we do also need to make sure that we're connecting the prompt. So these are essentially the directions. So connect the text right
[06:03] here with the prompt. You can just bring this over. We can do the same thing with this one. All right, so now that those are connected, it has the image and it around with the settings. Let's say we'll go for 10 seconds on this one.
[06:17] We'll put the resolution to 1080 and then we simply hit generate like this. generate. And then what's cool is that we have a ton of different other tools with workflows. So say for example that I want to go in and translate this
[06:31] video, can do that. So we have translation of the final product from what C dance gives us or from whatever C dance gives us. But remember we have the full set of directions here. So I'm going to duplicate this right here once
[06:45] going to duplicate this right here once and then we simply feed it just like so and this will create that translation. So we have our two just like this. Looks like it actually came out with the same variation. So let me just change this
[06:58] really quick. So it's actually going to take some time for all this to render. So what I've done is I've already went ahead and created the final variations for us. So I'll show you guys what these ended up looking like. Also organized
[07:11] variation. >> If you wake up with a puffy bloated face but you refuse to pay $100 for a lymphatic facial, this little green stone is about to be your best friend. That's [laughter] actually crazy. Watch
[07:25] >> If you wake up with a puffy bloated face but you refuse to pay $100 for a lymphatic facial, this little green stone is about to be your best friend. >> And then we can look at the translation. Si te despiertas con la cara hinchada e
[07:39] inflamada, pero te niegas a pagar $100 por un facial linfático, esta piedra
[07:52] >> So you can play around with the settings. You know, you can increase the duration. You can increase or decrease the resolution. And then of course the script itself. So you can basically duplicate this entire workflow and then
[08:05] change out different actors. You can also go into that LLM and have entirely different script. I would actually recommend doing each line one by one to get you know more consistent results. And then you just go in with
[08:20] post on CapCut and then piece everything together in one big cohesive edit. Let >> If you wake up with a puffy bloated face but you refuse to pay $100 for a lymphatic facial. Even the sigh. >> If you wake up with a puffy bloated
[08:34] face. So I know it looks super messy but hopefully you can kind of see what's going on. So to recap we have the product image right here that we uploaded. We have that LLM that we went ahead and created. And then we have all
[08:47] the creator images from Pinterest right here. Now the first connection comprises of the Nano banana pro model. We connected the product image with the creator image. It spat out her holding the product just like this. We also
[09:04] created another variation of her in a different angle. And then from there we wanted to bring this image to life right? So we had to create the video model node which we chose as C dance right here. We have all of our settings
[09:20] like so. And then we made sure that the main connection right here was that image of the creator holding the product with the script. So every single beat basically what is going on in the video. And And that is what it went ahead and
[09:36] >> I genuinely thought these were just a Pinterest aesthetic thing. Crazy. And then from there we went ahead and translated the video. So, we chose and translated the video. So, we chose that tool which was simply a translation
[09:50] and then we connected it and hit generate on all these nodes. So, once you look at everything piece by piece, it's not really that confusing, but it makes this whole process, I mean, just super simple, very organized. So, if we
[10:04] weren't using a workflow like this, what we would traditionally have to do is get that product image of our creator from like Gemini or Nano Banana, going on to that direct website, and then going on to Claude or ChatGPT, getting the
[10:20] instructions and the script, and then going into, you know, a software that's going to put everything together like this. So, this kind of makes the whole process a lot more seamless and more efficient and actually just a lot
[10:33] quicker and easy for us to replicate this process with different creators, different products, along with, you know, changing up the instructions and you've got a bunch of angles ready to run and this is where most people they
[10:47] get stuck. Not the creative, but knowing what to do once everything is live. Like behind and when do you pull the plug on something that isn't working? That's the right and that's what me and my team work through with you directly.
[11:02] your numbers. So, you guys want that kind of hands-on tailored help, I'll apply. So, here's how I actually think about this. Real creators still win when but before you get there, you need to know which angle your audience actually
[11:18] responds to. Now, unfortunately, most people they just end up finding this out hundred dollars per video, they wait two to three weeks for that video to come in and then you end up with maybe two angles to test. This workflow runs in
[11:31] minutes, so you get five, six, seven, eight different variations. You find your winner really fast, and then you bring in real creators to scale the I'll leave that full Notion guide in the description for you guys to access
[11:43] below. And then if this helped you, drop a like because it helps push this to of content useful for their own business. Other than that, I will see business. Other than that, I will see you guys in the next one. Peace.

⚡ Saved you 0h 11m reading this? Transcribe any YouTube video for free — no signup needed.