

I Built a Trading Indicator That Never Loses
52sThe promise of a foolproof trading tool sparks curiosity and debate among traders about its validity.
▶ Play Clip"Delivers a functional tutorial but oversells with 'best indicator ever' hype; still, the content is practical and detailed."
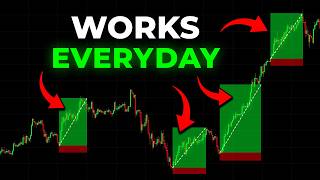
The video presents the Data Trader Toolkit, a set of trading indicators developed by the creator in collaboration with Chart Prime. It claims to provide accurate buy and sell signals, trailing stops, reversal zones, and trend strength analysis, with a tutorial on how to use each feature in real trading scenarios.
The creator introduces the Data Trader Toolkit, a set of indicators developed after months of backtesting, claiming it is better than anything seen before. It includes the DT oscillator, trailing stop, reversal zones, trend bar, and customizable settings.
To use the toolkit, go to the indicator section on TradingView, select 'Invite Only', and the Data Trader Kit should appear. Activate it to start using the features.
The DT oscillator is used on the 4-hour timeframe (best performance). For a buy: wait for the white line to cross below the lower bands, then cross back inside, and ensure the center line turns blue. For a short: cross above upper bands, cross back inside, and center line turns purple.
If the oscillator crosses below the lower bands, crosses back inside, but the center line hasn't turned blue and the oscillator crosses above the upper bands, that's an invalidation. Avoid entering any position.
The DT oscillator has a divergence feature: a blue line signals bullish divergence (enter long), a purple line signals bearish divergence (enter short).
The trailing stop indicator shows the best time to close a trade. It includes partial take-profit marks and a trailing stop line. For safe trading, sell ~70% at first take-profit; aggressive traders might sell 30%.
Wait for a valid DT oscillator entry signal, then confirm the trailing stop indicator turns blue (for long) or red (for short) before entering. Exit on partial take-profit or exit signal.
If the DT oscillator crosses below lower bands, crosses back inside, but before the trailing stop confirms, the oscillator crosses above the upper bands, the setup is invalidated.
Displays trend strength percentage on the chart. Candle colors change with trend strength: bolder for strong trends, faded for weak. Use it to avoid weak trends.
Combine with your strategy: only enter if trend strength is at least 70%. Example: 60.9% is too weak, so wait for stronger confirmation.
As a standalone buy/sell signal, wait for trend strength to show at least 99% (not 98.5%). This ensures entry into a strong trend.
Automatically identifies market structures: highs, lows, breaks of structure, and changes of character. Useful for beginners and experienced traders to visualize structure without manual drawing.
Identifies high-volume support/resistance levels with higher probability of bounces. Displays how many times a level has been crossed; after three crosses, the zone turns dotted, signaling weakening.
Higher volume sensitivity shows only extreme high-volume levels, which may be far from price. Lower sensitivity displays levels near the current price.
The toolkit can be combined with smart money concepts, price action, and chart patterns for advanced strategies. The creator thanks viewers and offers a 7-day risk-free trial via Chart Prime.
The Data Trader Toolkit offers a comprehensive set of indicators designed to improve trading accuracy across various markets, with detailed entry and exit rules. While the video is promotional, it provides practical guidance on using each feature effectively.
What are the three signals required for a DT oscillator buy entry?
The white line crosses below the lower bands, crosses back inside the bands, and the center line turns blue.
02:10
What is the invalidation condition for a DT oscillator buy setup?
If the oscillator crosses below the lower bands, crosses back inside, but the center line hasn't turned blue and the oscillator crosses above the upper bands, it's invalidated.
03:09
What does a blue line in the divergence feature indicate?
Bullish divergence, signaling a long entry.
03:37
What is the recommended percentage to sell at the first take-profit for a safe trader?
Around 70% of the position.
04:06
What is the minimum trend strength required when using the DT Trend Analyzer as a standalone entry indicator?
At least 99%.
08:09
What happens to volumetric key levels after the price crosses them three times?
The support/resistance zones turn dotted, signaling the level might be getting weaker.
09:48
What is the purpose of the automatic market structures feature?
It automatically identifies market structures like highs, lows, breaks of structure, and changes of character, eliminating guesswork.
08:39
DT Oscillator Entry Rules
Provides clear, actionable entry criteria for both long and short positions, forming the core of the toolkit.
01:41Invalidation Conditions
Defines when to avoid trades, a critical risk management principle often overlooked.
03:09Combining Indicators
Demonstrates how to layer signals for higher confirmation, a key technique for improving trade accuracy.
04:3299% Trend Strength Rule
Sets a strict threshold for high-probability entries, emphasizing quality over quantity.
08:09Volume-Based Key Levels
Introduces a data-driven approach to support/resistance, potentially more reliable than traditional levels.
09:20[00:02] the best indicator trying out multiple systems months of back testing making sure it works exactly how Traders need it to as you know I've also had a lot of experience with indicators myself so I know exactly which ones work and which
[00:16] ones doesn't and after months of development I think I finally did it I developed an indicator that's better than anything I've seen before so I present to you the data Trader toolkit a set of indicators that contains
[00:30] everything a Trader needs to profit in any Market condition it features the one-of-a-kind DT oscillator which gives extremely accurate buy and sell signals a trailing stop indicator to help you exit your trades at the best price
[00:44] reversal zones with the highest probability a trend bar that shows you the exact percentage of the trend strength customizable settings where you whether you're a more aggressive or passive Trader and many other features
[00:59] contained in this indicator to make sure that it's as accurate as possible I teamed up with chart Prime to help me create this indicator some of you may know these guys have published hundreds of indicators on trading view before and
[01:13] so you know they won't mess around when it comes to indicators now I'm going to be teaching you how to use the indicators to get the best results so let's see how it performs in a real trade example to start once you got the
[01:27] indicator you want to go to the indicator section C on trading view go to invite only and the data Trader kit should automatically be there now select it to activate the indicator the first feature that I'll be using is the DT
[01:41] oscillator and the chart we're looking at is the Euro doll pair on the 4-Hour time frame bear in mind that this indicator Works across all time frames and markets whether it be Forex stocks
[01:54] crypto Futures Etc but from all the back tests we've done the 4our time frame seems to perform best so here's how to use the indicator first you wait for the DT oscillator line this white line here to move outside of these bands if it
[02:10] crosses the lower bands we prepare to enter by and if it crosses the upper bands we prepare to enter short in this case it crosses out of the lower bands meaning we're getting ready to enter a buy position next you wait for the white
[02:24] line to cross back inside the bands once it does you need to make sure the center line which is this one here turns blue when all three signals are aligned you enter a buy or a long position and look how perfectly the indicator works the
[02:40] price Rises significantly after we entered it's the same idea for short positions first you wait for the price to cross above the upper Bands then wait for it to cross back inside the bands now make sure the center line
[02:54] turns purple and when it does you enter a short position again look at how the price drops after entering our short now I'm going to show you an example of what an invalidation for this setup looks like let's say the indicator crosses
[03:09] below the lower bands and then crosses back inside so you're preparing to buy however if the center line hasn't turned blue yet and the oscillator has already crossed the upper Bands then that's an invalidation this means you should avoid
[03:24] entering any position pretty simple there's also a Divergence feature you can activate from the settings like this a blue line signals bullish Divergence which means you can enter long and a purple line signals bearish Divergence
[03:37] which means you can enter short moving on to the next feature in the toolkit which is a huge GameChanger for my trading the trailing stop indicator this indicator shows you the best time to close a trade it includes
[03:51] partial takeprofit marks which can be used to close a portion of your trade and secure profits along the way and a trailing stopline which tells us exactly when to fully exit a trade before price reverses if you want to play it safe you
[04:06] might sell around 70% of your position at the first take profit Mark and let the rest of your trade continue if you're feeling more aggressive you might only sell 30% at the first Mark and let a larger portion of the trade continue
[04:19] it really depends on your trading Style and what you're comfortable with but remember it's always a good idea to sell a portion at the first takeprofit signal for guaranteed profits now let me show you how you can combine the trailing
[04:32] stop indicator with the DT oscillator first go to the indicator settings and make sure that the trailing stop indicator is activated now wait for a valid entry signal from the DT oscillator in this example the DT
[04:47] oscillator crosses below the lower bands crosses back inside and the center line turns blue once this happens you look at the trailing stop indicator and wait for it to turn blue as well once it does you can enter a buy position after that let
[05:03] the trade run until either the indicator displays a partial takeprofit or an exit signal here we see it displays the first partial takeprofit so I'll close a portion of my position and let the rest run notice that the indicator even
[05:17] signaled to close near the absolute top next the market starts losing a bit of momentum and the trailing stop indicator turns red signaling that we should fully exit the remaining position as you can see the indicator was spoton
[05:33] as the market began heading downwards immediately after for shorts It's the exact opposite first you wait for the DT oscillator to display a valid short signal like right here then wait for the
[05:47] turning red once it does you can take a short position let the trade run until the indicator signals an exit in this case it tells us to fully close the position and just like with the long trade it
[06:02] captured the absolute bottom helping us capitalize on most of the move before capitalize on most of the move before the trend reversed a quick side note the invalidation of this strategy is similar to the DT oscillator strategy if the DT
[06:16] oscillator crosses below the lower bands crosses back inside but right before the trailing stop indicator confirms the entry the oscillator crosses above the invalidated and you should avoid taking a
[06:30] position now that's just the tip of the iceberg there are even more features in this toolkit what of my personal favorites is the DT Trend analyzer this tool displays a trend strength percentage directly on
[06:43] your chart showing you exactly how strong a trend is this will help you make smarter decisions and avoid trading on weak Trends the candle colors also changes depending on the trend strength when the trend is strong the candles
[06:58] become Bolder and when the trend weakens the candles Fade Out to use this feature effectively make sure to turn off the candle borders from your chart settings it makes the candle easier to look at now there are two ways you can use this
[07:13] indicator first you can combine it with your current trading strategy second you can use it as your main entry indicator I highly recommend the first option but both methods work perfectly fine let's start with the first method to use this
[07:28] indicator along onside your existing strategy make sure that the indicator is displaying at least 70% Trend strength on the position you're about to enter for example say you're preparing to enter a long trade but when you apply
[07:42] strength notice it's only at 60.9% which is below the target of 70% indicating that the trend lacks momentum even if everything else looks
[07:54] good it's better to wait until the indicator confirms a stronger Trend in this example the price eventually went down so the DT Trend analyzer just saved us from this losing trade now for the second method you can use the DT Trend
[08:09] analyzer as your main Buy sell indicator to do this wait for the trend strength to show at least 99% again it has to be at least 99% not even 98.5% in this example the indicator
[08:24] shows 99% uptrend so we take a long position this ensures your entering into a strong Trend which means the price has a much higher chance of continuing in the same direction the next feature in the toolkit is automatic Market
[08:39] structures this indicator is extremely useful for Traders especially smart money concept Traders it was created to get rid of all the guesswork by automatically identifying Market structures in real time it automatically
[08:52] marks the highs and lows break of structures and change of characters making it much easier to spot potential re reversals this is especially useful for beginners not knowing how to draw Market structures properly but it can
[09:06] also be used by experienced traders to automatically visualize Market structure so you don't have to manually draw them yourself the last feature I want to talk about is probably the coolest volumetric key levels this tool automatically
[09:20] identifies high volume support resistance levels these type of key levels have a much higher probability of causing price bounces compared to normal support resistance levels as you can see in this example the price hits this high
[09:34] volume support level and bounces off it multiple times on top of that the indicator also displays how many times a level has been crossed by the price after it crosses three times the support or resistance zones will then turn
[09:48] dotted signaling that the level might be getting weaker but since it's still a high volume area it could still offer a chance for the price to bounce you can also adjust the sensitivity of the indicator in the settings higher volume
[10:02] sensitivity will cause the indicator to only show key levels with extreme high levels of volume but sometimes they tend to be further from the current price if that happens you can adjust the sensitivity lower to display levels near
[10:15] the current price so this was a simple and basic tutorial on how to use the toolkit if you want you can take it to a more advanced level by combining it with other techniques like smart money Concepts price action and chart patterns
[10:30] trust me you'd be surprised by how well it works if you've made it this far in the video I'd like to say thanks so much for watching all the way through and if I'll leave a link in the description or you can visit chart prime.com datat
[10:46] still unsure you can try it completely risk-free for 7 Days oh and did I mention that you'll also get access to all chart Prime premium indicators on top of the data Trader toolkit yeah so go check out the link I'll see
[11:01] yeah so go check out the link I'll see you there


⚡ Saved you 0h 11m reading this? Transcribe any YouTube video for free — no signup needed.