
Wife's Smart Home Addiction
45sRelatable joke about smart home dependency sparks curiosity and engagement.
▶ Play Clip"Title accurately reflects the content: a detailed walkthrough of building a dream smart home with Home Assistant."
The video documents the creator's journey to rebuild his smart home with Home Assistant after moving into a new house. He focuses on minimizing cloud-dependent and Wi-Fi devices, prioritizing Z-Wave and Zigbee protocols, and creating practical automations that simplify daily life.
After moving, the creator realized how much his family relied on Home Assistant, prompting him to set it up as a priority.
Private Internet Access (PIA) is sponsored; used for secure internet traffic and accessing region-locked content.
Minimize cloud/Wi-Fi devices, focus on useful automations, and keep the system organized and maintainable.
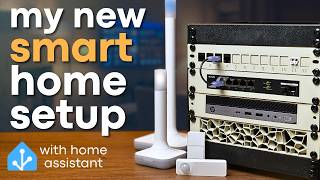
Uses an HP EliteDesk G3 Mini with 8-16GB RAM and NVMe SSD as a dedicated Home Assistant machine.
Uses Home Assistant Connect ZWA2 (Z-Wave) and ZBT2 (Zigbee) from Nabu Casa; initial setup had UI bugs but devices are stable.
Mounted the setup in a central closet using a 3D-printed Mod 10 rack for tidiness and optimal signal coverage.
Installed Zooz Z-Wave switches for lights and fans; pairing required PIN entry and triple-press, but they've been rock solid.
Uses Third Reality devices (sensors, remotes) which are reliable; avoids brands like C by GE that drop off the network.
Integrated IQ4 alarm panel via a custom HACS integration; required same subnet as Home Assistant.
Chamberlain/LiftMaster MyQ units use Security+ 3.0 (Bluetooth only), not compatible with ratgdo. Workaround: tilt sensor + dry contact relay on a spare remote.
Simple dashboard with badges for lights, toner order, low batteries, door sensors, and garage door status. Sections for rooms and presets.
Four-button Z-Wave controller in studio triggers lighting presets (e.g., talking head scene) via Home Assistant scripts.
Double-tap fan switch runs a 20-minute timer for kid's light; door sensor sends notification if kid leaves room at night; humidity sensor triggers bathroom fan; vibration sensor on washer sends notification when cycle ends.
The creator successfully built a reliable, locally-controlled smart home with Home Assistant, focusing on practical automations that reduce friction. Future plans include millimeter wave sensors and security camera integration.
What are the two protocols the creator uses to avoid Wi-Fi for smart home devices?
Z-Wave and Zigbee.
04:30
What hardware does the creator use as a dedicated Home Assistant machine?
An HP EliteDesk G3 Mini with 8-16GB RAM and an NVMe SSD.
04:00
What issue did the creator encounter with the ZBT2 adapter setup?
The automatic setup with the integration kept giving an error, so he had to set up the Zigbee network manually.
06:00
Why did the creator place the Home Assistant setup in a central closet instead of the server closet?
To ensure good signal coverage for Zigbee devices throughout the house.
07:00
What is the pairing method for Zooz Z-Wave switches?
Press the top button three times to enter pairing mode, then scan a QR code or enter a PIN in Home Assistant.
09:00
Which brand of Zigbee devices does the creator recommend for reliability?
Third Reality.
11:00
What integration did the creator use to connect the IQ4 alarm panel to Home Assistant?
A custom integration from Eric Highlands, installed via HACS.
12:30
Why couldn't the creator use the ratgdo device for his garage door opener?
Because his LiftMaster unit uses Security+ 3.0 protocol, which is Bluetooth-only and not supported by ratgdo.
15:00
What workaround did the creator use to automate the garage door?
He attached a Third Reality tilt sensor to the door for position sensing and wired a dry contact Zigbee relay to a spare remote to simulate a button press.
16:00
What automation does the creator use for the washing machine?
A vibration sensor on the washer triggers a notification when the cycle ends after running for a certain time and then stopping.
21:30
Chamberlain Rant
The creator passionately criticizes Chamberlain/LiftMaster for locking down garage openers with Bluetooth, calling them out for anti-consumer practices.
15:00Scene Controller Demo
He demonstrates walking into the studio and pressing a button to instantly switch lighting to a talking head scene, showcasing the power of physical controls.
19:00Washer Notification Automation
A simple but relatable automation that solves the common problem of forgetting laundry, highlighting practical smart home benefits.
21:00[00:00] In my last video where I talked about setting up our new networking now that we moved into this house, I had a comment asking me how I was able to get my wife to help me with pulling cables. And I jokingly responded, "Just take away Home Assistant for a week." And while that was definitely a joke, it was kind of true. After running Home Assistant in our previous house for many years, we didn't quite realize how
[00:20] much we relied on it until it was gone. So, I knew one of the first things that I wanted to set up once we got into this place was Home Assistant. So, in this video, I'm going to try to get Home Assistant set up and all of the crucial infrastructure I need for that to work. And I'm also going to show you some cool ways that I've put that to use and some future ideas as well.
[00:41] Now, Home Assistant isn't the only thing that I haven't gotten set back up since I moved into this house and started rebuilding my home lab. I also haven't gotten my VPN server set up. But fortunately, like I've talked about a few times on this channel, I have a backup thanks to Private Internet Access, the sponsor of today's video. Now, I'm sure many of you are aware of this, but a VPN is a great tool to have
[01:01] in your tech tool belt. It can help to keep your internet traffic safe from prying eyes and also allow you to access content or websites that aren't available in your region. And with tons of servers across 91 different countries, you'll have lots of options to choose from. I've been using PIA personally now for around 2 years, and it's been rock solid. And I love that I can use it on my phone, my laptop, or even Linux
[01:22] servers. One of the best use cases I have for PIA is with a Docker container called Gluten, which lets me easily tunnel traffic from other containers through PIA servers. Also, they have a strict no logs policy, which is verified by third party audits. So, if you're looking for a rock solid and featurerich VPN that you can get for a great price, make sure to check out Private Internet Access by using my link down in the description.
[01:42] With that, you can get 83% off plus 4 months for free. When I set up Home Assistant in the last house, I sort of did so peacemeal, just slowly adding things and kind of learning as I went. And this led me to make a lot of decisions that I regretted. But now that we're in this new house, I have a clean slate. I can sort of set up Home Assistant however I want. And I'm going to
[02:03] try to get the perfect smart home setup for me. Now, for this goound, I have a few goals. First of all, I want to have as few devices as possible that rely on any sort of cloud connectivity or even Wi-Fi. I also want to focus on making automations and scripts that actually make my life and my family's life easier rather than kind of doing fun goofy stuff. That being said, I still really like Home Assistant and
[02:23] I'm probably going to do some stuff just for the fun of it. But for the most part, I want Home Assistant to actually be helpful and not get in the way. And so I also want to try to keep things as organized as possible and easy to maintain. That way we don't end up with like broken things that are just more annoying than they are useful. So to get started on that, first we need a system.
[02:44] And while I previously ran Home Assistant in a virtual machine, I decided to build a standalone dedicated Home Assistant machine. And similarly to my network setup, I wanted to repurpose gear that I already owned. And I figured the perfect candidate for this might be my HP Elite Desk G3 Mini. I picked this machine up a few years ago, and I've used it for a ton of different projects, and so I feel like at this point, it
[03:04] deserves a permanent role. I dropped in 8 or 16 gigs of memory, I can't remember, as well as an NVM SSD, and then I followed the instructions to get Home Assistant installed onto it. Now, since I wanted to avoid Wi-Fi, I obviously needed to use some other type of protocol. And for that, I have these two adapters here from Nabukasa. First up is the Home Assistant Connect ZWA2, which is a Z-Wave antenna that was developed by
[03:25] Nabukasa, which is a part of the Open Home Foundation or the the company behind Home Assistant essentially. And this device is pretty simple. It lets you connect to Z-Wave devices. There's also the Home Assistant Connect ZB2, which can either be set up to use the Ziggby protocol or matter over thread. Unfortunately, I can't do both, and I'm going to stick with Ziggby just because I already have a lot of Ziggb devices. Now, I do want to
[03:45] be clear that these were sent over from the Open Home Foundation for me to take a look at and use in content. So, I did get these for free. I'll try to make sure that I mention anything else in this video that I received for free, but I still have my opinions that I will give on it, and I'll try not to be biased or anything like that. They do come in at pretty reasonable prices though.
[04:06] And also by buying these, you're helping support the Open Home Foundation, which helps make Home Assistant. So, I'd be happy to spend more money on that since I've been using Home Assistant for a long time. Oh, yeah. When Open Home Foundation sent over that Z-Wave antenna, they also sent some Z-Wave devices like a little smart plug from Zeus and then this water leak sensor. I haven't set these up yet, but um I did get them sent
[04:26] for free, so I just wanted to be clear on that as well. Anyway, since I already had Home Assistant installed, I went ahead and plugged in both of the adapters and started getting them set up. With the Z-Wave adapter, I had some weird UI bugs kind of when setting it up. But once I got it all configured and used the recommended settings, everything seemed to work just fine. And I got the firmware updated as well with
[04:47] the ZBT2. Oh gosh. With the ZB with the ZBT2. Gosh, am I even saying it right? That seems like it's wrong. Nope, it's ZBT2. That's just kind of hard for me to say. Anyway, with that one, I also got it set up, but I ran into some weird issues. When I tried using the automatic setup with the integration, I kept getting this error. And so, I ended up just having to set up the Ziggb network manually.
[05:07] I'm not sure if that's because I have some early uh like review sample models with some older firmware or anything, but that didn't seem to be the case. I'm not really sure. Hopefully, over time, they kind of smooth out the onboarding process and work out some of the bugs. But, uh once I got them set up, everything worked great. In fact, I haven't had a single issue with any devices dropping off or losing connection. So, yeah,
[05:28] they seem to be pretty rock solid. I didn't want that setup just sitting here in the middle of my studio, though. It needed a better home. And well, I decided to put this home assistant setup in a closet that's pretty much right in the middle of my house. I could have put it in my little server closet, but that's at the very corner of the house. And while I wouldn't be worried about the Z-Wave antenna probably
[05:48] with that distance, I'd be a little bit concerned that the Zigb devices all the way on the other side might drop out. I decided to put everything in that closet in the middle of the house. And to keep things nice and tidy, I decided to rack everything into this 3D printed Mod 10 rack that I covered in a previous video. I printed out a shelf for the Elite desk. And I also printed out this shelf for
[06:09] this Tinder 10 gig switch, which is probably going to be overkill, but if I ever decide to add any other little mini servers or something in that closet, then I'll have the option for some 10 gig. Oh, and I also printed out a little keystone panel as well as just a vent. got everything mounted in the rack and once I got it all wired up in the closet, it looked pretty decent. The beige filament was definitely
[06:29] a choice. Uh, realistically, that was just one of the first filaments that I could find when unpacking. I definitely need to do a little bit more tidying of the cables, but I also need to get a UPS in there that I just haven't found from unpacking yet. But once I finally find that UPS and then tidy up some of the cables, I think I'm going to be pretty happy with this little home assistant setup. Now, one
[06:50] of the more boring things, but also really important things that I wanted to get set up was switches for not all of my lights and fans and such, but at least for all of the things that I would want to probably automate. Fortunately, since we were building the house, I was able to get some of those just wired in with the electricians, but there was kind of some miscommunications and so I ended up having to wire
[07:10] up a few myself. And I also had my buddy Raymond, who's sort of an electrician, help me wire up some of them as well. So, thanks, man. Now, for those switches, I used these Zoo switches primarily, which are Z-Wave switches. Z-Wave seems to be a pretty good option for things like switches because it has a really good range, so you're not going to worry about things dropping off and whatnot. I picked up some that are these,
[07:31] you know, kind of standard decorative plates. Um, some of them were just toggles and some were dimmers. And then I also picked up a few that use this more standard toggle style switch so I didn't have to swap as many face plates. Now, getting these set up was a little bit different from what I was used to with setting up Ziggby devices. It's a bit more secure and you either have to scan a little QR code
[07:51] with like your phone or you have to have this little pin number whenever you set them up with Home Assistant. Now, I couldn't really get the QR code method to work, so I pretty much just had to go type in all these pins. And you also have to set these switches up into a pairing mode by pressing the top button three times. So, I did that like a billion times. But eventually, I got all the switches
[08:12] added. I updated the firmware for all of them. And so far, for about a week now, I've had absolutely no issues. They've been rock solid. So, yeah, these seem to work pretty well. I also picked up one other type of switch, which was from In Brighton. I picked this up because it also has a built-in motion sensor, and so I thought that might be fun to try out. And I installed it in the garage because, well,
[08:32] over the last few weeks, I've been walking in and out of my garage holding a bunch of stuff. And so, it's nice to just have the lights automatically kick on whenever I'm walking through there. Oh, yeah. Another device that technically isn't a light switch, but it's kind of a switch, is this little Z-Wave four button controller. As I mentioned, there were some miscommunications with the electricians. And because of that, there actually ended up being a few
[08:53] switches in the house that weren't actually wired up to anything. They were just dead switches. And so, I was actually able to take those out and instead install these little controllers. These don't actually wire up into the house or anything. They're just battery powered. But, they're Z-Wave devices that can send different signals based off whether you press the button or hold the button down. So, you can use those to trigger automations for scenes and such in
[09:13] Home Assistant, which is pretty cool, especially here in the studio space. But I'll talk a bit more on that here in just a minute. Now, setting up Ziggby devices was a lot more simple. It's the same as what I done in my previous Home Assistant video. Basically, different devices will have different ways of getting it into pairing mode, and then you just go add a device and yeah, it's done. Now, when it comes to Ziggby devices,
[09:33] I primarily used things from third reality. They have lots of different options of like little remotes and motion sensors and temperature and humidity sensors and vibration and tilt sensors and lots of other really cool things. And in my experience, they've been really rock solid. I've used a few other Ziggby devices from brands like Cara and Singled. I don't know how you say that necessarily, but with both of those, I had some issues with devices that would
[09:54] occasionally like drop off the network and I'd have to like power cycle them to get them to work again, which was pretty annoying. And I haven't run into that issue at all with any of the devices from Third Reality. So, yeah, I recommend checking those out. None of these were sent for free. I bought them all myself. Now, one of the next big things I wanted to get set up with Home Assistant was our alarm panel,
[10:14] which is this IQ4 hub from Culsus or something like that. Now, I felt like I was going on a wild goose chase trying to figure out how to get this set up. There were tons of forum posts of people having issues and this integration maybe worked but didn't and this one. And there was one integration that seemed to be the most popular, but it involved using an MQTT broker and also setting up like App Damon and
[10:35] it was kind of complex. Eventually though, I stumbled across this integration from Eric Highlands, which is great. You do have to install hacks or home assistant community store, and then from there, you have to add the custom repository, but then you can just install the integration and set it up. And well, it's fairly easy. Well, kind of. On the alarm panel, you do have to have your installer code, but well, fortunately, they just used the standard.
[10:55] I think it's 2222. And so once I put that in, I could go to the installation menu and devices and essentially set up the integration as like a Wi-Fi remote. Now earlier I did say I wanted to use as few Wi-Fi devices as possible, but obviously this was the only method that was going to work. However, I did set up a separate IoT VLAN in my last video for all the devices like this. However, with this
[11:16] integration, it does say that you need to have the panel and your home assistant machine on the same subnet. And I was hoping I could get around that because I have an MDNS repeater set up in OpenSense which has worked so far for other devices. But uh I could not get it to work on different subnets. And I think that's because technically Home Assistant is acting as like the remote device, not the server device. So the
[11:36] panel is trying to make requests to the remote. And uh even though I tried setting up some different firewall rules, I couldn't get it working. And so for now at least my alarm panel is still just sort of on the same VLAN that Home Assistant is on. But it works. And not only can I set the alarm at night or when we're leaving, I also get access to things like the smoke detectors as well as door
[11:57] sensors, which is really handy for certain automations. Now, unfortunately, I didn't have as much success with my garage door opener, which was another big thing that I wanted to tackle. When we were in the process of building the house, I got a quote for them to install garage door openers, and it was surprisingly cheaper than I was expecting. So, I just sort of assumed they were going to use super generic basic garage door openers, which kind
[12:17] of seemed like what I wanted because I could probably just install something with some like dry contact relays and go from there. But instead, they installed these MyQ units from LiftMaster, which is owned by a brand called Chamberlain. And uh there's definitely a history with Home Assistant and Chamberlain. There were integrations in the past that worked over Wi-Fi and then the manufacturer made changes to break that integration and there were more changes to fix the integration
[12:38] and then more changes to break it and it was a game of cat-and- mouse and eventually Chamberlain came out in uh what was just not very friendly to the home assistant community. Now, fortunately, there was an awesome device called the Rat GU Rat Rat GDIO. I'm not really sure how you say it. Uh, but this is a little ESP board that you could hook up that for some garage door openers could just work using like a
[12:58] simple dry contact relay. But for Chamberlain and Lyftmaster garage door openers, it could actually just work in line and essentially work as a remote, giving you all of the features you would normally get as well as kind of some extra features. But that's only if your garage door is their security plus 1.0 or 2.0 versions. Now, when I looked at our unit initially, I looked up at the little sticker on the learn button, and because of
[13:19] the yellow lighting, I kind of thought it was a yellow button, which would indicate that it was a security plus 2.0 version, which would be supported. So, I ordered this little guy and was excited to get it set up. However, when I actually got up there with better lighting, I realized the button was a white button, which means it's the security 3.0 version. Now, that's not supported by this because with their security plus 3.0 O protocol.
[13:39] Nothing is wired. Even though there's wires going from the unit to the remotes on the wall and to the sensors, that's just for power. Everything communicates via Bluetooth. And they basically blacklist any Bluetooth devices that aren't their own devices. Which is funny cuz they say that's in the name of security. But uh I can't imagine Bluetooth being more secure than literally a wire running to a button on the inside of your house. But whatever. Screw you,
[14:00] Chamberlain. Screw you, LiftMaster. Don't buy from them. They suck. That being said, I still wanted to find a way to get my garage door automated. So, I needed to find a workaround. Now, thanks to Third Reality's tilt sensor, having a sensor for the garage door being opened or closed was pretty easy. You just stick this guy on the top panel of your garage door and then hook it up to your Ziggby network and boom, you have
[14:20] a sensor for the position of your garage door. To actually trigger the garage door though, I had to go pretty much the same route I went with my previous setup. However, I didn't want to buy another remote from LiftMaster because they suck and I don't want to give them any more money. So, I just sacrificed this remote from my car. To simulate a button press, I picked up this little uh dry contact ZigGB relay and then
[14:41] designed a quick little enclosure so I could put both boards next to each other and soldered some wires onto the button that I needed. And after getting it all hooked up, I was able to set it up with Home Assistant and trigger a button press. This isn't going to win any awards for aesthetics or anything, but it's fairly discreet and it works pretty well, and I don't have to hook my garage door openers to the internet
[15:01] to use some garbage app. With the Ziggb and Z-Wave networks configured and the alarm panel hooked up and the garage door working, that was pretty much it for all of the big things. I also set up my Honeywell thermostat, and I do plan on getting security cameras integrated with Home Assistant, but that's going to come in the next video, so stay in tuned for that. But yeah, I had all of the big stuff kind of configured
[15:22] and then I could get to the fun parts of actually setting up and using Home Assistant. Now, my dashboard setup isn't crazy or anything, but I did get something set up that is pretty easy to use and has some pretty helpful features. So, right off the bat, you have access to like weather, the alarm panel, and the thermostat. But up at the top, I have some badges, which are pretty helpful. First of all, there's this little
[15:42] lights uh aggregate number thing here. And so, if I click that, I can actually see a list of all of the lights that are currently on. I can hit this button at the top to turn them all off. Or back on the dashboard, I can just hold down the badge to turn them off as well. Oh yeah, I have a little badge here for ordering toner because my printer is low on toner. And so if I
[16:03] click that, it actually just takes me to the link to purchase more toner, which is pretty helpful. I also have this low batteries indicator. A lot of these third reality devices just use like AAA batteries. And so when these start to run low, you'll have to replace them. And currently, I have the threshold set really high just so I could actually like demonstrate this working. So, I think it's set at like below or equal to 80%
[16:23] or something like that. But you can see it shows me which devices have a low battery and what the percentage is. And then another thing that's not showing up right now, but will if I go open a door. Yeah, I have this little door sensor here that shows me if any doors are open. And I also have a little indicator that pops up if the garage door is open. And then below that, there's nothing crazy. It's
[16:44] just uh different sections for different rooms and the devices that we would most often need to adjust. I have a few buttons for presets. I have this little sub view for our Sleep Number bed settings. Oh yeah, I also have the shopping list which I can go on there and add different items. That way when my wife is doing meal planning and grocery shopping, she can just check this. And then you can just check individual ones
[17:04] off and clear the completed ones or just wipe the whole list. It's pretty cool. And yeah, that's pretty much it for the dashboard. It's fairly simple. And actually, one of my goals with Home Assistant in this house is to try to avoid actually using Home Assistant. That sounds kind of dumb. like why would I set up a bunch of smart switches so that I can control them with my phone and then not control them with my
[17:25] phone and instead control them with the switches or something. But really what I'd like to do is not have to pull my phone out as much and instead be able to use physical switches around the house or have things just automated. One thing I'm really excited about is that little four button scene controller I mentioned earlier. I still have a lot of work to do, but I already have it set up to where I can just
[17:45] walk in and well, for example, I can hit a button which runs a script to turn all the lights off in this room. Now you can't see me, but I can just walk in and hit a different button. And now I can recall a preset to Oh gosh, I need to focus. All right, there we go. Uh, yeah, I can hit a button and cue my talking head scene, which not only adjusts the lights and stuff
[18:05] in the background, but it also triggers scenes for my studio lighting, which that was kind of a difficult thing to figure out because the the brand of lights I use doesn't have any sort of Home Assistant integration. So, I I came up with a really janky workaround. In fact, I think I'm going to do a little behind the scenes video on that specifically for my RAID members. So, if you are a RAID member, maybe keep an
[18:26] eye out for that. But yeah, anyway, it's really handy to be able to just walk in, hit a button, and have whatever lighting set up or whatever else I need in this room. And I also have one in the living room that I'm going to eventually get set up to have different scenes and stuff for daily life and whatnot. Oh, yeah. Another cool thing is these Zoo switches actually offer scene profiles, I think, is what it's
[18:46] called. Essentially, in the configuration, you can turn it on and then you can do things like doubleclick the down button or hold down the down button and instead of turning your fan on and off, it'll actually just send an event to Home Assistant that you can use for certain automations. Like, for example, our kid at nighttime likes to stay up and read books for a little bit. And so rather than leaving his light on for like
[19:07] 20 minutes and then having to remind myself to go turn it off whenever we walk out of his room at night, we can just double tap the bottom of his fan button and that'll run a script to wait 20 minutes and then set his lights to his scene for like sleep time. Also, one thing I found to be really handy with Home Assistant is sending alerts to my phone. One cool thing I did was set up
[19:27] this little door sensor from Third Reality on the top of our kids bedroom door. And I set up an automation that where if it's in the middle of the night and it also senses that via my sleep member bed I'm in bed, if he leaves the room, it'll send like a little notification to my phone and also turn my lamp on so that way I can get up and figure out whatever he needs. Another thing I
[19:48] did was set up one of these third reality temp and humidity sensors just outside my shower. I've always been pretty insistent on making sure to turn on the exhaust fan in the bathroom whenever you take a shower. That way there's not like humidity that builds up. But well, for a long time my wife had a really bad habit of not doing that. And over time, she's gotten much better at it. But to try to make her
[20:08] life easier, I just set up an automation to where whenever the humidity gets high enough in the bathroom, it'll automatically kick on the fan. Well, it will once I actually get that smart switch installed. Haven't gotten around to that yet, but I will eventually. I also picked up these vibration sensors from Third Reality, which uh sounds kind of weird, but for example, I have one stuck to the side of my washing machine. And then I have
[20:29] an automation to where once it kind of runs for a certain amount of time and then stops for a certain amount of time, it'll send a notification to my phone that says, "Hey, the washer's done running." Which seems really stupid, I know, but I will try to do laundry throughout the day all the time. So, I'll put something in in the morning, completely forget about it, work on videos, whatever, and then all of a sudden my
[20:49] wife comes home, we eat dinner and everything, and then we're trying to go to bed, and it's like, wait, where are the sheets for our bed, and I'm like, "Oh, yeah, I left them in the washer." So, uh, having just a helpful little reminder that goes to my phone that I can just, "Oh, hey, the washer's done. Let me go move stuff over." It sounds really dumb, but it's also really helpful for people like me that
[21:10] just kind of get distracted all the time. Now, I have some other automations set up, and I definitely have plans for a lot more. I like for a lot more things to just be automated so that things are frictionless and I don't have to think about it. But that's going to have to come a little bit later on. While I do have a variety of little motion detectors that I can set up some automations for, I
[21:30] kind of want to wait until I get some millimeter wave sensors, uh, specifically some from a brand called Apollo Automation. They actually sent me kind of a package of different things a while back to check out, and I haven't gotten around to making any videos on them, but I'm definitely going to in the future, primarily because they have these pretty inexpensive millimeter wave sensors that are presence detection sensors. I also really need to get my security
[21:51] camera set up, which is going to be in the next video. I think that's about it for now. I feel like I've been talking for a long time, so hopefully this video isn't insanely long. Hopefully it was interesting. If you have any questions, let me know down in the comments. If you have any ideas for the new smart home setup, put those down in the comments as well. Uh, also I do want to say thank you
[22:11] to all you guys for being so patient and uh, supportive through this whole process. Trying to just upend all of my studio and everything and move that while also trying to move our family and everything has been very stressful and there's a lot of work to do. There's still a lot of things I need to get done. And so, yeah, I just appreciate you guys being so patient through this process. I'm really excited to get around
[22:32] to making more normal hardware haven videos. So, uh, just be a bit more patient. We'll get there. But yeah, that's it for this one. So, thank you guys so much. Stay curious and I can't wait to see you in the next one.
⚡ Saved you 0h 22m reading this? Transcribe any YouTube video for free — no signup needed.