
3D Printing a God-Tier Studio Organization System
45sThe opening hook promises a dramatic transformation with 3D printing, appealing to makers and organization enthusiasts.
▶ Play Clip"Delivers on the promise of a perfectly organized studio, though the heavy product placement for the webcam slightly dilutes the focus."
The video documents a week-long project to organize a studio using the Gridfinity 3D-printed organizational system. The creator designs and prints custom bins for webcams, capture cards, and camera gear, as well as artistic stands for anamorphic lenses and practical pegboard hooks. The project involves extensive 3D printing, custom design, and attention to detail, resulting in a highly organized and visually appealing studio space.
The creator introduces the project: using Gridfinity, an open-source 3D printed organizational system, to organize all webcams, capture cards, tools, and camera gear into custom labeled colored bins within a week.
The gear closet, built 4 years ago, has become disorganized due to the 'goldfish effect' (out of sight, out of mind). The IKEA closet with eight massive drawers is underutilized and cluttered.
The plan involves creating artistic stands for anamorphic lenses and practical, quick-swappable stands for other lenses on a pegboard, alongside the Gridfinity drawers.
The first step is to print grids for the drawers. Custom spacers are printed to ensure a snug fit. Each drawer fits 15 squares wide by 12 deep, requiring many grids. Two printers run day and night for 2-3 days to complete four drawers.
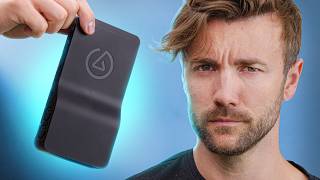
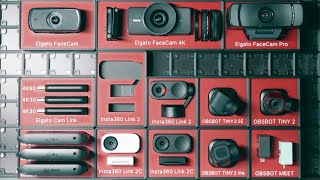
The layout for drawer one is designed, prioritizing frequently used items like webcams and capture cards. The first bucket is for the Insta360 Link 2C webcam, which is highlighted as a 4K AI-powered webcam with phase-detect autofocus and AI tracking.
The creator shows how to make a custom bucket: measure the item, cut out the shape, add a red top layer (6mm thick), and add white text. Templates are used for efficiency, but custom design is still needed for many items.
The creator designs beautiful minimal stands for anamorphic lenses with glowing accent lights, including a slot for the lens cap. The design includes a white deflector panel and translucent bamboo filament diffuser.
For other lenses, simple clean stands that lean backwards are created to prevent sliding. The design is based on modeling the lens dimensions, and a TPU layer is added to prevent scratching and reduce noise.
Pegboard hooks are printed lying flat to increase structural integrity, as vertical printing made them weak. A channel is cut in the back for reinforcement. Printing all six hooks took 30 hours.
Cable buckets are designed with soft TPU straps to hold cables. After about 12 hours of modeling and 100 hours of printing, the webcam drawer is finished with blank spaces for future additions. The creator plans to continue with drawer 2 and possibly Gridfinity home drawers.
The project successfully transforms a cluttered studio into a highly organized space using Gridfinity and custom 3D printing. The creator demonstrates that with careful design and printing, any item can have a dedicated, labeled, and aesthetically pleasing storage solution.
What is Gridfinity?
An open-source 3D printed organizational system invented by YouTuber Zack Freriedman.
00:04
What is the 'goldfish effect'?
Out of sight, out of mind; items become disorganized when not visible.
00:58
How many squares wide and deep does each drawer fit?
15 squares wide by 12 deep.
02:43
What is the Insta360 Link 2C?
A 4K AI-powered webcam with phase-detect autofocus and AI tracking.
03:22
What technique is used to reduce layer lines on shallow slopes?
Variable layer height calculation.
08:03
Why were pegboard hooks printed lying flat?
To increase structural integrity, as vertical printing made them weak.
08:30
What material is used for the soft layer on lens stands?
TPU.
07:32
How long did it take to print all six pegboard hooks?
30 hours.
08:44
Gridfinity Introduction
Introduces an open-source organizational system that is highly customizable and popular in the 3D printing community.
00:04Insta360 Link 2C Features
Highlights a budget webcam with advanced features like phase-detect autofocus and AI tracking, making it a notable product for streamers.
03:22Artistic Lens Stands
Demonstrates creative design and 3D printing techniques to create functional art for camera gear.
05:52Variable Layer Height
A useful 3D printing technique to improve surface quality on shallow slopes.
08:03Custom Cable Buckets
Shows a practical solution for cable organization using TPU straps, a simple but effective idea.
08:56[00:04] project and it was a big project. If you haven't seen videos on Grid Infinity yet, you should. It's an open-source 3D printed organizational system invented by YouTuber Zack
[00:18] Freriedman, and it's very impressive. You print a grid that goes in the bottom of your drawer, and then you print different sizes and shapes of bins that have custom cutouts for whatever you need to fill the grid. Almost any tool
[00:30] or battery or item you can think of, someone has made a gridfinity bucket for that thing. But I wanted to see if I can make this a little bit more next level. Take all my webcams, capture cards, tools, camera gear, put them in custom
[00:43] labeled colored bins, and all my lenses mounted and labeled for fast switching in time one week and show you how I made a god tier organizational system in my studio. [Music]
[00:58] When we built this place, the gear closet was an absolute godsend. But I've been here 4 years now, and the goldfish effect, it comes for everybody. That closet has gotten so full. How full is it?
[01:11] there somewhere. I built this IKEA closet just before the move. And it has these eight massive drawers that I've never used because there's no being a catch-all and being even less organized than anything else. going to
[01:23] make this thing the uh the ultimate gear cabinet just for the things I need other spot in this project is this shelf that I made a couple years ago. And I getting unorganized. I don't know how that happens. There's something someone
[01:37] That's supposed to be a quick grab YouTube space, but also look nice cuz it's on camera a lot. And I don't face the camera that way anymore cuz it's gotten nasty. It's getting out of hand. Right now, the plan is, well, the plan
[01:50] is two plans. The plan is to make these fancy artsy looking stands for the anamorphic lenses here. And then up here on the pegboard, make just some more practical, quick swappable stands for my
[02:02] quickly. This project took a ton of designing and then even more printing like this. Oh, let's start with these gridfinity drawers.
[02:16] First step is to completely grid out these drawers. Now, the grids are a works with every grid. But that means I wanted this grid to be snug. Nothing's sliding around in there. So, I printed
[02:29] printed out these little spacers so I could figure out the perfect width. Once I figured it out, I added it to the grid model to go on the edges. Cool. This is a premium feeling grid already. Each drawer could fit 15 squares wide by 12
[02:43] lot of these That's a lot of these boxes. We're going to get a lot fitting into these, but that also means printing a lot of these grids. So, I got two printers going day and night, just printing grids. Took like two or three
[02:56] days. That really ate into my week, but got four of them done. Decided that's out what the other four will be later. Next step was to organize where everything goes in the drawer. I wanted to start with the ones that I use and I
[03:09] I need to grab the most. Usually, that's webcams, capture cards, and some nice came up with. This is my layout for drawer number one. And the first bucket I made was for the Insta3 Link 2C. It gets to be first in line because, well,
[03:22] let's make this bucket from scratch while I show you this 4K AI powered way, this whole talking shot here wasn't actually shot on my fancy $4,000 camera that I normally shoot this on. It was shot on a $150 webcam, the Insta3 Link
[03:38] going to be because the premium sensor image that you can either capture in 4K 30 or 1080. The Link 2C is not only just a super sharp webcam, but it's also got an incredible autofocus technology. The
[03:52] same autofocus technology that's in this camera here. It's called phase detect face always looking crispy. And their software makes it super simple and easy to dial in the exact settings that you want for your shot. I didn't write this
[04:06] in the ad spot, but it's also got this really fun little privacy shutter here. kind of cool. It has this really cool AI tracking feature that even though the camera itself doesn't move, it punches in a little bit and follows you around.
[04:18] That way, if you happen to be a little bit more proactive on your Zoom calls, middle of the frame. And you can even activate tracking just by using hand gestures from halfway across the room. Super convenient. So, if you're looking
[04:30] streams, your Zoom calls, your long-distance relationships, check out the Insta3 Link 2C. I put a link to it in the description down below. A link to it. Nice. Anyway, this bucket for the webcam turned out perfect. I even got
[04:45] mount for the bottom of it. I added a thin top layer of carbon fiber red with really makes it pop. And then after precisely measuring this thing, I added about 2 mm of clearance. That way it slides in and out easily, but there's no
[05:02] rattle. Okay, there's a teeny tiny rattle. It's pretty good though. And while this white text isn't necessary, like I know what webcams are. It's going to look real nice in that drawer with everything
[05:14] labeled. Just wait. I made these templates for each size bucket. So, in order to make one of these, all I have to do is measure the item, cut it out, and then to make that red top part, I duplicate the top face and thicken it up
[05:26] by 6 millimeters, and I make that the red. Then just add the white text and print. The templates worked. It only took me like 15 minutes to make this, but I still have to custom design like 12 of these things. So, instead, I think
[05:39] they're a one sizefits-all. And while those are printing, I'm going to I'm going to get to work designing all these things. I want you to understand something. I had this grand vision for the lenses being true works of art.
[05:52] still can't believe I actually pulled it off. I don't think I could do it again. yourself. A healthy level of delusional confidence is something everybody needs. For the anamorphic lenses, I made these beautiful minimal clean stands that I
[06:08] they've got these glowing accent lights underneath them because every lens stand needs accent lights. But in the end, I've now got these awesome display mounts for my anamorphic artsy lenses that even have a little slot to put the
[06:23] I'm pretty pumped about that. That's actually one of my better ideas. The iterations to get right. It's just a little aperture MC light shooting upwards. And I printed this little white deflector panel with a little gap in
[06:36] and escape out the sides into a diffuser that I made using translucent bamboo filament. Top it off with one more little black piece in the top center and it's done. It looks crazy. It's awesome.
[06:49] Really, really proud of myself for that. As for the rest of the lenses, I just wanted a very simple, clean stand shape that leans backwards a little bit so they never eventually slide forward and fall off. I really wanted them to nestle
[07:02] in there safely while be easily removable so I can grab them quickly. something like a lens like this is to actually model the dimensions of the out of the mount shape. Then you polish it up with a few more cuts, add some
[07:16] than it really is. I mean, it's still just plastic, but like now it's fancy plastic. Then add a space for the lens labels on the front, but it's the little things that really take it over the top. That's Write that down. That just in
[07:32] Because my printer over here has two printer heads, I actually printed a printer heads, I actually printed a softer TPU layer where the lens slides. That way, it doesn't have that like metal on plastic sliding cheap sound,
[07:50] also because I've got a really shallow I was getting some serious layer lines. You can do this thing where you calculate a variable layer height depending on where it needs it the most.
[08:03] So these real shallow slopes, it really thins down the layer lines to really shallow angles still look super smooth. The little things, it's always the the pegboard was actually a little bit harder. At first, I just printed the
[08:17] problem is because it prints vertically, the layer lines were making the vertical part of the hook the weakest part of the entire thing. That's the part that holds the lens up and it w So we weren't we weren't doing that. So instead, I cut
[08:30] out a little channel in the back and then I printed the hooks lying flat on go a different direction. It added a ton more structural integrity. I think time will tell. I really think these turned out awesome. I still need
[08:44] to make one for this chunkier lens. Probably have to start from scratch. I printing all six of these took 30 hours, which was just enough time for me to go to town on making the world's greatest
[08:56] organizational drawer in the tech space. Eat your heart out. MKBHD. I did try a process. There is a an online tool called tooltrace.ai. You just take a top- down picture of your item next to a piece of paper for a
[09:11] size reference and then you click on the tool and it cuts it out for you. The problem with that is it's not very clean. Not clean enough for me. I would not have been happy with the end results. So, I did it from scratch,
[09:24] which is kind of my mantra. Sometimes I feel like an old man. the whole I was doing myself. That works. It just required a lot of measurements and some ADHD meds and then just did it. The cable buckets were
[09:38] really fun though. I decided to add this really soft TPU strap to hold them in so I didn't have to worry about like cable ties or anything. It's the little things. Don't forget that. And after about 12 hours of modeling and uh
[09:53] about 12 hours of modeling and uh probably 100 hours of printing, here's the result. Got a finished webcam drawer with some blank spaces to add some more webcams in the future. As of filming this, my week has run out, but I
[10:05] proven. I'm moving to drawer 2 right now. And along the way, I'll probably gridinity some of my home drawers and probably not tell Kenzie until I'm done. won't like the idea. You know what I mean? like ask for per forgiveness, not
[10:20] bucket files. I feel like they're very specific to each individual thing. Maybe let me know down below if you want a specific bucket. I'll put them on like don't know. Let me know which ones you want. If some of them get like
[10:34] overwhelmingly voted for, I'll do it. I already made them. Might as well give them to you. But that's it. I'm now an organizational whiz thanks to 3D printing and ADHD. Peace. Hit the like button. Subscribe
[10:46] Peace. Hit the like button. Subscribe later.
⚡ Saved you 0h 10m reading this? Transcribe any YouTube video for free — no signup needed.