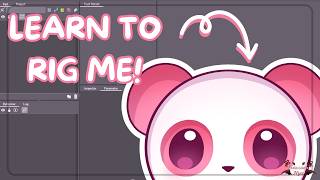
Your First Live2D Rig in Under a Minute
43sSatisfying beginner success moment as the model comes to life with breathing motion.
▶ Play ClipThis is a step-by-step tutorial for beginners on how to create a basic Live2D rig using a free pink panda model. The video covers everything from setting up the program to organizing the model, rigging head movements, eyes, mouth, body parts, and adding physics, culminating in exporting the model for use in VTubing software. The tutorial is designed to be accessible, with the model available for free in the description, and it guides the viewer through each process clearly.
Welcome to the tutorial. A free pink panda model is provided for download to learn Live2D rigging step by step in Live2D Cubism.
First, open the PSD file in Live2D Cubism. Then, organize the model by creating a warp deformer for the entire model, then separate warp deformers for the head, body, eyes, mouth, ears, feet, arms, and wings.
For glow layers, change the blend mode from normal to additive. This is found in the inspector under the blend mode option.
Create folders in the parameters box to organize angle X, Y, Z, eye-related parameters, mouth form/open, body movements, and breathing for easier navigation.
Select the entire model warp deformer, add two keyframes on the breathing parameter, and slightly move the model up and down to create a subtle breathing motion.
For angle X, add three keyframes, move the parameter to the right, then shift-drag the head to the right and push in the middle part. Use reflect motion for the left. For angle Y, do similar but manually for up and down. Then synthesize corners.
Create a rotation deformer for the head, label it 'Head Z', place it under the chin, add three keyframes on angle Z, tilt the head, and reflect for the other side.
For each eye, create a warp deformer, standard mesh, clip the shine/glow to the eyeball, add two keyframes on the 'I open' parameter, and squish the eye closed. Set up 'I jiggle X' and 'I jiggle Y' parameters with physics to make the eyes jiggle when blinking.
Mesh arms and feet, then add rotation deformers and keyframes on body X parameter to make them move slightly. Use copy-paste-reflect to mirror the motion.
Manually mesh the mouth parts (upper/lower lip, skin). Use the deform path edit tool to create a path. Add two keyframes on 'mouth open', then move the lower lip down and adjust the lower skin to reveal the mouth interior.
Create 'Bounce X' and 'Bounce Y' parameters. Squish the entire model on the X and Y axes, then add physics with angle X/Y inputs to give the model a bouncy feel.
Mesh wings, add a rotation deformer on breathing, create a 'batwing move' parameter, stretch and squish the wing using the deform brush tool, then add physics with custom pendulum settings for a flapping motion.
Go to Modeling > Texture Atlas to generate textures, then File > Export for Runtime as .moc3. Create a folder, place the exported files in it, and move it to the Live2D model folder in VTube Studio.
Open VTube Studio, change model to the new Panda, use auto setup if available, and the model is ready to use.
By following this tutorial, you have learned the fundamental steps of Live2D rigging, from organization to exporting, and created your first animated model. This foundational knowledge will empower you to tackle more complex rigging projects in the future.
"The title accurately describes a beginner-friendly, step-by-step tutorial using a free model, and the content delivers exactly that."
What file format does Live2D Cubism use for importing artwork?
PSD (Photoshop Document).
1:29
What is the purpose of a warp deformer in Live2D Cubism?
To group art layers together so they can be moved as a unit (e.g., moving the entire head).
2:44
How do you change a layer's blend mode to 'Additive'?
Select the layer, go to Inspector, find Blend Mode, and change from Normal to Additive.
5:52
What is the first step in rigging any movement in Live2D Cubism?
Add keyframes to the parameter you want to animate (e.g., add two or three keyframes).
11:30
What does 'Synthesize Corners' do?
It creates a 2D grid from two parameters (e.g., angle X and angle Y) so they can be combined for diagonal movements.
18:23
How do you make a head tilt (angle Z) using a rotation deformer?
Create a rotation deformer on the head, place its axis near the chin, add three keyframes on angle Z, slide the parameter to the right, tilt the head, then reflect horizontally.
26:50
What is the 'deform path edit tool' used for?
To create a curve along which the mesh can be deformed more accurately, especially for lips during mouth opening.
49:33
How do you make a model's eyes jiggle when blinking?
Create 'I jiggle X' and 'I jiggle Y' parameters, add keyframes on the eye glow/shine to squish them horizontally/vertically, then set up physics with input 'I open' and output those jiggle parameters.
31:08
What is the maximum export resolution for the free version of Live2D Cubism?
2048 pixels.
63:16
How do you mirror the rig from one eye to the other?
Copy the eye parts (Ctrl+C), paste (Ctrl+V), then right-click on the pasted group, select 'Reflect', and choose angle X (and possibly I jiggle X) to mirror horizontally.
36:29
First Rigging Step - Breathing
It teaches the absolute basics of adding keyframes and moving a warp deformer, which is the foundation for all other rigging.
10:50Head Turning with Reflect Motion
Demonstrates how to efficiently create symmetrical head movements using the reflect motion feature, saving significant manual work.
14:05Synthesize Corners for Diagonal Head Movements
This step shows how to combine parameters for smooth diagonal movement, a core concept in creating natural head animations.
18:23Eye Blink Rigging with Physics
Combines a simple blink with physics jiggle to create a more lively and natural eye movement, a key detail for character expressiveness.
29:50Manual Meshing for the Mouth
Contrasts automatic and manual meshing, showing how manual meshing gives more control for complex shapes like a mouth opening, a critical skill for realistic rigging.
44:20[00:00] want to learn rigging but don't know
[00:01] where to start welcome to my hopefully
[00:04] all-encompassing tutorial I purposely
[00:07] designed a pet model which I believe to
[00:09] be less intensive and beginner friendly
[00:11] to teach you you can download this model
[00:13] for free in the description and work
[00:15] alongside me step by step I recommend
[00:18] doing so as I'll be introducing live2d
[00:20] cubism to you little by little through
[00:22] this pink panda bat we'll be working in
[00:24] live 2D cubism where there is a free and
[00:27] a paid version of this program if you
[00:30] want to view all the differences between
[00:31] the two you can do so with this link
[00:33] provided in the description you can also
[00:35] activate a free 42-day trial of the paid
[00:38] version that has all the features but
[00:41] you may want to save that for when
[00:42] you're doing your main model I tried my
[00:45] best to make this model free version
[00:46] friendly but keep this in mind as we
[00:49] work feel free to pause as many times as
[00:51] you need the first thing to note when
[00:54] opening your live 2D cubism program is
[00:56] the layout in front of you yours may be
[00:59] white mine is black because I have it in
[01:02] dark mode if you prefer dark mode you
[01:04] can activate this by going into file in
[01:07] the upper left hand corner going to
[01:09] environment settings and then changing
[01:11] the color theme to dark right here hit
[01:14] okay when you're done we have to start
[01:16] by pulling up our file go to file
[01:21] open and search for your newly
[01:23] downloaded pan tutorial
[01:26] PSD live2d cubism reads PSD files if you
[01:30] ever want to rig your own model in the
[01:31] future you must not only separate your
[01:33] artwork into different layers but you
[01:35] must save it as a PSD or photoshop
[01:38] document let's get acquainted with what
[01:41] has appeared on the screen to the right
[01:43] we have our Panda to the left we have
[01:45] our art folders right here if we click
[01:48] on this little arrow we can see the
[01:51] different folders that I have separated
[01:53] them into in my art program and to the
[01:57] bottom we have them just all Loosey
[01:59] goose
[02:00] that we can use under the little
[02:02] deformer tab here you can adjust your
[02:04] windows however you like but I believe
[02:06] mine are still set to the defaults so
[02:08] your screen should look pretty similar
[02:09] to this the first thing you want to do
[02:12] or at least what I like to do is click
[02:15] on this button right here it's this
[02:17] little grid icon in the middle it just
[02:20] makes the art a little bit easier to
[02:22] see we're also going to organize our
[02:25] model this is the first step when it
[02:27] comes to getting your model ready for
[02:30] rigging hold down the left click in the
[02:33] upper left hand corner and drag it down
[02:36] to the bottom hand corner of the artwork
[02:38] you're going to see that it's selected a
[02:40] bunch of different
[02:41] things then we're going to go to this
[02:44] button up here that says create warp
[02:46] deformer go ahead and click
[02:49] that and I like to call this the entire
[02:54] model hit create next what we're going
[02:57] to do is we're going to separate the
[02:59] head and the body individually in their
[03:01] own warp
[03:03] deformers now there are two ways to do
[03:05] this you can do the same hold left click
[03:09] and drag method to try to grab as much
[03:11] as the head or you can individually
[03:14] select the art over on the left side of
[03:18] the screen under deformers I prefer to
[03:21] do it under deformers because I tend to
[03:23] make less mistakes that way so in order
[03:26] to select the art that we want to have
[03:29] hold down the control button on your
[03:31] keyboard and just left click every mesh
[03:34] that the head has so this is going to be
[03:37] all of the eye layers all of the mouth
[03:41] layers The Head and the
[03:44] ear to check to make sure that you've
[03:47] grabbed every single layer you're
[03:49] supposed to you can move the head and if
[03:54] you've grabbed everything you needed to
[03:56] only the head should be moving to put
[03:59] the head back back where you want it to
[04:01] hold control and then hit
[04:03] C now once you have the head create
[04:07] another warp deformer and label it head
[04:10] to finish the rest of the organization
[04:12] for the body all you have to do is the
[04:15] exact same procedure except you're just
[04:18] going to do the body parts so I'm
[04:20] holding down control and left clicking
[04:22] the rest of the
[04:24] body to double check to make sure I have
[04:27] everything from the body I just move it
[04:29] to the left and the right to make sure I
[04:31] didn't accidentally grab any head layers
[04:33] which it doesn't look like I did hit
[04:36] contrl Z to put the head sorry the body
[04:39] back into place go back to this create
[04:42] warp deformer
[04:43] button and we'll label this the body
[04:47] this organizational method is going to
[04:50] make things so much easier for us when
[04:52] we really get into the nitty-gritty of
[04:54] rigging now that you have organized the
[04:57] head different from the body we're going
[04:59] to go up to file and we're going to hit
[05:02] save you're going to want to get into
[05:05] this habit of saving your model you do
[05:07] not have to name it anything fancy if
[05:09] you want to you can but you're going to
[05:12] want to save your model as much as
[05:15] possible just in case if your program
[05:17] crashes in the art meshes I used a
[05:20] technique called add glow this makes it
[05:23] so that the eye shines a bit but once
[05:25] you export a art piece into live 2D in
[05:30] any multiply or add glow layers will
[05:32] need to be told that they are actually a
[05:34] multiply layer or an add glow layer it's
[05:37] basically a shading effect we need to
[05:40] tell that this eye glow on both the left
[05:43] and the right eye are actually a glowing
[05:45] layer to do this we click on L glow for
[05:49] example go to
[05:52] inspector and then you can come down to
[05:54] the blend mode option right here right
[05:57] now it's listed as normal
[06:00] to change it back to how it was in the
[06:01] art we just select it to additive we'll
[06:05] do the same thing to the r i
[06:08] glow we just click on it change the
[06:10] blood mode to additive your artist
[06:13] should tell you in the layer itself
[06:16] whether a piece of art is a glow layer
[06:20] or an additive layer or a multiply layer
[06:23] so you know what you need to change with
[06:25] the artwork now we're not done with
[06:27] organization just yet now if you're on
[06:30] the free version you might be limited on
[06:32] the amount of warp deformers that you
[06:34] have access to but let's try to do as
[06:37] much as we can so we definitely want to
[06:40] separate the mouth into its own warp
[06:43] deformer so for the mouth layers we need
[06:45] to grab the upper lip lower lip upper
[06:48] skin lower skin upper teeth lower teeth
[06:51] and oral once you have all of these
[06:55] different um art layers go ahead and
[07:00] make another warp deformer and label it
[07:02] the mouth we're going to do the same
[07:04] with the eyes we're going to want to put
[07:05] them in its own little uh folder as well
[07:09] so grab our ey shine R ey glow R eyeball
[07:13] L ey shine L ey glow an L eyeball once
[07:17] you have that go to the create new work
[07:20] deformer and call it eyes if you want to
[07:23] do one for the ears you can as
[07:26] well just grab both the L ear and r ear
[07:29] ear and label it ears now let's break
[07:32] down some of the body into further
[07:34] organizational parts we can grab LF foot
[07:37] and R
[07:39] foot and call that feet we can grab L
[07:42] arm and R
[07:46] arm and call that the arms and we can
[07:49] grab the r-wing and the L wi and call
[07:52] that the
[07:53] wings that is probably as much as I
[07:57] would break down the organization of
[07:59] this specific pet model now that you
[08:01] have organized your deformers we want to
[08:04] organize our parameters which is this
[08:06] little box here you're going to see a
[08:08] bunch of different stuff like angles eye
[08:11] opens brows mouth Etc we're going to
[08:15] make folder so this is just a little bit
[08:16] easier to navigate especially if this is
[08:18] your first time rigging we don't want
[08:20] you to get lost so what we're going to
[08:22] do is we're going to click on angle X
[08:24] we're going to then rightclick it and
[08:26] we're going to get this menu to create a
[08:28] folder
[08:30] all we're going to do is we're going to
[08:31] call this head
[08:33] angles and we're going to push angle X
[08:37] angle Y and angle Z so now if we click
[08:40] on this folder it will drop down now if
[08:44] you want to make this look nicer you can
[08:47] rightclick this folder again and you can
[08:49] Auto change the color to one of the
[08:51] defaults or if you like to be a little
[08:53] fancier you can go to advanced settings
[08:55] and you can manually pick whatever color
[08:58] you want on the color wheel
[08:59] we've got a pink panda so we're going to
[09:02] make it Pink we're going to make a few
[09:04] folders now ahead of time so that when
[09:06] we get into rigging we are not slowed
[09:08] down we're going to right click again
[09:10] we're going to create a folder we're
[09:11] going to call it eyes for the eye folder
[09:15] I'm going to put in I open I open we can
[09:21] put in the I and IR smile eyeball X and
[09:25] Eyeball y for now it looks like a lot
[09:29] but it won't be too crazy and again we
[09:32] can go to advanced settings and you can
[09:35] choose whatever uh color you would like
[09:39] we do not have any eyebrows for this
[09:41] model so you do not have to worry about
[09:43] that but we do have a mouth so go ahead
[09:45] and create another
[09:47] folder we'll call this one the mouth
[09:49] you'll have to scroll down a bit to find
[09:51] the mouth form and the mouth open so
[09:54] let's go ahead and drag up mouth form
[09:57] and mouth open and we can put those in
[10:00] here we're almost there we're going to
[10:03] create two new folders we're going to
[10:05] create one called body and then for the
[10:09] body we're going to grab the body X and
[10:13] body Y and then we're going to create
[10:16] another folder and we're going to call
[10:18] it
[10:21] breathing all right you're going to have
[10:24] this parameter called breath that you're
[10:26] going to want to grab for breathing and
[10:29] we'll tuck it right in there all right
[10:31] congratulations you are done with the
[10:33] organization part of your model make
[10:35] sure that you save so you don't lose
[10:37] your work which you can either do the
[10:39] shortcut contrl s or go to file and hit
[10:42] save next we are going to do your very
[10:45] first rigging movement which is actually
[10:47] a really simple one it'll be done super
[10:50] super quick so at the very beginning I
[10:52] had you select the entire model and make
[10:54] a work deformer called entire model this
[10:57] is actually going to be our very first
[11:00] movement if you are on the paid version
[11:03] or on a free trial go ahead and click on
[11:05] entire
[11:07] model select a new deformer and call it
[11:12] breathing this isn't necessary which is
[11:15] why I say if you're on the paid version
[11:17] go ahead and do this you can still do
[11:19] this method even if you just do it on
[11:22] the entire
[11:23] model click on the breathing parameter
[11:27] and go up here where it says add two key
[11:30] frames it's this one with two little
[11:31] dots right under the inspector
[11:34] Tab and then once you're here you're
[11:37] going to
[11:38] slide your little red dot all the way
[11:41] over to the right and then you're going
[11:43] to have two little boxes you're going to
[11:46] have a green box that's around the panda
[11:48] and then a red box I like to grab the
[11:50] red box which you'll know the difference
[11:53] because your mouse will look like this
[11:54] with a little four cross on the green
[11:57] box and your mouse will look just with
[12:00] like a two like a little line on the red
[12:04] box all you're going to do is you're
[12:06] going to move the panda up slightly and
[12:09] I mean very very slightly make it subtle
[12:11] when you've made that movement you can
[12:13] test it very briefly in this window by
[12:16] just moving your slider back and forth
[12:19] and you can see that the panda looks to
[12:21] be moving up and down now if you want to
[12:23] ever test what physics or movements
[12:26] you've done you go up to this menu the
[12:29] upper left that says modeling click on
[12:32] it and then go to the bottom that says
[12:33] physics
[12:34] settings now breathing is an automatic
[12:37] parameter that already moves so whatever
[12:39] we set to it is going to move already we
[12:42] don't have to do anything fancy and here
[12:44] we can see with the subtle movement that
[12:46] we've done just by dragging that red box
[12:48] up a little the panda looks like it has
[12:50] some life into it it's already moving up
[12:53] and down slightly as if it was breathing
[12:56] and just like that you've rigged your
[12:58] very first movement now it is time for
[13:01] us to tackle the head angles so for this
[13:05] we can either click right on the head
[13:08] here you can find the head in the little
[13:11] art Parts up here or you can find the
[13:14] head in the deformer tab there are
[13:16] multiple ways that we can get to the
[13:18] head so once we're on the head what
[13:20] we're going to do is we're going to go
[13:22] to the auto button up here this is
[13:23] called the automatic mesh generator
[13:26] everything that we mesh is going to help
[13:28] us move in this
[13:30] program we'll get to this menu here and
[13:33] then we'll have this preset for this
[13:36] video and to help you get used to this
[13:38] we're going to be using a
[13:41] standard preset for almost everything go
[13:45] ahead and hit standard and then hit X
[13:48] this applies the standard mesh
[13:49] automatically for us what we're going to
[13:51] do is open our head angles folder and
[13:55] we're going to create a new warp
[13:57] deformer and we're going to call this
[13:59] the actual
[14:01] head now what we're going to do is we're
[14:03] going to go to angle X and we're going
[14:05] to add three key forms for breathing we
[14:08] did two but for this we're going to do
[14:10] three that is because the Panda's going
[14:13] to be looking straight at us in the
[14:14] neutral position but then we now need to
[14:16] add it looking to the right and it
[14:19] looking to the left okay what we're
[14:21] going to do is we're going to
[14:24] grab grab our little parameter here and
[14:27] move it all the way over to the right
[14:28] this is a mistake I made a lot when I
[14:31] was first starting is I forgot to move
[14:33] my parameters when I was about to do a
[14:35] rigging motion so make sure it is moved
[14:37] all the way over to the right then we're
[14:39] going to go to the actual Panda and
[14:41] we're going to hold shift and then move
[14:45] the head to the right we hold shift so
[14:48] that it doesn't accidentally go up or
[14:50] down it keeps it on the
[14:52] x-axis and then if we move this over
[14:55] it'll show that just the head is moving
[14:57] to the right it may look a little a
[14:59] little awkward because the eyes don't
[15:00] move with it the ears and the mouth
[15:02] don't move with it and that's okay
[15:04] because we're only moving the the actual
[15:06] literal head part right
[15:08] now then once we do this we have to show
[15:12] that the the side of the head is moving
[15:14] backward a little bit right so in order
[15:16] to give this effect we're going to hold
[15:19] left click and
[15:21] push the
[15:23] middle the bottom and the top of the
[15:27] head in a bit the middle will probably
[15:30] be the one that's pushed in the
[15:32] most and then if you want to take a look
[15:35] you get a little bit of a curvature
[15:37] effect here again it's going to look a
[15:40] little weird because the other parts of
[15:41] the face aren't moving with it yet so
[15:44] what we're going to do is instead of
[15:46] manually doing the same thing for the
[15:48] left we can actually tell the program to
[15:51] reflect it over for us so we're going to
[15:53] keep our DOT over to the right and we're
[15:56] going to go down to this three line or
[15:58] Hamburg menu that says show pallet menu
[16:01] we click on this and then we get this
[16:03] menu that says reflect motion we can
[16:06] click on that it tells us what we're on
[16:08] which is the actual head and we can
[16:09] choose to reflect horizontally or
[16:11] vertically we want to reflect
[16:13] horizontally hit okay so
[16:17] now without having to manually do it
[16:20] which would cause a lot of issues it
[16:22] probably wouldn't line up perfectly the
[16:25] program is smart enough to realize hey
[16:27] we can do that for you so before we go
[16:30] and move everything else on the x-axis I
[16:32] like to just jump right right to moving
[16:35] the head on the y axis so what we're
[16:38] going to do is we're going to click on
[16:40] the x axis one more this little button
[16:44] here that lets you input a number and
[16:46] just set it to zero so it's back in the
[16:48] neutral position then we're going to go
[16:50] to angle Y and hit three new key
[16:53] parameters again or three new key forms
[16:56] my apologies then we're going to move
[16:59] all the way to the right now when the
[17:01] for the Y AIS moving the dot to the
[17:05] right means you're looking up that'll be
[17:07] when the O's looking up and then moving
[17:09] it all the way to the left is when it's
[17:11] looking down so for looking up all we're
[17:15] going to
[17:16] do is we're just going to hold shift
[17:19] again and push it up a bit I also like
[17:21] to grab this little dot here on the
[17:24] middle and hold shift and push this up a
[17:27] little bit as well
[17:29] and then if we take a look I like to do
[17:33] that then now for the x axis I showed
[17:36] you that you could reflect horizontally
[17:37] and vertically I actually don't like to
[17:40] do that for the Y AIS I prefer to
[17:42] manually do it so if you want to you can
[17:46] hit the hamburger menu and do reflect
[17:50] vertically I prefer to do it manually so
[17:53] for the angle y i just scoot My Little
[17:55] Dot all the way over hold shift push
[17:58] push it down this time and then hold
[18:01] shift again and push down the Green
[18:05] Dot and now I have my little head motion
[18:09] there we have one last part of the head
[18:11] before we can move on to the ears and
[18:13] the eyes and the mouth and get
[18:15] everything moving together click on the
[18:17] little numerical value on the right set
[18:19] it to zero then we're going to go back
[18:21] to the pallet menu here and there will
[18:23] be something called synthesize Corners
[18:26] go ahead and click on that make sure
[18:28] parameter 1 says angle X and parameter 2
[18:31] says angle y then we hit okay what this
[18:34] does is it syncs up these two parameter
[18:37] so that it'll flow nicely so what we can
[18:40] do is on the far left here right before
[18:43] the text is we can click on it and it'll
[18:46] merge the two together so if I move the
[18:50] dot around in this little grid it'll
[18:53] show us that the head is moving around
[18:57] now if you want to get fan see some
[18:59] people will get really intricate with
[19:01] their head motions and their mouth and
[19:04] edit it but as this is a beginner's
[19:06] first rig tutorial I'm not going to get
[19:08] into that we're just trying to make sure
[19:10] that the head can move around now let's
[19:13] do the ears so I had you put the ears in
[19:18] a warp deformer first that is because
[19:21] this will allow us to move both ears at
[19:23] once but before you move the ears we
[19:26] still want to add an art mesh to them
[19:29] so what we can do is we can grab the L
[19:32] ear and then we hold on to control and
[19:34] grab the r ear this will allow us to
[19:36] mesh both of them at the same time then
[19:39] we go to up to this button that says
[19:40] Auto which is our automatic mesh
[19:42] generator we can go ahead and hit
[19:44] standard again and then there we have it
[19:47] they are already meshed and ready to go
[19:50] now you could go to the warp deformer
[19:52] and try to move meshes without having
[19:55] them properly or try to move our part
[19:58] without having the mesh I've done that
[20:01] before and it it just it can get goofy
[20:05] we're going to repeat a lot of the
[20:07] similar processes we just did for the
[20:09] head so go ahead and go to angle X and
[20:12] add three key forms make sure you move
[20:15] the Red Dot over to the right and once
[20:18] again I'm going to hold shift grab this
[20:21] little thing in the middle scoot the ear
[20:24] over then I'm going to grab this Green
[20:27] Dot and just tuck it in
[20:30] and as for how much or how little you
[20:32] want to tuck something in that's really
[20:34] up to you what do you think is going to
[20:37] help you achieve that turning effect and
[20:41] then of course you can check it I think
[20:42] I want to tuck this ear in even
[20:44] [Music]
[20:46] more to help with that
[20:49] turning and the more pieces you start to
[20:52] turn the more uh the the head turn will
[20:57] come together and of course um you can
[21:00] go back and adjust these as you go reset
[21:03] this back to
[21:04] neutral go to the angle y do the same
[21:08] thing I'm just going to scoot the ear up
[21:10] a
[21:11] bit push it
[21:13] up scoot the ear down a bit scoot it
[21:18] down and then synthesize the corners by
[21:21] going to that same menu hitting
[21:22] synthesized Corners we still want angle
[21:25] X and Y hit okay and then there you have
[21:30] it the ears are now moving with the head
[21:34] now maybe we want to do some eyes so we
[21:38] can go and find our eyes hold down
[21:41] control and grab every single eye art
[21:44] piece you can do the standard mesh again
[21:48] I'm going a little bit faster because as
[21:50] you begin to repeat these processes
[21:52] you'll start to get the hang of it a
[21:54] little bit more and then I had you put
[21:57] eyes in a warp deformer this is why I
[21:59] like warp deformers because they make
[22:02] doing these motions a lot easier so
[22:04] you're not moving every individual art
[22:06] piece over you're instead moving like a
[22:08] group of art
[22:10] pieces so for this you have the little
[22:15] uh Pink part of the panda's fur to help
[22:18] guide you on like where the eye should
[22:21] go so you're not scooting it over too
[22:24] much or too little which I hope will uh
[22:28] help
[22:29] you when it comes
[22:32] to the Head turns and you can of course
[22:36] reflect this on the eye as well and
[22:39] we'll want to do the same thing for
[22:41] angle
[22:48] [Music]
[22:54] Y and then synthesize the corners once
[22:58] again
[22:59] let's go ahead and do the nose
[23:01] next so grab the
[23:04] nose if you're on the paid version go
[23:07] ahead and give it a warp deformer even
[23:11] if you're on the free version try to
[23:13] create as many warp deformers as you can
[23:15] until you run out of space or until it
[23:18] won't let you do it anymore and again
[23:21] we're going to add a standard mesh to
[23:24] the
[23:25] nose now the nose is really the part
[23:28] that's going to help us create that
[23:31] movement of the face
[23:34] turning so we're going to just do the
[23:36] same thing we're going to scoot the nose
[23:38] over however when the face turns the
[23:41] nose does a lot of the Turning too so
[23:44] something that we can do to
[23:46] really
[23:47] help show this is we can just push the
[23:51] mesh over like this maybe we even move
[23:54] the middle piece of the mesh
[23:57] too maybe maybe not that far but you
[24:01] know just to show like wow it's
[24:04] moving and of course we can adjust it
[24:07] more as we need to Let's reflect it for
[24:13] now and then we'll do the up and the
[24:16] down
[24:33] synthesize them let's do the mouth now
[24:37] the mouth is going to require a lot of
[24:40] intricate meshing so we're actually not
[24:43] going to mesh the mouth right now we're
[24:44] just going to try to get it into a nice
[24:48] position so for this you can just grab
[24:50] the mouth warp deformer you made make
[24:53] your three key form scoot it over and
[24:56] then try to find a nice position for the
[25:01] mouth I like to curl it up a little bit
[25:03] with my mesh like
[25:07] this then we'll do the angle y
[25:12] version which will just be pushing up
[25:14] the mouth a little bit and then pushing
[25:17] down the
[25:19] mouth yeah and of course synthesize the
[25:23] corners once more let's go ahead and
[25:26] check our work and see how well we did
[25:29] or what little edits that need to be
[25:32] made once again we go to modeling at the
[25:33] upper left corner here physics settings
[25:37] now we have her breathing that
[25:38] automatically shows but in order to make
[25:40] the model turn its head and whatnot we
[25:42] just grab our Mouse hold down left click
[25:46] and then move it
[25:47] around so I see
[25:50] here that the head turn that I made was
[25:53] pretty subtle like yes the head turns
[25:55] but it's not a very dramatic head turn
[25:57] and hon hly if you want if you like this
[26:01] type of head turn that's fine you don't
[26:03] have to make it super dramatic you know
[26:05] depending on the model some people have
[26:07] like really really stunning head turns
[26:09] and they're able to get a very dramatic
[26:12] range and some are very subtle like this
[26:15] I'm going to go ahead and keep it subtle
[26:17] as head turns are a lot tougher than
[26:19] they look but of course if you want to
[26:22] like really tuck this ear behind and
[26:24] make this ear stick out you can you can
[26:26] play with it if you would like
[26:28] there is one last part to the head that
[26:31] I would like to do with you so we're
[26:33] going to grab the head warp deformer not
[26:37] the actual head that we did together but
[26:39] the head and we're going to go up here
[26:43] to this one that says create rotation
[26:46] deformer we can go ahead and label this
[26:49] head
[26:51] Z it's going to create this little
[26:53] symbol here go ahead and hold control
[26:57] shift and drag it down just underneath
[27:01] the line that's at the bottom of the
[27:03] head then we can go hit angle Z of our
[27:07] head angles this is a really cute and
[27:10] fun movement you can do and it's really
[27:12] simple once you have this setup go ahead
[27:14] and select three key forms move it to
[27:18] the right and then you'll have this
[27:20] little like curved line that appears at
[27:22] the
[27:23] edge and go ahead and tilt the Panda's
[27:26] head as much as you want now don't go
[27:28] too far because the body is only drawn
[27:31] so much to the back but feel free to
[27:35] just give it like a little head tilt and
[27:37] just like we have in the past you you
[27:40] can go to this little pallet menu
[27:43] reflect motion
[27:44] horizontally and now your Panda can do
[27:48] little head tilts back and forth
[27:51] rotation deformers like this are really
[27:54] good for the Z movement and it's
[27:56] honestly a really cute movement that you
[27:58] can do on humans too and it's also
[28:00] really good for wings and at the very
[28:03] end of the video if you feel confident
[28:05] with rigging I'll show you how to do
[28:07] some Wing some very simple uh Wing
[28:10] rigging which is why I included them as
[28:13] like a little fun extra challenge for
[28:14] you so stay tuned to the end if you want
[28:17] to give yourself a little challenge all
[28:20] right so now you have your head
[28:22] movements done we've got a z movement
[28:26] we're going to work on the eyes next and
[28:28] the eyes are going to be pretty
[28:32] interesting and they're not going to be
[28:33] super tough with the way I've drawn this
[28:35] model so you can go ahead and pick
[28:37] whether you want the right eye or the
[28:39] left eye whichever one suits your fancy
[28:43] I'm going to work on this ey which is
[28:45] the model's left it's our right the
[28:47] model's
[28:49] left now again if you have warped
[28:52] deformers to spare go ahead and put the
[28:55] left eye in its own
[28:57] deformer it just it helps to be
[28:59] organized and you'll find as you
[29:02] continue to rig that you'll find your
[29:05] level of organization if you're someone
[29:07] who likes to be very meticulous or
[29:09] someone who is okay with being a bit
[29:11] looser you'll find you'll find what
[29:14] level works best for you but we'll go
[29:16] ahead and put the left eye which is the
[29:18] LI eye shine L eye glow and the L eye
[29:21] ball in its own uh deformer for now next
[29:24] what we're going to do is we're going to
[29:26] grab the LI shine and the Li glow go
[29:29] ahead and hold control to grab both of
[29:31] these hit inspector and then we see this
[29:35] clipping ID option right here go ahead
[29:38] and click that it's going to pull up all
[29:41] of our art layers we're going to scroll
[29:45] until we see the eyes which is actually
[29:46] the very first thing and we're going to
[29:49] clip it to the L eye ball clipping the
[29:51] LI ey shine and the LI ey glow is going
[29:53] to make this next part so much easier
[29:55] what you're going to do is you're going
[29:56] to add two key forms to the LI open and
[30:00] then you're going to keep the Red Dot to
[30:02] the left you'll see this red box appear
[30:05] around your eye which is what we
[30:08] want and what we're going to do is we're
[30:10] going to
[30:11] squish it down from the front and then
[30:14] we're going to squish this down from the
[30:17] bottom and we're going to go ahead and
[30:19] get it pretty close so that when we have
[30:22] our movement it looks like the panda is
[30:25] squishing its eyes shut now with human
[30:28] model you're going to have eyelashes and
[30:31] those eyelashes are going to help you
[30:32] create that closed look but for this
[30:35] little Panda I made the eyes very very
[30:37] simple so you can just get an idea of
[30:39] what it's like to move the top part of
[30:42] the eye down and the bottom part of the
[30:44] eye up so you can create a nice little
[30:47] blinking motion now that we have your
[30:50] eyes squished together for this blinking
[30:54] motion I'm going to actually introduce
[30:56] to you your first met physics and that
[30:59] is going to be with the LI I glow and
[31:02] the LI I shine so for this what we're
[31:06] going to do is we're going to create a
[31:08] parameter and we're going to call this I
[31:11] jiggle X you want the minimum to be -30
[31:15] and the maximum to be -30 hit
[31:19] okay we're also going to create a
[31:22] parameter we're going to call this I
[31:25] jiggle y same minimum and maximum
[31:29] we have the LI glow for the X1 we are
[31:33] squishing from left to right so you can
[31:36] choose how much you want to squish it
[31:39] I'm just going
[31:40] [Music]
[31:42] to see I made that mistake I mentioned
[31:45] at the beginning of the video make sure
[31:46] you add two key forms um with the L eye
[31:49] glow a red box is going to
[31:52] appear you can squish it as much or as
[31:55] little as you want just make sure you
[31:56] drag the Red Dot over to the right
[31:59] before you make your movement and do the
[32:02] same with the L shine if you want to
[32:05] make the movement a little bit more
[32:06] interesting squish one a little bit more
[32:09] than the
[32:10] other so I chose to squish my li glow
[32:14] layer more than the LI shine layer do
[32:17] the same thing with the I jiggle y
[32:19] parameter you just made except now
[32:23] you're going to be squishing up and
[32:26] down so squishing this one up and down
[32:30] and I'm going to do the same thing here
[32:32] make sure you add your two key forms and
[32:34] move your dot all the way over to the
[32:36] right as you do
[32:39] this all right so now they are moving up
[32:42] and down and then you'll want to
[32:45] synthesize your Corners like we've been
[32:47] doing make sure it says parameter 1 is I
[32:49] jiggle X and parameter 2 is I jiggle y
[32:53] you'll want to synthesize them
[32:58] all
[33:00] right once you have done that I'm going
[33:02] to show you how to set it up in the
[33:07] model so when you create physics they're
[33:10] not going to automatically apply so if
[33:13] you want to test out your blink you can
[33:15] go to the iil and
[33:17] just test it out for yourself like this
[33:20] by moving the slider or you can go to
[33:23] this little box this says pattern a and
[33:25] then scroll down and hit posing and then
[33:27] there's this little play button here and
[33:29] once you hit the play button it will
[33:31] actually play all of the different
[33:32] things you've rigged so far on your
[33:34] model and then hopefully there we go
[33:37] it'll do the blink and you can see how
[33:39] the model's moving so far I'm going to
[33:42] go ahead and hit pause I'm actually
[33:44] going to reopen it so it's back in the
[33:46] neutral position and what we're going to
[33:48] do is you're going to see this this
[33:50] whole menu it's it's dulled right now
[33:54] we're going to hit add we're going to
[33:56] call this I
[33:58] Jiggles we're going to hit add and we
[34:01] want this to jiggle whenever the I and
[34:04] the IR open happens we're going to
[34:07] change the effectiveness to 50 and for
[34:09] this section feel free to copy
[34:12] everything I do as
[34:14] is then for the pendulum go ahead and
[34:17] just hit add it'll add a default
[34:20] setting for the output we want the
[34:23] outputs to be our I jiggle X and the I
[34:26] jiggle y because that's that's what we
[34:28] had rigged for the
[34:30] physics now in order to test this we go
[34:33] to our eyes again and we just move this
[34:35] parameter right right now nothing's
[34:38] really happening that's because our
[34:40] output and our scale is really really
[34:42] low to change that we just hit the
[34:45] increase output button and now we'll see
[34:47] that this has changed to an output of
[34:49] 100 and a scale of about 33 let's do
[34:52] this again now you can
[34:55] see let me really zoom in on the eye
[34:59] here that the eye has a subtle jiggle
[35:02] whenever you open and close it now here
[35:06] once again this is the very very basic
[35:08] way of doing this but this is where you
[35:11] can add different levels to the pendulum
[35:15] you can choose how long it lasts for how
[35:17] much it shakes down here the reaction
[35:19] time to get different effects you can
[35:23] choose how many pendulums you want so if
[35:25] we add another pendulum you can see like
[35:29] the little difference there so again
[35:31] this is once you have this basic set up
[35:34] here you can start to play with it to
[35:36] see the different
[35:37] effects and and see what you can do but
[35:42] congratulations you have just not only
[35:45] rigged your first physic parameter but
[35:47] you made your first little physics piece
[35:50] now it is time to make the other eye
[35:52] match now if you're on the free version
[35:55] you might have to manually do everything
[35:57] we just did did again however I
[36:00] encourage you to try to follow along
[36:01] with the steps I'm about to show you in
[36:03] case the free version does let you
[36:05] repeat these steps I genuinely don't
[36:07] know but what I'm about to show you will
[36:10] let you have the eyes match each other
[36:12] perfectly without having to redo
[36:14] everything again so we've been working
[36:17] on this eyeball what we're going to do
[36:19] is we're going to hold control and left
[36:23] click the L eyeball the L eye glow L ey
[36:26] shine and the left eye deformer we
[36:29] created then we're going to go to the
[36:31] main eyes deformer that we created
[36:34] earlier what we've done is we selected
[36:36] the art meshes from before and the whole
[36:39] art layer that the eyes is attached to
[36:42] or the deformer then we're going to hold
[36:45] contrl C and contrl V to copy and paste
[36:48] the I we just
[36:50] did then what we can do is right
[36:53] click go to the very bottom I know my
[36:56] model is covering it but at the very
[36:58] very bottom there's a there's a menu
[37:00] that says reflect you're going to hit
[37:03] reflect all right and it'll let you
[37:05] choose what parameters to reflect you're
[37:08] going to hit angle X and I jigle X and
[37:12] then hit
[37:13] okay and this is how you make your eyes
[37:16] match once your eyes
[37:19] match you can delete the parameters from
[37:24] the r eyeball you can delete R eyeball r
[37:27] i glow and R I shine that was there as
[37:31] just a placeholder to make sure that you
[37:32] did it right now it actually turns out I
[37:35] made a mistake the ey Jiggles are
[37:39] backwards so this just tells me I did an
[37:42] oopsie I checked out the I checked the I
[37:45] jiggle X when I shouldn't have and if
[37:48] you did that same thing don't worry
[37:50] because you can go back and fix it if
[37:52] you hit contrl Z you can undo mistakes
[37:55] that you've made but do not spam contrl
[37:58] Z because you might actually undo good
[38:01] work you've done so just slowly undo
[38:04] contrl Z until you're back to this point
[38:07] where you have to reflect the
[38:08] eye hit right click again
[38:12] reflect do hit angle X but don't hit
[38:15] Iggle X and then you can test it again
[38:18] and there we go we're on the same page
[38:21] now that you know how you can fix a
[38:23] mistake what we're going to do now is we
[38:26] want the Cana to be able to wink at us
[38:29] so before we click off of
[38:31] this what we're going to do is we're
[38:33] going to go to the I open and we if we
[38:37] scroll all the way over to the right we
[38:38] get this little menu there's a Green Dot
[38:41] with a plus gray one with a minus and
[38:44] then we have this little menu we're
[38:45] going to go to the bottom and select
[38:47] change and this will allow us to move it
[38:49] to I are open which will let us
[38:54] wink now we can go ahead and delete the
[38:57] the r ey shine r i glow and the r
[39:00] eyeball now we can clearly
[39:03] see the panda is able to wink let's go
[39:06] ahead and just take a look at our work
[39:09] modeling physics setting we can go up to
[39:12] pattern a here hit posing and then hit
[39:15] the play
[39:18] button right now it's just tilting its
[39:21] head a bit I'm waiting for the blink and
[39:23] there you go we can see the subtle bit
[39:25] of the eye Jiggles which are the physics
[39:27] that we we put in
[39:29] congratulations you have done your eyes
[39:31] and you've even figured out some IE
[39:33] jiggle physics you'll probably see that
[39:35] in your eye folder we didn't touch eye
[39:38] Smiles or eyeball X and Y eyeball X is
[39:43] when the eyeball itself is when your
[39:45] eyes move left and right eyeball y
[39:48] That's when they move up and down for a
[39:51] model like this there's not really a
[39:54] whole lot going on that can make the
[39:56] eyes move that way but for a human model
[39:58] you'll probably move it that way I'm
[40:01] going to show you what it would look
[40:02] like if you wanted to do these motions
[40:05] but they're not going to be rigged on
[40:07] this Panda model but essentially if you
[40:09] wanted to do eyeball X or Y it's quite
[40:12] literally this simple you just hold down
[40:15] the shift move it to the right move it
[40:18] to the
[40:20] left if you want to do eyeball y you
[40:22] move it up and then you move it down and
[40:26] you synthesize the corner corers which
[40:27] is what I've been showing you multiple
[40:29] times throughout the video and there's
[40:31] your eyeball X and Y let's work on our
[40:33] arms shall we so typically when it comes
[40:36] to the body you'll be moving stuff on a
[40:38] human model like clothes and arms and
[40:41] whatnot now for arms like these these
[40:43] are in front of the body so instead of
[40:45] showing you how to like put one arm in
[40:47] front of the other I'm just going to
[40:49] show you a cute little motion you can do
[40:52] so we can go to our arm deformer grab
[40:55] our L arm and R arm
[40:57] standard mesh
[41:00] it pick whichever arm you want to work
[41:02] on whether it be L arm or R arm I'll do
[41:05] the left and I'm going to show you to
[41:08] create a rotation
[41:10] deformer you don't have to name it if
[41:12] you don't want to I'm not going to hold
[41:14] down
[41:16] control and move this keep holding down
[41:19] control and this will allow you to
[41:21] change the direction in which your
[41:23] rotation deformer
[41:26] is now now what you can do is I'll I'll
[41:29] do this on body X create three key
[41:34] forms move it to the right move this
[41:36] slightly
[41:38] up and then move this slightly
[41:43] down now your arm will move slightly up
[41:47] and
[41:48] down now if you do not want to redo this
[41:52] little tiny motion you do the same thing
[41:55] I did with the eyes you you make sure
[41:57] you have arms rotation highlighted hold
[41:59] down control grab the larm grab the
[42:02] whole warp deformer the arms are
[42:05] inrl c crl v to copy paste right click
[42:09] get the whole model hit
[42:12] reflect hit
[42:14] okay and now the arms will move slightly
[42:18] once you've confirmed that everything
[42:20] looks okay go ahead and delete the right
[42:24] arm go to modeling physics settings
[42:27] and now whenever the model looks left
[42:31] and right the arms will also move up and
[42:34] down I'm going to go ahead and do the
[42:37] same thing with the feet because this
[42:39] will just add a little extra motion to
[42:40] the model and it's a simple motion you
[42:42] can do too so grab the feet again give
[42:46] it a not that menu give it a standard
[42:50] mesh pick which foot you want to work
[42:53] with I'll grab this one grab the
[42:56] rotation to form armor hold control move
[42:59] it where you want it to go keep holding
[43:01] control to change the
[43:03] direction I'm going to do it on body X
[43:07] again three key forms I'm going to have
[43:11] the foot go
[43:13] out and then the foot go
[43:18] in and then grab the feet
[43:22] rotation grab the left foot grab the
[43:25] whole feet warp deformer you made contrl
[43:29] Ctrl V right click reflect
[43:37] okay it actually looks like the panda is
[43:40] now tagging its
[43:41] feet go ahead and delete the right foot
[43:45] that you no longer need now if we check
[43:47] our work we got a little bit of body
[43:50] movement now it's not a ton but this
[43:53] body was drawn in a way to where you
[43:54] wouldn't need a lot of body MO
[43:58] movement so now let's work on the mouth
[44:01] and the mouth is one of the most complex
[44:05] part of a model in my opinion but when
[44:08] it comes to a pet model I just wanted to
[44:11] show you some of the basics that goes
[44:14] into mouth riging and so that's what
[44:17] we're going to focus
[44:18] on so this part instead of standard
[44:22] meshing which you can do if you do not
[44:24] want to manually mesh it you could
[44:25] standard mesh it if you want but I I
[44:27] want you to not be afraid of manually
[44:29] meshing where you need to so I'm going
[44:31] to show you how to do that the manually
[44:33] mesh it's right next to the standard
[44:35] mesh it's just the one over we're going
[44:38] to go ahead and click it what we're
[44:40] going to do is we're going to grab the
[44:41] lasso tool which is right under tool
[44:44] details here grab this whole thing with
[44:47] the upper lip that we're on and delete
[44:50] it then we're going going to go to the
[44:52] plus button right now there's not a
[44:55] whole lot going on but we're going to
[44:56] hit this box that says mirror edit now
[45:00] there's a line here so that we only have
[45:02] to create half of the little
[45:04] vertices I like to start in the center
[45:07] and work on the
[45:09] top this is going to give us so much
[45:12] more control over the
[45:14] mouth you can choose how close or how
[45:18] far you want to put the dots but I like
[45:21] to put them decently close together for
[45:23] the
[45:24] mouth I also like to put put dots right
[45:29] on the actual mouth
[45:32] itself and then once I get a piece that
[45:36] I'm happy with make sure that everything
[45:38] is closed then you can hit
[45:40] autoconnect and the check
[45:43] mark you did a manual mesh it seems a
[45:47] little crazy at first but it's actually
[45:48] not too bad once you have this manual
[45:52] mesh you can go and hit the last so tool
[45:55] again this might not be a available on
[45:57] the free version so let me know but what
[46:00] you can do is you can hit contrl + C to
[46:03] copy
[46:04] this go to the lower lip do the lasso
[46:08] tool just like last time and delete the
[46:10] vertices from before and then hit contrl
[46:12] + V now the vertices are exactly the
[46:14] same as the one on the upper and the
[46:17] lower lip just for a bit more
[46:18] consistency if you were unable to do
[46:21] this step I just showed you don't worry
[46:23] it's not going to matter on a model like
[46:25] this but I just wanted to show you that
[46:27] this is very possible and it's going to
[46:28] be helpful if you go into rigging
[46:31] further now we have meshes like the
[46:33] upper skin and the lower skin that I
[46:35] want you to manually mesh as well again
[46:38] you could standard mesh it if you want
[46:41] but you'll have a lot more control over
[46:43] it if you manually mesh it
[46:46] yourself so here we are we're going to
[46:49] do the same method as before with the
[46:51] upper
[46:53] skin go to our plus button after we
[46:55] delete the four ver sees have our mirror
[46:58] edit which should automatically be on
[47:00] now cuz we clicked it
[47:02] before I like to start at the top and I
[47:05] like to have a lot of dots on the
[47:08] top and then as I get closer to the
[47:12] bottom I like to space them out
[47:14] more and it's okay if you are away from
[47:19] the actual art part that is
[47:23] fine then once I get here I just slow
[47:26] slly work my way
[47:29] up if I get to a point on the edge I can
[47:33] just go up here to the selection
[47:36] tool go back to the
[47:38] middle and then start working my way
[47:41] back up
[47:43] again this will help you have more
[47:46] control over your
[47:49] mesh I just want you to not be afraid to
[47:53] manually mesh especially because there
[47:56] are situations like the mouth where it
[47:59] can be very advantageous for you to do
[48:04] so once you feel like you've gotten a
[48:06] decent mesh go ahead and hit autoconnect
[48:09] and hit the check mark we're going to do
[48:11] the same thing with the lower skin exact
[48:14] same process I'll still walk you through
[48:17] it sometimes hearing the repetition can
[48:20] really help if you're feeling confident
[48:22] feel free to skip ahead in the video a
[48:23] little bit otherwise feel free
[48:27] to just listen along
[48:31] as I get these dots in there like see
[48:35] how I did this angle a little harsh
[48:37] again you can use contrl
[48:39] Z to undo some of the dots and again
[48:44] don't spam control Z I know it can be
[48:48] very tempting to just Spam control Z to
[48:52] get to a better place but I can tell you
[48:55] from experience I have b control
[48:58] Z way way too much and I have lost good
[49:01] work because I had gotten frustrated and
[49:05] just undid it this might help you it
[49:09] might not but I want you to have the
[49:11] confidence to be able to manually mesh
[49:14] when
[49:22] appropriate all right hit autoconnect
[49:24] when you're done now that you have your
[49:26] upper scale skin your lower skin lower
[49:28] lip and upper lip meshed it is time for
[49:31] me to introduce to you the deform path
[49:33] edit tool what this does is it gives us
[49:36] a line to work with when it comes to
[49:38] things like this so for a line like this
[49:41] it's squiggly I like to put a dot here
[49:44] here in the
[49:46] middle basically on each of the corners
[49:50] the
[49:51] middle and each in
[49:54] between do the same for the lower
[49:57] lip try to get it as close as you
[50:02] can and then for the upper
[50:05] skin do it to the edge of the mesh but
[50:08] you're still following that little wavy
[50:10] line format same with the lower skin
[50:13] except for doing it to the end of the
[50:17] mesh this is going to make opening the
[50:20] mouth easier for us so typically in
[50:23] order to get multiple mouth forms you
[50:25] you have the mouth open which is what
[50:28] we're going to rig here but you also
[50:30] have mouth forms which allows you to get
[50:31] different shapes like for example my
[50:33] model throughout this entire video
[50:34] you've probably seen
[50:36] it change into different shapes we are
[50:40] not going to be rigging any mouth forms
[50:42] I just want you to see what it's like to
[50:45] add art
[50:46] meshes and open the mouth once to get
[50:49] just one open form it'll be like a
[50:52] puppet in a
[50:53] way so what we're going to do is we're
[50:55] going to grab the low lower lip and
[50:57] we're going to change our tool to the
[50:59] arrow tool go ahead and add two key
[51:01] frames and move it all the way to the
[51:04] right then we're going to hold down
[51:05] shift and move down
[51:08] this lip
[51:10] line then we can use the green dots to
[51:13] our advantage to
[51:18] really
[51:19] [Music]
[51:21] curve this into a mouth shape that we
[51:24] like now this is where you can add the
[51:26] grid back remember how at the very
[51:28] beginning I said to get rid of it well
[51:30] this grid we can add back it's next to
[51:33] this button that says solo right here we
[51:35] can add that back to make sure that this
[51:38] is as symmetrical as we can get it so
[51:42] like we can make sure that this Green
[51:43] Dot is on this little line
[51:46] here you know just try to get it as
[51:48] close as we can and
[51:50] now we have this motion of the mouth
[51:54] opening but that's not enough because
[51:57] that all that does is open the line we
[51:58] need to see the mouth inside that we
[52:00] drew so now what we're going to do is
[52:03] the lower skin that we meshed we're
[52:05] going to go ahead and add two key frames
[52:07] again make sure we're on the far right
[52:09] we're going to use the arrow tool and
[52:11] open that mouth up yeah that's right
[52:15] we'll frame it to the lower lip we just
[52:19] created and then would you look at that
[52:22] there's our beautiful mouth we got the
[52:25] tongue we drew and even the lower teeth
[52:27] are showing a bit so
[52:31] now we've got this motion I'm going to
[52:34] go ahead and get rid of the grid again
[52:36] so you guys can see the art a bit more
[52:38] clearly but what if I what what if what
[52:41] if we can make this a little bit more
[52:44] interesting all right firstly the upper
[52:47] teeth are a little bit too high when
[52:49] this happens don't don't key it to
[52:51] anything if you want the upper teeth to
[52:53] show we can just push it down a little
[52:55] bit and there we go now the upper teeth
[52:58] will
[52:59] show okay cool we solved that problem
[53:03] but what if we want the lower teeth and
[53:05] the oral which is the back of the mouth
[53:07] to do a little bit something more
[53:10] interesting
[53:12] well go ahead and add it as our key
[53:18] frame and now whenever the mouth opens
[53:20] by just just all we did is I moved it
[53:23] down a little bit that's all I did I
[53:25] tucked it down it looks like when the
[53:28] jaw
[53:29] opens the mouth will slowly move down
[53:33] with it which gives it just that little
[53:35] bit of extra depth without having to go
[53:37] super crazy with any any rigging
[53:39] techniques I know it's been a while make
[53:41] sure you've been saving let's go ahead
[53:44] and go to
[53:46] modeling and let's go to posing and let
[53:49] it play now we have a mouth that moves
[53:53] you're pretty darn close there's one
[53:55] more thing I want to to show you that
[53:57] you can do to really bring this model to
[53:59] life there's one last raking motion I
[54:01] wanted to show you to really help bring
[54:04] this model together and that is bouncy
[54:07] physics so once again I'm going to be
[54:10] showing you the physics menu but before
[54:12] that we're going to create a parameter
[54:14] we're going to call this bounce X
[54:16] minimum of -30 maximum of
[54:18] 30 and bounce
[54:21] y remember at the beginning how I said
[54:24] to create a Warp deformer the entire
[54:26] model this is where it's be going to
[54:28] become handy again we're going to select
[54:31] the entire model we're going to go to
[54:33] bounce X do two key frames scoot it all
[54:38] the way over to the right and we're just
[54:40] going to push the model on the x-axis
[54:43] together it does not have to be
[54:45] symmetrical just as long as you got a
[54:48] squishing
[54:49] motion all right and you'll do the same
[54:52] with bounce y except I personally think
[54:55] bounce y better if you only squish it
[54:58] from the top because this panda is also
[55:01] sitting so it would be weird if the
[55:03] bottom squishes up with it so I like to
[55:06] just squish it from the top then go
[55:08] ahead and synthesize the
[55:11] corners if you want to see it in
[55:15] practice we got a little motion going
[55:17] here but once again when it comes to
[55:20] physics we do have to apply it to the
[55:22] menu so let's go to the physics setting
[55:24] menu and get that applied okay we're
[55:26] going to go hit add we're going to call
[55:29] this
[55:31] bounce we're going to add angle X and
[55:34] angle y change the effectiveness to 50
[55:38] for each make sure you hit enter so the
[55:40] numbers remember add a pendulum go to
[55:44] our output setting the output will
[55:46] always be the parameter you just worked
[55:49] on so our output will be the bounce X
[55:53] and the bounce y now right now nothing's
[55:55] really happening because again we need
[55:58] to go increase our
[56:03] output and look at that he is
[56:06] so so much more bouncy than before it
[56:10] just adds a little extra of flow to our
[56:13] little pet mascot if you want to see
[56:16] that play go ahead and hit posing and
[56:19] just watch him move and whenever he
[56:21] makes a dramatic movement to the left
[56:23] right up or down there will be a little
[56:25] bit of Squish up or down that just makes
[56:27] it feel a little bit more
[56:30] livik uh than before if you do not like
[56:33] how this motion turned out don't add it
[56:36] but if you do like it you can adjust
[56:39] again the intensity how much you want
[56:41] him to be squished or not
[56:44] congratulations you have completed your
[56:46] very first rig in live GD
[56:49] cism however I did mention if you wanted
[56:53] a challenge that I would show you how to
[56:55] rig some B bat wings so if you're here
[56:58] for the challenge if you're feeling
[56:59] confident feeling good let me show you
[57:01] how to rig some bat wings for the bat
[57:03] wings we're going to open the
[57:05] breathing parameter from
[57:08] before and we're going to go to either
[57:11] r-wing or l-wing once again you get to
[57:13] pick which one you you like better
[57:16] either way we're going to add a standard
[57:19] mesh to
[57:20] both then I'll be working on this Wing
[57:23] over here I I like to always work
[57:26] towards my right the model's left that's
[57:28] just how my brain works go ahead and add
[57:31] a rotation
[57:33] deformer hold
[57:35] control scoot it over keep holding
[57:38] control to change the
[57:40] direction now I'm going to add three key
[57:43] forms to breath which is something we've
[57:46] already worked on to get the panda to
[57:48] breathe up and down but when we move the
[57:51] Red Dot all the way to the right we are
[57:54] going to
[57:57] make the wing go up and then make the
[58:01] wing go
[58:03] down all
[58:06] right now this is a simple movement I've
[58:08] already shown you how to do you could
[58:10] leave it at this but what if you want to
[58:13] make the Batwing a little bit more
[58:15] interesting well let's create a
[58:18] parameter and call this batwing move
[58:23] minimum 30 maximum 30
[58:27] we're going to go to our elwing
[58:30] again add three key
[58:32] forms and then I'm going to introduce to
[58:34] you the deform brush tool what this does
[58:37] is it basically allows us to just squish
[58:41] things before we were always squishing
[58:43] things with a box around it but now you
[58:45] can manually squish things if you so
[58:49] desire so what we're going to do is with
[58:52] the Batwing the new batwing uh
[58:56] parameter you created when it's all the
[58:58] way to the right we're going to squish
[59:00] the wing outward as if the bat is
[59:04] stretching out its wings and this does
[59:07] not have to be
[59:08] perfect you want to try to keep it as
[59:11] smooth as you can but you might not be
[59:14] able
[59:15] [Music]
[59:17] to I just wanted to show you that this
[59:21] deform tool exists and you can also do
[59:24] this with a deformer box it might be
[59:27] easier to do with a deformer box but I
[59:30] want to show you that this little path
[59:32] tool exists so now it looks like the
[59:34] wing is being stretched outward now
[59:36] we're going to squish it inward like
[59:38] they're folding the wing in now
[59:40] typically you would have multiple layers
[59:42] here so you can help show that the wing
[59:47] is folding in on itself but this is one
[59:49] layer so we're just going to pull it in
[59:52] as much as we
[59:54] can by squishing
[59:57] [Music]
[1:00:04] this all right so just by squishing out
[1:00:08] squishing out squishing in once you have
[1:00:11] this this is where it gets a little bit
[1:00:14] interesting going to go to modeling go
[1:00:17] to physics settings now because it we
[1:00:20] rigged the rotation deformer on
[1:00:22] breathing it's already got that done in
[1:00:23] for us awesome
[1:00:26] what we're going to do is we're going to
[1:00:27] add a new physics menu and we're going
[1:00:30] to call this a
[1:00:32] Batwing we're going to hit add we're
[1:00:35] going to add our input as
[1:00:39] breathing we're going to have the
[1:00:40] effectiveness be 100 add a random
[1:00:43] pendulum so we just tell it to work and
[1:00:46] then we hit batwing move as our in as
[1:00:50] our output excuse
[1:00:52] me now it's not going to work at first
[1:00:55] cuz we need to increase our
[1:00:59] output but you see we're still we're
[1:01:01] still struggling it's not really showing
[1:01:03] a lot let's add another pendulum shall
[1:01:06] we still still not working here is where
[1:01:10] we're really going to have to mess with
[1:01:12] the numbers to see how we're going to be
[1:01:15] able to get this breathe out and in
[1:01:18] motion okay I did some of the number
[1:01:21] crunching off camera so that I wouldn't
[1:01:25] bore you with with some of the numbers
[1:01:27] we now have this little circular
[1:01:30] rotation so that it isn't just an up and
[1:01:33] down Movement we instead get just a
[1:01:35] little bit of extra curiosity going on
[1:01:38] here now is this the craziest movement
[1:01:40] out there no but it's something to add
[1:01:44] just a little bit of extra curiosity to
[1:01:47] your model if you would like to copy
[1:01:50] what I have down here you are absolutely
[1:01:53] able to do so if you'd like and you can
[1:01:55] also tell how much it's moving by
[1:01:58] checking your parameter here now I can
[1:02:00] see that it's not getting all the way to
[1:02:03] the stretch motion I have but it's
[1:02:06] definitely getting to the squished
[1:02:08] motion so just to give you a bit of an
[1:02:11] idea but once you have the wing to a
[1:02:15] rigging position that you enjoy we're
[1:02:18] going to do the same copy technique
[1:02:20] we've done this entire time so hold down
[1:02:23] control grab your wing your wing
[1:02:26] rotation and then the final Wing
[1:02:27] parameter you've been in crl + C contrl
[1:02:31] V right click
[1:02:36] reflect and you shouldn't have to change
[1:02:39] any you shouldn't have to do any extra
[1:02:42] reflecting should automatically go with
[1:02:44] it and then you can delete the right
[1:02:46] wing so you will no longer need it we
[1:02:49] can go to the physic
[1:02:51] settings and you will see the wings are
[1:02:54] now rigged so you've done the rigging
[1:02:57] you've made it this far what next well
[1:03:01] let's export
[1:03:03] it let's go ahead and close make sure
[1:03:06] you're saved what we're going to do is
[1:03:08] go to modeling
[1:03:11] texture edit texture
[1:03:13] Atlas so if you're in the free version
[1:03:16] the highest amount of pixels you'll be
[1:03:18] able to export is
[1:03:20] 248 that's fine this just means that
[1:03:24] when you zoom in your model it'll get
[1:03:26] pixelated the higher you export your
[1:03:28] model one the higher the resolution will
[1:03:32] be and the more you zoom in the better
[1:03:34] the quality will
[1:03:36] keep but but keep in mind better does
[1:03:41] not you know higher pixel does not
[1:03:42] always equal better if your PC is not
[1:03:44] the best you may want to export at a
[1:03:46] lower pixel amount so it does not
[1:03:48] explode your PC I will be exporting at
[1:03:51] 4,000 pixels cuz my PC can handle it and
[1:03:54] it tends to hold up pretty decently well
[1:03:56] when zoomed in if you're on the free
[1:03:58] version again you will only be able to
[1:04:00] do
[1:04:02] 2,000 go ahead and hit okay and let the
[1:04:05] texture Atlas generate once the texture
[1:04:07] Atlas is done generating you can go
[1:04:09] ahead and hit
[1:04:10] file export for runtime export as moc3
[1:04:15] file go ahead and hit
[1:04:17] okay I'm just going to keep the name the
[1:04:20] same as Panda
[1:04:22] tutorial once it's done saving uh
[1:04:25] apologies for my mess of files go ahead
[1:04:28] and hit rightclick new
[1:04:32] folder I'm going to call this Panda
[1:04:35] tutorial then you're going to grab Panda
[1:04:38] tutorial all of the files associated
[1:04:41] with it and put it in this new folder
[1:04:43] you just
[1:04:44] made then you'll go into 52d studio and
[1:04:49] put this folder you just made into the
[1:04:52] live 2D model folder mine is clipped
[1:04:55] because I put so many models in there
[1:04:58] for testing but I'll show you how to
[1:05:00] find it real quick in vtube studio if
[1:05:03] you ever want to find data folders you
[1:05:07] just double click click on this gear
[1:05:10] icon and then if
[1:05:14] I scroll a little bit it's open data
[1:05:18] folder right here and then you'll be
[1:05:20] able to find the live 2D model folder
[1:05:22] where you will put your Panda uh folder
[1:05:25] that you just made go ahead and get vtu
[1:05:29] Studio up if you had it up and running
[1:05:31] before you'll have to restart it now
[1:05:33] that you have a new model on hand go
[1:05:36] ahead and click on change VTS model go
[1:05:39] until you find the Panda
[1:05:41] [Music]
[1:05:42] one all right if you have the option to
[1:05:45] auto set up go ahead and click Auto set
[1:05:48] up and B
[1:05:51] [Music]
[1:05:56] there you have it here is the model you
[1:06:00] just rigged if it is your first time
[1:06:02] exporting a model to vtube Studio it's
[1:06:04] likely going to ask you for a webcam to
[1:06:07] set up or a phone for tracking but if
[1:06:10] you have set up models to vtu Studio
[1:06:12] before you may probably get the uh Auto
[1:06:17] setup feature and here is your
[1:06:20] Panda yippee I hope you have fun
[1:06:24] enjoying your new mascot this is free to
[1:06:27] use so if you would like to use it on
[1:06:29] your streams show people the amazing
[1:06:32] first rig you've done feel free to go
[1:06:34] ahead and do so I hope this tutorial was
[1:06:37] helpful I hope it gave you confidence in
[1:06:40] rigging at least the basics and showing
[1:06:43] you around the live 2D cubism
[1:06:47] application if you enjoyed this tutorial
[1:06:50] please subscribe leave a like comment
[1:06:54] all of that good stuff this did take a
[1:06:56] while to put together so I would really
[1:06:58] really appreciate that and I hope you
[1:07:01] have fun rigging and making V tubing
[1:07:04] projects in your future bye for now
[1:07:11] [Music]
[1:07:25] oh
[1:07:29] [Music]
⚡ Saved you time reading this? Transcribe any YouTube video for free — no signup needed.