
Fix Your Boring Stream in 6 Mins!
45sImmediate before/after comparison hooks viewers who want a pro look for free.
▶ Play Clip"The title accurately promises a free, beginner-friendly guide to make your stream look professional, and the video delivers exactly that."
This tutorial shows beginners how to set up a professional-looking live stream for free using OBS Studio and the Own Pro tool. It covers importing custom scenes, overlays, and transitions, as well as adding a webcam and game capture.
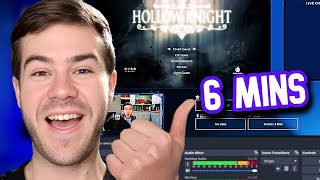
The video starts by contrasting a poor-quality stream with a professional one, promising to fix it for free.
Download OBS Studio if not already installed, then use the free tool Own Pro to get professional stream designs.
Click 'Join for Free' on Own Pro, sign in with Twitch or YouTube, then choose one of three free designs (e.g., Pure series).
Change language, choose a color (e.g., red), and optionally add social media links (Instagram, TikTok).
Download the JSON file and transition file from Own Pro. Note the transition point value (e.g., 1000).
In OBS, go to Scene Collection > Import, select the downloaded JSON file, then switch to the imported collection (e.g., Pure).
The imported collection includes scenes: Starting Soon, Ending, BRB, Overlay (for gameplay and webcam), and Talking (for webcam and display capture).
Use a good microphone like the Rode PodMic USB for clear sound.
Use a high-quality webcam like the Insta360 Link 2 (4K 30fps or 1080p 60fps with AI tracking). Add as Video Capture Device in OBS.
In Own Pro dashboard, go to My Scenes, open the package, select the overlay scene, add a webcam graphic, resize, and save.
If changes don't appear in OBS, right-click the foreground browser source, select Properties, scroll down, and click 'Refresh cache of current page'.
Add a Game Capture source to capture gameplay (e.g., Hollow Knight). Drag it below the webcam overlay.
In the Talking scene, add existing game capture and resize it between foreground and background for a clean overlay look.
In Scene Transitions, add a Stinger transition, browse for the downloaded video file, and set the transition point (e.g., 1000).
By following these steps, you can transform your stream from amateur to professional for free, potentially attracting more viewers.
What free tool is used to get professional stream designs?
Own Pro
0:11
What file format is downloaded from Own Pro to import into OBS?
JSON file
0:50
What type of transition is added in OBS for scene changes?
Stinger transition
5:44
What is the transition point value mentioned for the Pure design?
1000
5:57
How do you refresh a browser source in OBS to see changes?
Right-click the source, select Properties, scroll down, and click 'Refresh cache of current page'.
4:10
What are the two webcam models mentioned from Insta360?
Link 2 and Link 2C
2:16
What is the resolution and frame rate of the Insta360 Link 2 webcam?
4K 30fps or 1080p 60fps
4:27
Stream Transformation Promise
Sets the expectation that the video will turn a poor stream into a professional one for free.
Download and Import Process
Key step to get the custom scenes into OBS, including the transition file.
0:48AI Auto Tracking Webcam
Demonstrates the advanced feature of the Insta360 Link 2 webcam that tracks movement automatically.
2:53Adding Stinger Transition
Explains how to add a professional-looking transition between scenes.
5:39[00:00] does your stream look like this no one
[00:02] wants to watch that so let's fix that
[00:04] and make it look Pro like this instead
[00:06] for free so you can get more viewers
[00:08] first let's get OBS studio if you
[00:09] haven't already everything's Linked In
[00:11] the description for you guys then we'll
[00:12] use this free tool called own Pro we're
[00:14] going to click on the join for free
[00:15] button then sign in with twitch or
[00:17] YouTube I'm going to do twitch choose
[00:19] one of these three free designs I'm
[00:20] going to choose the pure series next we
[00:22] can change our language if we want or we
[00:24] can choose a color I'm going to choose
[00:25] this red one over here you can also
[00:27] click show more and click a lot more
[00:28] colors but I'm just going to choose
[00:30] let's say this red one then I'm going to
[00:31] hit install now now we can enter our
[00:32] social media if you want if you don't
[00:34] want to just hit no otherwise hit yes
[00:36] I'm going to type in my socials for all
[00:38] three add social pick whatever socials
[00:40] you want Instagram and Tik Tok so I got
[00:42] all three here and then I'm going to hit
[00:43] next and while we wait for this to load
[00:45] make sure to drop a like on the video so
[00:46] other streamers can find this video now
[00:48] we can click on this download button
[00:50] here to import it into OBS studio so
[00:52] click to download then we're going to
[00:53] hit the next button and then we're going
[00:54] to click to download the transition file
[00:56] as well now remember this number right
[00:58] here transition point with this value
[01:00] remember this number for later it's
[01:01] going to come in handy don't forget it
[01:03] now we can go into OBS Studio you can
[01:05] see we got our amazing background here
[01:06] but what we need to do is go to the
[01:08] scene collection at the top click that
[01:09] tab then we're going to go to the import
[01:11] button ignore what I have here you're
[01:13] going to go to the first empty box in
[01:14] the middle click this little three dots
[01:16] button so click that find the Json file
[01:19] that you just downloaded then we're
[01:20] going to click it and hit open make sure
[01:22] that box is checked and then we're going
[01:23] to hit import then we go to the very top
[01:25] again where it says scen collection and
[01:27] then click on Pure or whatever package
[01:29] did you download it so I'm going to
[01:31] click on pure for me now go to the
[01:32] bottom left corner you see we got a
[01:34] whole folder of stuff we got starting
[01:35] one animated starting soon screen for
[01:37] free and it has all of our socials
[01:39] automatically in then we got our ending
[01:41] scene same thing we got BRB already done
[01:43] then we got overlay one which we can add
[01:45] our gameplay and our webcam in a second
[01:47] and then we got our talking one we can
[01:48] have a webcam and then like a display
[01:50] capture for browsing the internet here
[01:52] chat and all that good stuff in order to
[01:53] have a professional stream we obviously
[01:55] want to make sure we sound nice I'm
[01:56] using the road pod mic USB which I
[01:58] really like cool part is I can also
[02:00] connect it from my computer to my phone
[02:02] so I actually use it to record my shorts
[02:04] and everything which is really
[02:05] convenient for me and it sounds pretty
[02:07] nice don't you agree I'll leave all
[02:08] these Linked In the description down
[02:09] below by the way if you sound nice you
[02:10] got to look nice right so that means we
[02:12] got to get a good webcam lucky for us
[02:14] insta 360 sent over these webcams for us
[02:16] to try we got the link two and the link
[02:17] 2C the only difference is that the two
[02:19] is on a gimbal so it can do tracking
[02:20] compared to AI autof framing but they're
[02:22] pretty much the same so I'll be using
[02:23] the two so I simply plugged in that bad
[02:25] boy we're going to add a new video
[02:27] capture device source so click on the
[02:29] plus button under sources video capture
[02:31] device I'm going to call this insta 360
[02:33] link 2 and then I'm going to hit okay
[02:36] now I'm going to find the device from
[02:37] this list as you can see I got an
[02:39] integrated webcam for my laptop and look
[02:41] at how awful this looks this is a very
[02:43] bad webcam with the laptop so actually
[02:45] I'm going to double click on that Source
[02:46] I'm going to switch it to the beautiful
[02:47] link 2 that we just got all we got to do
[02:49] is hit okay and look at that beautiful
[02:51] that is absolutely amazing quality it's
[02:53] got AI Auto tracking you guys can see my
[02:55] vacuum cleaner that I need to go and put
[02:57] away it tracks me automatically I a't
[02:59] got to do nothing nothing so that's
[03:00] pretty cool got a lot of cool features
[03:02] and now I'm going to drag the corner
[03:03] down here and we're going to fit it in
[03:05] between these things here so we got our
[03:08] camera here I'm going to drag it in
[03:09] between there now we just got to tweak
[03:11] it a little bit so we can kind of drag
[03:13] the arrows and use the arrow keys on our
[03:15] keyboard to make it fit perfectly behind
[03:16] it which looks pretty good like that
[03:18] nice also we can do the same for our
[03:19] overlay tab so we go back to this scene
[03:21] I want to add a webcam overlay so let's
[03:23] go back to onpro we're going to hit done
[03:25] I'll add that transition later but we're
[03:27] going to go to the dashboard right here
[03:29] then we're going to go to the my scenes
[03:30] tab on the left and we're going to open
[03:32] up that package we just had then we're
[03:33] going to go to the overlay scene overlay
[03:36] so click on that one now we can make any
[03:38] changes to our stream here in case we
[03:40] like something or don't like something
[03:41] or you want to change something but I
[03:43] just want to add a webcam graphic so I'm
[03:44] going to click the add graphic button
[03:46] and then I'm going to go to overlays
[03:48] right here I'm going to find the package
[03:49] we're using which is pure we got our
[03:51] webcam overlay right here so click on
[03:53] that I'm going to click on the middle
[03:54] and then drag this corner to make it
[03:56] more appropriately sized let put on the
[03:58] left over here maybe like right there
[04:00] then I want to hit save in the top right
[04:02] corner otherwise none of this is going
[04:03] to save so make sure to hit save and
[04:04] let's go back to OBS as you can see now
[04:06] it is updated right here and if it
[04:08] didn't simply click on the foreground
[04:10] browser double click that scroll down
[04:12] and then hit refresh cach a current page
[04:14] it's going to force it to refresh and
[04:16] that way if you hit saved it will update
[04:18] your changes so now we can do the same
[04:19] thing we'll click the plus button we'll
[04:21] go to video capture device and we'll do
[04:22] add existing We'll add that webcam
[04:24] earlier I can't get over how good
[04:26] quality this is this is a 4K 30fps or
[04:29] 1080p 60 frames per second webcam and
[04:31] has a/2 in sensor which for noobs or
[04:33] people that don't do Tech is actually
[04:35] really freaking good for a webcam so I'm
[04:36] going to make sure to do the same thing
[04:38] to drag that right in the middle and
[04:40] boom we got it right there so we got our
[04:41] beautiful webcam we got our webcam
[04:43] overlay and that once you got your game
[04:44] open I'm going to open up a new source
[04:46] we'll hit the plus button you can use
[04:48] display capture if you want to capture
[04:49] your whole screen or you can use game
[04:51] capture or window capture I'm going to
[04:52] use game capture hit okay and then now
[04:55] you can either choose capture any full
[04:56] screen application if you got two
[04:57] monitors otherwise click this little
[04:59] button button here and then go to
[05:00] capture specific window I'm going to
[05:02] specifically capture Hollow KN now if
[05:04] you play different games you're going to
[05:05] have to change this window every time
[05:06] but if you want you can choose whatever
[05:08] you want there's multiple different
[05:09] options but we'll just hit okay we're
[05:10] going to drag our game capture all the
[05:13] way down and now you can see we have our
[05:15] beautiful game capture we got our webcam
[05:17] overlay and we got our stream labels at
[05:18] the top automatically imported pretty
[05:20] quick we're going to go to the talking
[05:21] scene at the very bottom do the same
[05:23] thing plus button then we're going to do
[05:25] game capture then we're going to do add
[05:26] existing game capture hit okay I'm going
[05:29] to drag the Corner down to make it fit
[05:31] right about here but instead of dragging
[05:33] it all the way down we're going to drag
[05:34] it in between the foreground and the
[05:36] background so that way it has that nice
[05:37] little overlay look now we got to add
[05:39] our transition so let's go to scene
[05:41] transitions box right here we're going
[05:42] to click that little plus button we're
[05:44] going to choose Stinger then we're going
[05:45] to hit okay and now we're going to
[05:47] browse for that video file we're going
[05:48] to click on that transition we just
[05:50] downloaded earlier hit open and then now
[05:52] we got to go all the way down to where
[05:54] it says transition point now on that
[05:55] page we skipped through it told us the
[05:57] transition point I remembered it's going
[05:58] to be 1,000 for that this one then we
[06:00] hit okay now we're going to click on a
[06:02] different scene like that give it a
[06:04] second and boom we got a perfect little
[06:06] transition there so go feel free to test
[06:08] that out there looks beautiful but now
[06:10] you're streaming in style so now you can
[06:11] get more viewers but if you want to get
[06:13] even more viewers and grow your stream
[06:15] watch this video to the side me it's
[06:16] going to take your stream to the next
[06:17] level my name's Cody and I'll see you in
[06:19] the next one


⚡ Saved you 0h 06m reading this? Transcribe any YouTube video for free — no signup needed.