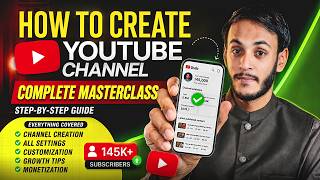

$500 from one video? Proof inside!
42sReal earnings proof creates instant curiosity and motivation for aspiring creators.
▶ Play Clip"Delivers a thorough step-by-step guide as promised, but includes motivational fluff and self-promotion that pads the runtime."
This video is a comprehensive mobile-only tutorial on creating a YouTube channel from scratch, covering everything from Gmail account creation to channel monetization. The creator walks through each step with live demonstrations, including logo/banner design using Canva and critical settings in YouTube Studio.
The video promises a complete masterclass: creating a Gmail account, YouTube channel, logo, banner, understanding monetization criteria, and early subscriber growth.
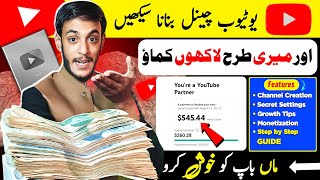
The creator shows a video with 769,000 views and 13,900 subscribers earned, with revenue of approximately $500 (₹1,44,000 in Pakistani rupees) to motivate viewers.
Emphasizes creating a new Gmail account (not using an old one). Steps: open YouTube app, tap account icon, tap plus, 'Create Account', 'For My Personal Use', enter name, date of birth, gender, choose Gmail address, set strong password (capitals, lowercase, numbers, symbols).
After Gmail creation, go to YouTube app, select the new account, tap profile icon, 'Create a Channel', optionally add logo with Canva (download from Play Store). Search 'YouTube logo' template, customize, download. Set channel name unique by combining personal name with category.
Add banner using Canva (search 'YouTube banner'), customize, upload. Write channel description manually or via ChatGPT (prompt for professional description). Save all changes.
Open browser, go to studio.youtube.com (no spaces), log in. In Settings -> Channel: set country, add keywords (include channel name, separate by commas, max 500 characters). Enable features: verify phone for uploads >15 min, enable channel history for monetization review.
Set upload defaults: video visibility (unlisted recommended if needed), default description with channel name and social links, default tags (only channel name, not video-specific). Choose category (e.g., Education for cooking), video language, and title/description language (English recommended). Save.
Add sections: enable 'Popular Videos' section, customize home tab. Add business email for sponsorships. Set featured video or live stream. Publish channel layout.
Two paths: 4,000 hours watch time + 1,000 subscribers (long-form videos) OR 10 million Shorts views in 90 days + 1,000 subscribers. Once eligible, apply, YouTube reviews channel quality.
Do NOT tell anyone or ask for subscriptions after channel creation. Let algorithm work organically. Provide value (education, entertainment, etc.) consistently. Avoid shortcuts.
Creating a successful YouTube channel requires careful setup from the start: unique channel name, professional design, correct settings, and a focus on providing value. Monetization comes from either long-form watch time or Shorts views, paired with 1000 subscribers.
What are the two monetization criteria for a YouTube channel?
Either 4,000 hours of watch time in last 365 days + 1,000 subscribers (long-form), OR 10 million Shorts views in 90 days + 1,000 subscribers.
22:41
Why should you create a new Gmail account for a new YouTube channel?
To avoid interference with existing channels and ensure a fresh start; though not mandatory, it's recommended.
03:07
What four elements must a strong password include?
Capital letters, lowercase letters, numbers, and symbols.
05:03
How do you add channel keywords and what limit is there?
In YouTube Studio Settings -> Channel, add keywords separated by commas, max 500 characters. Include channel name.
15:00
What is the purpose of enabling 'Channel History' in feature eligibility?
It allows YouTube to review your channel for monetization and other features.
17:46
Which language should be selected for 'Title and Description Language' in upload defaults?
Only English, as per the creator's recommendation.
20:16
What is the key strategy to get first 1000 subscribers according to the video?
Do not tell anyone or ask for subscriptions; let the algorithm grow the channel organically by providing value.
24:18
Earnings Proof
Demonstrates real earnings from a single video to motivate viewers.
02:23Unique Channel Name
Recommends combining personal name with category for uniqueness and search ranking.
05:42Keyword Inclusion
Stresses including the channel name in keywords for better discoverability.
15:00Two Monetization Paths
Clarifies the separate criteria for long-form and Shorts content.
22:41No Early Sharing
Advises against promoting the new channel to avoid algorithm penalties.
24:04[00:02] but are still confused, then brother, this will be your last video on this topic because in today's video we will not only learn to create a channel but will also show you the step by step journey from creating a Gmail account to channel monetization. I
[00:16] channel monetization. I authentication, then believe me, this proof is in front of you. 5 lakh people have already learned to create a YouTube channel from our channel. And still learning. And
[00:31] practically speaking, we have created channels for thousands of people with our own hands. And he is working too, Alhamdulillah. And if we talk about myself, then believe me, keeping Allah present, I am telling you this from an empty pocket when I had nothing in my pocket. From having
[00:46] empty pockets to reaching lakhs. Today I have everything, Alhamdulillah. Studio setup, camera, business, money, everything is there. How has this been possible? He gave it because of YouTube but YouTube became the reason.
[01:01] So today I will teach you how to create a perfect YouTube channel by keeping Allah present. I am going to give you a complete master class on how to create a Gmail account ? How to create a YouTube channel? How to set it up, how to create logo and banner
[01:14] , what is the monetization criteria ? And how to complete the first 1000 rubles quickly ? The entire guide will be given to you till here. So please watch this video carefully. Brother, believe me, this video is very precious. It is being
[01:28] made for you with great effort so that you do not have to watch such videos again and when the channel is made, there should be no doubt in your mind whether the channel has been made correctly or incorrectly. I have full guarantee. Ok. My name is Syed Yasir Abbas and
[01:42] I have been working in the YouTube and online content creation field for the last six years. So So look at it carefully, look at it leisurely. Inshallah after watching this video look at it leisurely. Inshallah after watching this video
[01:57] start our master class. First of all, to motivate you and prove what I said in the beginning, I am going to show you a small proof which will help you know whether you want to do YouTube or not.
[02:10] OK, let me open YT Studio. I have opened a video of this channel. I click on its performance. You can see the views on this video here. 769,000 views you see. Scrolling further, I found that this one
[02:23] video has garnered me 13,900 subscribers. But look at what I want to show you. But look at what I want to show you. converted into Pakistani currency, it comes to approximately ₹1,44,000.
[02:39] I have shown you the earnings of this one video. This video has $500,000 and 70,000 views. And Alhamdulillah, more than a million videos have been uploaded on this channel of ours. The videos have reached up to 2 million. So Alhamdulillah, if you set up YouTube and
[02:52] grow your channel, you will earn more than you expected. I have shown you this live so that you can get motivated. Secondly, you should Ok? Now I think your mind must be clear. Now let's start our work. The
[03:07] first step is to create a Gmail account for this masterclass. Remember, whenever you create a new YouTube channel, you You did not create a channel on the old Gmail account. Ok? Why not make it? Leave this reason. Create a new Gmail
[03:23] account. How to make it? You have to open the YouTube application. At the bottom right corner, you will see a logo button. You have to click on it. Accounts will be visible on the top left corner. You have to click on it. And
[03:35] you will see a plus button on the top right corner. You have to click on it. As soon as you click on it, you will be asked whether you want to put your fingerprint or password. Your mobile will tell you to install it. And after that this kind of interface will open in front of you. If you
[03:48] Create Account. You have to click on it. You have to click on For My Personal Use, Not Business, For My Personal Use. Use, Not Business, For My Personal Use.
[04:00] name here. It is not necessary that it is yours or the channel's. Whatever you want to put, put it. Ok? So here we enter our name Syed Yasir Abbas and click on the Next button. After that you have to enter the date of birth here. Date
[04:13] of birth brother has to be entered in reality. There is no need to hide it. Ok? So here we enter our date no need to hide it. Ok? So here we enter our date of birth like this and make it 1998 here. You have to select gender male or female.
[04:26] Here three options will open in front of you. First of all, the two options that you see are addresses. Have a Gmail address. And in the last you can see Create Your Own Gmail Address. If
[04:38] you like any of the first two then simply select it. You have to do it ok. If the first two do n't feel good. If you want to you have to click on the last option. Create your own Gmail address and you
[04:51] can create any address you want as per your wish. Ok? So I would say that you have to select the one which you like best out of the first two. Ok? So I would say that you have to select the one which you like best out of the first two. Here you have to enter a strong password which should have capital, small, letter and
[05:03] symbol. So these four words that I have written here are capital, small , then letter and then symbol. All four of these should be in your password. Whether your password is long or short. You must use these four things.
[05:15] This is a strong password. Because it is a channel, it is your business. If your channel is going to grow in future then it should be secure. So here you have to enter the password. After entering the password, you simply have to click on the Next button.
[05:28] your Gmail account will also open here. The name will also be opened. You will see the Next button again below. You have to click on it. That's it. Your Gmail account has been created. So this is the way to create a Gmail account. Now part
[05:42] ? Brother, this is the way. There is no more rocket science. We also made it the same way. Once the Gmail account is created. Now comes the turn to create the channel. So what do you have to do for that? Again you have to
[05:55] click on it. You have to click on Accounts. The Gmail account you just created. You have to select that account. We will select that. This type of interface will open in front of you. Again
[06:09] you have to click on the same logo. And if you look here, you will see Create a Channel. You have to click on it. As soon as you click on it, first of all it is asking you to add the logo. If you want to give your picture then simply
[06:22] click on the picture and set it here. If you want to create a logo, you have to create it. I will teach you how to make it. You have to come back from here. You have to go to Play Store. You have to download an application named Canva.
[06:35] This has to be downloaded and installed. Simply open it. As soon as you open it, this type of interface will open in front of you. Look right in the center, you can see the templates. You have to click on it. You have to click on the search templates
[06:47] and here you have to search YouTube and write the logo in front of it. After writing this, you have to search. As soon as you search, you will get templates here. Look here,
[07:00] , whatever seems suitable to you. Simply you have to click on it like this. As soon as you click on it, this type of interface will open in front of you. Now this logo that you are Trust the idea is written. So you
[07:14] can change it by clicking on it. You can put your channel name here. Ok? Once you have done all these things, adjust it. You can adjust each of these lines. Click on Trust. You can change this. Click on The Idea. You can change this.
[07:26] And see Work Until It's Done below. Click on it. You can change this also. If you want to change the color, you can do that too. You can do all kinds of changes here. So you have to adjust the logo according to your needs. The download button will be visible above.
[07:39] You will see Save As Image. There is a save button at the bottom. We will click on it. The logo will appear in your gallery. So this is the way to create a logo. It was very simple. If it is taught in a roundabout way, it will take a lot of time. Ok? You have to come back from here. We have to open the same tab
[07:54] from where we went to create the logo. If you look here, you will see the picture option. You have to click on the camera. After clicking on this, you can see this logo. Simply click on it. You have to click on the Done button.
[08:07] And you have to adjust this here. As you can see here, let me zoom in on this. And we adjusted this. Simply look below and Save as Profile Picture is visible. You have to click on it. Within seconds the logo will be added
[08:20] and it will be added. Ok. After that look at the second number, you will see the name. This is basically the name of your channel. Write the channel name here. And remember, the channel name should always be such that no one else already has a channel on it. If
[08:35] someone already has a channel, your channel will not appear in the search or will appear late. So try to have a unique channel name and how will it become unique? Create a channel name with your name. For example, I am creating a channel on cooking. I am
[08:49] creating a channel on recipes. So I will set the channel name by adding my name. Like Syed Yasir Abbas Recipes this can happen. Apart from this, this can be Syed Yasir Abbas Kitchen. So these things will make your channel name unique. When your name will be there plus your category. The
[09:04] channel name will automatically become unique. It will come on top when searched and will become a brand. So here we write Syed Yasir Abbas recipe. We wrote this down. You have to click on the save button above. As soon as you click on it, you will
[09:17] see that the handle has also been installed below. After that the channel name is also set and your logo is also placed on top. We have put the logo to make you understand. You have to create the logo according to your category. If it is a recipe then it is a recipe, if it is cooking then it is cooking, if it is
[09:29] travelling then it is a vlog, if it is tech then that is best. Once this setting is done here. The Create Channel button is visible. Simply you have to click on it. Click on it. You have to
[09:44] wait a little bit. And see below the channel has been created. This is an incomplete channel. The settings for this channel are still pending. Proper channel customization is yet to be done. what do people do ? Just create this much channel and start working. Brother, no, this channel is
[09:59] not complete. Channel settings are still pending. We have to do that. How? Here this type of interface will open in front of you. You have to click on the logo again and here you will see the view channel. You have to click on it.
[10:13] After clicking on it, see Edit Channel visible here. You have to click on it. Click on it. If you look behind it, you can see an empty area. This is basically the banner of the channel. Check out my channel here. The
[10:27] image you see behind is the channel banner. So, you have to put this banner here also. This helps in branding your channel. The channel looks professional. So, this is very easy how to make a channel banner. I have to come back. Cwa has to be opened.
[10:40] After opening Cwa, you have to click on Templates here. write YouTube banner here. Simply write this and then search. After that this type of interface will open in front of you. See below you are getting ready made banners.
[10:54] You have to select one of these which you find suitable. According to your category. We will select this. This type of interface will open in front of you. Now you can customize it. If you click on such logo,
[11:06] you can delete it and put your image here. So here we have selected our image. After that, if you look further, you will see the channel name. So we have to click on it and after clicking on it, we simply have to
[11:18] edit it and here we enter the name of our channel. Like Syed Yasir Abbas was there with the recipe, so he would write the recipe and it would be done. What do you have to do now ? This is how we have to zoom in and make it smaller. Because our name is long,
[11:33] we will shorten it here. Something like this, after this if you look up then you can edit. And if you want to write something here, you can write it. Otherwise you can also delete it. Ok? You can see the subscribe button below.
[11:47] Place it up or down wherever you want. So see, our banner has been made. Now when the banner is created, you have to click on the download button above. This banner will appear in your gallery. I have told you this method. You have to take some time.
[12:02] You have to make a perfect banner after careful consideration. So brother, it will become a great banner. Here you just have to make the changes. The design is already made. Ok? So the banner has come to the previous tab. You can
[12:14] see a camera logo above the banner. You have to click on it. You have to click on Choose from your photo. You have to select the banner that you have made. Click on the Done button. You have to zoom it out and click on the save button. As soon as you click on it,
[12:27] you have to wait a little within these seconds. Your banner will now appear here. Here you go, your banner has been put up. Ok? So, in this way you have to put up the banner of your channel also. Now if you look below, you can see an option for description.
[12:40] Ok? Now what is description? In the description we tell who I am. What kind of content will be uploaded on our channel? Let's get a little introduction. Ok? So you have to write this description yourself. If you cannot write it yourself then
[12:52] simply open Chat GPT. And after opening it, you have to write the name of your channel here. Like the name of our channel is Syed Yasir Abbas Samne Recipe and after writing this channel name you have to tell this. This is the name of my channel.
[13:15] Below you have to write the short for this channel. But write a professional description in English.
[13:28] After writing this, you have to click on the send button. As soon as you click on the send button, description will be ready. Simply copy it from here. I have to come back. Click on the description box. Paste the description. There
[13:41] is so much work. Will be done. Click on the save button above. So this description will be saved. Now our work here is complete. But there are still some settings left for us to do. How to do the setting now ? You have to come back completely from here. There will be
[13:54] some browser in your mobile phone like Opera or Chrome, you have to open it. After opening it, click on the search box and here you have to write studio. So just as I have written, you also have to write it exactly the same way. There
[14:07] should be no space and you have to write as it is. If you do not write like this, then this tab will not open in front of you. After writing this, you have to click on the search button. Click on it. The next interface will
[14:20] open in front of you like this. What do you have to do now ? This is how you have to zoom in. You will see the logo on the top right corner. You have to click on it. Here you have to confirm whether the channel login is the same one you have just created. If any other channel is logged in here
[14:33] All the channels on your device will open. Select the channel you just created. Ok? So we have selected that channel. After that you have to zoom in. If you go to the bottom left corner, you will see the settings icon.
[14:47] You have to click on it. The necessary settings are starting from here. Please pay attention. Ok? Click on it. This type of interface will open in front of you. You have to click on the channel. Secondly, first look at the country
[15:00] of residence. You have to click on it. You have to select the country where you are living. So Pakistan is ours. So here we simply select Pakistan. You are from India, Bangladesh , Saudi Arabia, whatever it is, you have to select it.
[15:12] After that, if you look below, you will see keywords. These keywords are the keywords of your channel so that if people search, they reach your channel. Let YouTube know which category your channel belongs to. Like how to
[15:27] make embroidery? How to make pulao? How to make tea? How to make roti after that? How to make Chicken Biryani? These are the keywords that people search for or search for recipes of these things. So we have to enter all these keywords here. For example, how to
[15:42] enter keywords? I am entering the first keyword. Here we have to write Syed Yasir Abbas Samne recipe. Now this keyword is complete. we wrote. What do you have to do now? You have to put a comma at the end of this. I will put a comma. One of your keywords will be completed here like this.
[15:57] Then write the second keyword. A comma has to be put at the end. The second one will be completed. There is a 500 word limit. You can write keywords here. If you do not know how to write keywords yourself, then you have to go to chat.gpt and here
[16:10] you have to tell it to write keywords for this channel. So I have written it here. Simply click on the send button. As soon as you click on the send button, it will give you your category below and the keywords according to your channel.
[16:22] Simply you have to copy them here. Like see this, I copy all these keywords from here. Copied this. You have to come back again to the same tab where the channel name was written and paste it in front of it. There you go, your
[16:36] keywords are complete. Keep one thing in mind that your channel name must be added inside the channel keyword. Only then will your channel appear in the search. Ok? So keywords have also been added here. After that you have to click on Advanced Settings. And here
[16:50] this setting which you are seeing, you have to keep it at the last. I want to review this setting for every video. Ok? This thing has to be adjusted here and there is no special option below. You have to come under the feature eligibility. Look here inside the third option,
[17:03] you can see three options. The first one is enable. The other two you have to enable. How to enable it? And what happens in these. Now this second option that is visible has to be enabled so that you
[17:19] then you will not be able to upload videos longer than 15 minutes. So enabling the second option is very easy. Click on the dropdown. Click on Verify Phone Number. A box will open in which you have to enter your mobile number.
[17:32] As soon as you enter the mobile number, there will be a get code button below. We will click on it. A code will appear on your same number. Like logging in to WhatsApp. Then you will enter the same code here and a box will open again. It has to be filled up inside. Click on Verify. That's
[17:46] it. Your mobile will be verified. The second option will be done. After that comes the turn of the third option. So you have to click on the dropdown. You will have three options. Video Verification, Valid ID, Channel
[17:59] History. Click on Channel History. Click on the access feature. This third option will go into review. It will take one or two days or maximum 7 days. After that this third option will also be enabled. So, this is the way to enable this setting.
[18:13] Once this is done, look here you will see Upload Defaults below the channel. You have to click on it. Ok? You have to unlist this. Unlisted brother, please do it as per your wish. And
[18:29] after that, if you look below, you will see the description. This is not a channel description. check out the description of my videos here. You see social links. After that our gadgets are visible.
[18:42] We do not write all these things separately. We have written it only once. These things are automatically mentioned below every video. How are mentions made? Whatever you write here, for example, I write the name of my channel here. Syed Yasir
[18:55] Abbas Recipe. Ok? Now I do not need to write the name of this channel separately. this name will automatically appear in its description. So whatever things you want to add, want to add your social media links or want to add your introduction.
[19:10] You have to write it here already. Then there is no need to write it separately. Whenever you upload a new video, those things will automatically appear there. Ok? And after that you can see tags below. These tags are not channel tags. These are the tags for your video.
[19:22] So here you simply have to write the name of your channel and nothing else. Ok? Apart from this, do not write any other tag because the topic of every video will be different. Sometimes you might be teaching how to make sherbet , sometimes you might be teaching how to make cake
[19:36] , sometimes you might be teaching how to make embroidery. So here the tags will be according to your topic. So when they upload the video, you have to upload it. You just have to enter the name of the channel here. And after that look ahead, advanced settings are visible.
[19:49] you can see the category. There is a drape down front. You have to click on it. Many categories will open in front of you. Definitely you must be working in some specific category. Might be working in cooking, might be working in comedy
[20:03] , might be working in entertainment , might be making animation. You will have some special work to do. So, whatever type of work you have, you have to select that category here. Like ours, cooking will definitely come under education. So we will
[20:16] select education. Ok? And after that watch the video language. You have to click on it. You have to select the language in which your video is. And after that, click on Title and Description Language below and select Only on
[20:31] English. Apart from this you do not have to select any other language. Correct ? So here we select English. After doing this, look below, the save option is visible. You have to click on it. These settings will be saved.
[20:44] What do you have to do now? You have to zoom in and see here the button that you see, simply you have to click on this button. After clicking on it, come down and see here that an option of email address is visible. Here
[20:57] you have to enter your business email. What will happen in this ? When your channel grows, many companies or brands will contact you. We will get you sponsorship. They contact you. We will get you sponsorship. They
[21:10] become your medium of communication and contact. So here you have to enter the email address through which people can contact you. Ok? So it is mandatory for you to put this in. After entering this email, if you look above, you will see a home tab button on the second number.
[21:24] You have to click on it. You have to enable this button which you see on the right corner. button which you see on the right corner. can select the button of your choice here. Like if you want to keep the video then keep it. If
[21:36] you want to end a past live stream, simply click on it. Remove Section This section will end. After that, if you want to finish the last section then finish it. If you want to add a new section, click on Add Section.
[21:48] Click on Popular Videos and this section will be added. What will happen in this ? Whatever sections you add here, Like we have added popular section. So what will happen in this? The
[22:03] popular videos of our channel will be shown to the new visitor on the first tab. This will make a good impression on them. good impression on them. Ok? So, you have to add this section here. The publish button is visible above.
[22:16] Simply you have to click on it. As soon as you click on it, that's it. A to G your channel has been created. Apart from this, if someone says that this setting has to be done , that setting has to be done, then brother, it is a wasting of time. Only On These are the settings
[22:29] which I have shared with you. And this is how this channel has been created on which you are watching the video and we have created channels for many people in this way and they are earning. Ok? Now let's talk about what is the criteria? Now you have created the channel.
[22:41] You have started uploading videos on it. So the criteria of the channel is that you have to complete 4000 hours of watch time in the last 365 days. If you make long videos, then what are the long videos ? Like they are watching my video.
[22:55] If you are uploading such videos then you have to ? Like TikTok videos,
[23:07] you have to complete 10 million views in the last 90 days. Then you will not complete the watch time. Correct? Two categories, 4000 hours of watch time in one long, 10 million views in the short. There is one important thing with both of these and that is 1000 subscribers. So
[23:23] you definitely have to complete 1000 subscribers. Whether you make it short or long. So you have to complete 1000 subscribers also. When either of these two criteria is fulfilled. 1000 subscribers, 4000 hours of watch time or
[23:35] 1000 subscribers, 10 million views your channel will be eligible for monetization. Now if you apply your channel for monetization, what will happen in it? YouTube will review your channel. If your channel is good, you do good work
[23:49] , do your own work then people will accept you. Monetization will be accepted. Now, whatever number of videos you upload, whatever number of views they get, you will get dollars in return. Ok? If it gets rejected then you will not get anything. Ok? So this is the method of
[24:04] monetization. Now let's talk about how to achieve your first 1000 subscribers. Look, I had created many channels earlier also which did not work and I have seen with my own eyes many such channels which did not work. What is Reason? This is the mistake they make. They will make this mistake. The
[24:18] channel will not work. And if you avoid this mistake, you will get your first 1000 subscribers like this. What to do? After creating the channel, do not tell anyone. Do n't ask anyone to subscribe. Do n't share it anywhere. It's true brother.
[24:34] You just have to upload videos on your channel. The rest you have to let it grow on the basis of algorithm. With this your channel will grow well and you will reach 1000 subscribers quickly. What is the second thing you have to do?
[24:47] You should not play any trick by getting influenced by anyone. Do n't look for any shortcuts. Brother, one thing among thousands of things is that if you want to grow on YouTube or social media, then you will have to give value to people. There is no other option. If you are doing comedy then you have to make
[25:02] people laugh. If you are educating them then you will have to give them education. If you are entertaining then you will have to provide entertainment. If you give value, they will support you in return and your channel will grow. If you keep looking for shortcuts like this,
[25:15] nothing will happen brother. Time will be wasted. This is the overall thing. This way your channel will grow. I have made a video on opening a bank account and receiving payments. If they want to see it, they can see it. So I hope
[25:28] saw your brother's hard work, then please give it a like. This is motivation for us. Apart from this, if you want us to create a YouTube channel for you or if you already have a channel which is not working and you want us to check your channel,
[25:41] that too in PDF result, then you can contact us on Instagram account. Take great care of yourself. Allah Hafiz.

⚡ Saved you 0h 25m reading this? Transcribe any YouTube video for free — no signup needed.