

Boring Strategy: 3 Wins = 9 Wins?
44sThe surprising math of risk-reward ratios hooks traders immediately.
▶ Play Clip"Delivers a real, repeatable strategy, but the '4 wins in 5 trades' title doesn't match the three wins and one loss shown in the video."
A simple, low-effort trading strategy for crypto and forex that requires only a few minutes per day and works around a full-time job. The method relies on identifying market structure on the 1H/4H chart, marking a Fibonacci 'golden zone' or supply/demand area, then confirming entries on the 5-minute chart with internal break of structure and change of character, while targeting a minimum 3R. The video walks through four real trades that netted roughly +8R, showing a realistic, repeatable approach for part-time traders.
A 'boring' trading strategy that works for crypto and forex, used on a prop firm account. It generates zero to three trades per week and takes only a few minutes a day, making it ideal for people with a business or a 9-to-5.
Choose a specific time each day to analyze the chart (e.g., 7:00 a.m. before the London session) and stay consistent. The analysis is done on the 1-hour chart.
Look for market structure on the 1-hour or 4-hour timeframe, not higher than 4H and not lower than 1H. The key is spotting breaks of structure and changes of character.
Pull a Fibonacci retracement from swing high to swing low to create the 'golden zone' — the area where price is expected to retrace from before continuing. Supply/demand zones or order blocks can also be used and often overlap with the golden zone.
When the Fibonacci golden zone overlaps with a supply zone (order block), it creates a strong reversal area. The plan is to wait for price to reach this region and then trade it.
Go to the 5-minute timeframe and look for an internal break of structure (IBOS) followed by an internal change of character (ICH) — the first candle body that closes in the opposite direction. This is the entry trigger.
Go long or short from the internal high/low, place the stop loss on the other side, and target at least a 3R risk-reward ratio. If the setup does not offer 3R, skip the trade.
Instead of watching the chart, set an alert on the rectangle/zone. When price touches the level, you get notified, then you go to the 5-minute chart for confirmation. Once the order is placed, close the chart and go about your business.
After CPI data made Bitcoin bearish, the same structure was identified with a supply zone. The alert triggered, the 5-minute chart showed an internal break of structure and a change of character, leading to a profitable short trade.
The strategy does not work all the time — one losing example is shown. With a 3R target, a 50% win rate is enough to be profitable. The four trades shown produced three 3R wins and one loss, a net positive of roughly +8R.
The strategy is simple and repeatable: pick a fixed time, identify structure, mark a zone, set an alert, and confirm on the 5-minute chart before entering with a minimum 3R target. It won't win every trade, but positive expectancy makes it a viable approach for traders with limited screen time.
What timeframes should be used to identify market structure in this strategy?
The 1-hour or 4-hour timeframe; do not go higher than the 4-hour or lower than the 1-hour.
01:57
What is a 'change of character' (CHoCH)?
The first time price changes direction to the other side, confirmed by a candle body close.
07:06
What is an internal break of structure (IBOS)?
A break of structure on the lower timeframe (e.g., 5-minute) that occurs within the larger market structure.
06:37
What minimum risk-reward ratio does this strategy require before taking a trade?
At least 3R. If the setup does not offer 3R, the trade is skipped.
07:20
How many trades per week does this strategy typically generate?
Zero to three trades per week.
00:30
What was the result of the four trades shown in the video?
Three wins (each at least 3R) and one loss, resulting in a net positive of roughly +8R.
15:35
What is the 'golden zone'?
A price level identified using Fibonacci retracement from a swing high to a swing low, where price is expected to retrace before continuing; it can overlap with supply/demand zones.
05:01
What should you do after placing your trade order?
Close the chart and go about your business; you don't need to watch the trade constantly.
08:16
How can you catch a trade without staring at the chart?
Set an alert on the zone/rectangle so you get notified when price reaches that level.
08:45
Why is a 50% win rate enough for this strategy to be profitable?
Because each winning trade targets at least 3R, so three 3R wins and one 1R loss still yields a net gain of +8R.
14:06
The math behind 3R wins
Three 3R wins and one 1R loss equal a net +8R — a concrete, mathematical edge that makes a 50% win rate profitable.
15:35Golden zone meets supply zone
Combining the Fibonacci golden zone with a supply/demand zone creates a high-confluence reversal area, improving the probability of a successful trade.
05:44Alert-based workflow
Setting an alert on the zone lets traders walk away from the screen and still catch setups — critical for those with a 9-to-5.
08:30Internal change of character definition
Clear definition of CHoCH as the first opposite-direction candle body close gives traders a precise entry trigger on the 5-minute chart.
07:06Expect losses, plan for them
The strategy is not perfect, but with 3R targets, a 50% win rate still yields positive expectancy — a realistic and sustainable expectation.
14:06[00:02] boring trading strategy that really works. You can use it for crypto, you can use it for forex as well. This is a strategy I used to trade my prop firm
[00:14] account. Now, in my last trades before this video, this strategy gave me three wins and one loss. But, when I say this, it is not even giving you the full picture because each win is three times the size
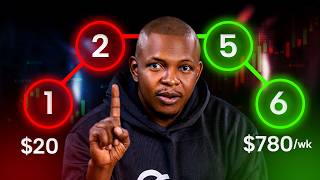
[00:30] of the loss. So, even though it's three win and one loss, the maths actually win and one loss, the maths actually works like nine wins and one loss. I call this strategy boring because it gives zero to three trades a week. That
[00:46] gives zero to three trades a week. That is it. It doesn't take your time. Just a few minutes a day is all you need. So, it is perfect if you have a business or if you have a 9-5. By the end of the video, you will know how to take this
[01:01] video, you will know how to take this trade and how to organize your time so that you can actually catch them. And I'll be explaining all of this with the actual trades that I took. Now, the first thing
[01:14] you do is to pick a time. That is the first step you do, to pick a time to analyze your chart. You can do this in the morning like I do, or you can just pick a time. Just be consistent with that time. When
[01:30] you pick a time, you now have to look at the structure. Now, I'm looking at the Bitcoin chart. Right now, I'm on the 1-hour. And you can see here that my analysis is actually at 7:00 a.m.
[01:43] before the London session opened. Just pick a time and be consistent with that time. Now, once you pick this, you now have to identify the market structure. You can do this on the 1-hour. You can as well
[01:57] go to the 4-hour timeframe and do it. But don't go higher than the 4-hour. Don't go lower than the 1-hour in identifying the market structure. now. We can clearly see that
[02:11] from the higher timeframe perspective, this market has been making higher highs high. So, we have here a break of structure here.
[02:28] So, we have a break of structure here, here, and here. [music] Now, what you notice is the market price did this. Okay, retraced. Retraced. Did this. Okay, so you should expect a
[02:41] retracement this way before it keeps going up. So, mentally I'm thinking that higher, we should see a retracement [music] to at least this region. Okay?
[02:55] going higher or is it going lower. I can now go to the 1-hour timeframe. As a matter of fact, I'm just showing you what happened before this line. You don't even need to go back as far as the 4-hour timeframe. So, on the 1-hour,
[03:10] mind you, I've established that this is the point Okay? Then, if you now look at this, what are we seeing here? We're also seeing break of structure to this side.
[03:23] Again, we are trying to identify the market structure. Break of structure and change of character, basically. Now, if you look at this, we've been breaking structure to the upside here and around here as well. Okay?
[03:39] When the market start breaking down, these are all actually internal. So, these are internal structure uh break of structure. But I can I can call this one this one here change of character
[03:53] this one the change [music] of character, this one here. And this one here also a break of structure to the downside. But, these are actually all internal. Okay? If you look at this, we've broken structure
[04:06] We did this. Broke structure here. Retraced. And what happened again? Price broke structure here again. Now, let me make it neater. So, you see
[04:20] that. So, again, all we're doing is identifying the market structure. Okay? This is a break of structure. With this break of structure to the downside, and mind you, we're trying to get to this particular
[04:33] yellow rectangle I drew. What should I be expecting from here? I should expect a retracement this way. Okay? Then, we keep We should keep breaking structure to the downside till
[04:47] we hit here. Then, from here, based on the action that we have here, we can actually go higher or we keep going lower. But, that is not what I'm bothering myself with right now. What I should bother myself right now is how to
[05:01] treat this market to this point. Okay, so this is is established. I've identified structure on the higher time frame. So, [music] if I pull my Fibonacci tool from this high
[05:15] to this low, you see that yellow triangle? That is my golden zone. I'm just going to mark it out and I'm going to call it my golden zone. This is the price level I'm expecting
[05:30] price to actually retrace from to go lower. Okay? Now, another way to identify the region where I should expect price to retrace from is to mark out the supply and demand zone.
[05:44] So, here right now is a supply zone. People people order block as well, which is also fine. This is all my supply zone. And you can see clearly that it's actually overlapping with the golden zone.
[05:57] So, this is my trade. I'm waiting to see price get into this region and then I trade it down. But, to take this trade here, I have to go down to the 5-minutes time frame to get confirmation. Again, I am
[06:11] on the 1-hour in this [music] trade. What I saw here, because I took a trade what I saw here was opportunity to take a trade from this region
[06:23] and take it higher, then take a trade from here So, what I do right now is to go to the 5-minutes time frame. Go to the 5-minutes time frame, identify a change of character.
[06:37] So, what do I mean? Over here, this is a break of structure on the 5-minutes time frame. I like to call this internal break of structure. That is IBOS. Then, this is the highlight that. So, if I draw this from
[06:52] here all the way to this point, >> you can see there's a candle body closure. So, this is an internal change of character. Change of character is basically
[07:06] the first time price changes direction to the other side. I call it change of character. So, from here, this is my trade. How do I take this trade? We're going long. So, from here to this region.
[07:20] I'm targeting this region, okay? This is one. So, I'm going to bring all this thing all the way down till it gives me at least a three. Okay, this is how you trade. If it's not a three, I don't take it.
[07:35] Then, this is exactly the trade I took. And I then place a limit order from here.
[07:47] You can see price came all the way down, took my order, and what do we see next? We went straight to take profit. So, this is a simple trick. Now, why did you look at this, in the morning, this is around 7:00,
[08:03] I have already identified this. Okay? Mark this, mark this, place my limit order, place my take profits, and that is it. So, this literally took me a
[08:16] very few minutes. It is done. You place it, you close the chart, you go about your business. Okay? So, this is this trade. Now, the second trade is this. You see from this region,
[08:30] we have already established that we expect price to go down from this region. So, this is where we should look for the next trade. All I have to do is simply this. Click on the rectangle, and
[08:45] [music] set an alert on the rectangle. So, whenever price gets there, I get notified. I don't have to be staring at this chart. didn't actually take this trade on Bitcoin. This particular trade, I did
[09:01] not take it on Bitcoin. I took it on Ethereum because I look at the same time. So, I was looking at Bitcoin, Ethereum, and Solana. But, this show you that. So, this one Ethereum, this is a a
[09:16] similar chart at the same time frame. And for Bitcoin, I took the trade here to this region. For Ethereum, I was looking for trades here once I got the alert. So, going down back to the 5-minute time frame,
[09:32] let's look at it. So, the same thing. We have a break of structure here internal. All I have to do right now >> [music] >> is to watch this region, this low.
[09:45] Okay, once price breaks it, I call it an internal change of character. And where low. Now, Now, let's play this forward.
[10:02] broke this level. This then becomes my internal change of character. The same thing is what I do here. Simply take your [music] short position to place it at this
[10:15] High over here. Where is my target? My target is here. to put it here. And I want [music] a minimum risk reward of three. Now, the what I'm doing sometimes you miss trades because you
[10:30] might not always get that three. It's all fine. You mustn't catch every So, this is all I do and I set it and leave it. You can see price just
[10:43] start This is a very lucky trade because price just tapped into that region. And straight and hit take profits. So, this is a second trade. Now, for the fourth trade,
[10:57] So, this is the next trade. We actually broke below this line broke below this line and enter into an efficient region. And because of the CPI data that came out that particular week, I realized
[11:11] out that particular week, I realized that Bitcoin is very, very bearish. So, when I look into this, what we can see here is simple. The same thing, the same structure. And mind you, this here
[11:23] is my 7:00 a.m. I'm going to mark it out. in the morning when I'm when I the charts. You can see here that over here, this same structure, we have what? A break of
[11:37] structure here. Then, how come we mark this? Over here, this particular line here, this way, my supply zone, rather. So, this is my supply zone.
[11:51] supply zone. Okay? So, what you do is this. You put an alert on this line and wait to take a trade when price gets this point. All I need to do is to wait till price
[12:05] gets here. Once price touches this line, it gives me an alert and I can now go down again to the 5-minutes time frame. Let's look at it together. So, the first time price touched here is at this region.
[12:18] Here. It touched here. So, can we identify break of structure and change of character? You clearly see that it didn't come [music] in this region at all. The next time price got here is here.
[12:31] And can we identify a internal break of structure? Yes. So, from here to this point on the 5-minutes is the internal
[12:44] break of structure. And over here is the low that led to that break of structure. So, when that low is broken, it becomes change of character. So,
[12:57] >> [music] >> where is the target? The target is this low here. This becomes the target. And how then do we take this trade? Okay?
[13:11] So, what you do is is very simple. What you do is take your short position to place it here. Here becomes the target. This over here, above,
[13:25] is the stop loss. I want to aim for at least a minimal I want to aim for at least a minimal risk-reward ratio of three. trade. And what do you do?
[13:37] Once you have gotten this, it's simple. Just place your order and go about your Just place your order and go about your business. And price on its own came up, business. And price on its own came up, tapped into the trade, we got in, and it
[13:51] eventually came all the way down and we hit take profits. They're as simple as No, it doesn't work all the time. Let me show you where it doesn't work. So, you see that it doesn't work all the time. But the thing is, if it works
[14:06] 50% of the time, then we are good. Okay, so this is a point where it didn't work. You can see here that we have over here And this becomes
[14:20] our demand zone. Over here becomes our demand zone. If I decide to also pull the Fibonacci tool, bottom, the golden zone also lie in this region.
[14:34] So, this is a region we start looking for a change of character in the lower time frame. So, on the 5 minutes, if you go down to the 5 minutes, you will see that change of character here. Where did they occur?
[14:46] An internal break of structure over here. And an internal change of character over here. So, what do you do again? This very low becomes the target. And
[15:00] >> it's as simple as that. Take a short position from this region over here. And make sure you get at least a 3R. So, this became the trade. So, let's see how this trade actually played out.
[15:23] >> [music] >> and hit take profit, but we were taken out at this region. So, this is not a perfect strategy, but it this is not a perfect strategy, but it does work a lot of the time. And if you
[15:35] look at it, four trades, three of them gave me at least a three hour, which is a nine hour, and one loss. So, that is the eight plus eight [music] hour trade. And this is a bonus strategy I use every single day to trade
[15:50] my prop firm account. So, you can see that this strategy fits into your lifestyle. But the truth is that you can still miss these trades because may just get in the way. You never can tell. That is why I built Copy Me. Real
[16:07] traders, including me, take this exact setup and your account mirrors them setup and your account mirrors them automatically, sized to your own risk >> The waitlist is in the description. We're actually looking to launch by the
[16:21] Now, everything I just showed you is what I on my funded account. But what if you are starting with, say, $50 on your own? That is a different game. Same setup
[16:38] and different ways to take them. And that is exactly what I explained in this that is exactly what I explained in this video right here.



⚡ Saved you 0h 16m reading this? Transcribe any YouTube video for free — no signup needed.