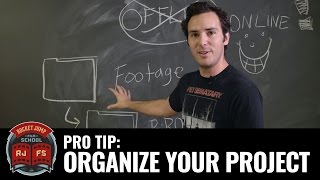

Your Editing Projects Are a Mess—Fix It!
45sRelatable hook comparing editing projects to a messy room, with a clear promise of organization tips.
▶ Play Clip"The title accurately reflects the content, which is a straightforward tutorial on organizing editing projects."
In this video, Joey Scoma from Film School teaches beginner editors how to organize their editing projects. He uses the metaphor of cleaning a room to explain the importance of keeping footage, audio, and other media in folders to prevent offline issues. He also covers organizing the timeline, duplicating sequences, and managing exports.
Organizing your project into folders keeps all media in one place, preventing offline issues and saving time.
After importing, create bins (folders) to sort footage, audio, and B-roll by category or source.
After picture lock, move all clips to the bottom track to keep the timeline clean and organized.
Duplicate your sequence after an assembly to preserve previous versions and allow easy reverting.
Create a dedicated folder for exports, date all files, and maintain consistent naming to track the latest version.
Keep everything in one place
Centralizing media prevents offline issues and saves time tracking down files.
00:39Clean up your timeline
Moving all clips to the bottom track after picture lock keeps the timeline tidy.
02:15Duplicate your sequence
Duplicating sequences allows you to revert to previous versions without losing work.
02:27Organize exports
Creating a dedicated folder for exports and dating files helps track the latest version.
02:54Stay consistent
Consistency in naming and folder structure is key to a maintainable workflow.
03:32[00:01] Your parents ever tell you to clean your room? Yeah, well that's what I'm about to tell you, but with your editing projects. Hi, Film School. Welcome to this Pro Tip. I'm Joey Scoma, and I'm going to teach you how to not be such a slob in your editing programs.
[00:13] Let's start. All right, editors, your project is your room. And if you have a dirty room, you're not going to be able to find everything. Some people can organize their room with piles and piles of messes. But say you're an assistant editor and you hand someone a pile of your dirty clothes,
[00:27] they're not going to know where your socks are. So you want to make things organized. Your footage is your socks. So when you're organizing your projects, you want to put everything into folders and that keeps everything in one place.
[00:39] Have a clean room. If everything's in one place, then none of your media will go offline. And when your media goes offline, it's a pain in the ass to try and track down where your missing clothes are. Makes sense, right? Offline.
[00:51] See, now we're in school. You don't want that. Don't have it scattered all over the place. don't just save things to the desktop, it just start piling up all over the place Keep your room clean You gonna start your project You go file new project Boom You got a new project And you start bringing things in You going to bring in all your footage You going to bring in all your audio
[01:09] Great. Everything's imported. Okay, now let's start editing. WRONG! You might be asking yourself, why can't I start editing? Now you have to start organizing things inside your project. So you start making bins.
[01:21] Also known as folders. And you sort everything where it needs to go. Setting up your project is everything because it might take a second to do it, but it will save you time in the end. As you import new things, say I need a shot from Dawn of the Dead.
[01:35] I find that shot, make a new folder for clips, and you just start keeping your things organized. Did I say this? This is a folder, and that's footage in the folder. Inside here, you're probably going to have some B-roll. Within the B-roll, you might have more B-roll that you just got to sort through.
[01:49] So to make life easier, you say, oh, well, let's just say this is just the VGP B-roll. So this is everything inside Vincent Guastini's studio. Now I know where to find it. He'll begin right now by putting his jacket and cap away
[02:02] where they belong Then he know just where to find them tomorrow morning That another one of his responsibilities So you organize you organized Look at that That great You organize here but then once you finally have a cut of your project
[02:15] you want to organize your timeline. So what Freddy likes to do, and I've just adopted this method, is once you have a picture lock and you're happy with that cut, you bring everything down to the bottom track. That keeps the timeline nice and clean.
[02:27] We'll probably do another video on timeline stuff, so we'll get into this later. Now once you have an assembly, I like to duplicate my sequence. That way I can always go back to any version of the film I've cut. If you're like, I don't like this edit, I like how it was before, you can go back.
[02:42] You don't have to delete anything. So do that, and you're good. So now, once you're done with your friggin' project inside your timeline, guess what? You start exporting different versions of it. You have a rough cut, you have a final cut.
[02:54] Where are those all going to go to? You guessed it, you're going to make a folder to export it to. when you export cuts, put them back where you found it. But make a new place to find it. And date everything, put a date on it.
[03:07] That way you can find the most recent version You title everything the same you screwed I feel like I the guy in Ancient Aliens just trying to get people to believe me you know Hey there flying saucers around trust me old
[03:20] Clean your room! Yeah, clean your room, Old Testament! Instructions were given, whatever you do, don't look back. If you've made it with me this far, all I have to say is, everyone has a different method,
[03:32] but just stay consistent, you know? If you don't want to call your folder footage and and we want to call it media, great. Put everything in a media folder. If you're doing this to your own projects, you're making your own projects, then you must know what it's like to have media go offline.
[03:47] You've learned from that, hopefully. You keep everything in one place. Thanks for listening. And now start editing. Clean your room. Clean your room.
[04:05] So this video hopefully introduced you to some basic concepts. If you want to get a more in-depth look at our folder breakdown thing, here's this document over here. Check it out. It's right there.

⚡ Saved you 0h 04m reading this? Transcribe any YouTube video for free — no signup needed.