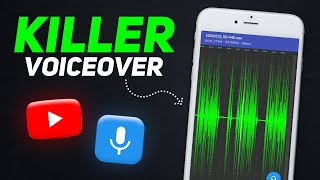

You Don't Need a Mic for Good Audio!
45sChallenges a common belief and reveals that a phone's built-in mic is enough, which is a relatable pain point for new creators.
▶ Play Clip"The title promises a full guide, and the video delivers exactly that—comprehensive, actionable steps without fluff."
This video provides a comprehensive, step-by-step guide to recording professional voiceovers for YouTube videos using just a smartphone. It covers everything from equipment and environment setup to recording techniques and post-production editing, emphasizing that high-quality audio is achievable without expensive gear.
The video addresses the most requested topic from the audience: how to record professional voiceovers without expensive equipment.
The creator emphasizes that a smartphone's built-in microphone is sufficient for high-quality audio, as they started their channel with just that until reaching 10,000 subscribers.
The Boya BY-M1 is recommended as a cheap collar mic that improves voice clarity, though it doesn't help with noise cancellation.
The default voice recorder on a phone is sufficient, but the creator personally uses RecForge II, with a link in the description.
A quiet, echo-free space is essential. Noise can be removed in editing, but it's better to avoid it. Recording late at night or early morning can help if there's unavoidable noise.
More objects in a room reduce echo. Acoustic panels are an option, but a pro tip is to record in a small, cluttered space like a closet filled with clothes and cushions.
Standing up improves voice control. The phone's mic should be close to the face, with distance adjusted for best results.
Recording at a slightly higher volume than normal conversation adds energy to the voiceover, similar to how teachers raise their voice in class.
Record the script in parts, taking breaks to rest the voice and stay hydrated, especially for longer scripts.
Technical improvements only account for 50% of a professional voice; the other 50% comes from speaking style, which is crucial even with the best equipment.
The four key aspects are pronunciation, pacing, emphasis, and avoiding monotony. These are basic but often overlooked by creators.
Clearly pronounce each word to ensure understanding; otherwise, the message may be lost.
Maintain a moderate pace—not too fast or too slow—to keep the audience engaged and ensure clarity.
Emphasize certain words to highlight key points and make the delivery more engaging, as demonstrated with a sentence example.
A monotone voice is boring; vary pitch, tone, volume, and pauses to keep the audience interested.
For noise removal, tools like Adobe Podcast Enhance and Lexis Audio Editor are recommended, with specific steps for using Lexis Audio Editor's noise reduction and equalizer.
After editing, the voiceover is ready for use in videos. The creator also mentions a playlist for detailed video editing tutorials.
By following the steps outlined—from equipment and environment setup to recording techniques and post-production editing—anyone can achieve professional-sounding voiceovers using just a smartphone. The key is to focus on both technical quality and speaking style.
What is the minimum equipment needed to record a professional voiceover?
A smartphone's built-in microphone is sufficient; the creator started with just that until 10,000 subscribers.
00:34
Which affordable collar mic is recommended in the video?
The Boya BY-M1.
00:49
What is the pro tip to reduce echo when recording?
Record in a small, cluttered space like a closet filled with clothes, cushions, and books.
02:22
Why should you stand up while recording a voiceover?
Standing up helps you have better control over your voice and improves quality.
02:36
What volume level should you use when recording a voiceover?
Record at a slightly higher volume than normal conversation to add energy.
03:05
What are the four aspects of speaking style that make a voiceover sound professional?
Pronunciation, pacing, emphasis, and avoiding monotony.
04:51
What is the recommended pacing for a voiceover?
A moderate pace—not too fast or too slow—for proper storytelling.
05:21
How can you avoid a monotonous voice?
Vary pitch, tone, volume, and pauses to keep the audience engaged.
06:22
Which tool can be used for automatic noise removal?
Adobe Podcast Enhance.
07:12
In Lexis Audio Editor, what does increasing the threshold in noise reduction do?
It removes more noise, but increasing it too much can degrade audio quality.
07:25
Phone Mic is Enough
Debunks the myth that expensive microphones are necessary for professional audio.
00:34Closet Recording Hack
A practical, low-cost solution for reducing echo that anyone can implement.
02:22Speaking Style is 50% of the Equation
Highlights that technical quality alone isn't enough; delivery is equally important.
04:06Four Pillars of Professional Voiceover
Provides a clear framework (pronunciation, pacing, emphasis, monotony) for improving voiceover quality.
05:04Free Noise Removal Tools
Offers accessible solutions for cleaning up audio without expensive software.
07:12[00:00] This is literally our audience's most requested video. Most people think that they need an expensive microphone and advanced editing software to In this video, I will walk you through my step-by-step process and share some secrets
[00:17] The output will be so good that trust me, you won't even need extensive editing. But first, let's talk about the things you'll need to record good audio. Many people, especially new creators, believe they can't record good audio without a microphone.
[00:34] You can even record high-quality audio using your smartphone's built-in microphone. In fact, I started this channel with just my phone's built-in mic until I reached 10,000 So, I can easily say that your phone alone is enough for a good voiceover.
[00:49] But if possible, I strongly recommend investing in an affordable collar mic. Currently, I'm using the Boya BY-M1, which is a very cheap mic. I have a voice sample, listen to it.
[01:04] (PLAYING SAMPLES) You must have observed that the voice clarity with the mic is comparatively better than without. This mic isn't very helpful for noise cancellation, so for that, you'll need to do something else,
[01:21] Talking about sound recording apps, you can use your phone's default voice recorder. I personally use RecForge II; the link is in the description. After mic and app, now we need to set up a perfect environment for recording the audio.
[01:34] For a good voiceover, you need a place with no noise or echo. While noise can be removed with editing, I prefer not to rely on editing for this purpose. If there's still noise, try recording very late at night or early in the morning when
[01:55] After this, you need to remove echo. The more objects in the room, the less echo there will be, and the emptier the room, the
[02:07] If you already have them, even better. Additionally, if you wish, you can buy Acoustic sound panels that YouTubers use in their videos, If you want a pro tip to reduce echo: Record in a small space.
[02:22] For example, you can stuff a closet with clothes, cushions, books, and place your phone inside You'll notice that the echo decreases, and clarity improves. After doing all this, you're now ready to finally record the voiceover.
[02:36] Standing up helps you have better control over your voice and improves the quality of Then bring the script in front of you and place it where it's easy to read.
[02:52] Next, if you're using your phone's microphone, bring the phone's mic close to your face, Although this distance may vary, find what works for you. Now, many ask how loud their volume should be while recording a voiceover.
[03:05] One thing I've observed is that if you record at the same volume as you talk in daily life, So, if you want your voiceover to have at least normal energy, then while recording,
[03:19] Just like how teachers increase their volume slightly while reading in class, keep it a Now, when you start recording, remember not to record the entire script at once, but break For instance, if I have to explain 4 points in the script, I can take a break after each
[03:38] point's recording for a few minutes, and during the break, I'll have some water as well. This is especially important if the script is long, to rest your voice and prevent vocal Alright!
[03:51] Now the question is, will we achieve a professional voice by doing all this? Everything I've mentioned so far, if you follow, your audio quality for the voiceover will be excellent (which means no noise, echo, inconsistency issues).
[04:06] But, will these improvements make your voice sound better? For the remaining 50%, you'll need to improve the way you speak, i.e., your speaking style. And this is crucial because without it, even with the best microphone and advanced editing,
[04:20] So, one day, I was watching some videos on YouTube under the hashtag #decodingyt that And I observed that although the information was mostly the same in most videos, the thumbnail and editing were similar, but some videos got more views while others got fewer...
[04:35] When I started watching these videos, I realized that the key factor was the voiceover. Those videos with fewer views were not focusing on these 4 aspects, and hence, their voiceovers In fact, if you improve on these 4 aspects, your voiceovers will instantly sound professional.
[04:51] And yes, everyone has a good voice; it's just about how you speak that makes a difference, It's a basic thing, but if it's not correct, people won't understand you well, and even
[05:04] So, if you want to sound professional, you need to clearly pronounce each word without Point no.2 is Pacing, which means the speed and tempo at which you read the script.
[05:21] If you speak too fast, people might have trouble understanding you, and if you speak too slowly, It's important to strike a moderate pace for proper storytelling. adjust your pacing accordingly.
[05:36] When reading sentences from the script, you can't say all the words in the same way. Some words need more emphasis, which will highlight them and effectively convey the If I read every word the same way, it would sound bad: "what if I tell you ki YouTube
[05:55] Now, if I emphasize some words while reading the same sentence: "what if I tell you ki YouTube pe grow krne k liye subscribers ki zarurat nhi h."
[06:07] As you heard, it sounded better due to the right emphasis. 4: Don't be Monotonous. If your voice sounds boring, chances are you're speaking in a monotone.
[06:22] that many of them make this mistake. A monotone voice is where the pitch, tone, volume, and pauses remain at the same level For example, if there's a sentence, you can't read it like: "How to Record a Professional
[06:39] This is a monotonous voice without any tone. And that's it! These four points are very basic, but many creators still make mistakes in these areas.
[06:56] If you find it hard to improve each point one by one, I recommend watching videos from You'll learn a lot. First, if there's noise in your audio even after closing all doors and windows, you can
[07:12] Simply import your audio file, click upload, and you'll get noise-free high-quality audio. Additionally, there's an app called Lexis Audio Editor, which is popular among creators
[07:25] Import your voiceover, click the three dots on top, and then click on noise reduction. Here, you'll see the threshold option; increasing it removes more noise, but don't increase
[07:38] After noise reduction, move to the Equalizer/Amplifier section. Here, you can increase the bass using the left bars and increase the treble using the Raising the right bars makes your voice crispy, while lowering the left bars reduces the crispness.
[07:55] So, I need to balance both; I'll raise the first three bars and the last three bars like You can try these settings, but everyone's voice is different, so you might need to experiment
[08:07] Below that, you'll see the pre-amplifier option. it too much, or your voice might crack. Finally, you can normalize the audio to maintain a certain level, and then save your audio.
[08:26] And there you have it, your voiceover editing is done, and you can use it in your videos. So, up to this point, I want to congratulate you because by watching this video, you've But remember, video editing matters too for engaging videos.
[08:43] If you want to learn step-by-step detailed video editing like mine, click on the playlist Goodbye!



⚡ Saved you 0h 08m reading this? Transcribe any YouTube video for free — no signup needed.