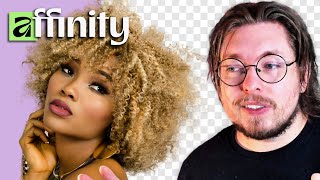

Cut Out Hair in Affinity Photo!
45sDirectly addresses a common pain point, promising a solution for a notoriously difficult task.
▶ Play Clip"The title promises a hair-cutting tutorial and the video delivers a straightforward, step-by-step demonstration without exaggeration."
This video demonstrates how to cut out hair from a photo using Affinity Photo's Refine Selection tool. The creator emphasizes that while the process is similar to cutting out other objects, hair requires extra care due to its fine details. They walk through the entire workflow, from making a rough selection to refining edges and outputting a clean mask.
Start by switching to Pixel mode and selecting the Selection Brush tool to make a rough selection of the subject, focusing on hair.
Useful shortcut: hold Control + Alt, click, and drag left/right to resize brush, up/down to adjust hardness.
Use the Refine Selection tool (accessible when a selection tool is active) to refine edges by painting over the boundary, not tracing it precisely.
Enable 'Color Decontamination' to remove background bleed, especially important for hair with frizz.
Adjust the 'Ramp' setting to control how much background is pushed into the subject; each photo may require different values.
Choose the output mode (new layer or mask) and apply; then toggle the original image to see the true result.
Duplicate the cut-out layer and reduce its opacity to add volume back to the hair, compensating for lost thickness.
What is the first step to cut out hair in Affinity Photo?
Go to pixel mode, select the Selection Brush tool, and roughly paint over the subject, focusing on the hair area.
00:56
How do you resize the brush in Affinity Photo?
Hold down Control + Alt and click with the mouse, then drag left/right to resize and up/down to adjust hardness.
01:24
Which tool in Affinity Photo helps refine edges, especially for hair?
The Refine Selection tool, opened by clicking 'Refine' while a selection tool is active, uses a matte brush to define subject vs. background edges.
02:39
What does the 'Color Decontamination' option do?
Color Decontamination reduces color spill from the background bleeding into the subject.
05:11
What is the function of the 'Ramp' setting in the Refine Selection panel?
Ramp determines how much background is pushed into the subject and vice versa, affecting edge softness and bleed.
06:04
How can you output the refined selection in Affinity Photo?
The 'Output' setting lets you choose to create a new layer or apply a mask to cut out the subject immediately.
06:51
What technique is suggested to compensate for reduced hair volume after cutting out frizzy hair?
Duplicate the cut-out layer, increase its opacity, and lower it to add volume, compensating for lost hair thickness.
08:24
Why is a high-resolution photo recommended for cutting out hair?
Using high-resolution photos ensures better results because low-resolution images lack detail for fine hair edges.
04:34
Brush Resize Shortcut
A practical keyboard shortcut that speeds up precision work and is commonly used in professional editing.
01:24Refine Brush Strategy
Instead of tracing edges, brush broadly over hair to mark background vs. subject, making the process faster and more effective.
02:53Color Decontamination
Effectively removes background spill, a key step for clean cutouts on hair with many fine strands.
05:11Effect of Resolution
Highlights that photo resolution directly impacts the quality of the cutout, a common pitfall for beginners.
04:34Volume Compensation
A clever workaround to restore hair thickness lost during cutout, showing a creative problem-solving approach.
08:24[00:00] So today I'm going to show you how you can cut out hair inside your photo inside Affinity. So in the last video I showed you how you can cut out different objects using the refine tool
[00:13] inside Affinity and people were wondering you know what exactly do you do for hair because that is a slightly more complex procedure since hair is a lot more fine and when it comes to hair it is
[00:25] actually the exact same process as I showed in the last video so if you want to have a much more in-depth explanation of the refine tool. I do have another video that I'll link inside the description that does show how the refine tool works more in depth. But for this one, I'm just
[00:40] kind of going to take things a little bit faster. So I have a subject here and my goal is to basically remove the hair. Then once we're done, I'm going to take the new version and put it on the canvas or inside the artboard on the side over here. So we kind of compare to see how well did
[00:56] So the first thing you want to do here is you want to make sure you go into a pixel mode and you want to choose some sort of selection tool. In this case I'm just going to choose my selection brush tool so I can just kind of like roughly choose my subject.
[01:09] And we're just going to worry about the hair for now. So inside my photo here I'm just going to go over the subject and do a selection. You can increase the size a little bit. By the way for people who don't know the shortcut for increasing brush sizes you can hold down
[01:24] control alt and then click with your mouse button and then go left and right. If you have hardness on your brush as well, up and down is going to increase and soften the brush which is something that's just a really good shortcut to know about. So we're just going to go through the subject here and just select
[01:39] as much as possible. It doesn't have to be perfect, you just need to have somewhat around the edges there because you will afterwards using the refine tool go in and just make a much more perfect selection when it comes to the edges
[01:53] there. So I'm just going to go ahead and select here and just going to add a softener or make my brush a little bit smaller. Just going to select the hair here. I'm going to try to not cut out this process because some people will not believe me if I cut out some parts
[02:08] of the video. Oh, I cheated, they'll say. So we're going to go ahead and pick as much hair as possible. I'm just going to go up and pick a little bit more there. As soon as you pick everything inside the body here, I'm just going to be able to do that. I think
[02:20] we're roughly good. Now the jewelry here we're not going to worry too much about. So let's stick to the hair for now. Good So now that we have a selection I going to go up and make sure I have one of these selection tools selected Because when you have one of those you can pick something called refine So if I click it you can see we get refine selection
[02:39] Now, refine selection basically tells you how do you want to basically refine the edges of your selection. So by default, you're going to have this matte brush tool that you can, again, can increase and decrease in size.
[02:53] and you just want to run it across the edges to tell it what part of the background, what parts of the subject. So you want to make sure you don't do this where you make it really small and you go around and trace the edges because that's not really our goal here. Our
[03:07] goal is to tell the software where the background is and what part of the subject. So we're going to have a slightly larger brush, especially when you have this much hair going on. You want to have a larger brush size. So I'm going to start by the bottom right corner here.
[03:21] I'm just going to draw across and make sure you get all the little hairs. So there's some hair in the background there that's kind of like sticking out because it's very, what is the word, like fizzly. Like it's just all over the place there.
[03:34] There's a little bit of hair there. I'm just going to make sure I get that. Make sure you go a little bit into the hair because there is some background elements showing through the hair. So I want to make sure you do that as well. And again, this is a process. and a lot of people want like a magic wand where they just kind of like do this in one step and
[03:51] they don't have to do anything but it is kind of a more than artistic sort of like process to to remove hair so we're just going to do that step by step again like i said this is a slightly
[04:03] faster not as in-depth tutorial so this is more or less oh you can go into refine hey let's go ahead and draw out the edges here um but tweaking the settings inside the refine selection tool is something that is required in order to get the right effect. And if you are sitting with
[04:19] a different photo than mine, you're going to need to have different settings inside your refine tool. A lot of people follow tutorials and they draw around like I do here and it doesn't look quite right. And it's because whoever is sitting with the photo also, another
[04:34] important point, if you have a very low res photo where the pixels aren't very big or like very detailed, this is going to be a lot less of a good result as well. So you do want to make sure you have high res photos
[04:47] as much as possible when you do this sort of thing. Okay, so we got the hair. Not gonna worry too much about the jewelry here, just the hair for now. So what I going to do is I gonna go inside a different preview mode I gonna choose black matte so you can just kinda see what is going on here and as you can see we do have some hair selected Now in order to avoid some of that spill which you can see we have
[05:11] here which is kind of when the background bleeds into our subject I'm going to click on color decontamination and then you can see that kind of goes away. So it's already looking quite good. We can always tweak some of these
[05:25] settings inside our refine selection for example there's some hair over here I do want to make sure that we do get all the hair so it's not you know not making a
[05:37] good selection there so I'm just going to try to adjust this as much as possible you can do some redo and undo clicking control set control shift set to do those two things but again we're just kind of going through and you know
[05:51] making more of some artistic choices here to make sure that things are looking just right so now with a selection that we might quite like we can go in and start adjusting some of these settings so inside the ramp
[06:04] setting I can just kind of like experiment with a little bit I can drag it a bit to the side see what happens I can try to drag it to the other side you can see now it takes away some hair let's go back to the other side just kind of see oh now we start getting some bleed in from the background let's go
[06:19] back down to zero just to kind of see the difference here so you can always tweak how you want these settings to be and rent just basically determines how much background are we going to try and push into this object and how much of the subject i'm going to try and push out to the background
[06:34] so we're ramping to one side or the other again i have another video this kind of like takes this in detail let's see if 15 might be a little bit better uh so let's go and do that so again we we can do before after before after so once you're satisfied with your refined
[06:51] selection properties here in order to just sort of set everything correct the next thing we can do is you can go in and say what kind of output mode do we want to have do we just want to have this as a new layer or should we actually go in and have this masked out so I'm going to go ahead and mask this out
[07:07] because I just wanted to cut it out immediately I'm going to click apply so So now what I'm going to do is I'm going to untoggle the original image which is in the background and don't get tricked by the fact that now the hair looks more volumptuous once I untoggle
[07:22] the visibility because there is some alpha going on inside the hair which means that the transparencies around the edges are going to get much more thick once I toggle this on As you can see this is not the same image as the other one In fact we would have to do this to get a more accurate read on before
[07:42] and after. Let's go ahead and take the new version and just sort of drag it over inside the other artboard here. Just going to drag it over. There we go. So now we have the new version on the right side and we have the old version or the original inside the left
[07:58] side here, so we can see the before and after. And as you can see, there are of course going to be slight differences. It's not perfect. And that, again, has to do with the fact that you have to sit there and tweak some of the settings, and also the fact that whenever
[08:11] you remove some background, it's almost unavoidable, especially on very frizzy hair like she has, to 100% cut out the background without accidentally taking away some of the hair. Now, something
[08:24] you can do to counteract this is to duplicate the version that you output so we're just going to take the new version we're going to duplicate it here then you see we get a lot more volume inside the hair then we just sort of tone down
[08:37] the opacity it's just sort of make up for that so maybe around let's say 15% so now if I do before and after just so you can see this is before this is after this is slight difference that's going on over here and just kind of like draw
[08:51] in a background, this could be this very dark green here, just going to draw it in. You can see that we do have the hair actually cut out. If we were to pick something a little lighter, because that might
[09:03] make a little more sense, because we do have some very light color against dark color that can kind of shake the eye, but then you can see if I pick a lighter color, now I can also see all those fine hairs in detail and all of that. So this is how you can cut out hair from
[09:20] backgrounds. Some people were very unhappy with me not using very delicate and frizzy hair in the last video, but the point was just kind of like to show the the refine tool in more detail. And again, like I said, watch that video if you
[09:35] want to have more detailed video. This one focuses more around just very quickly just cutting out hair so you can see how do you do that using the refined tool. So as you can see, before, after. So with that said, thank you so much for watching
[09:48] and I'll see you guys next time.




⚡ Saved you 0h 10m reading this? Transcribe any YouTube video for free — no signup needed.