
AI Summary
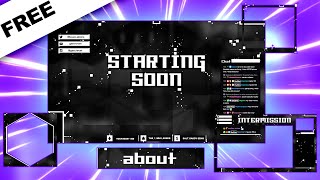
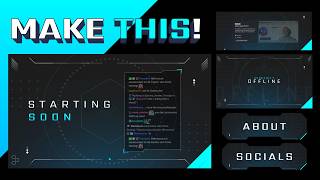
The video is a recap of the creator's process for designing a Twitch overlay pack using Photo P, a free Photoshop alternative. The creator demonstrates how to create a starting soon screen, offline image, banner, and panels, sharing tips on typography, color, and layout. The full unedited process is available to members.
Chapters
The creator has released new templates on photop.com; users can search the creator's name in the template section to find them.
The video is a condensed recap; the full unedited process is about 1 hour 18 minutes and is available as a member-only video to avoid retention issues.
Uses Photo P (free Photoshop alternative) with the pen tool for custom shapes, keyboard shortcuts for outlines, and opacity variations for detail.
Uses a grid as a guide, adds pluses with the text tool, duplicates them, lowers opacity, and duplicates the pattern for background detail.
Spends time on font selection; advises matching font style to the design vibe (e.g., not using bubbly fonts for futuristic designs). Increases tracking (letter spacing) for a clean, luxurious look.
Adds color accents and gradients; the gray background allows any color to fit. Uses gradient on the 'soon' word and adds a light effect from the bottom.
The starting soon screen takes the most time; once done, the rest is copy-paste. The creator also posts templates but had to re-record due to a shape making 'soon' look like 'I soon'.
Creates a classic 'currently offline' centered text, duplicates with Gaussian blur and lowered opacity, and sets blend mode to react to colors underneath.
Checks Twitch banner size, copies background and details from starting soon screen, and creates a symmetrical design.
For each panel, changes text and exports as PNG. Advises starting with the biggest word (e.g., Instagram) to ensure all text fits at the same size.
Had an issue exporting as a template (turned white); fixed by changing clipping mask to a normal raster mask.
The video provides a practical walkthrough for creating a cohesive Twitch overlay pack using free tools, emphasizing efficiency and design consistency. The creator encourages viewers to check out the templates and subscribe for more content.
Mentioned in this Video
Tutorial Checklist
Study Flashcards (5)
What tool does the creator use as a free Photoshop alternative?
easy
Click to reveal answer
What tool does the creator use as a free Photoshop alternative?
Photo P
00:58
What is the purpose of increasing tracking in typography?
medium
Click to reveal answer
What is the purpose of increasing tracking in typography?
To make the text look cleaner and more luxurious, as luxury brands do.
02:29
Why is it recommended to start with the biggest word when creating panels?
medium
Click to reveal answer
Why is it recommended to start with the biggest word when creating panels?
To ensure all text for all panels is the same size, and if the biggest word fits, the others will too.
07:02
What issue did the creator encounter when exporting a template, and how was it fixed?
hard
Click to reveal answer
What issue did the creator encounter when exporting a template, and how was it fixed?
The template turned white; fixed by changing the clipping mask to a normal raster mask.
07:33
What is the typical time for the full unedited process of creating the overlay pack?
easy
Click to reveal answer
What is the typical time for the full unedited process of creating the overlay pack?
About 1 hour and 18 minutes.
00:16
💡 Key Takeaways
Typography Tip
Explains how increasing letter spacing (tracking) creates a clean, luxurious look, a technique used by high-end brands.
02:29Efficiency Insight
The starting soon screen takes the most time; once done, the rest is copy-paste, saving significant effort.
04:44Panel Design Principle
Starting with the biggest word ensures consistent text sizing across all panels, a practical design principle.
07:02Troubleshooting Export
Demonstrates a specific fix for a common export issue in Photo P, valuable for users facing similar problems.
07:33Full Transcript
[00:02] we have pretty much a recap of how I created a bunch of new templates that are available right now over at photop.com. template section and type my name in the search bar and you will see it. In
[00:16] [music] this video, I plan on just showing you the process. This is a thing and also yapping. [music] If you want to see the whole video without any edits, it's about 1 hour [music] and 18 minutes. um then you can
[00:30] a member only video. The reason [music] I do that is so that so that I don't retention on my on my channel, right? [music] me if I put a 1 hour video and people will just click off after 3
[00:44] minutes. Okay. So instead, I'm going to yap over this and hopefully this 3 minutes is going to be, you know, a good uh 25% of the video, [music] which is a pretty high audience rate attention. All right, so I use Photo P. It's completely
[00:58] Photoshop. [music] And uh I use the pen tool to do like custom shapes, shapes that are not like primitive. And then after that, I use as a keyboard shortcut. And then you just create those outlines. You can
[01:12] immediately create the outline without having like a fill color. So this is uh what I used. And I I did a couple of those squares [music] that I rotated and with the opacity to kind of give them more variation. I'm basically just
[01:26] filling out [music] the gray background to give it, you know, some detail without without it being too um too complex, [music] right? Just something to to kind of look at to make it feel uh less empty. Here,
[01:39] I'm using the grid as a guide so I can add just [music] a couple of pluses, like literally the text tool, pressing plus, and then duplicating them so I can have like a little grid of uh pluses. I [music] lower the opacity on that and
[01:52] then I duplicate it. I place um one in the [music] middle. And at this point, I was ready to, you know, start doing my text. So, of course, the [music] text is with the text tool. Uh I usually spend a lot of time messing around with the
[02:05] font, not going to lie. And I do. I did this time, even though I tried to go way this time, even though I tried to go way faster than usual, but um my advice here matches [music] the vibe that you're going for with the
[02:17] >> [music] >> uh this design, for example, having something that is super round, super bubbly wouldn't work. [music] Having something that is grungy, like a brush stroke or something like that, it
[02:29] that is clean and that is kind of futuristic, right? I [music] even um increased the tracking on on the text. The tracking is basically the distance in between letters to make it look a little bit
[02:43] more clean. This is what luxury brands [music] do for example to make their stuff look luxurious and clean. They put like a lot of space in between the Here I'm creating uh an extra shape for the chat cuz I [music] ended up not
[02:56] going with something in the middle for the text. So text is left side and then chat is going [music] to be on the right side. And here I realized that I wanted [music] color actually and I forgot to add that.
[03:09] it. I [music] added this little bar to add a little accent, but I'm going to end up removing it because uh what I'm going to do is the word soon is going order to avoid confusion, I'm going to remove that bar here. I'm creating a
[03:24] little accent, and [music] then I'm adding that gradient that I talked about. Um here, I'm adding just a little uh circle with the gradient, and it's starting to take shape. [music] Since the the background is already pretty
[03:37] much gray and different shades of gray, uh it's easy to add any color. [music] Literally any color would absolutely fit in there. You can see me play around with the gradient. As I said, the the soon word will will contain that that
[03:50] [music] gradient this time. And in here, I'm finally adding more overall color to [music] to kind of imitate some sort of light coming from the bottom. And I used both colors from the gradient. I started with the darker color or the bluer color
[04:04] if you will and then I [music] moved on to the teal/ turquoise um/mint kind of not really. Uh here I'm adding this extra [music] on the corner, the bottom
[04:16] right corner. And initially I wanted to put it on both sides. I love to [music] do things always symmetrical and always have like uh the color bottom right and like, you know what, it actually looks good enough on the right side. So, I'm
[04:30] just like that, our starting soon screen was done. When we're making overlay packs, working on the starting soon is going to be the thing that, you know, takes the most time. And, uh, fortunately, we had that pretty much
[04:44] done. [music] And the rest is pretty much going to be like copy paste. You're towards the rest. This was half of the time. Uh, keeping in mind that we need to make a banner, we [music] need to make panels, and we need to make an
[04:57] offline image. And on top of that, I'm taking the [music] time to actually post You can see me post this as a template. But then I realized that that shape next to the [music] soon made it look like it's spelled I soon. So, I would have to
[05:10] delete that template and re-record it. So, what I decided [music] is to make it gray, lower the opacity, make it the same size, just like a little bit of detail that is way less um prevalent. Okay. And then I re-uploaded the [music]
[05:23] template. So now our starting soon is done and we can work on our offline. I decided to do the classic currently offline, center it, remove the chat frame that I had created. And here I'm duplicating the text, [music] making it
[05:36] um blurry with a gshian blur and then lowering the opacity and also setting it reacts to the colors underneath it. And that was it. That was the offline image. That's how fast it was. So, here on Twitch, I [music] went to check the
[05:50] banner size um so that I could recreate it. And here you can see me showing all [music] the different ways that you can just copy and paste the background from your starting soon screen to um well to [music] just add it to your banner and
[06:03] then your banner is done. So, what I did here is copy the background separately and then I copied the [music] details separately. And then here you can see me symmetrical. In the end, I [music] ended up with this design. Much more simpler
[06:18] [music] the banner is done. As I told you, it's it's way faster. Now, for the um panels and for each each uh for each thing here, [music] is change the text and then export. By the way, you export by going to file,
[06:33] export [music] as, and PNG, and you have it. Okay. Um first. The first shape I absolutely hated, so I decided to go with a shape where I could um Oh, there's an ambulance passing by. A shape that I
[06:49] could just duplicate and mirror. I'm not super proud, not super happy with the the final shape. It looks like a dog toy, but uh we got to do what we got to do. Uh my tip here is you want to start with
[07:02] your biggest word. For me, usually it's Instagram because you want to you want all of your text for all of your panels to be the same size. And if they are the great. And if you start with the biggest word, that means that every other word
[07:17] is going to fit [music] in there. Okay, so I tried type schedule, type everything else, specs, just the typical um Twitch streamer handle stuff [music] right here. I had an issue with photo. It would not let me export this as a
[07:33] template. It kept making it white, [music] but I tried enough times to to finally make it work. I had to change my um clipping mask. For some reason, it was turning it into a white smart object, but uh after creating a normal
[07:46] raster mask, it worked and I was very happy about it. And just like that, template where you can make a starting soon screen, you can make a bite back, second one for your offline image. And then you have your banner ready for your
[08:01] Twitch. And then you have your panels. That's it. photo.com. Check out the templates and [music] make sure you subscribe here if you want to see more. membership if you would like to see the full unedited video of me creating this
[08:16] and explaining my process [music] step by step. Thank you for watching.