
Local LLM Setup Revealed!
45sThe creator addresses the most common question from viewers, creating immediate curiosity and engagement.
▶ Play Clip"Title accurately reflects content: the video delivers a complete guide to running a local LLM with Ollama and Home Assistant."
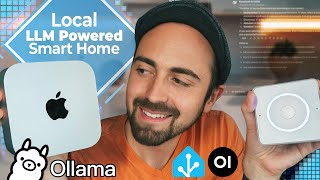
The video demonstrates how to run a local LLM using Ollama on a Mac Mini M4 Pro, integrated with Home Assistant for voice control and a WLED animation to visualize LLM activity. The setup prioritizes speed and reliability through cached responses and multiple models.
The creator runs Ollama on a Mac Mini M4 Pro, integrated with Home Assistant and a WLED animation that visualizes LLM workload.
Apple Silicon's unified memory architecture allows GPU and CPU to share memory, giving models more headroom compared to Windows machines with limited VRAM.
To improve speed, the creator uses cached responses: a larger model generates summaries (e.g., weather) periodically, which are cached and served instantly by a lightweight model for real-time voice interactions.
A WLED animation (SOAP) speeds up or slows down based on the Mac Mini's power draw, visually indicating LLM activity. The Mac Mini idles at <5W and peaks at 65W.
Steps: set a static IP, download Ollama from ollama.com, drag to Applications, run it, and expose it to the network via settings.
Use command 'ollama run <model> verbose' to download and test models. Example: 'ollama run qwen2.5:4b verbose'.
For Home Assistant voice, 50 tokens per second is the minimum; larger models like DeepSeek 32B run at ~10 tokens/s, usable for background tasks but not real-time.
Models must support tool use. The creator recommends Qwen 3 (4B or 8B) for Home Assistant; Mistral 3 24B for heavier tasks. Avoid Llama models due to errors.
Add Ollama integration in Home Assistant, enter the Mac Mini's IP address and port (11434), then add conversation agents for different models.
Open Web UI provides a ChatGPT-like interface to interact with Ollama models, allowing side-by-side comparison of different models.
Running a local LLM with Ollama on a Mac Mini is feasible and efficient, especially with Apple Silicon. Using cached responses and multiple models optimizes speed and accuracy for Home Assistant voice control.
What is the main advantage of Apple Silicon for running local LLMs?
Unified memory architecture allows GPU and CPU to share a common memory pool, giving models more headroom compared to limited VRAM on Windows machines.
0:55
What is the 'cached responses' strategy?
A larger model generates summaries (e.g., weather) periodically, which are cached and served instantly by a lightweight model for real-time voice interactions.
2:30
What command is used to download and test a model in Ollama?
'ollama run <model> verbose' (e.g., 'ollama run qwen2.5:4b verbose').
6:45
What is the minimum tokens per second recommended for Home Assistant voice?
50 tokens per second.
9:00
Which model does the creator recommend for Home Assistant?
Qwen 3 (4B or 8B parameter model).
10:37
What port does Ollama use by default?
11434.
6:23
What is Open Web UI?
A local ChatGPT-style interface that lets you interact with Ollama models in a traditional chat-based format.
13:47
What is the idle power consumption of the Mac Mini M4 Pro?
Less than 5 watts.
4:34
Apple Silicon Advantage
Explains why Apple Silicon is cost-effective for local LLMs due to unified memory.
0:55Cached Responses Strategy
Key technique to make local LLMs fast enough for real-time voice interactions.
2:30Mac Mini Efficiency
Demonstrates low power consumption (idle <5W, peak 65W) making it economical for 24/7 LLM hosting.
4:34Speed Threshold for Voice
Establishes 50 tokens per second as minimum for usable Home Assistant voice responses.
9:00Recommended Model for Home Assistant
Qwen 3 (4B/8B) is highlighted as the most reliable model for tool use in Home Assistant.
10:37[00:00] By far the most common question I get on
[00:02] any of my videos that have to do with
[00:04] Home Assistant Voice or LLMs is, am I
[00:07] running the LLM locally? And if so, how
[00:09] am I doing it? Well, I can finally say
[00:12] yes to that question, and I'm excited to
[00:14] share how it all works. In this video,
[00:16] I'm going to walk you through my whole
[00:17] LLM setup that I've got running on a Mac
[00:20] Mini M4 running Lama and how I've got it
[00:25] integrated with Home Assistant and even
[00:27] a fun WLED animation that visualizes how
[00:30] hard the LLM is working at any given
[00:32] moment. And definitely stick around to
[00:34] the end. I give a sneak peek on how I'm
[00:36] running my own chat GPT like server
[00:38] locally called Open Web UI.
[00:42] [Music]
[00:45] All right, so let's quickly go over
[00:46] everything I've got running here,
[00:48] including all the components in case you
[00:49] want to try something like this
[00:50] yourself. For hardware, as I said, I've
[00:52] chosen a Mac Mini M4 Pro. One of the
[00:55] reasons why Apple Silicon works so well
[00:57] for local LLMs is because of its unified
[01:00] memory architecture. Large language
[01:02] models run best on GPUs, and on Windows
[01:06] machines with Nvidia cards, you're
[01:07] limited by your GPU's VRAM. With Apple's
[01:10] unified memory, the GPU and CPU share a
[01:14] common memory pool, giving the models
[01:16] much more headroom and flexibility. It's
[01:18] actually a pretty compelling setup
[01:20] dollar for dollar when you compare it to
[01:22] other compact devices in the same
[01:24] performance class. For the software
[01:26] side, I'm running a Lama to handle all
[01:28] of the models, Home Assistant for the
[01:30] smart home side of things, and Open Web
[01:33] UI for a local chat GBT style interface
[01:36] for everything outside of Home
[01:38] Assistant. for the specific models I'm
[01:40] running. For now, I'll just say that
[01:42] there have been two that have been
[01:44] standouts for me in Home Assistant, but
[01:46] more on models in a little bit. All
[01:48] right, so let's take a look at how this
[01:50] works in real time. Here's Home
[01:52] Assistant voice running on a PE. No
[01:55] cloud, no third party processing, just a
[01:57] fast local response. I'm not going to
[01:59] speed this up up at all. It's going to
[02:01] be real time.
[02:05] This battery pack is dead.
[02:08] All right, let's try this again.
[02:12] Lauraai, what's the weather like?
[02:16] [Music]
[02:20] The weather today is cloudy with a
[02:22] temperature of 80° F and 69% humidity.
[02:26] This will be even snappier once realtime
[02:28] LLM sentence streaming comes to a lama
[02:30] in Home Assistant. What makes my local
[02:33] LLM setup both fast and reliable despite
[02:36] running on relatively modest hardware is
[02:38] a strategy I call cached responses.
[02:41] Instead of exposing a huge amount of
[02:43] entities and asking the LM to reason
[02:46] through them in real time, I've started
[02:48] leaning on home assistant scripts and
[02:50] predefined pathways to simplify its job.
[02:53] This lets me delegate heavier, more
[02:55] complex processing to slower but smarter
[02:58] models running in the background, while
[03:00] a lightweight model handles real-time
[03:02] voice interactions and simply pulls the
[03:04] pre-ompiled answers or at least can grab
[03:07] those pre-ompiled answers and create the
[03:10] response that it needs from that small
[03:12] piece of data rather than again trying
[03:14] to reason through potentially hundreds
[03:17] of exposed entities. A good example is
[03:20] weather. One of the most common things
[03:22] we ask around the house is, "What's the
[03:24] weather like tomorrow?" or "What's the
[03:26] humidity outside?" There's really no
[03:28] need to reprocess all of that
[03:31] information every time. So, I have a
[03:33] larger model generate a clean spoken
[03:35] weather summary every hour. That result
[03:38] gets cached and is instantly available
[03:40] to any smaller model to serve up. It's a
[03:43] similar idea to what we're seeing across
[03:45] the LLM landscape. multiple agents or
[03:48] models, each with their own strengths,
[03:50] collaborating to deliver fast, useful
[03:53] results. And of course, I needed to
[03:55] involve a WLED in some way. I found this
[03:59] incredibly beautiful pre-built animation
[04:01] in WLED called SOAP. And I've got the
[04:05] speed of that animation automated to
[04:07] parallel the current power draw of the
[04:09] Mac Mini. And one of the nice things
[04:11] about the animation is that it's got
[04:12] easing built into it. So, as the LLM
[04:15] ramps up, the wattage increases and the
[04:18] animation smoothly speeds up and calms
[04:20] back down when the LLM is idling. This
[04:23] Mac Mini is dedicated for LLM use. So,
[04:26] the visuals pretty spot-on as it's
[04:29] processing different tasks, and this M4
[04:32] Mac Mini is incredibly efficient. When
[04:34] it's not processing anything, it idles
[04:37] at less than 5 watts, and even under
[04:40] full load, it only hits about 65 watts.
[04:43] But that gives me a nice range to
[04:45] display the animation speeds. Uh, I
[04:47] still can't believe that it only uses 65
[04:49] watts even under full load. And that
[04:52] would really help keep electricity costs
[04:54] down when hosting your own LLM,
[04:56] especially since it idles at basically
[04:59] no power usage.
[05:01] So, if you're ready to try something
[05:03] like this yourself, here's a quick
[05:04] walkthrough. Setting up a Lama on a Mac
[05:07] is actually pretty simple. The first
[05:09] thing I recommend doing is setting your
[05:12] IP address on your Mac to a static IP
[05:14] address. That'll make sure that your IP
[05:17] address remains static so that Home
[05:19] Assistant and other devices can always
[05:21] reach it.
[05:24] Then you want to head over to Lama.com
[05:27] and go ahead and click that download
[05:29] button. And then once you've downloaded
[05:32] it, go ahead and
[05:34] drag O Lama to the applications
[05:37] and go ahead and run it. Once you have O
[05:40] Lama running, you should see a little
[05:42] Llama icon up in the top taskbar area.
[05:47] When you run this for the first time,
[05:49] make sure to go to settings and make
[05:51] sure to expose O Lama to the network.
[05:53] This is critical so that Home Assistant
[05:55] and other devices can use Olama.
[05:59] Once you have a llama running and
[06:01] exposed to your network, make sure that
[06:03] other devices on your network can reach
[06:05] it. So go to a different computer that
[06:07] is not running a llama that is connected
[06:09] to the same network and go to the
[06:13] devices IP address. In this case, my Mac
[06:16] Mini's IP address is 139. And then you
[06:20] want to go to port
[06:23] 1434.
[06:25] And this is the response you should see
[06:28] if Lama is indeed running, Olama is
[06:31] running. Now to test that everything is
[06:33] truly working well and LLMs can actually
[06:36] run, go to the device running
[06:39] and open terminal. Once terminal is
[06:42] open, you can run a simple command like
[06:45] Olama run quen 3 billion verbose. Now
[06:52] what this is going to do is it's going
[06:53] to download the Quen 3 model the 3
[06:56] billion parameter and by putting the
[06:59] verbose flag at the end it will actually
[07:02] give you a readout on how many tokens
[07:04] per second you used and some other
[07:06] statistics which can help determine how
[07:09] performant the model is.
[07:12] Now it's telling me that this doesn't
[07:13] exist. Uh, so this is a good moment to
[07:16] demonstrate
[07:18] how you can use.com
[07:22] to find models. So head over to
[07:24] alama.com, go to models,
[07:28] and jump over to Quen 3. And the reason
[07:31] why Quen 33 3 billion didn't work is
[07:34] because it doesn't exist.
[07:37] So, let's try something that actually
[07:39] does exist, like the Quen 4B, which I
[07:43] actually already have installed. So, it
[07:46] won't actually install it for me right
[07:48] now. But you can see that this model is
[07:51] 2.6 GB in size. So, it'll download that
[07:54] entire 2.6 GB model the first time you
[07:56] run it. So, go ahead and click on the
[08:00] model that you want to install and run.
[08:03] And then this is your command right
[08:05] here.
[08:07] Paste that into terminal. I'm going to
[08:09] add the verbose tag or flag I should
[08:13] say.
[08:14] And now you can start talking to the LLM
[08:17] right within the terminal window.
[08:23] So now this is a model that actually
[08:25] thinks before it spits back the final
[08:28] response.
[08:31] And this what is E is a prompt that I
[08:35] just use to test models. It's pretty
[08:37] broad and challenges the model to reason
[08:40] through the question.
[08:43] And this is moving pretty quickly.
[08:47] Now we can see that the evaluation rate,
[08:50] which is pretty much the one that I used
[08:53] more than anything else, uh was about 50
[08:55] tokens per second, which in my opinion
[08:57] would be usable within Home Assistant. I
[09:00] think anything above 10 tokens per
[09:02] second is technically fast enough to be
[09:04] usable, but for home assistant voice, I
[09:08] think 50 tokens per second is the
[09:10] absolute minimum. Preferably, it should
[09:13] be more than that. Now, let's look at a
[09:15] model that's much larger
[09:19] like
[09:20] deepseek
[09:22] 32 billion parameters. This is a pretty
[09:26] large model and also very capable.
[09:30] I already have it installed,
[09:32] so we can jump right into testing. And
[09:35] you'll see it's quite a bit slower than
[09:38] the other models. Even loading this into
[09:41] the memory takes a bit of time. So,
[09:43] we're going to try that same prompt.
[09:46] See what we get.
[09:53] It's outputting basically as fast as I
[09:56] can read, which in my opinion is still
[09:59] usable for certain tasks that you need
[10:01] that horsepower. I found that 32 billion
[10:04] parameter models seem to be the
[10:05] threshold for this Mac Mini M4
[10:09] with it being usable speed. And there we
[10:12] go. We have about 10 tokens per second,
[10:16] a little bit under that, which again I
[10:18] think is usable as a traditional LLM,
[10:21] but not so much in Home Assistant.
[10:22] little bit too slow. One of the most
[10:24] important things to keep in mind when
[10:26] looking for models for Home Assistant is
[10:29] that they need to be able to use tools.
[10:31] Fortunately, Olama includes a filter,
[10:33] which allows us to just see the models
[10:35] that have tool capabilities. At the time
[10:37] of recording this, my favorite model for
[10:39] Home Assistant is Quen 3. And depending
[10:42] upon what hardware you're running,
[10:45] either their 4 billion or 8 billion
[10:47] parameter model works okay. Obviously,
[10:50] the 8 billion parameter model is smarter
[10:52] than the 4 billion parameter model, but
[10:54] you have to try to strike that balance
[10:56] between speed and performance or
[10:59] accuracy. I've also seen others on
[11:01] Reddit saying that they've had success
[11:03] with the Llama models in this version of
[11:07] Home Assistant, which is currently
[11:09] 2025.7.2.
[11:12] I get errors when I use these models,
[11:14] but Quen and Mistrol have been pretty
[11:17] great so far. So to get moving, I
[11:19] recommend installing a Quen model. Try
[11:22] that first with Home Assistant. And now
[11:25] let's move over to Home Assistant. I
[11:27] already have Olama installed, but it's
[11:30] simple as going to add integration,
[11:32] typing in a Lama, and then simply
[11:36] putting in the IP address of the device
[11:39] that's hosting a Lama and your LLM. In
[11:42] this case, I put in this IP address,
[11:46] which is the IP address of my Mac Mini,
[11:48] plus the port at the end. Don't forget
[11:50] that. And then once you have this
[11:51] running, you can add as many
[11:53] conversation agents as you'd like using
[11:56] any of the models you have installed.
[11:58] For instance, I have all these different
[12:00] ones installed that I've been
[12:02] experimenting with, and I've landed on
[12:04] Mistral 3.224B in 22 24b for my heavier
[12:08] duty tasks that I don't need as timely
[12:10] of a response on and for realtime
[12:13] conversations I've gone with Gwen 3 and
[12:16] I'd love to use the 8 billion parameter
[12:18] model but for now the 4 billion is
[12:22] faster so I'm leaning on that although
[12:24] once in a while it does hallucinate a
[12:26] little bit and then once you have these
[12:28] installed you can invoke them anytime
[12:30] you want anywhere you want so you can
[12:33] create specific scripts and automations
[12:35] which tap into specific models. Again, I
[12:38] think I'm moving more toward an
[12:39] agentcentric ecosystem where there's
[12:42] multiple LLMs working together rather
[12:44] than one really massive super powerful
[12:46] LLM. Now that I'm fully invested in
[12:49] running my own local LLMs, I'm more
[12:52] curious than ever to find out how they
[12:54] work and how they function under the
[12:56] hood. That's where Brilliant comes in.
[12:59] Brilliant is an interactive learning
[13:01] platform that helps you build real
[13:02] understanding through problem solving.
[13:05] One course I really like breaks down the
[13:06] architecture behind LLMs, how neural
[13:09] networks function, how transformers
[13:11] process information, and why these
[13:13] models are capable of the things that
[13:15] they do. What sets Brilliant apart is
[13:17] that you're actively engaging with the
[13:19] material. Solving puzzles, working
[13:21] through logic, and building intuition as
[13:24] you go. It's a great way to sharpen your
[13:26] thinking and go deeper on topics like
[13:28] AI, programming, and data science. Head
[13:31] to brilliant.org/strottlebuilds
[13:33] or scan the QR code on the screen to try
[13:35] Brilliant for free. And if you sign up
[13:38] using my code, you'll get 20% off an
[13:40] annual premium subscription. Big thanks
[13:42] to Brilliant for supporting this
[13:44] channel. Before we wrap up this video, I
[13:47] want to quickly show you Open Web UI.
[13:49] This is a local chat GPT style interface
[13:52] that lets you interact with O Lama
[13:53] models in a more traditional chatbased
[13:55] format. So here is my instance of open
[13:58] web UI and you can easily switch between
[14:01] installed models, run queries across
[14:04] different model types and test how each
[14:06] one performs side by side. So as we
[14:09] mentioned earlier, you can see the
[14:12] different size models we have here.
[14:13] everything from
[14:16] larger Deepseek models, Deepseek 32
[14:19] billion, down to some smaller models
[14:21] like Llama 3.2, which is only a 3
[14:25] billion parameter model. So, we click
[14:27] into that and run a query,
[14:32] you can see how fast it is, and it's
[14:35] generally not bad. Llama is a pretty
[14:38] well-rounded model for its size. But now
[14:40] if I switch over to a larger model like
[14:42] let's say DeepSseek 32 billion run the
[14:47] same query. Now I can compare these side
[14:49] by side and decide which one's better
[14:52] for the task. Now DeepSseek is a
[14:54] thinking model. So it will do some
[14:56] interpretation, some thinking on its own
[14:59] before it decides on a final answer.
[15:01] It's kind of fun to see how it processes
[15:03] and thinks along the way.
[15:06] So as you can see this is very similar
[15:08] to Jad GPT. It can search the web, it
[15:12] can interpret images and this is a
[15:16] platform that is continuing to evolve.
[15:18] So more on this in future videos, but I
[15:22] think this is really the next step. If
[15:23] you've already got Alama installed, give
[15:25] Open Web UI a try. If you're familiar
[15:27] with GitHub and following some
[15:29] instructions, you should be able to get
[15:31] it off the ground.
[15:33] So, that's going to wrap up this video.
[15:34] If you want to dig deeper and try some
[15:36] of these things yourself, I highly
[15:38] recommend checking out the description
[15:39] below. I've got a full write up on
[15:41] straddields.com, which includes links,
[15:44] examples, my running list of tested
[15:46] models with home assistant support. So,
[15:49] it should be a pretty good resource to
[15:51] help you get started. Huge thanks to
[15:53] Brilliant for sponsoring this video. And
[15:56] if you enjoyed this video, if you felt
[15:58] like it helped in any way, please
[16:00] consider giving it a like. It really
[16:02] helps me out. And if you're into this
[16:04] kind of stuff, local LLMs, home
[16:06] assistant, home automation, building,
[16:08] you know, privacy focused systems,
[16:10] definitely get subscribed. I've got a
[16:12] ton of videos in the works. Thanks so
[16:14] much. I will see you in the next one.
[16:17] [Music]
⚡ Saved you 0h 16m reading this? Transcribe any YouTube video for free — no signup needed.