

The First Pullback Signal Every Trader Needs
43sIntroduces a high-value trading concept that promises to minimize losses and maximize profits, appealing to traders seeking an edge.
▶ Play Clip"Delivers a solid trading strategy with clear examples, but the title oversells the 'signal' as a unique secret when it's a common pattern."
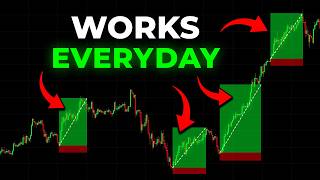
The video explains the 'first pullback' trading pattern, a predictable price action signal that appears in almost every trend reversal. The presenter demonstrates how to identify and trade this pattern to improve risk-to-reward ratios, minimize losses, and increase profits, using examples from Bitcoin, gold, and Apple stock.
The first pullback is a highly predictable pattern that shows up in almost every trade setup. It occurs when a trend reverses, and price makes a brief pullback before continuing in the new direction.
V-shaped reversals are rare. Typically, after a trend reversal, price pulls back first before continuing. This initial pullback is the 'first pullback' and is a common pattern across charts.
The pattern appears on Bitcoin 4-hour chart (downtrend to uptrend with pullback), gold (uptrend to downtrend with pullback), and Apple stock (downtrend to uptrend with pullback).
Entering at the first pullback improves risk-to-reward ratio. You get a better entry price, allowing a tighter stop loss. If the trend fails, losses are smaller; if it holds, gains are larger.
Crucial to correctly identify a trend reversal. A valid low is only broken if price breaks previous highs after forming the low. If price breaks a low without breaking previous highs, it's not a valid reversal.
Use supply and demand levels to predict where the pullback will form. Supply/demand zones are areas before sharp price moves. Place a limit order at the bottom of the supply zone (for shorts) or top of demand zone (for longs).
When there are no clear highs/lows, use MACD to confirm a reversal. A cross upwards signals a valid uptrend. Then identify demand zone and place a buy order at its highs.
If supply/demand levels are unclear, use Fibonacci retracement. The 61.8% level (golden zone) is where price most commonly pulls back. Place entry at 61.8%, stop loss slightly below, take profit at previous high or higher.
The first pullback concept can be combined with breakout strategies. After a breakout, wait for a pullback to the 61.8% Fibonacci level before entering, improving risk-to-reward.
Sometimes price won't retest and you'll miss trades. Missing a trade isn't losing one. Stick to high win-rate setups and don't force trades.
The first pullback is a versatile pattern that can improve trading performance by providing better entry points and risk management. By combining it with supply/demand levels or Fibonacci retracement, traders can increase their win rate and profitability.
What is the 'first pullback' pattern?
A predictable pattern where after a trend reversal, price makes a brief pullback before continuing in the new direction.
00:02
Why is entering at the first pullback beneficial?
It improves risk-to-reward ratio: you get a better entry price, allowing a tighter stop loss, resulting in smaller losses on failed trades and larger gains on successful ones.
01:39
How do you identify a valid low for trend reversal?
A low is valid only if price breaks the previous highs after forming the low. If price breaks a low without breaking previous highs, it's not a valid reversal.
04:30
What are supply and demand levels?
Areas where significant buyers or sellers have placed trades, often before sharp price moves. Price tends to bounce from these levels.
06:11
How do you mark a demand zone?
Highlight the last candle before an impulsive upward move; the zone from its high to low is the demand level.
06:52
What is the 'golden zone' in Fibonacci retracement?
The 61.8% Fibonacci level, where price most commonly pulls back to.
10:49
How can the first pullback be applied to breakout strategies?
After a breakout, wait for a pullback to the 61.8% Fibonacci level before entering, improving risk-to-reward.
11:47
Risk-to-Reward Advantage
Explains the core benefit of the strategy: better entry prices lead to tighter stops and asymmetric risk.
01:39Valid Low Definition
Clarifies a common misconception about trend reversals, which is crucial for correct analysis.
04:30Supply and Demand Levels
Provides a practical method for predicting pullback areas using supply/demand zones.
06:11Golden Zone (61.8%)
Highlights the most reliable Fibonacci level for pullback entries.
10:49Patience and Discipline
Emphasizes that missing trades is acceptable; sticking to high-probability setups is key.
12:58[00:02] this signal forms on your chart the signal that I'm talking about here is called the first pullback and in this video I'll explain how you can use it to minimize losses while increase profits for every trade that you take so without
[00:15] further Ado let's get into it so what is the first pullback the first pullback is a highly predictable pattern that shows up in almost every trade setup here's how it works imagine the price is in a downtrend and begins to reverse into an
[00:29] uptrend as we know it's extremely rare to see a perfect v-shaped reversal when the trend is changing what typically happens is the price starts to reverse makes a brief pullback first and then continues climbing now this initial
[00:43] pullback after the reversal is what we call the first pullback and I'm not exaggerating when I say this pattern is everywhere on the chart want proof let's look at a couple of examples take a look at this Bitcoin 4-Hour chart the price
[00:57] was in a downtrend and reversed upwards it then made a slight pullback first before continuing trending higher here's another chart from gold or xau this time the price was initially in an uptrend then it begin to reverse downwards but
[01:12] it made a slight pullback first before continuing downwards here's a chart from Apple stock the price started off trending downwards it then reversed upwards made a pullback and resumed upwards you can
[01:25] find countless of examples like these on any chart try it out for yourself after watching this video so the main concept behind this strategy is to time the first pullback and aim to enter at around the end of the pullback the key
[01:39] reason for this comes down to one crucial Factor risk to reward ratio let's break it down with an example imagine spotting a setup where the price was initially in a downtrend then a strong buying pressure pushes it upwards
[01:54] as a trend Trader you might see that the trend begins to shift and think about entering by but but buying immediately at the highs of the trend isn't the best move why because there's a chance that the price could pull back or Worse the
[02:07] uptrend could fail entirely if you enter at the highs with a tight stop loss the pullback alone could stop you out and if you set a wider stop loss to with a much bigger loss if the trend fails
[02:22] altogether this is exactly why waiting and entering at the first pullback is almost always the better play at a pullback your getting in the trade at a more favorable price which means your stop loss can be tighter if the price
[02:35] keeps dropping after the pullback that's a signal that the uptrend is invalid keeps your losses small but if the trend holds and price profits since you've entered in at a lower price it's a win-win condition
[02:50] you'll get smaller losses on failed trades and much higher gains on successful ones now let's break down how to trade this strategy step by step know that I also share trade signals completely for free for example just
[03:06] recently I called that ethereum was about to break out and just 2 days later it shut up nearly 5% if you want to see more of my trades Live join my free telegram Community Link is in the description now back to the strategy the
[03:21] first step of trading the strategy is knowing how to identify a trend reversal this part is absolutely crucial if you mess this up the trade simp won't work here's how to do it so one of the very first things Traders are taught is how
[03:35] to spot uptrends and downtrends if the price is making higher highs and higher lows it's an uptrend if it's making lower highs and lower lows it's a downtrend simple right but here's the thing there's a good chance you're
[03:50] actually getting this wrong let me break it down for you with an example imagine a chart forming higher highs and higher lows clearly showing uptrend but then something interesting happens the price starts heading down
[04:05] and breaks a previous low here's where I see most Traders make mistakes when this low is broken many assume the trend has reversed thinking we are now in a downtrend but what if I told you that this chart is still fundamentally
[04:18] bullish sure the price broke a low but this low isn't actually a valid one why because it didn't break the valid low which is this one let me make this
[04:30] Crystal Clear for a low to be considered valid the price needs to break the previous highs after forming the low in our example the price never actually broke the previous highs which is this one meaning the valid low is
[04:45] this one so the price can do anything at this area but as long as it remains above the valid low this is still considered an uptrend now let's take this a step further if the price instead moves up
[04:59] and breaks the previous highs this establishes a new high in that case the valid low shifts to the most recent low before the breakout and for the trend to reverse the price would now need to break this new valid low let's look at
[05:15] an example on a real chart here we see the price forming higher highs and higher lows and we can identify that the valid low is this one because it broke the previous High afterward later the price moves down and breaks this valid
[05:29] low this break confirms a reversal since the price closed below the valid low keep in mind it's crucial to wait for a candle to actually close below the valid low for it to considered as a reversal once you understand how to identify a
[05:44] valid reversal we can move on to the next step entering at the first pullback when we want to enter at the first pullback we need to figure out where the pullback might form this is important because pullbacks could form anywhere on
[05:58] the chart and identify in the right area is key to timing your entry from my experience there's a specific area where the first pullback tends to form and bounce from and it's called supply and demand levels for those unfamiliar
[06:11] supply and demand levels are areas where significant buyers or sellers have placed trades the basic idea is that if the price retraces toward a supply or demand level there's a high chance it will bounce from it similar to how
[06:25] support and resistance work so if we can identify these levels on a chart we can potentially predict where the first pullback will occur the easiest way to identify supply and demand zones is by looking at the area right before a
[06:38] sharp price move for example if the price makes a sharp move upwards the area before the rise is called a demand level similarly if the price makes a sharp move downwards the area right before that drop is called a supply
[06:52] level returning to our original example you can spot this impulsive downwards move to Mark the supply Zone highlight the last candle before the impulsive move happened which is this one use a rectangle tool to draw the Zone from the
[07:07] Campbell's High to its low this marked area becomes your supply Zone once you've identified a supply Zone you can place a sell order at the bottom of the supply level set your stop loss slightly above the supply level and Target a
[07:21] take-profit level at two times the size of your stoploss alternatively you can aim for the previous lows as your profit Target now let me clarify something with this strategy you're not entering the market
[07:35] at the current price instead you're setting a limit order at your desired entry price along with your stop loss and takeprofit levels once everything is said just leave it alone and let the price do its thing the trade only
[07:50] activates if the first pullback happens and the price hits your entry point like in this example the price comes back hits our sell entry and bounces from the Supply level giving us a nice profit but keep in mind when using this strategy
[08:05] an order but the price keeps moving without triggering your entry and that's totally fine since no trade is triggered you don't lose any money the key here is to only take trades that perfectly aligns with our trading plan if it
[08:19] doesn't Don't Force It just stay patient and wait for the next opportunity let's look at another example again the first step is to spot a trend reversal and in this setup we noticed the price was in a downtrend and
[08:33] then started moving upward but look closely on this particular move price didn't give us any clear lower highs or lower lows to Mark as the drop happens in one straight swing so how can we tell if this upwards move counts as a
[08:48] reversal when there are no clear highs or lows to identify this is where Trend indicators come into play while there are tons of options to choose from I prefer the Mac CD because it's straightforward and reliable so let's
[09:02] straightforward and reliable so let's apply it to our setup once the macd is applied we can use it to confirm whether this upwards move is a valid reversal in this setup we see that it crosses upwards at this point here that's our
[09:16] signal that the reversal is valid and that we are now on an uptrend so now we can move on to the next step which is entering at the first pullback to do that we need to identify a demand level in this setup in this case
[09:29] we can see that the impulsive move upwards started here so the first candle before the impulsive move is our demand Zone the next step is to place a buy order at the highs of the demand level set your stop loss just below the demand
[09:44] level and your take profit targeting the most recent high after that we simply wait for the price to follow the trading plan in this example the price pulls back triggers our buy entry and then continues upward to hit our takeprofit
[09:57] now even though this trade ended end up being successful you'll notice that the price experienced a slight draw down and came very close to hitting our stop loss but because we stuck to our initial plan and let the trade play out the price
[10:10] takeprofit this shows why sticking to our initial trading plan is so important the analysis and letting the trade play out can still lead to a win that brings
[10:22] us to an important question what if you can't identify obvious supply and demand levels on the chart well there's another method that I use to find entries on pullbacks without using Supply demand levels which is
[10:35] using Fibonacci retracement zones essentially it's a tool that automatically highlights key levels based on Fibonacci numbers as you can see the tool generates multiple lines and price has the potential to bounce
[10:49] off any of these levels however one specific level the 61.8% level also known as the golden zone is where price most commonly pulls back into this is
[11:01] why it's often the most reliable area to watch here's how I use it first if I've identified a potential first pullback scenario such as this I'll draw the it from the lows of the move to the highs then at the 61.8% Fibonacci level
[11:19] place a buy order with a stoploss set slightly below the entry for the takeprofit I either aim for the previous high or Target an even higher level as these setups often the potential to run significantly once everything is set
[11:33] just let the market play out and do its thing and as you can see here price just barely Wicks into our entry then bouncing off making this a successful trade now here's the exciting part the concept of the first pullback doesn't
[11:47] just work as a standalone strategy you can also apply it to your existing trading strategies too for example one popular strategy that complements the first pullback concept is the breakout strategy
[12:00] I won't dive too deep into it here but the basic idea is this price consolidates within a range for a while and when it finally breaks out of that range it often makes a quick sharp movement leaving us little time to enter
[12:13] And if you do decide to chase the breakout and enter anyways you're going to have a bad risk to reward trade so what I'd like to do instead is wait for a first pullback to form before entering once the breakout occurs and the trend
[12:27] shows signs of slight exhaustion I'll apply the Fibonacci tool drag it from the lows to the highs of the breakout move next I place a buy order at the 61.8% level set a stop loss slightly below our entry and take profit at the
[12:43] previous highs now I'll simply let the price play out and in this example price retraced into the golden Zone hits our entry and bounced off hitting our takeprofit making it a successful trade now I cannot stress this enough
[12:58] sometimes price may not even retest and just continues running you will miss a few trade opportunities using this strategy but missing a trade isn't the same as losing one personally I'd rather stick to high- win rate setups rather
[13:11] than entering at a bad price so learning techniques like this is great but what if I just give you real-time Market updates that you can actually profit from like in this example I said that ethereum would bounce from this area and
[13:23] ethereum would bounce from this area and 2 days later it was up 5% or this one when I told my subscribers to buy how and 2 weeks later it shot up 16% so if you want signals like this join my free telegram Community Link in
[13:37] join my free telegram Community Link in the description below again it cost absolutely 0 to join meaning it's free if you found this video helpful don't forget to like And subscribe it only takes 2 seconds to do but it helps the
[13:50] channel out a ton thanks for watching and I'll see you in the next one


⚡ Saved you 0h 13m reading this? Transcribe any YouTube video for free — no signup needed.