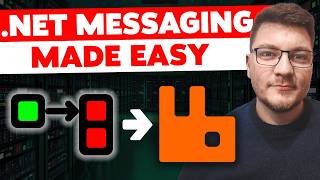

Stop Using RabbitMQ the Hard Way
45sDirectly challenges common pain points and promises a simpler solution, grabbing attention of developers frustrated with complex messaging setup.
▶ Play Clip"Delivers a solid, practical tutorial that matches the title's promise of an easier way to use RabbitMQ."
This video introduces EasyNetQ, a lightweight and popular .NET library for RabbitMQ messaging, as an alternative to lower-level clients or heavier frameworks. The presenter demonstrates a simple publisher-subscriber setup, explains key concepts like subscription IDs and queue naming, and shows advanced features like the auto-subscriber pattern.
EasyNetQ is a lightweight alternative to the RabbitMQ client or frameworks like MassTransit and Wolverine. It has over 41 million downloads and excellent documentation on its GitHub Wiki.
Two console apps (publisher and subscriber) reference a shared messages class library containing message contracts. The EasyNetQ NuGet package is installed in both applications.
EasyNetQ integrates with .NET DI. Call AddEasyNetQ with a connection string (e.g., host=localhost;username=guest;password=guest). The System.Text.Json serializer is used.
Resolve IBus from the service provider. Use bus.PubSub.PublishAsync with a concrete message type (e.g., TextMessage) to send messages to RabbitMQ.
Use bus.PubSub.SubscribeAsync with a subscription ID. The subscription ID determines queue behavior: same ID scales out consumers on one queue; different IDs create multiple queues.
Run a local RabbitMQ instance with Docker: docker run -d --name rabbitmq -p 5672:5672 -p 15672:15672 rabbitmq:3-management. The management UI is available on port 15672.
The UI shows connections, exchanges, and bindings. Queues are named like messages_textmessage (message type) and messages_messages (subscription ID). Queues are durable by default.
A background service publishes an OrderPlaced message every 3 seconds. The consumer handles it asynchronously. Important: queues are created only when the consumer connects; otherwise messages are lost.
Use bus.Advanced.QueueDeclareAsync to create queues in the publisher if needed. Follow EasyNetQ's naming convention to match what the subscriber expects.
Implement IConsumeAsync<T> to create consumers. Wire up with AutoSubscriber, passing the bus, service provider, and subscription ID prefix. EasyNetQ scans an assembly for consumers.
By default, EasyNetQ appends a UUID to the subscription ID. You can override this with the AutoSubscriberConsumer attribute or a custom GenerateSubscriptionId function.
What is EasyNetQ?
A lightweight .NET library for RabbitMQ messaging, with over 41 million downloads.
00:15
How do you configure EasyNetQ with .NET DI?
Call AddEasyNetQ on the service collection, providing a connection string (e.g., host=localhost;username=guest;password=guest).
01:54
What is the core abstraction in EasyNetQ?
IBus, which provides access to pub/sub and advanced messaging APIs.
02:34
What happens if you use the same subscription ID for multiple subscriber instances?
They scale out and listen to the same queue.
03:41
What happens if you use different subscription IDs?
Multiple queues are created, and a copy of each message is routed to all queues.
03:53
What is the default RabbitMQ username and password?
guest and guest.
02:07
What is the naming convention for queues in EasyNetQ?
Queues are named as [message type]_[subscription ID], e.g., messages_textmessage.
05:52
Why might messages be lost if the consumer hasn't connected?
Because the queue doesn't exist until the consumer connects; the publisher only publishes to the exchange.
07:11
How can you create a queue in the publisher?
Use bus.Advanced.QueueDeclareAsync, following EasyNetQ's naming convention.
07:37
What is the AutoSubscriber pattern?
Implement IConsumeAsync<T> and use AutoSubscriber to scan an assembly for consumers, automatically wiring them up.
08:02
EasyNetQ popularity
Shows the library's credibility with over 41 million downloads.
00:15Subscription ID behavior
Explains a key concept for scaling consumers and queue topology.
03:41Queue creation timing
Highlights a common pitfall where messages are lost if the consumer hasn't connected.
07:11AutoSubscriber pattern
Demonstrates a clean, framework-like approach to consuming messages.
08:02[00:01] uses RabbitMQ for messaging, you will have to decide which library you want to use in your C# code. You can go low-level with the RabbitMQ client or high-level with a messaging framework like MassTransit or Wolverine. However,
[00:15] in this video, I want to introduce you to a lightweight alternative that is perfect for RabbitMQ and it's called EasyNetQ. And if you didn't know, EasyNetQ is a fairly popular library. It has more than 41 million downloads and
[00:31] me show you how. And the documentation for this library is excellent. On their GitHub Wiki, you can find basically everything you need to get started with messaging using EasyNetQ. However, I
[00:43] examples. So, let me show you how we can use this inside of our .NET applications. So, I've got two simple console apps here, a publisher and a subscriber, and I've got a messages class library that is being referenced
[00:56] by both of my console apps, and this is where my message contracts are going to that you share between the publisher and the subscriber use the same namespace. So, let's install the EasyNetQ library into my two applications. I'm going to
[01:12] look for EasyNetQ, and we want to install the latest version of the EasyNetQ package. So, let me add this to my publisher, and just to make this faster, I'm going to copy paste the package reference and drop it into my
[01:26] far as NuGet packages are concerned. And now, let's define a message contract. I'll add a class here that I will call the text message, and all we need is a string property that we're going to pass between our publisher and subscriber
[01:41] apps just to show you how all of this works in its simplest form. So, in our publisher, we're going to start by instantiating a new service collection. So, let's say new service collection, and then we want to set up a couple of
[01:54] services with dependency injection. Now, EasyNetQ has built-in integration with the .NET DI framework, and you just have to call add EasyNetQ and provide your connection string. Now, we're going to be using a local RabbitMQ instance, so
[02:07] I'll say host localhost, and then it can use the default username and password, which is guest and guest. If you are using a concrete username and password, connection string. I'll also be using the System.Text.Json serializer with
[02:21] EasyNetQ. So, that's all we need as far as DI goes. Now, we can now build our service provider. So, I'll say services. Build service provider, and we can use the service provider to get our required service, which is the core abstraction
[02:34] of EasyNetQ, and it's called the IBus. So, let's resolve this, and the bus is messages and subscribe to messages coming from RabbitMQ. Now, I'll drop in a piece of code that's just going to
[02:47] prompt me to enter something in the console, and when we get an input from the user, we can say await bus, then we access the pub/sub property, which allows us to publish and subscribe to messages, and we want to publish our
[03:01] input. Now, we have to publish this as a concrete message type, and luckily, we have our text message that we defined, where we can pass in our input, and this is all we need to publish a message using EasyNetQ. So, now, let's move into
[03:14] our subscriber. We're going to reuse some of the code that we had here just to skip over the boilerplate, and then here, we want to access the same pub/sub property, except now, we're going to call subscribe async. Subscribe async
[03:28] also has an overload that accepts a message type, and here, we have to provide our subscription ID, which is a unique way to identify your subscribers. If we deploy multiple instances of our subscriber application with the same
[03:41] subscription ID, we can scale out our message consumers, and they're going to be listening to the same queue. If we deploy this with a different subscription ID, then we're going to have multiple queues inside of RabbitMQ,
[03:53] routing the copy of the message to all of the appropriate queues. So, let's say the subscription ID is just messages, and now, we need to define a callback that's going to give us our text message, and we have to decide what we
[04:07] solution would be simply writing this to the console, and let's say got message, here that I'm going to replace with the text message text. And then, we're just going to add a write line statement, and we're going to wait for any messages to
[04:22] show up. Now, obviously, one more thing we're going to need is a local instance of RabbitMQ, and you can get one by running this command. I'm going to use Docker. I'll say Docker run, and I want to run this in detached mode. I'll call
[04:34] my container RabbitMQ, and I'm going to use the default port of 5672, and I'll also expose the port for the management UI on port 15672. And you have to make sure just to run an image that supports the management UI
[04:48] like RabbitMQ free management. So, let's run this. This is going to start my container locally. We can confirm our RabbitMQ instance is up and running inside of Docker Desktop, and now, I can go ahead and start both of my console
[05:00] what you should see when both of the apps start. And a few moments later, you should get an info log that the connection to RabbitMQ has been established. Now, let's send a test message inside of our publisher
[05:13] application, and you can see that the message is instantly sent once the this may take a few moments when you first run this, but nonetheless, it should just succeed. And now, I can send these messages between my two
[05:26] applications pretty quickly, and you can see that the responses get from one side to the other in basically no time. Now, if we jump into the RabbitMQ management UI and log in with guest and guest as the username and password, we can take a
[05:38] look at the connections. You can see there are three of them here, one from message, and then the subscriber uses different connections for publishing and reading messages. In the exchanges, you can see one exchange created for our
[05:52] bindings, you can see there's a binding to a queue called messages_textmessage and then messages_messages. I know this is a bit confusing, but basically, this is your message type, messages.textmessages, then messages is
[06:06] the namespace, and the _messages is our subscription ID. You can see this is configured as a durable queue, going to survive application restarts, and that's basically your hello world setup for a publisher and subscriber. Now, if you
[06:19] advanced, it could look something like this, where we've got some background worker, which is just a background service, and every couple of seconds, it's going to produce a new order placed message, which is a simple message
[06:33] contract with a couple of properties, and publish it using our EasyNetQ bus. Now, we also need a respective consumer inside of our subscriber app. So, this And all you would have to do here is provide a subscription ID and a message
[06:47] handler, which can be asynchronous, so you can do async work here. So, you can return a task here and make this method async if you want to, and you would handle the message here. And if I go ahead and start both of the applications
[06:59] again, you would see the messages will start flowing between our two applications as soon as the connections are properly established. So, in this case, the producer application already established a connection and is going to
[07:11] start publishing a message every 3 seconds. However, the consumer hasn't something important you have to realize here. Until the consumer establishes a connection, the queue doesn't exist. So, the publisher would only be publishing
[07:24] to the exchange, and the messages would be lost because they're not routed to a queue. So, you would either have to make sure to create the respective queues queue creation in the publisher application, which you can do through
[07:37] the advanced API. And how you would access this is through the same bus interface. So, you can say something like bus.advanced, and then you got access to advanced messages like declaring a queue. So, you can say
[07:49] queue.declare async, and here, you can configure your queue name, but you have to keep in mind the naming convention that EasyNetQ uses. So, just something familiar with how messaging works, you would already know this. And I want to
[08:02] show you one more interesting example of EasyNetQ, which is called the auto subscriber, and how it works is instead of subscribing to a message by using pub/sub and then saying subscribe async, you can implement a class much like the
[08:15] other messaging frameworks do, and implement the IConsumeAsync interface. gives you your message, where you can now do your work. This also supports dependency injection, which is great. And how you wire this up is in your
[08:29] subscriber, you create a new auto subscriber instance, where you pass in the bus, the service provider, and the subscription ID prefix. So, in this case, order demo. Then, you're going to say auto subscriber.subscribe async, and
[08:41] you need to provide an assembly, which EasyNetQ will scan to find your consumer automatically take care of invoking the respective consumer when the message arrives from RabbitMQ. An important thing to note here is that EasyNetQ is
[08:56] going to append a custom subscription ID for each consumer for this message, consumers from the same queue if you implement this interface more than once. Now, there's no limitation on having an IConsumeAsync here for a different
[09:10] message type. I can also consume the text message from the same class. I respective interface. Now, I don't want to be doing this in this example, and start this. So, very similar to our previous example, messages will start
[09:24] subscriber apps. Now, I want to show you what happens in the RabbitMQ instance. still this one exchange for our publisher application for the order bindings, you will see that there's a new queue here, which looks almost
[09:40] identical to our previous one with the same message type and subscription ID prefix. However, there's a UUID here for our specific consumer implementation, and this is automatically appended by EasyNetQ. You can also configure this
[09:53] something different here, which is recommended, and you've got two options here. One is decorating your consumer with the auto subscriber consumer, and then being able to set the subscription ID. So, let's say this is the order
[10:07] placed consumer, and now this will be used for the subscription ID, or rather this has to be defined on the consume method because this class could be a consumer for multiple messages. Or, when you're creating your auto subscriber,
[10:19] you can provide your custom generate subscription ID function where you can access your consumer info. And for example, you can use your concrete type and specify the name of the type as the subscription ID. So, overall, this is a
[10:31] should implement publishing and subscribing with RabbitMQ, and it's very messaging applications that don't really need a full-blown framework and want something that works fast and it's easy to implement, then this could be a nice
[10:46] alternative to consider. And if you want to see how much better this is than the RabbitMQ client, check out this video here where I show you what it takes to implement all of this on a very low level with the client directly talking
[10:59] to RabbitMQ. If you enjoyed this video, maybe gently tap the like button to let me know. Thanks a lot for watching, and until next time, stay awesome.
⚡ Saved you 0h 11m reading this? Transcribe any YouTube video for free — no signup needed.