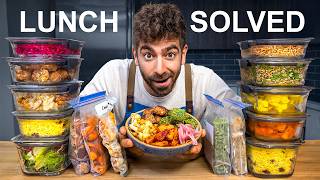

Never Get Bored of Lunch Again: The 14-Day System
45sThe promise of a boredom-free lunch system is highly relatable and hooks viewers who struggle with meal prep monotony.
▶ Play Clip"Delivers exactly what the title promises: a detailed, practical 14-day lunch system with recipes and freezing strategies."
This video presents a comprehensive two-week lunch meal prep system inspired by Mediterranean and Middle Eastern cuisine. The creator demonstrates how to prepare six core components—proteins and veggies—that can be frozen and mixed with fresh grains, salads, and sauces to create varied, flavorful lunches every day. The entire meal plan is offered for free in a linked Google Doc.
The video introduces a two-week lunch meal plan with simple recipes designed to be frozen, customizable, and mix-and-match to avoid boredom. The full plan is available in a free Google Doc.
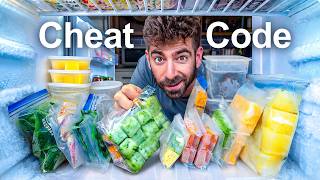
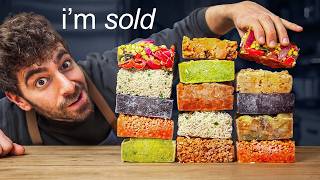
The plan involves prepping six core components (proteins and veggies) once, freezing half for week two, and pairing them with fresh grain and salad bases plus an all-purpose sauce each week.
Pressure-cook dried chickpeas for 10 minutes (undercooked) to keep them crispy when roasted. Roast with cauliflower and za'atar at 450°F for 20-25 minutes. Freeze half for week two.
Blend cooked chickpeas with garlic, tahini, lemon, salt, and aquafaba until smooth. Hummus freezes well; portion half into freezer molds for week two.
Mix ground turkey (99% lean) with pesto, sun-dried tomatoes, breadcrumbs, salt, and pepper. Freeze in half-cup silicone molds; cook in air fryer at 380°F for 10-12 minutes.
Combine ground beef (or lamb) with red onion, parsley, garlic, feta, egg, salt, and pepper. Bake at 450°F for 10 minutes. Freeze half flat in a bag for week two.
Toss sweet potato pieces with harissa paste and salt, roast on trays with meatball drippings at 450°F for 25-30 minutes. Freeze half for week two.
Soak dried beans overnight (canned won't work), process with corn, spinach, feta, onion, garlic, and herbs. Freeze in molds; air fry at 370°F for 10 minutes.
Make saffron yellow rice in a rice cooker with bone broth and golden raisins. Pre-prep a salad base with baby gems, kale, radicchio, cucumber, and tomatoes, stored with paper towels to stay fresh.
Blend yogurt, feta, tahini, herbs (mint, parsley, dill), lemon, salt, and pepper, emulsifying with olive oil to create a herby tahini yogurt feta sauce.
Make mushroom farro in a rice cooker with beef bone broth and thyme. Use homegrown greens for the salad base, simply chopped and bagged.
Blend balsamic vinegar, mustard, herbs, fermented garlic, and olive oil to make a balsamic caper vinaigrette.
All frozen items reheat well, including hummus (microwave with a little water). The creator notes that after 4 weeks of testing, flavors remain enjoyable, proving the system prevents boredom.
This meal prep system offers a practical, customizable solution for busy individuals seeking variety in their lunches. By prepping core components once and freezing half, you can enjoy fresh, flavorful Mediterranean-inspired meals for two weeks without repetition.
What is the key to getting crispy roasted chickpeas?
Pressure cook dried chickpeas for 10 minutes (undercooked) so they stay crispy when roasted.
02:00
What temperature and time are used to roast the cauliflower and chickpeas?
450°F for 20-25 minutes.
03:23
What ingredients are in the hummus?
Cooked chickpeas, garlic, tahini, lemon juice, salt, and aquafaba.
04:08
How are the pesto turkey burgers cooked after freezing?
In an air fryer at 380°F for 10-12 minutes.
06:16
What is the key to keeping the turkey burgers moist?
Using the oil from the pesto container.
05:37
What temperature and time are used to bake the feta meatballs?
450°F for about 10 minutes.
07:35
What is used to roast the harissa sweet potato fries for extra flavor?
The drippings from the meatballs.
09:34
Why must dried beans be used for the black-eyed pea fritters instead of canned?
Canned beans won't work; dried beans are required for the recipe to work.
10:40
What is the key ingredient in the yellow rice that gives it its color and flavor?
Saffron (or turmeric for color).
12:31
How are the salad greens kept fresh for a week?
Stored with a paper towel on the bottom and top to absorb moisture.
13:42
What are the ingredients in the week one herby tahini yogurt feta sauce?
Yogurt, feta, tahini, fresh herbs (mint, parsley, dill), lemon juice, salt, pepper, and olive oil.
14:06
What is the week two grain base?
Mushroom farro cooked in beef bone broth with thyme.
15:26
What is the week two all-purpose sauce?
Balsamic caper vinaigrette.
17:04
Core Components Strategy
Explains the efficient method of prepping six components once and freezing half for week two, saving time.
01:06Crispy Chickpea Technique
Undercooking chickpeas in a pressure cooker ensures they stay crispy when roasted, a key texture tip.
02:00Moist Turkey Burgers
Using pesto oil keeps lean turkey moist, a practical cooking insight.
05:37Reusing Meatball Drippings
Roasting sweet potatoes in meatball drippings adds flavor and reduces waste.
09:34Salad Freshness Hack
Using paper towels in storage containers extends salad green freshness for a week.
13:42[00:01] delicious lunches every single day of the week when you're super busy and you don't have much time to cook? Well, it comes down to two main things. You need the right recipes and you need the perfect meal plan. And in today's video,
[00:13] I've taken care of both of those things for you and created a two-week lunch meal plan with recipes that are super simple to make, designed to be frozen to extend for a full 2 weeks, and are completely customizable so you can mix
[00:25] and match every day and never get bored of your lunch again. part is I'm giving you the entire lunch meal plan for free in a Google Doc below so you can follow along step-by-step. Now, if you live in the US, you've probably heard of the
[00:38] fast-casual spot known for Mediterranean-style grain and salad bowls, and it's actually the inspiration behind this video because in my opinion, Mediterranean and Middle Eastern food is the perfect cuisine for lunch. It's
[00:52] it's super flavorful, and honestly, it's just something I personally can eat every day without getting very tired of it. Now, here's how this two-week meal going to prep six core components. These are going to be your proteins and your
[01:06] every meal. And we're going to freeze half of each of these items so they can week, you're going to prep one fresh grain base, one fresh salad base, which you're going to pair with those proteins and veggies so every day you can mix
[01:21] different bowl or salad. Then each week, you'll also prep one fresh all-purpose sauce that works either to top the bowls or as a dressing to really bring the lunches together. All right, so let's
[01:33] get right into prepping these proteins. And I did design this meal plan so you can pick a block of time, say on a Sunday or whenever you have time, and just prep all of these at once so you only have to cook once. That's, of
[01:45] to do it that way. So, we'll set the oven at 450° so we can keep that running change it or turn it on and off. And there's going to be a bunch of crossover some of the equipment. Speaking of ingredients, since we're making
[02:00] some chickpeas, which are going to work for two recipes. The first recipe is a and you can totally use canned chickpeas, you're just not going to get the exact texture we want in this dish. So, I like to pressure cook them right
[02:14] from their dry form. No need [music] to even soak them overnight. I'll take my right in the pressure cooker, and I'll cover them with water. And I'm going to cook them on a high pressure for 10 minutes. And this is exactly what we
[02:26] chickpeas. But, I've got a little smart meal prep moment here. I'm going to the pressure cooker. I'm going to add just a little bit of baking soda, and I'm going to keep the pressure cooker uncovered and put it on a high sauté
[02:40] pressure cooker has. And I'll let those bubble away for another 30 minutes, which we'll use for the base of a hummus coming right after this recipe. Now, back to the cauliflower. I'm using two heads here. I'm going to remove the core
[02:54] just tiny little bite-size pieces. Then I'll spread it out evenly on a baking tray, and I'll add back those al dente undercooked chickpeas, and I'll drizzle the seasoning, I'm keeping things really simple, just some za'atar spice mix,
[03:09] Mediterranean flavors, and a little bit of sumac if you have it, it's totally together right on the tray. And so it's not overcrowded, I'm just going to split it up evenly onto two trays, and I'll get that roasting in that 450°
[03:23] Fahrenheit oven for about 20 to 25 minutes until the cauliflower is golden and slightly charred. And because we undercooked the chickpeas earlier, they come out super crispy and crunchy, which is what we're going for. If you just use
[03:36] the canned stuff, they would slightly overcook and just get a little bit soft when you roast them, which wouldn't give you that wonderful texture when we add [music] this mixture to a salad or a bowl later on.
[03:53] going to freeze the other half in this half-cup mold for week two. And just locked in, and we're going to move right into our core component number two, to those chickpeas, which have been bubbling away in the pressure cooker,
[04:08] them down even more so they are now perfectly soft and ready [music] to turn then I'll add them straight into my food processor. Then I'll go in with a clove of garlic, a few generous scoops of tahini, the juice of one lemon, some
[04:23] salt to season, and a bit of that aquafaba or chickpea cooking liquid. And I'll blend that up until it is completely smooth and creamy.
[04:35] scratch, I tend to end up with more than I can eat [music] fresh for 1 week. But, the good news is hummus actually freezes really well. So, I'll portion out a rest will go into these half-cup freezer molds, which I will save for week two.
[04:55] option, which are pesto turkey burgers or turkey cubes, however you want to delicious, and they're only four ingredients. Well, technically, like 12 ingredients, but hear me out. So, the key is getting yourself some good pesto.
[05:10] This is a batch I froze from last summer. I freeze a ton of garlic scape pesto, which is my absolute favorite version of pesto. But, any store-bought basil pesto will work perfectly here as well. And to a bowl, I'm going to add
[05:23] two packs of ground turkey. And this stuff is super lean, it's like 99% lean, so I'll mix the entire container of pesto, and all of that oil we not only going to add a ton of flavor, but it's really going to help keep this
[05:37] turkey nice and moist and juicy. Next, I'm going to finely chop up some sun-dried tomatoes, and I'll throw those in for a little sweetness and a little texture. Then I'll finish this off with some breadcrumbs and salt and pepper to
[05:49] season, and I'll mix all of those flavors together. into patties, you could cook them right away, or you could freeze them raw. Both options would work, but an even more convenient option, in my opinion, is
[06:04] using one of these silicone cube molds. I'm using a half-cup mold, and I'll stuff all of the turkey meat in there. I'm going to fill up two full molds so I'll have 10 turkey burgers or turkey cubes, and I'll freeze those overnight.
[06:16] Then anytime over the next 2 weeks, whenever I want to use one of these for a bowl or a salad, all I have to do is pop one in the air fryer at 380° Fahrenheit for about 10 to 12 minutes, and you have the most flavorful, super
[06:29] juicy turkey burgers that I can cut up and throw right into a bowl or a salad. All right, we're moving right into another protein option, which again is very simple and just packed with flavor. These are my mini feta meatballs. And
[06:42] first, we're going to prep our veggies, which is simply just dicing up a medium or small red onion, and also chop up some fresh parsley. Then in a bowl, I'm going to add a couple pounds of some ground beef. also use ground lamb here,
[06:55] that would work wonderfully with these meatballs. Then I'll add in that onion and parsley. I'll grate in one clove of garlic. I'll sprinkle in some dried of feta right here, which I'm going to use for a few recipes. And I'll just
[07:08] off the mixture, I'm going to add one egg and some salt and pepper, and I'll mix everything [music] together until it's fully combined.
[07:22] portion out these meatballs onto my baking tray. And I couldn't quite fit all of them onto a tray, so I split them across two, and they go right into that across two, and they go right into that same preheated 450° oven for about 10
[07:35] done, you're going to see they release a ton of juices and fat, and you do not actually going to take advantage of it moving right into the next recipe. So, I'll package up half of those meatballs to have fresh for the week, and the
[07:49] other half, I'm going to lay them nice and flat in a bag in my freezer so they >> [music] >> All right, now before we finish up these core components, I want to tell you about today's sponsor, and honestly, one
[08:01] of my favorite meal prep hacks, Kettle & Fire. One of the easiest ways to instantly add a ton of flavor to your meals while also boosting the nutrition. And for me, most of the boxed broths that are available on the market just
[08:13] don't use the ingredients [music] or the techniques that make a quality broth. But, Kettle & Fire uses organic pasture-raised chicken and grass-fed, grass-finished beef bones, and they slow simmer them for over 14 hours so you're
[08:26] getting real collagen, actual nutrients, and that deep, rich broth flavor that best part is, it's just easy. You pick your flavor profile, tear open a carton, and add it to whatever you're making. Soups, stews, curries, pastas, even
[08:40] rice. I add this stuff to everything for an instant upgrade. And you guys know I love making homemade broth, but as a busy home cook, I don't always have to Kettle & Fire for me is a staple in my pantry. I always have a few cartons
[08:54] try it out and upgrade your meal prep, you can use code word MikeG for 20% off your order using the link below. All right, moving into a veggie option
[09:06] with these harissa sweet potato fries. And this is another super simple item we're going to be building pretty much all of the flavor from some harissa paste, which is a Mediterranean chili paste loaded with so much good flavor.
[09:19] potatoes here, and I'm just going to peel them up. But, if you're short on the skins on. Then I'll cut them into halves, cut those halves into quarters, I have these bite-size [music] pieces. Now, instead of using a clean tray, I'm
[09:34] going right back to those trays with all of those delicious meatball [music] drippings. This is going to be all of the fat we need to roast these sweet then all I'm going to do is add a few big scoops of this harissa paste and a
[09:47] little bit of salt to season, and I'll mix everything up until it's evenly coated. I'll spread them across two trays so they can roast properly, and then I'll get them in that same 450° preheated oven for about 25 to 30
[10:01] preheated oven for about 25 to 30 minutes. I'm going to keep half in the fridge fresh for the week, and the other half I'm just going to take the tray and throw that right into the freezer. And
[10:14] I'll scoop them up and place them in the bag so none of the sweet potatoes pull them out as we need [music] them the following week and reheat them. All right, and just like that we've made it to the final core component of this meal
[10:28] prep, which is a bit of a protein veggie combo. I'm calling these black-eyed pea corn fritters. And I start by soaking my dried beans overnight. Now, you can totally replace the black-eyed peas with other types of beans, but you can't use
[10:40] canned. You have to use dried beans if you want this recipe to work. The next them off and I'll add them right to my food processor. Then I'll drain off one as well. And I wasn't originally planning on adding any greens to this
[10:55] dish, but I was walking through the garden and the first fresh spinach was coming in. It had to be picked, and I thought it would make a nice addition.
[11:11] blanched it in some boiling water for about a minute and I transferred it over to some cool water. Then I squeezed out as much excess moisture as I could, and on top of that, I crumbled in some of that fresh feta. I added a small chopped
[11:25] red onion, a couple cloves of garlic, and a nice mix of some fresh herbs. I'm using some cilantro, parsley, and dill, but use whatever you have. Then I processed everything together until it was broken down and could hold together
[11:37] fritters right away, what I do is I portion them right into my molds. I've got two different size silicone molds right here. Any size is really going to to do once they're frozen is we'll remove them from the molds and we'll pop
[11:51] cook these is throw them in an air fryer, give them a little spray, and cook them at 370° for about 10 minutes.
[12:03] of those core components. They're prepped, half of them are frozen for week two. But to kick off week one of lunches, we still need that grain and And for the grain base, I'm making a yellow rice that's just a full-on dump
[12:17] best rice ever. So, to the rice cooker pot, I'm going to add some basmati rice. I'll add in some Kettle & Fire bone broth for that extra flavor, and I'll some golden raisins, which will add some nice sweetness, a few tablespoons of
[12:31] butter, and the key ingredient here is some saffron. And if you can't get your some turmeric for the same color. But just a teaspoon of saffron will give you the most beautiful yellow color and such a subtle floral flavor that really makes
[12:45] this rice so special. And I like to set my rice cooker to the harder rice cooking setting just to ensure those grains don't actually overcook and I get this perfectly fluffy rice. That is some fluffy rice. Now, something I love to do
[12:59] pretty much every single week is pre-prepping my salad, which saves a ton of time. You make a nice salad base [music] before the dressing goes on and it should last you about a week. Now, for this first mix, I had three lonely
[13:13] through the winter in my greenhouse. And I've just been waiting for the perfect time to pick these little baby gems, and now is that perfect time. So, I got those cleaned up. And to bulk things up and to create a nice mix of flavors and
[13:27] kale. I also have a small head of radicchio, and I'll give those baby gems bite-size. Then on top of the leaves, I'm chopping [music] up some cucumber, tomatoes to give me more of a comprehensive mix. And I'm going to
[13:42] stuff that in a larger food container with one paper towel on the bottom of the greens and one paper towel on the top to absorb any of that extra moisture, which is going to ensure those greens stay fresher and last you
[13:54] we start bringing some lunches together, we need that perfect week one all-purpose sauce, and let me tell you, this herby tahini yogurt feta sauce is
[14:06] unbelievable. It's really simple to make, just please try it and report back food processor as well, I'm going to add in my yogurt, some fresh feta, a scoop of tahini plus a little bit of that oil, some fresh herbs. I'm using the trio of
[14:21] mint, parsley, and dill, the juice of two lemons, salt and pepper to season, and I'll blend that all together while emulsifying in some olive oil to make emulsifying in some olive oil to make that nice and thick and creamy.
[14:48] >> So, what's great about this meal plan is you can mix and match and get super rice bowl picking a few of those core components. Other days I would air fry some of those proteins and add it to a greens base for a hearty salad. And I
[15:01] would just slightly shift things up each day to keep it fresh, and fresh it was, day to keep it fresh, and fresh it was, my friends.
[15:13] still not over these flavors. I'm not sick of them at all. It's why I love this type of cuisine. It seems to never get old. It's the perfect lunch. And I've got all those six frozen core elements ready to go. But of course, we
[15:26] need a new grain and salad base, and we need a new sauce. Now, for the grain base, this is another simple dump in a rice cooker and get something delicious on the other end, a delicious mushroom farro. Now, you can do this without
[15:39] mushrooms, but I have been growing a ton of mushrooms outside, and they're just this wet spring weather. So, I'm using some fresh oysters, but any type of And I'll dice those up nice and small, get them in the rice cooker pot along
[15:53] with two cups of farro. This is some pearled farro. Then I'm going to use 16 oz of some Kettle & Fire beef bone broth. I'll top that with water, a little salt to season, and sprinkling in some thyme, which pairs so nicely with
[16:06] those mushrooms. Finally, some butter to make it a little more rich and creamy. longer to cook, I'm going to set it on the brown rice setting. And there's just something really special when you combine those beefy and mushroomy
[16:18] flavors that just enhances this farro to a completely different level than your a completely different level than your basic grain dish. just exploded in the greenhouse. So, for week two salad mix, it's the first time
[16:33] I'm bringing together a full mix of homegrown greens.
[16:52] fresh, and to be honest, I was feeling a little bit lazy, I just chopped them up, I threw them in a bag, and that's my salad green prep for the entire week. And we need that all-purpose sauce to bring it all together. So, for week two,
[17:04] I have a balsamic caper vinaigrette. So, to my blender, I'm adding a whole bunch juice. I've got some fermented garlic easily replaced with just honey and garlic. And all of those adjustments are
[17:16] down below in the free Google Doc. I'll add in some mustard, some fresh herbs. dill, and mint, then a good bit of that balsamic vinegar, some salt and pepper to season, and I'll blend that up while slowly emulsifying in my olive oil.
[17:39] two, all of the foods that I froze reheat very well. Even this hummus, just throw it in the microwave, add a little water if it's feeling thick, and it's two was a bit of the same, some delicious bowls, some hearty salads. I
[17:53] actually had some leftover tops from my air fryer that I heated up with the fritter to make this delicious bowl right here, and it was good eating all week long. All right, so this is day 14 lunch. Kind
[18:06] got some farro in there, some meatballs. And I've been eating these meals for close to a month now because I was recipe testing before I went into filming the video. And I would say just now, like 4 weeks later, I am just
[18:20] getting bored of these flavors. At 2 weeks, I was fine. I was ready for more. lunch over the last few weeks. And if recipes, remember, free Google Doc below, all the ingredients listed out,
[18:32] all the recipes. And if you want more meal prep ideas, check out this.

⚡ Saved you 0h 18m reading this? Transcribe any YouTube video for free — no signup needed.