
Why upscaling video is hard
45sRelatable problem for creators: scaling up low-res footage looks bad without AI.
▶ Play Clip"Title is accurate; video delivers a thorough comparison of AI upscaling tools."
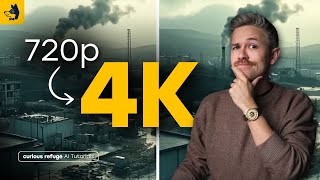
This video compares several AI tools for upscaling video footage from 720p to 4K, testing CapCut, Krea, Runway, and Topaz Video AI. The host demonstrates each tool's performance and highlights the best options for retaining detail.
Simply scaling up footage loses detail; AI tools can upscale while preserving quality.
Using a 720p scene with establishing, medium, and close-up shots to upscale to 4K.
CapCut (desktop/online) allows exporting at higher resolutions like 4K with high quality MOV format, but results are not great; details remain low quality.
Krea online platform limits clips to 5 seconds and max upscale factor of 1.5x; frame rate options limited (30/60/120 fps). Results worse than simple scaling.
Runway can upscale AI-generated clips to 4K via actions menu. Produces good detail and sharpness, but only works for clips generated within Runway.
Topaz offers cloud and local versions; supports any video type. Has presets, custom resolution, multiple AI models (Proteus default, Thea model intense). Provides natural upscaling without over-sharpening.
Runway and Topaz are in a league of their own; Topaz preserves cinematic quality better than Runway.
For best results, use Topaz Video AI for its flexibility and natural upscaling, or Runway if your footage is generated within it. CapCut and Krea are less effective.
What is the main limitation of CapCut's upscaling?
It exports at 4K but doesn't add much detail; quality remains low.
1:49
What are the clip length and upscale factor limits in Krea?
Clips limited to 5 seconds; max upscale factor 1.5x.
2:40
Which tools can only upscale footage generated within their platform?
Runway.
5:00
What AI model does Topaz Video AI use by default?
Proteus model.
6:15
Which two tools are considered best for upscaling according to the video?
Runway and Topaz Video AI.
7:42
What is the advantage of Topaz over Runway in terms of image quality?
Topaz doesn't over-sharpen; it preserves cinematic quality more naturally.
7:51
AI upscaling need
Establishes the core problem that simple scaling loses detail.
CapCut quality issue
Demonstrates that even 4K export from CapCut lacks detail.
1:49Krea worse than scaling
Krea's upscaling performed worse than simple scaling.
3:26Runway good detail
Runway adds significant detail and sharpness.
4:00Topaz versatility
Topaz works with any video type, not just AI-generated.
5:10Topaz natural sharpness
Topaz avoids over-sharpening, maintaining cinematic look.
7:51[00:00] if you need to upres your footage and
[00:03] simply scale it up chances are it's not
[00:06] going to look great thankfully there are
[00:09] quite a few AI video tools out there
[00:11] that allow you to upres your video
[00:14] footage and retain those details in this
[00:18] video I'm going to talk about a few of
[00:19] the options available to you and we'll
[00:22] compare each one to figure out the best
[00:24] option for you as a video creator let's
[00:28] get to it for our example we will use
[00:30] this scene here the entire scene is in
[00:33] about 720p so pretty small resolution
[00:37] but we want to upscale it to 4K so you
[00:40] can see here we have a wide variety of
[00:41] shots an establishing shot medium shot
[00:43] and then a closeup let's see how the
[00:46] tools do so the first tool that I think
[00:48] you should know about is called cap cut
[00:51] while a lot of people know that cap cut
[00:52] can be on your phone you may not realize
[00:55] that cap cut actually can work on a
[00:57] desktop computer and the best part is
[01:00] you can actually use the software online
[01:02] as well cap cut is super easy to use all
[01:04] you have to do is go to the upload
[01:06] button and upload your file I have ours
[01:09] already uploaded right here we'll just
[01:11] double click on it and when you're ready
[01:14] to export it in a higher resolution you
[01:16] don't have to apply any effect or
[01:18] anything like that all you have to do is
[01:20] go to export download and then you can
[01:24] select the resolution that you want to
[01:26] export it as so for our example we will
[01:28] scroll down to 4K and we'll change the
[01:32] quality from recommended quality to high
[01:35] quality you want maximum quality from
[01:37] your export and for the format we're
[01:40] going to select mov that's a less
[01:42] compressed format so you'll get maximum
[01:45] resolution and when you're ready go
[01:47] ahead and click export so here's a
[01:49] comparison of the original and then the
[01:52] cap cut version on the left I went ahead
[01:54] and zoomed in so you can see the
[01:57] differences between the two clips and as
[01:59] you can see even though we exported the
[02:01] cap cut clip in 4k it's not doing a
[02:05] great job at getting us really nice
[02:08] details it still feels pretty low
[02:11] quality so generally speaking the uprer
[02:14] inside of cap cut is not my favorite the
[02:17] next tool we're going to take a look at
[02:19] is Korea Korea is an online platform
[02:21] that has a lot of really helpful AI
[02:23] tools including having the ability to
[02:25] upres footage to use Korea to upres your
[02:28] footage just go to the website and
[02:30] scroll down and click on the enhance
[02:33] button and you can simply drag and drop
[02:35] your video clips into the timeline I
[02:37] should note that video clips are limited
[02:40] to 5 Seconds long so you will have to
[02:42] upload your individual Clips one at a
[02:44] time we'll go ahead and drag and drop
[02:47] that into Kaa and on the right here
[02:49] you'll see we have upscaling Factor so
[02:52] we're going to go ahead and select 1.5
[02:55] unfortunately that is the current
[02:57] limitation of using Kaa you can't go
[03:00] beyond 1.5 and then for frame rate
[03:03] you'll also see we only have 30 frames
[03:06] per second 60 frames per second and 120
[03:09] but our core video footage is in 24
[03:11] frames per second so that's not ideal if
[03:14] you're working in a film making context
[03:17] so when you're ready go ahead and click
[03:19] enhance so here's the result here we
[03:21] have Korea on the left and the original
[03:23] footage on the right and honestly I
[03:26] think Korea did a worse job than simply
[03:28] scaling up the footage so when it comes
[03:30] to enhancing footage I don't think that
[03:33] Korea does a great job the next tool
[03:35] that we're going to talk about is the
[03:37] uprising feature available directly
[03:39] inside of Runway so after you've created
[03:42] a video clip using Runway you actually
[03:45] now have the ability to upscale the
[03:47] video to 4K all you have to do is go
[03:50] down to the actions menu and select
[03:52] upscale to 4K it takes just a couple of
[03:55] minutes and then you can download the
[03:57] video footage directly to your computer
[04:00] here's a before and after with runway on
[04:02] the left and the original on the right
[04:04] and you would see that Runway did a
[04:06] really good job there's tons of extra
[04:08] detail and Fidelity in the upred footage
[04:11] especially if we take a look here at
[04:13] that first establishing shot the walls
[04:16] look really good obviously there's some
[04:18] strange stair stepping here on this this
[04:21] building but that was just really deep
[04:23] in the original video footage so it's
[04:25] doing the best it can there there's a
[04:27] lot more resolution in this detail here
[04:30] on the building and then moving on to
[04:32] the shot of the soldier you can see we
[04:34] have a lot of pixelation going on in the
[04:38] helmet whereas over here it's much more
[04:40] smooth sharp around the edges and it
[04:42] just generally looks better and then
[04:44] finally if we look at this shot here
[04:47] much more detail in the hair the uh skin
[04:50] has a lot more detail versus the
[04:52] original it's just kind of just very
[04:54] blurry and doesn't look that great the
[04:56] big downside to using Runway is of
[04:58] course the fact that you have to use
[05:00] Runway to generate the video footage so
[05:03] if you didn't generate the AI footage
[05:05] directly inside of Runway it's honestly
[05:07] not that helpful and that brings us to
[05:10] our final way to upres your footage this
[05:14] is my favorite way to upres footage and
[05:17] it has a ton of customizable options to
[05:20] allow you to get maximum quality from
[05:22] the tool and I am of course talking
[05:24] about topaz video AI topaz video has a
[05:28] version that works in the cloud and
[05:30] basically you can pay for credits but
[05:32] they also have a version that works
[05:34] directly on your computer you basically
[05:36] download the application to your machine
[05:38] and you can upres the video locally so
[05:40] you buy one license of the software and
[05:42] then you basically just have access to
[05:44] it forever so in order to use topaz all
[05:47] you have to do is drag and drop your
[05:50] video clip here so we have our clip
[05:53] loaded into topaz and you can select
[05:55] your output they have tons of presets
[05:57] here and then you also have the ability
[05:59] to set a custom resolution if you have a
[06:02] specific aspect ratio or resolution that
[06:04] you're going for and under the AI model
[06:07] section you have the ability to select
[06:10] all sorts of AI models depending on what
[06:12] type of video footage you inputed the
[06:15] Proteus model which is the default model
[06:17] tends to work the best but you do have a
[06:19] lot of other good options here I really
[06:21] like working with the Thea model but it
[06:24] can be pretty intense on your computer
[06:26] now you also have the ability to change
[06:29] the frameware R you can change the frame
[06:31] interpolation and basically Slow Down
[06:33] the video footage if you wanted to and
[06:35] those features work really well but for
[06:37] our example we're just going to export
[06:39] it as it is so here's a quick comparison
[06:42] from topaz again topaz on the left
[06:45] original on the right and you can see we
[06:47] have a ton of resolution here it looks
[06:50] really really nice especially this last
[06:53] shot here you can see there's a lot of
[06:55] detail in the hair there's a lot of
[06:57] detail in the skin and it just looks
[06:59] much more sharp than the original
[07:01] footage which has a ton of resolution
[07:04] issues so the cool thing about using
[07:06] topad is the fact that you can bring in
[07:08] any type of video clip it doesn't have
[07:10] to be a clip that was generated in a
[07:12] specific tool whether you shot a wedding
[07:15] and you're looking to upres it or if you
[07:17] legitimately are trying to go through an
[07:19] old archive and upres footage to use in
[07:22] a documentary you have the ability to
[07:24] upres using all sorts of really awesome
[07:27] features using topaz so let's take take
[07:29] a quick look at a comparison here we
[07:31] have Korea in the top left cap cut top
[07:33] right runway in the bottom left and then
[07:36] topaz in the bottom right and you can
[07:38] see that very clearly Runway and topaz
[07:42] are kind of In A League of Their Own the
[07:44] resolution just looks so much better
[07:46] there's tons of fidelity there and the
[07:48] cool thing about topaz specifically is I
[07:51] feel like it doesn't over sharpen the
[07:52] footage inside of Runway sometimes it
[07:54] can feel like it's adding a little too
[07:56] much sharpness at the cost of cinematic
[07:59] qual quality whereas with topaz it still
[08:01] understands lens Dynamics and is able to
[08:04] upres the footage in a more natural way
[08:07] now if you want to learn more about
[08:08] Advanced AI film making techniques I
[08:10] highly recommend checking out our AI
[08:12] film making courses over at curious
[08:15] Refuge we actually train artists at
[08:17] every major studio and we would love to
[08:19] have you inside of the program courses
[08:21] start up every single month so be sure
[08:23] to click the link below if you want to
[08:25] learn more but absolutely no pressure at
[08:28] all with we also have a Weekly
[08:30] Newsletter that we send out with the
[08:32] latest AI film making news that you need
[08:35] to know you can subscribe by visiting
[08:37] curious refuge and clicking that blue
[08:39] button in the top right corner thank you
[08:41] so much for watching be sure to like And
[08:44] subscribe and we will see you next time
⚡ Saved you 0h 08m reading this? Transcribe any YouTube video for free — no signup needed.