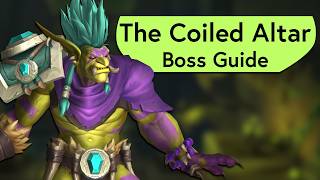

3 Boss Mechanics That Wipe Raids
45sQuickly highlights multiple deadly mechanics, perfect for hooking viewers interested in raid strategy.
▶ Play Clip"Delivers exactly what the title promises — a clear, structured guide for both difficulties."
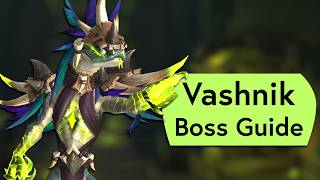
This video is a comprehensive raid guide for the Coiled Altar encounter in The Venomous Abyss, covering both Normal and Heroic difficulties. The guide details the three phases and intermission, explaining each boss mechanic and providing clear strategies for tanks, DPS, and healers.
The fight has three phases and an intermission. Phase 1 involves two bosses: Axegrinder and Venomfang. Axegrinder throws spinning axes, and Venomfang poisons players.
Green orbs spawn and can be picked up by running into them. They drop back to the ground after five seconds. Players should collect them into piles for tanks to clear.
Zul'jan's Sever frontal cone stacks a debuff and destroys venoms. Tanks should move the boss to clear orb piles and tank swap between cones.
Guillotine is a group soak followed by a massive AOE. The target places it on an edge, everyone soaks, then runs out. Fangs of the Coiled Altar does raid damage and fills the floor; players must move to the middle.
Dreadmarch mind controls players, making them march to the edge. DPS must break the absorb shield to break the MC. A ghost spawns that fixates players; facing it stops it.
The tank's Soul Sever frontal cone deletes ghosts. After a cone, three soul fragments spawn that must be collected before expiring. Tank swap after every cone.
Gloombomb marks players with AOEs; they must run out and collect their soul pieces. At 100 energy, the boss gets an absorb shield and casts a raid wipe; DPS must break the shield and kick the cast.
Zul'jan takes 100% increased damage, so burn him. Fragments of Malacrass walk to Zul'jan and heal him; popping them causes raidwide damage. In Phase 3, fight both bosses together, DPS evenly to kill them simultaneously.
On Heroic, destroying green orbs stacks a DoT on the raid. Soaking Guillotine applies a debuff, requiring two soak groups. Getting hit by a fixate ghost mind controls you, so face them before they bump into you.
How long does a green orb stay on the ground after being picked up?
Five seconds.
00:27
What does the Sever frontal cone do?
It stacks a debuff and destroys venoms (orbs).
00:39
What happens if you fail to collect your soul pieces after Gloombomb?
You will die.
02:07
What happens at 100 energy in Phase 2?
The boss gets a big absorb shield and starts casting a raid wipe.
02:20
What is the strategy for Phase 3?
DPS both bosses evenly and kill them together to avoid enrage.
03:04
What is the Heroic difference for Guillotine?
Soaking Guillotine applies a debuff, so you need two soak groups to trade off.
03:29
Tank Cone Clears Orbs
Explains the core tank mechanic for Phase 1, emphasizing positioning and orb management.
00:39Mind Control Break
Details the DPS responsibility to break mind control shields, a critical raid-saving action.
01:19Raid Wipe Prevention
Highlights the high-stakes moment at 100 energy, requiring coordinated DPS and interrupts.
02:20Even DPS to Avoid Enrage
Stresses the importance of balanced damage to prevent enrage, a common wipe cause.
03:04[00:00] Hi! I’m Hazel, and this is a guide to The Coiled Altar fight in The Venomous Abyss on Normal and Heroic difficulty. This is a big fight with three phases and an intermission, so buckle up.
[00:12] In Phase one, Axegrinder chucks spinning axes, don’t get lawnmowed. Venomfang poisons a few players, cleanse it if you can and heal through it if you can’t. and we need to gather them up. You can Run into an orb to pick it up,
[00:27] and it’ll drop back onto the ground five seconds later. Collect those up into a few little piles. To clear them, we need our tanks. Zul’jan will aim the Sever frontal cone at his target, which stacks
[00:39] a debuff and destroys venoms. Our tanks want to movethe boss around and clear orbs with that cone. This is much easier if the raid has done well at piling up orbs. Tank swap between cones.
[00:52] Guillotine is a group soak followed by a massive AOE. The target needs to place it on an edge, everyone gets in, then everyone gets the heck out of there before the floor erupts. Group sprints like roars or lock gates are really nice here.
[01:06] Fangs of the Coiled Altar does raid damage and fills up the floor from these fountains on the side. Get to the middle where it’s safe. When Zul’jan dies, we enter phase two. Any orbs still up will explode,
[01:19] In Phase Two, we fight Malacrass. Dreadmarch will mind control players and make them march towards the edge. We need to DPS off their absorb shield to break their MC before they jump. c
[01:33] When the MC is broken, a ghost will spawn that fixates players. They will walk towards you unless you face them, which stops them in their tracks. and then face them to pause them in place. You cannot DPS these, so you're just stacking them up.
[01:51] Our tank has a frontal cone again, this one called Soul Sever. They want to aim that at the ghost pile to delete them. After the tank takes a cone, they spawn three soul fragments that they need to collect before they expire. And like before, we want to tank swap after every cone.
[02:07] Gloombomb marks a few players with AOES, they need to run out of the group with that. After those go off, the targets will also need to collect their soul pieces, just like the tanks did. Failing to get your soul back in time will kill you, so pick em up before you head back in.
[02:20] At 100 energy, the boss gets a big absorb shield and starts casting a raid wipe. We need to DPS off the shield and kick the cast, while doing plenty of raid healing and dodging stuff on the ground. When Malacrass dies, there is a knockback, so mind the edge. It’s intermission time.
[02:37] Zul’jan takes 100% increased damage, so blow cooldowns and burn him with everything you’ve got. Fragments of Malacrass will walk to Zul’jan and heal him if they get there. You can pop those by walking into them, but it does do a pretty gnarly burst of
[02:51] raidwide damage. We want to Pop as many of the fragments as we can but keep an In Stage 3, we fight both bosses together, with nearly every mechanic from the first
[03:04] two phases. Either will enrage if the other dies, so DPS evenly and kill them together. so the tank cone can clear them both. It’s a race to the end to
[03:17] On Normal, that’s it. On Heroic, we get a bunch of new stuff. Destroying green orbs on heroic now stacks a DoT on the raid,
[03:29] Soaking Guillotine now applies a debuff, so on Heroic you’ll need to assign two soak groups for Guillotine and trade off. In phase two, getting hit by your fixate ghost now Mind Controls you,
[03:42] be careful to turn and face them before they bump into you. raidwide fears- those need to be kicked and killed. I’ve got more raid guides if you want ‘em and have a wonderful, wonderful day. Bye!
⚡ Saved you 0h 04m reading this? Transcribe any YouTube video for free — no signup needed.