The Truth Behind My Minimalist UI
42sReveals that the clean look is achieved by cropping the screen, surprising viewers who thought it was the full layout.
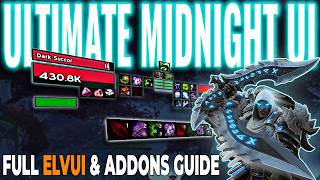
▶ Play ClipThis video provides a comprehensive, step-by-step guide to creating a minimalist World of Warcraft UI using ElvUI and a curated set of add-ons. The creator shares their exact profiles and configuration settings, covering everything from core setup to optional quality-of-life enhancements. The guide is designed for users of varying monitor resolutions and includes detailed instructions for importing profiles from Wago.io and GitHub.
Viewers requested a breakdown of the creator's UI and add-ons, including setup instructions and importable profiles.
The video explains the add-ons used, how to set everything up, and provides profiles for import.
The UI is built on ElvUI as a core foundation with several layered add-ons.
During recording, only the center portion of the screen is shown. The full UI extends further out on the sides on a 49-inch ultra-wide monitor (5120x1440). For the video, the resolution was downscaled to 2560x1440 for wider usability.
Users on 1920x1080p monitors can import the profiles but may need to adjust the overall UI scale in ElvUI and reposition a few elements.
Essential core add-ons are highlighted in deep blue; optional quality-of-life add-ons are in green.
The creator walks through setting up the entire UI from a fresh character, with timestamps in the description for each add-on.
First-time users need to run the setup wizard: click 'setup CVars' and set UI scale to auto-scale.
Instructions to import the main profile string and optional aura filters string from the Wago link for the Dim UI ElvUI profile.
Instructions to import the WindTools profile from GitHub via the raw script copy-paste method into the ElvUI WindTools import box.
Enables Blizzard's built-in damage meter via gameplay enhancements options; if not using it, WindTools re-skinning for the damage meter needs to be disabled.
Install Plater, choose it as the nameplate add-on, then import the Dim UI profile from Wago.
Two profile versions are provided: 'light' (for Death Knights with ElvUI action bars) and 'full' (replaces center action bars and adds HUD). Import instructions vary by version.
For Death Knights using the light version, recommended to pair with mini compact runes add-on for rune/resource tracking.
A customizable icon showing the current assist/highlight spell. Settings: enable show with target, show in combat, hide while mounted, hide in vehicle/pet battle.
Apply the 'Dark Skulls' skin globally for skinnable elements; for simple assisted combat icon, use the 'Squat' skin.
A keybinding helper that reduces on-screen action bars by dragging spells/macros into spec-specific tabs. General tab carries across all characters; character-specific tab is per spec.
Configured to show only incoming and static battle text. Disable outbound frames and notification frame. Set inbound to hide icons; static with reverse direction. Disable server alerts to reduce spam.
A minimalist info bar replacing ElvUI's default data bar. Import profile from GitHub raw script.
A quality-of-life add-on with frame scaling, better private aura handling, and visibility rules. Import profile from GitHub; enable frame scaling; enable standalone private aura and position it next to the player unit frame.
Adds improvements to looting, talking heads, inventory, title management. Key options: enable loot window, talking head, title manager, reagents/vendors locations, nameplate soft targets, show cast bar, show quest objective.
Replaces default quest/NPC dialogue windows with a modern dark mode UI. Adjust settings via F1 when interacting with an NPC. Recommended to disable camera movements and enable auto-complete quest for holiday events.
Adds a clean beam waypoint pointing towards objectives. Works well alongside TomTom. Default settings are sufficient.
This walkthrough provides a complete, import-based solution for building a minimalist WoW UI. By following the step-by-step instructions and using the provided profiles, users can replicate the exact look and functionality, with flexibility for different classes and monitor resolutions.
"The title promises a full ElvUI setup and add-on list, and the video delivers exactly that with detailed, step-by-step instructions and importable profiles."
ElvUI
tool
WindTools (ElvUI plugin)
tool
Plater
tool
Class UI Enhance
tool
Bliss HUD
tool
Simple Assisted Combat Icon
tool
Masque
tool
Dark Skulls (Masque skin)
tool
Squats (Masque skin)
tool
BindPad
tool
Midnight Battle Text
tool
XIV Data Bar Continued
tool
Enhanced QoL
tool
Plumber
tool
Dialogue UI
tool
Waypoint UI
tool
Mini Compact Runes
tool
TomTom
tool
Dim (video creator)
person
Dim UI ElvUI Profile (Wago)
link
Dim UI Plater Profile (Wago)
link
Dim UI Bliss HUD Profile (Wago)
link
Dim UI Light Class UI Enhance Profile (Wago)
link
Dim UI Full Class UI Enhance Profile (Wago)
link
Dim UI Enhanced QoL Profile (GitHub)
link
Dim UI XIV Databar Profile (GitHub)
link
What is the core foundation add-on for the UI demonstrated in the video?
ElvUI
0:20
What monitor resolution was used for recording the video, and to what was it downscaled?
Native: 5120x1440 (49-inch Samsung Odyssey G9 ultra-wide). Downscaled to 2560x1440 for the video.
0:55
What two things must a first-time ElvUI user do in the initial setup wizard?
Click 'setup CVars' and set the UI scale to auto-scale.
2:23
What is the command to open ElvUI settings in chat?
/ec
2:57
Which two add-ons are recommended to be imported before Class UI Enhance to ensure correct loading order?
Bliss HUD (for layout) and the Class UI Enhance profile (light or full).
7:09
What Masque skin is applied globally for skinnable elements, and which skin is used specifically for the Simple Assisted Combat Icon?
Global: Dark Skulls. For Simple Assisted Combat Icon: Squat.
12:51
What does BindPad replace on the screen?
It replaces the need for many on-screen action bars by allowing keybinding via drag-and-drop of spells/macros into a pad.
13:54
How do you fix flickering with Blizzard's damage meter after installing Midnight Battle Text?
Left-click the Midnight Battle Text minimap icon and toggle the damage meter option on.
15:38
What is the purpose of enabling 'Standalone private aura' in Enhanced QoL?
It allows private auras (such as debuffs you apply) to be displayed as a separate movable icon, rather than being merged into the general buff/debuff frame.
19:21
Recording vs actual UI difference
Explains the deliberate use of a camera crop to create a minimal look, while the full UI extends on the sides on an ultra-wide monitor.
0:42Color-coded add-on categories
Categorizes add-ons as essential (deep blue) vs optional quality-of-life (green), helping users prioritize setup.
1:29Two-string import for ElvUI profile
Demonstrates that the ElvUI profile requires both a main string and an optional aura filters string for full functionality.
2:47Light vs Full Class UI Enhance profiles
Offers two profiles tailored to different playstyles and class needs (Death Knight vs general use), showcasing modularity.
7:36BindPad reduces on-screen clutter
BindPad is highlighted as a five-year staple that dramatically reduces the number of visible action bars by centralizing keybinding.
13:54Enhanced QoL frame scaling and private aura
Shows how to enable quick scaling of UI panels and separate private auras for better visibility, key for advanced UI customization.
17:48Dialogue UI replaces default quest windows
A full replacement for the default NPC dialogue system, with dark mode, camera control, and auto-complete for a streamlined experience.
20:49[00:01] In my last video, a lot of you asked
[00:03] about my UI and what add-ons I use to
[00:06] achieve this look. So, today I'm going
[00:08] to break it all down for you. Exactly
[00:10] what add-ons I run, how to set
[00:12] everything up, and I'll share all my
[00:14] profiles so you can import them and get
[00:16] the same style. My UI is built on ElvUI
[00:20] as a core foundation with several other
[00:23] add-ons layered on top that each play an
[00:25] important role in overall design. This
[00:28] video is also a great way for you some
[00:31] really useful add-ons that can seriously
[00:33] improve your gameplay and UI. Before we
[00:35] jump into the add-ons, I wanted to
[00:37] quickly explain what you're actually
[00:39] seeing in my videos. When I record, you
[00:42] only see the center portion of my
[00:44] screen. This helps create that clean,
[00:46] minimalistic look you see in the video.
[00:49] In reality, my full UI extends further
[00:52] out on the sides. I play on a 49-in
[00:55] Samsung Odyssey G9 ultra-wide monitor at
[00:58] the resolution of 5120 by 1440. For this
[01:02] video and sharing my profiles, I've
[01:04] downscaled my resolution to 2560 by
[01:07] 1440. This makes the layout much more
[01:10] usable for most of you. If you're
[01:12] playing on a standard 1920 by 1080p
[01:15] monitor, you can still import the
[01:17] profiles, but you'll likely need to
[01:19] adjust the overall UI scale in ElvUI and
[01:22] reposition a few elements. With that out
[01:25] of the way, here are all the add-ons I
[01:27] use.
[01:29] Add-ons highlighted in deep blue are the
[01:32] essential core add-ons that build my UI.
[01:35] The ones in green are completely
[01:37] optional, but they add nice quality of
[01:39] life touches and contribute heavily to
[01:41] the minimal aesthetic. Most of these
[01:44] add-ons have imported profiles, which
[01:46] I've linked below. The ones that don't
[01:48] support profiles are pretty
[01:49] straightforward to set up manually.
[01:52] Because I recorded this at a lower
[01:54] resolution than my native setup, you may
[01:56] need to make small adjustments to unit
[01:59] frame positions after importing. I'll
[02:01] show you how exactly I like them placed.
[02:03] To make this as easy as possible, I'm
[02:05] going to walk you through setting up the
[02:07] entire UI from a fresh character. I've
[02:10] added timestamps in the description so
[02:12] you can jump straight to any specific
[02:14] add-on. Let's start with ElvUI and the
[02:16] WindTools plugin. If this is your first
[02:18] time using ElvUI, you'll need to go
[02:21] through the initial setup wizard. The
[02:23] only two things you'll need to do here
[02:25] is click setup C vars and set the UI
[02:28] scale to auto scale. This helps
[02:30] everything line up correctly. If the UI
[02:32] feels too small afterwards, you can
[02:35] increase the scale later, but just know
[02:37] you may need to reposition a few
[02:39] elements in ElvUI and other add-ons.
[02:42] Once you've completed the setup and
[02:44] reloaded your UI, it's time to import my
[02:47] Dim UI ElvUI profile. To get to the
[02:49] ElvUI interface, you can hit escape, go
[02:53] to ElvUI in the menu, or simply type /ec
[02:57] in chat. Navigate to profiles, then
[03:00] select the import tab. Go to the Wago
[03:03] link for the Dim UI ElvUI profile.
[03:06] You'll need to import two strings from
[03:08] this page.
[03:10] Copy the main profile string and paste
[03:12] it into the first box. The second
[03:14] string, labeled aura filters, is in the
[03:17] description on that same page. This one
[03:19] is optional if you already have your own
[03:21] aura filters set up. Paste it in the box
[03:24] directly below the first one. Click
[03:26] import, reload your UI, and it should
[03:29] start looking a lot like mine. A quick
[03:31] note, since I mainly play Death Knight,
[03:34] I left action bar two and action bar
[03:36] three enabled in this profile.
[03:39] I use them as my personal cooldown
[03:41] tracker instead of Blizzard's default
[03:43] cooldown bar, which I don't like the
[03:44] look of.
[03:46] If you want to keep my exact layout,
[03:48] you'll need a resource bar that fits
[03:50] nicely between the two action bars. For
[03:53] Death Knights, I'll show you how to set
[03:54] up mini compact runes later in this
[03:57] video.
[03:58] If you prefer to use your own cooldown
[04:00] manager add-on or the Class UI Enhance
[04:03] add-on I included, you can simply
[04:05] disable action bar two and three in
[04:08] ElvUI under the action bar section.
[04:11] I've also included later in this video
[04:13] my full cooldown profile for Class UI
[04:16] Enhance that works across all classes.
[04:18] Now, let's set up the WindTools plugin.
[04:21] Open the ElvUI option again, scroll down
[04:24] to WindTools on the left, go to advance,
[04:27] then the profile tab.
[04:29] Go to the WindTools GitHub link in the
[04:31] description, click the raw button to
[04:33] open up a new window, then highlight the
[04:36] script by pressing control A. Then press
[04:39] control C to copy the entire script.
[04:41] Now, paste this into the import box.
[04:43] Before you click import, make sure you
[04:45] first click the accept button, then hit
[04:48] import. After reloading, you should
[04:50] immediately notice a big improvement in
[04:52] how quest and other elements are
[04:54] displayed.
[04:55] I use Blizzard's built-in damage meter
[04:58] for my UI layout with WindTools handling
[05:00] the re-skinning. If you want to enable
[05:02] Blizzard's damage meter, hit escape, go
[05:05] to options, select gameplay
[05:07] enhancements,
[05:09] and check the box for damage meter.
[05:11] If you're not using Blizzard's damage
[05:13] meter, you will need to disable
[05:15] WindTools re-skinning to remove the
[05:18] black panel from appearing in the bottom
[05:20] right of the screen.
[05:21] Open ElvUI, go to WindTools under
[05:24] plugins, then navigate to combat, select
[05:28] damage meter layout tab, and disable it.
[05:31] If you're experiencing flickering with
[05:33] Blizzard's damage meter after installing
[05:35] Midnight Battle Text, here's the fix.
[05:38] Left click the Midnight Battle Text icon
[05:41] on your mini map and toggle the damage
[05:43] meter option on. This should resolve the
[05:46] flickering issue.
[05:48] Next up is Plater for name plates.
[05:51] Plater is a powerful name plate add-on
[05:53] that's incredibly easy to customize. You
[05:56] can click directly on any elements to
[05:58] change its settings or simply drag
[06:00] widgets to move them around. My profile
[06:03] is optimized for solo content, mythic
[06:05] plus, and rating in mind. It also color
[06:08] codes elite mobs to make group content,
[06:11] questing, and world content feel cleaner
[06:13] and more intuitive. When you load Plater
[06:16] for the first time, it will prompt you
[06:18] to select which add-on you want to use
[06:20] for name plates. Choose Plater and
[06:23] reload your UI.
[06:25] Once that's done, hit escape, go to
[06:28] options, then click on the add-on tabs,
[06:31] select Plater,
[06:32] and click open options. In the general
[06:35] tab, click the import button. Go to the
[06:38] Wago link for the Dim UI Plater profile,
[06:41] copy the main profile string, and paste
[06:44] it into the import box. Then press
[06:46] import.
[06:48] A confirmation window will pop up asking
[06:51] if you want to override the current
[06:53] profile or create a new one. Select make
[06:56] new and name it Dim UI and click okay.
[07:00] And that's it. Your name plates are now
[07:01] fully set up and should look just like
[07:04] mine. No further adjustments needed for
[07:06] this add-on. Before we set up the class
[07:09] UI enhance cool down manager, it's best
[07:12] to import the Bliss HUD layout first so
[07:14] everything loads in the correct order.
[07:17] Hit escape and go to edit mode. Then
[07:19] click import layout. Go to the Wago link
[07:22] for the Dim UI Bliss HUD profile, copy
[07:25] the main profile string, and paste it
[07:28] into the import box. Name the layout Dim
[07:30] UI
[07:32] and click import.
[07:34] Now we can move on to the class UI
[07:36] enhance add-on. I've created two
[07:38] different profiles for this add-on. A
[07:40] light version and a full version. The
[07:43] light version is what I use on my Death
[07:45] Knight. It works alongside ElvUI's
[07:48] action bar two and three, and the mini
[07:50] compact rune as my main resource bar.
[07:53] The full version replaces the center
[07:55] action bars two and three, and the mini
[07:58] compact runes add-on completely. The
[08:01] light version profile only enables the
[08:03] racial trinkets consumables buffs
[08:06] and buff bar trackers from the Class UI
[08:09] Enhance add-on.
[08:10] To import it, open the Class UI Enhance
[08:13] options by right-clicking the minimap
[08:15] icon or typing {forward slash} Q in
[08:18] chat. Go to the import/export tab, open
[08:21] my DemUIQ Light Hub layout on waego.io
[08:25] and copy the string. Paste it in the
[08:27] import box and click import. Make sure
[08:29] the profile name contains the word
[08:31] light, then confirm the import.
[08:34] Now, reload the UI.
[08:36] After reloading, go back into the Class
[08:39] UI Enhance options, click cooldown
[08:41] manager settings in the top right. This
[08:43] will open the cooldown settings, which
[08:45] allows you to see your buff tracker and
[08:48] buff tracker bars.
[08:50] Real quick, in the cooldown settings,
[08:52] click on the buff tab and confirm you
[08:55] have spells under track buff and the
[08:57] track bar section. If this is empty, the
[08:59] buff tracker and buff tracker bar will
[09:02] not show.
[09:03] After confirming this,
[09:05] if any trackers are in the wrong
[09:06] position, you can easily adjust them. To
[09:09] do this, go to the tracker tab, select
[09:12] the tracker you want to move, buff
[09:14] tracker, buff tracker bars, etc. You can
[09:17] then use the X and Y offset sliders to
[09:20] fine-tune the position.
[09:23] For Death Knights using my light version
[09:25] profile of Class UI Enhance, I highly
[09:28] recommend pairing it with the mini
[09:30] compact rune add-ons for your runes and
[09:32] resource tracking. Since this add-on
[09:35] doesn't support profile importing, I'll
[09:37] show you exactly how I have mine
[09:39] configured. You can pause the video and
[09:41] match these settings.
[09:48] The full version profile enables the
[09:50] complete center HUD, cooldowns, buffs,
[09:53] utilities, resource bars, etc. If you
[09:56] use this version, you should disable
[09:58] action bar two and action bar three in
[10:01] ElvUI, so the center of your screen
[10:03] stays clean.
[10:05] To import, open the Class UI Enhanced
[10:08] Options by right clicking the minimap
[10:10] icon or typing /q in chat.
[10:14] Go to the import export tab. Open my
[10:18] dmuiq full HUD layout on wago.io and
[10:22] copy the string. Paste it into the
[10:24] import box and click import.
[10:27] Make sure the profile name contains the
[10:29] word full, then confirm the import.
[10:32] Reload your UI.
[10:34] After reloading, go back into the Class
[10:37] UI Enhanced Options. Click cooldown
[10:40] manager settings in the top right. This
[10:43] will open the cooldown settings, which
[10:44] allows you to see your buff tracker and
[10:47] buff tracker bars.
[10:49] To see the center HUD, you will need to
[10:51] have a target. In the cooldown settings
[10:53] that opened up after clicking on the
[10:55] cooldown manager settings, look under
[10:57] the spell tab. Make sure you have spells
[11:00] you want to track under the essential
[11:02] cooldowns and the utility cooldown
[11:04] section. If these are empty, the HUD
[11:06] will not display correctly. Now, click
[11:08] on the buff tab and confirm you have
[11:10] spells under the track buff and track
[11:13] bar section. If these are empty, the
[11:15] buff tracker or the buff tracker bar
[11:18] will not show. If the central hub or any
[11:20] of the trackers are out of place in the
[11:22] full version, you'll need to adjust them
[11:24] by selecting yourself or a target, so
[11:27] the HUD elements appear. Now, in the
[11:29] Class UI Enhanced Options, go to the
[11:32] tracker tab. To adjust the HUD, you will
[11:34] need to select the cool down tracker.
[11:36] Then use the X and Y offset sliders to
[11:39] fine-tune the position. For adjusting
[11:41] the buff tracker bars or consumables,
[11:44] click the cool down manager settings in
[11:46] the top right to adjust the positions.
[11:49] Once everything looks good, reload your
[11:51] UI to save the positions.
[11:53] Next is simple assisted combat icon.
[11:56] This is a simple icon that can be placed
[11:59] anywhere on the screen that will show
[12:01] the current assisted highlight spell
[12:03] without having to look at your action
[12:05] bars all the time. When you first load
[12:07] the icon, you will see the icon appear
[12:10] on your screen. To open the settings,
[12:12] hit escape, go to options, click the
[12:14] add-ons tab,
[12:16] select simple assisted combat icon, and
[12:19] go to profiles. There's no importable
[12:21] profiles, so create a new one. Under the
[12:23] display section, enable the following
[12:26] options: show with target, show in
[12:28] combat,
[12:30] hide while mounted,
[12:32] hide in vehicle, and pet battle.
[12:35] The rest of the settings are personal
[12:36] preferences. I personally only show the
[12:39] icon itself and keep the keybinds
[12:41] hidden.
[12:43] Go ahead and drag it to where you want
[12:44] it to show during combat. Don't worry
[12:47] about the size for now, we'll adjust
[12:49] that next with the Masque add-on.
[12:51] Up next is Masque with the two skins,
[12:54] Dark Skulls and Squats. Before we open
[12:57] Masque, we first need to enable a few
[12:59] options in ElvUI so the skins apply
[13:01] correctly. Type EC in chat. Now go to
[13:05] action bars, select the Masque tab, and
[13:07] enable action bars, pet bars, and stance
[13:10] bar.
[13:11] Now go to the buff and debuff section,
[13:14] select the Masque tab, and enable buffs
[13:17] and debuffs. Close ElvUI and reload your
[13:20] UI.
[13:21] Now open the Masque settings.
[13:23] Hit escape,
[13:25] options, add-on tabs, expand mask.
[13:29] Now, go to profiles. There's no
[13:31] importable profiles, so create a new
[13:34] one. Under the global section, select
[13:36] the skin dark scale. This will apply the
[13:39] look to most skinnable elements across
[13:41] your add-ons. If you're using the simple
[13:43] assisted combat icon add-on,
[13:46] go to that specific group in the mask
[13:48] menu and change its skin to squat.
[13:54] Next up is BindPad. To open BindPad,
[13:58] type BP in chat. This add-on might look
[14:01] a little confusing at first, but it's
[14:03] perfect for reducing the amount of
[14:05] action bars you need on your screen.
[14:07] It has become one of the most useful
[14:09] add-ons I have used over the last 5-plus
[14:12] years. It makes keybinding extremely
[14:14] simple by just drag and dropping spells
[14:17] or macros into the pad. The general tab
[14:20] is for abilities like macros you use on
[14:22] every character, such as mounts or
[14:24] consumables. This tab carries over to
[14:27] all your characters when the add-on is
[14:29] enabled. The character specific tab is
[14:31] where you set up keybinds for each spec
[14:34] on your current character. On the right
[14:36] side of the BindPad window, you'll see
[14:38] four tabs. The first time you switch
[14:40] specs after installing the add-on, these
[14:42] tabs will populate.
[14:44] You'll need to drag your class abilities
[14:47] and macros into the correct spec tab and
[14:50] keybind them. For example, if you use a
[14:52] specific interrupt macro, like the one
[14:55] from my previous video, you can drag
[14:57] that macro into the character specific
[14:59] tab and set the keybind. Once you've set
[15:01] up all your specs, BindPad will remember
[15:04] your keybinds perfectly when you switch
[15:06] between the specs.
[15:08] Next is Midnight Battle Text. To open
[15:11] the settings, hit escape, go to options,
[15:14] click the add-ons tab, then select
[15:17] Midnight Battle Text and go to the
[15:18] profiles. There are There are importable
[15:20] profiles for this add-on, so create a
[15:23] new profile. I only use the incoming and
[15:26] static frames with this add-on to keep
[15:28] the center of my screen clean. Here's
[15:31] how I have it set up. Go to the scroll
[15:33] frames and disable both outbound frames
[15:36] and the notification frame. Now, adjust
[15:38] the frames you'll actually use. Click on
[15:40] inbound and check hide icons. Click on
[15:43] static and make sure reverse direction
[15:46] is enabled. Under event types, I disable
[15:49] server alerts to reduce spamming from
[15:52] currency and items while looting. You
[15:54] can enable or disable these based on
[15:56] your preference. Now, let's position the
[15:58] frames using BlizzHUD. Click the edit
[16:01] position button at the top of the static
[16:03] window. While in edit mode, disable the
[16:06] green eyeball icon in the top right to
[16:09] hide the Blizzard default frame so you
[16:11] don't accidentally move them. Select the
[16:13] inbound frame, set the horizontal curve
[16:15] to zero. This makes the damage and
[16:17] healing text fall in a straight vertical
[16:19] line. Then position it nicely above or
[16:21] around your player's unit frame. Select
[16:24] the static frame and set the height to
[16:26] around 230. If you're unable to save the
[16:29] position, this is normal since we didn't
[16:31] touch any Blizzard frames. Once
[16:33] everything looks good, you can reload
[16:35] your UI.
[16:36] If you're experiencing flickering with
[16:38] Blizzard's damage meter after installing
[16:40] Midnight Battle Text, here's the fix.
[16:43] Left click the Midnight Battle Text icon
[16:46] on your mini map and toggle the damage
[16:49] meter option on. This should resolve the
[16:51] flickering issue.
[16:53] Next is XIV Data Bar Continued. This
[16:56] add-on adds a clean, minimalist info bar
[16:59] at the bottom or top of your screen. It
[17:02] shows useful information at a glance
[17:04] like gold, durability, FPS and latency,
[17:07] time, spec and talent information, and
[17:09] more. It's very lightweight, highly
[17:12] customizable, and looks great with
[17:14] minimal UIs. I use it because it
[17:16] replaces a lot of the ElvUI's data bar
[17:19] that I feel is dated. You can open the
[17:21] add-on by right-clicking the minimap
[17:23] icon or by typing {forward slash} XBC in
[17:27] chat. Go to profile sharing and click
[17:30] import profile.
[17:31] Head to the XIV data bar continue
[17:34] profile link on GitHub. Click the raw
[17:37] button, then highlight the script by
[17:39] pressing control A, then press control C
[17:41] to copy the entire script. Paste the
[17:43] string into the import box and click
[17:45] accept. Next up is enhanced QoL. This is
[17:50] a fantastic quality of life add-on that
[17:52] adds tons of small but extremely useful
[17:55] improvements to the UI and automations.
[17:58] It includes things like frame scaling
[18:00] and moving, better private aura
[18:01] handling, and many other handy features.
[18:04] You can open the add-on by
[18:06] right-clicking the minimap icon or
[18:08] typing in {forward slash} EQoL in chat.
[18:12] Go to profiles, add-on,
[18:14] head to the enhanced QoL profile link on
[18:18] GitHub. Click the raw button,
[18:20] press control plus A to select all, then
[18:23] control plus C to copy. Paste this into
[18:26] the import box and click okay.
[18:30] If you play a pet class,
[18:32] you might occasionally see Blizzard's
[18:34] default pet frames overlapping your
[18:37] ElvUI pet frame, especially after
[18:39] editing the BlizzHUD. To prevent this,
[18:42] go into enhanced QoL options,
[18:45] click interface, scroll down to
[18:47] visibility and fading frames. Under
[18:50] visibility rules, find pet frames and
[18:53] set it to always hidden. This keeps
[18:55] things clean and stops the double pet
[18:57] frames from appearing.
[18:59] Now, go back into enhanced QoL,
[19:02] click interface,
[19:04] scroll all the way down to the bottom
[19:06] and expand the mover section. Check the
[19:09] box for enable scaling for all frames.
[19:12] This lets you hold control and scroll
[19:14] with your mouse wheel to quickly resize
[19:16] interface panels. It's super handy.
[19:19] Next, you want to expand standalone
[19:21] private aura and make sure that option
[19:23] is enabled. Finally, let's make sure the
[19:25] private aura icon is in the right spot.
[19:28] Go to edit mode and check that the
[19:30] private aura is positioned next to the
[19:33] player unit frame. If it's already
[19:34] there, you're good to go. Plumber is
[19:37] another quality of life add-on that adds
[19:39] a bunch of useful improvements to many
[19:41] parts of the game. It enhances looting
[19:44] windows, talking heads, inventory
[19:46] management, title management, and adds
[19:49] several other handy little features.
[19:52] Open Plumber by right-clicking the
[19:54] minimap icon or typing Plumber in chat.
[19:57] There's no importable profiles for this
[19:59] one, but here are the key options I like
[20:02] to enable. Under the top section, enable
[20:04] loot window and talking head. Click the
[20:06] cogwheel next to each to adjust their
[20:09] position if needed.
[20:11] Enable title manager. This is great for
[20:13] quickly searching and switching titles.
[20:15] Under inventory, I turn on reagents and
[20:19] vendors locations to help quickly
[20:21] identify what reagents I can combine and
[20:23] which vendors to turn in certain
[20:25] currency. Under unit frames, enable
[20:27] nameplate soft targets. This is really
[20:29] nice for seeing interactable items
[20:32] without having to target them. I also
[20:34] turn on show cast bar and show quest
[20:37] objective in the settings. These are
[20:39] just the ones I personally keep enabled.
[20:42] Feel free to turn on or off anything
[20:44] that doesn't fit your playstyle. It
[20:46] won't break anything. Next is Dialogue
[20:49] UI. Dialogue UI is a clean and modern
[20:52] replacement for Blizzard's default quest
[20:54] and NPC dialogue windows. It makes
[20:57] conversations with NPCs much nicer to
[20:59] look at with better layouts, dark mode
[21:01] support, improved camera options, and
[21:03] several quality of life features while
[21:06] interacting with quest and vendors. You
[21:08] can open the add-on by right-clicking
[21:10] the minimap icon. The default settings
[21:12] are already very good, but I find some
[21:14] of the camera options to be a bit
[21:16] annoying, especially when recording. I
[21:18] recommend testing what feels best for
[21:20] you. Overall, this is a fantastic add-on
[21:23] and you really can't go wrong with it.
[21:25] To adjust the settings, find an NPC with
[21:28] a quest available,
[21:29] open the quest, then press F1 on your
[21:31] keyboard to open the dialogue UI menu.
[21:34] Under the UI, I like using dark mode.
[21:37] Under the quest section, enable the
[21:39] options you prefer. Under the camera
[21:41] tab, I personally turn camera movements
[21:43] off. In the control tab, take a moment
[21:45] to learn the keybinds. They make
[21:47] accepting and turning in quest much
[21:49] faster. Under the gameplay tab, I enable
[21:51] quest item display, valuable reward
[21:54] pop-ups, and auto complete quest. This
[21:56] is especially useful for holiday events.
[22:00] Last up is Waypoint UI.
[22:02] This add-on is perfect with its default
[22:04] settings, so you don't need to change
[22:06] much. If you haven't heard of it before,
[22:09] Waypoint UI adds a clean, modern beam
[22:13] waypoint that points towards your
[22:14] objectives and really elevates the
[22:16] overall look of your UI. It also works
[22:19] great alongside TomTom if you prefer
[22:22] using that for manual waypoints. And
[22:24] that is my complete UI setup from start
[22:27] to finish. If you run into any issues
[22:29] while setting this up, drop a comment
[22:31] down below and I'll do my best to help
[22:33] you out. Also, let me know what you
[22:35] think of the UI.
[22:37] If you found this video helpful, please
[22:39] drop a like and subscribe so you don't
[22:41] miss future UI updates or guides. I'm
[22:44] always tweaking things, so there will
[22:46] probably be more videos like this in the
[22:48] future.
[22:51] Happy hunting.
⚡ Saved you 0h 23m reading this? Transcribe any YouTube video for free — no signup needed.