

The 4 Rules to 10x a Small Account
60sReveals the exact risk management rules (1:3 risk-reward, 20% risk, compounding) that promise 10x growth, sparking curiosity and debate.
▶ Play Clip"Title promises strategies for beginners, but the content is padded with promotions and unverified claims, overselling the 10x result."
The video presents three trading strategies aimed at growing a small trading account, with the creator claiming to have turned $100 into over $1,000 in under 30 days. It emphasizes strict risk management rules, including a minimum 1:3 risk-to-reward ratio, aggressive position sizing, compounding profits, and trading on medium time frames. The strategies include trend pullback entries using the 50 EMA and fair value gaps, trend reversal trading with volume analysis, and trend line breakout trading.
The creator claims to have turned $100 into over $1,000 (a 10x return) in under 30 days using a live trading account.
A free guide compiling the strategies is available in the creator's Telegram community, linked in the description.
Before strategies, four rules are introduced: high reward setups, large position size, compounding winners, and medium time frames.
Every trade must have at least a 1:3 risk-to-reward ratio. Example: risking $20 should aim for $60 profit.
For small accounts, risk 20% of balance per trade. This is aggressive and only suitable for small accounts.
Reinvest profits by risking the same percentage on the next trade, accelerating growth. Example: $100 to $160, then risk $32 on next trade.
Trade on 15-minute to 4-hour charts. Avoid higher time frames (slow) and lower ones (too volatile).
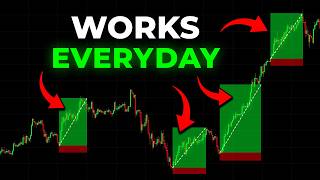
Identify trend using 50 EMA, wait for pullback into a fair value gap, enter with confluence, set stop-loss below gap, take-profit at 3x risk.
Use volume oscillator. Wait for volume spike above 30% line, identify trend, wait for volume drop below middle line, then cross back above with price reversal. Enter with stop-loss and 3x take-profit.
Draw trend line connecting at least three swing points. Wait for significant breakout, then enter on pullback to trend line. Stop-loss below line, take-profit at 3x risk.
Recommends Blofen for crypto trading, claiming fast execution, low fees, and bonuses up to $100,000 in futures bonuses via the link.
The video provides a structured approach to growing a small trading account, emphasizing strict risk management and specific strategies. However, it heavily promotes a free guide and a trading platform, and the claims of guaranteed returns are not substantiated.
What is the minimum risk-to-reward ratio required for every trade in the video?
At least 1:3, meaning profit potential must be at least three times the risk.
01:10
What percentage of balance is risked per trade for a small account?
20% of the balance.
02:03
What time frames are recommended for trading?
Between 15-minute and 4-hour charts.
03:23
What is a fair value gap?
A setup where the high of the first candle and the low of the third candle do not overlap with the middle candle's body, creating a visible gap.
05:03
How do you identify an uptrend using the 50 EMA?
The EMA is sloping upwards and price is above it.
04:26
What does a volume spike crossing above the 30% line indicate?
A spike in volume, showing strong momentum behind the current price movement.
09:21
What is the purpose of waiting for volume to drop below the middle line?
It confirms that the trend is losing strength and a reversal may be coming.
09:35
How many swing points are needed to draw a valid trend line?
At least three swing points.
12:09
Why is entering immediately after a breakout not recommended?
Because price often makes a slight pullback retesting the trend line, giving a better risk-to-reward entry.
13:13
Risk-to-Reward Rule
Establishes a strict risk management principle that is crucial for small account growth.
01:10Compounding Wins
Explains how reinvesting profits accelerates account growth, a key technique for small accounts.
02:31Fair Value Gap Definition
Provides a clear, actionable definition of a technical pattern used in the first strategy.
05:03Volume Oscillator Setup
Gives specific steps to set up the volume oscillator indicator, making the strategy implementable.
08:43Trend Line Validity
Emphasizes the importance of at least three swing points to avoid false breakouts.
12:09[00:02] trading account for beginners. Now, some to be true, but I've actually done it myself with a live trading account, turning $100 into over $1,000, a clean 10x return in under 30 days. And in this
[00:17] video, I'm revealing the exact strategies I used to make that happen so trading account yourself. By the way, I created a free guide that compiles all the strategies in this video into one document. Inside, you'll find
[00:30] step-by-step explanation of these strategies, which you can use as a cheat sheet for your next trade. This guide is available inside my Telegram community, the link in the description below. So,
[00:42] actual strategies, there's something I need to make clear. These strategies setups. They worked because I also followed a very specific set of rules rules, I would have never 10xed my account. So before we get into the
[00:57] actual strategies, I want to walk you through the four key rules I followed you skip this part, the strategies I'm about to teach won't help you. So pay close attention. Now, when I was growing this small account, I couldn't afford to
[01:10] take average trades. Each trade I took needs to have a high profit potential. is every trade you take must have at least a 1 to three risk-to-reward. What that means is if you're analyzing a trade, the profit potential must be at
[01:23] least three times the risk. So, for example, if I'm risking $20 on a trade, then the profit potential should be at least $60. Now, here's an example of a trade I'm not willing to take. Notice how this setup only has a one:1
[01:36] risk-to-reward. What that means is if I'm risking $20 on this trade, my potential profit would only be $20, which is not enough. And that's why every strategy I'll teach later in this video will have at least a one to three
[01:48] riskto-reward. So having a highreward setup is important, but that alone won't to the second rule, which is using a large position size. If you want to grow a small account quickly, you have to be aggressive and take more risks. That's
[02:03] exactly why this video is titled how to grow a small trading account because this method only works for small accounts. Once your account gets bigger, it's not wise to take this much risk. So, here's what I did with my $100
[02:15] account. For every trade, I risk 20% of my balance. That means that if a trade hits a stop-loss, I would lose 20%, which in this example is equal to $20. number one, which is only taking trades with at least a 1 to3 risk-to-reward,
[02:31] that meant I could make 60% back or $60 from just one winning trade. So, one winning trade is enough to cover three of my losses. Now, moving on to the one of all, and that is compounding my winners. This is what made my account
[02:45] grow so much faster than expected. Here's what it means. Let's say I started my account with $100. Then, I made a $60 profit from a trade. That brings my balance up to $160. Now, instead of locking in profits and
[02:57] playing it safe, I doubled down and continued risking the same percentage on the next trade. For example, let's say I found another potential trade setup. This means I'll now risk 20% of my $160 balance, which is $32. So, if the trade
[03:11] hits the stop- loss, I would lose $32. But if the trade wins, I would now gain But if the trade wins, I would now gain $96 because of the 1:3 risk-to-reward. So, by continuously compounding the wins onto my next trades, I was able to grow
[03:23] the account so much faster. Now, for the fourth and final rule is I only take trades on medium time frames, and that is between the 15minut to the 4hour chart. The reason I avoid higher time frames like the daily chart is because
[03:36] each candle takes too long to form. If I want to compound my account fast, I must use lower time frames. On the flip side, I also avoid time frames that are too low, like the 1 minute chart, because it's extremely volatile, and the
[03:48] strategies I'm about to teach don't work well on very low time frames. So, the sweet spot is between the 15-minut to the 4hour time frame. So, now that you growing a small account, let's get into the top three trading strategies you can
[04:01] use. Starting with the first one, this strategy is all about taking advantage of trends. But instead of chasing the trend, the key here is to enter during a pullback of that trend. This way, when the trend continues, you'll end up with
[04:13] way more profits because you entered with a better risk-to-reward. So, here's how the strategy works. Step one is to first identify the direction of the current trend. Is it an uptrend or a downtrend? The easiest way to do this is
[04:26] by using an indicator like the 50 period exponential moving average or the 50 EMA for short. To identify the trend using this indicator, we simply look at the direction of the indicator and the position of the price. So if the EMA is
[04:39] sloping upwards like this and price is above it, then it's a clear uptrend, which means for this setup, we'll wait for a pull back downwards to enter a long position. Now, if the EMA is sloping downwards and then price is
[04:51] below it, then it's a clear downtrend, which means we'll wait for a pullback upwards to enter a short position. Now, the obvious question is, how do we know the exact spot where price will make a pullback? This brings us to the second
[05:03] step. Look for something called a fair value gap. For those who don't know, a fair value gap is a setup where the high of the first candle and the low of the third candle don't overlap with the middle candle's body. This creates a
[05:15] visible gap called a fair value gap. So remember, if there's no gap, then it's not a fair value gap. Now, why does this matter? It's because when a fair value gap forms on a chart, price usually has a high chance of pulling back into it,
[05:28] almost like a magnet. Most of the time, it'll retest the gap and bounce off it, continuing the direction of the original trend. And it's during this pullback is where we'll enter our position. One thing to remember is for a fair value
[05:40] gap to be considered valid, it needs to be large. The larger the gap, the higher the chance that the setup actually plays out. If the gap is too small, there's a it's best to avoid trading it. Now, let's implement this in a real example.
[05:55] current trend. In this case, we can see that initially price was in a downtrend as shown by it staying below the 50 EMA. Then, price crosses above it, signaling we're now looking for a pullback to buy into this current uptrend. The next step
[06:11] is to look for a fair value gap. And right here, we spot a large green candle doesn't overlap the low of the next candle, creating a fair value gap. The which makes it valid for entry. The next step is to be patient and wait for the
[06:27] price to pull back into the gap. But we also want to make sure that the uptrend structure remains intact and that the pullback isn't too deep. In this example, price eventually pulls back into the gap. Now, ideally, we also want
[06:39] to see some confluences here, which simply means that there must be other factors confirming the setup besides the fair value gap alone. In this case, we can see that price is also sitting on the 50 EMA acting as a support level.
[06:51] This gives us extra confirmation that it will likely bounce from this area. From here, we can enter a long trade with our stop-loss placed just below the fair value gap and our take-profit set at three times the risk. As you can see,
[07:04] price bounces perfectly and hits our take-profit target. Let's look at another example. Here we can see that the 50 EMA is sloping downwards and the price stays below it, making this a clear downtrend. This means we're now
[07:16] looking for a pullback upwards to enter a short position. Next, we can spot a bearish fair value gap from this large red candle where the previous candle's low doesn't overlap with the next candle's high. Once the fair value gap
[07:28] is identified, the next step is to wait for price to make a pullback and fill the gap, ideally with confluence. In this case, price retraces into the fair value gap while also touching the 50 EMA. From here, we can place a short
[07:41] position with our stop-loss slightly above the fair value gap and our take-profit set at three times the risk. And as you can see, price drops target. Now, moving on to the second strategy. For this one, we're taking
[07:54] advantage of trend reversals. For example, if price is in a downtrend, we'll try to spot the exact moment where the downtrend is about to end so that we can time our buy entry right before the trend reverses. Now, of course, timing
[08:06] reversals like this isn't easy. Luckily, there is a way to do it with high accuracy, and that's by using volume. For those of you who don't know, volume in trading simply measures the strength behind a price movement. For example, if
[08:19] price is in an uptrend and volume is high, it means that the uptrend has a strong momentum behind it. Same goes for a downtrend. If price is dropping and volume is high, it means that the downtrend has strong momentum behind it.
[08:31] But here's the key. If you start to see the volume decreasing, that tells us the strength of that trend is now getting weaker, which could be an early clue that a reversal might be coming. So, by using this concept, we can start to
[08:43] predict when a trend is about to reverse just by watching the volume. So, here's how the full strategy works. The first thing you need to do is apply the volume oscillator indicator. To do that, go to the indicator section on Trading View
[08:55] and type in volume oscillator. Click the default one and add it to your chart. Once it's applied, aim your mouse at around the 30% level of the indicator. Then draw a horizontal line. If you're using Trading View, you can press Alt +
[09:09] H to easily draw this line. Once the indicator is ready, let's break down the exact entry conditions. Step one, we're looking for a setup where the volume indicator crosses above the 30% line we marked earlier. This shows us that
[09:21] there's a spike in volume. Step two is identify the trend that led to that volume spike. For example, here we see that when the volume spike happened, market was in a downtrend. So, our objective is try to time the end of this
[09:35] downtrend so we can open a buy position and catch the reversal. This brings us to step three, wait for the volume to drop below the middle line. This confirms to us that the downtrend is losing strength and that a reversal is
[09:47] likely coming soon. Step four, we want to wait for price to start forming a reversal while the volume crosses back above the middle line. The logic for this is simple. We want to confirm that the reversal is actually backed by
[09:59] uptrend isn't supported by increased volume, it means the move is weak and most likely won't last. Once the trend reversal is confirmed with high volume, that's when we enter a buy position. Next, place your stop loss
[10:13] give it enough room to breathe so you don't get stopped out too early. Then, set your takerit at three times your risk. Now, just let the price run. And as you can see, price reverses and hits our profit target. Let's look at another
[10:28] example. Again, the first thing we want to see is a volume spike crossing above the 30% level like in this example. Next, identify the trend that led to uptrend, which means we're waiting for this trend to end. So, we can time the
[10:42] short entry and profit off the reversal. After that, we wait for volume to drop below the middle line like this. This gives us even more confirmation that the uptrend is likely losing strength. And looking at these candles alone, you can
[10:54] already tell that the trend isn't as strong as before. Next, we want to see price forming a reversal while the volume crosses back above the middle line. This confirms that the new downtrend is backed by strong volume.
[11:07] So, once all the conditions are met, we place a short position. Next, we can place a stop loss slightly above our entry and take profit is set at three entry and take profit is set at three times the risk. As you can see,
[11:20] price reverses and hits our take-profit target. Overall, this strategy works great for growing small accounts since entering before the start of a new trend risk-to-reward setup. Now, moving on to the third strategy. For this strategy,
[11:33] we're going to use a concept called trend lines. A simple line that connects multiple swing points in price. The key idea behind the trend line is that if price breaks out of it, there's a high chance it'll move sharply in the
[11:45] direction of that breakout. So, if we can time our entry before the breakout happens, we can potentially enter a setup with a very strong risk-to-reward ratio. That's exactly why this is one of my favorite strategies. But, of course,
[11:57] to make this work, we can't just draw a random trend line and wait for a breakout. If the line is drawn slightly wrong, you could end up entering at the wrong place. So, here's how to trade the breakout strategy properly. The first
[12:09] step is to identify a trend line setup. And this is the most important part because a lot of traders get this wrong. To draw a valid trend line, you need to find at least three swing points in price. If it's anything less than three,
[12:21] swing points, connect them with a line. Now, here's something important. Before drawing a trend line, make sure you also check the direction of the trend. If the trend line connecting the swing high points. If the market is trending up,
[12:35] you draw the trend line connecting the swing low points. Once you've drawn the trend line, the next step is to wait for a breakout confirmation. A common mistake I see traders make is when they see price slightly broke out of the
[12:47] valid breakout already. But that's a big mistake because this will lead you prone to fake breakouts. For example, if we had drawn the trend line just slightly fake breakouts. That's why the correct
[13:00] way to do this is simple. We wait for a significant breakout. something like this. Once a valid breakout is identified, we can move on to the last entry. I don't recommend entering immediately after the breakout because
[13:13] too far which will give us a bad risk-to-reward ratio. So a trick that I after the breakout because what usually happens is after price makes a sharp
[13:25] breakout it will often make a slight pullback retesting the trend line before continuing its direction. Once we get that pullback, we can enter a buy pullback, this gives us a better risk-to-reward entry. I like to place a
[13:39] line. And for the take-profit target, we can aim for three times the stop-loss. As you can see in this example, price continues moving up and eventually hits our takerit target. A clean and successful trade. So, those are the top
[13:52] three strategies I used to 10x my account in less than 30 days. Now, in strategies I mentioned in this video are available inside a free guide that I've created. You can access it for free by joining my Telegram community. The link
[14:06] is in the description below. Once you're inside, just go to the files section and the guide will be there. And one last thing, another important factor that many traders overlook when growing a small account is the platform they use.
[14:18] Make sure to use a trading platform that can execute trades fast, has low fees, and offers a wide range of trading pairs. In my [music] opinion, Blofen is the best platform for trading crypto. It's also the one I personally use. If
[14:30] you sign up using my link in the description, you'll get up to $100,000 in futures bonuses. On this chart, you can see a full breakdown of the rewards platform. So, if you're already trading crypto, why not get free rewards for
[14:43] doing it? Join Bluff and now using the link in my description. I'll see you in link in my description. I'll see you in the next


⚡ Saved you 0h 14m reading this? Transcribe any YouTube video for free — no signup needed.