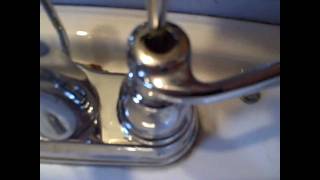

Stop the Drip: Fix a Leaky Faucet Fast
37sOpens with a relatable, frustrating problem and a confident promise, hooking viewers who want a quick fix.
▶ Play Clip"The title accurately describes the content: a straightforward faucet repair tutorial."
This video provides a step-by-step guide to fixing a leaky faucet, covering disassembly, seal replacement, and reassembly.
The video starts with a dripping faucet and the goal to fix it.
First step is to turn off the water supply and verify it's off.
Remove the handle by popping off a piece and unscrewing a screw, then unscrew the rest. Use pliers if needed.
The rubber seals are what keep water in; when they go bad, the faucet drips.
Replace the old seals with new ones. Clean hard water deposits around the seal area.
Put the seals back in place, then reassemble the faucet, aligning the flat side of the handle correctly.
Hand tighten everything, then give extra turns. Replace the top screw and turn water back on.
If still dripping, tighten the clamp bolt with pliers until the drip stops.
By replacing the rubber seals and tightening the clamp bolt, the leaky faucet was successfully fixed.
What is the first step in fixing a leaky faucet?
Turn off the water supply.
00:13
What part of the faucet typically causes dripping when it goes bad?
The rubber seals.
01:20
What tool can be used to remove the faucet handle if it doesn't come off by hand?
A pair of pliers.
00:56
What should you do if the faucet still drips after replacing seals?
Tighten the clamp bolt with pliers.
02:45
What is the purpose of the rubber seals in a faucet?
To keep water in the pipes when the water is off.
01:20
Seals Cause Drips
Identifies the root cause of a leaky faucet: worn rubber seals.
01:20Tightening Clamp Bolt
Provides a troubleshooting step if dripping persists after seal replacement.
02:45[00:00] This is my drippy ass faucet and today we're going to fix it.
[00:13] First thing we want to do is turn off the water.
[00:25] Simple. Check to make sure it's all the way off. Nothing. Now start disassembling the
[00:37] faucet. Onto this little piece right here, might be different on yours. Pop that off. Down there there's a little screw. Once it's unscrewed the handle is going to come right
[00:56] off. Then unscrew the rest of it. If this doesn't come right off by your hands, get a pair of pliers.
[01:20] These right here are your seals. These little rubber pieces. Then what's keeping the water in the pipes when you get the water off. Once these go bad your water starts to drip.
[01:33] Just got to replace these and put it all back together. I also for good measure cleaned this up a bit There were a little bit of hard water deposits around where the seal is So I went ahead and straighten that up just to make sure
[01:53] This right here is what it looks like when the seals are all back in place. We've replaced the outside and inside. Now we can put this side back together.
[02:07] You can see this flat side here. If you look under the handle you'll see a flat side on that and you want to be angled the same way.
[02:20] Once everything is back in, you've got everything hand tightened, give it a couple more good spins just to make sure it's back in place. Top screw back in place, turn your
[02:45] water back on. Alright so the water is back on and I still noticed a little trippy trippy. So what I noticed was right here this little clamp bolt take a pair of pliers
[03:06] and I tightened it just another couple turns until no more drip and the handle's back on and we're good we fixed the leaky fucking faucet that's it guys happy fixing later
⚡ Saved you 0h 03m reading this? Transcribe any YouTube video for free — no signup needed.