
Why You Shouldn't Use 1080p for Streaming
54sEducational tip about stream resolution that many new streamers get wrong.
▶ Play Clip"Delivers a thorough, practical guide that matches the title's promise, though some rambling and repeated points keep it from being exceptional."
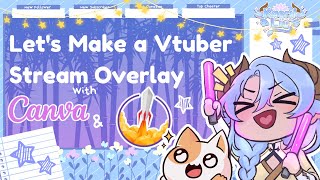
This video tutorial demonstrates how to create a VTuber stream overlay using Canva for design and StreamElements for live widgets. The creator walks through layout planning, adding labels, chat boxes, and personalizing with themes, then shows how to set up the overlay in StreamElements and integrate it with OBS.
The tutorial uses Canva for layout and design, with Clip Studio Paint mentioned as optional for final touches. Canva is praised for its snapping feature that aids symmetrical arrangement.
Start with a video canvas at 1920x1080 (referred to as '180p' by the creator). Choose a solid color background to begin layouting.
Use the Elements tab to add shapes like rectangles. Adjust corner radius using the corner handles for a softer look. Resize and position shapes to define areas for the stream.
Create labels for followers, subscribers, donations, and cheers. Use shapes like rounded squares and text. Symbols like stars, hearts, and dollar signs can be used to save space.
Add a rectangle for the chat area and a dividing line (hold Shift to keep straight). Customize line style and weight.
Upload a PNG of your VTuber model or logo to check color compatibility and placement. Adjust layout accordingly.
Add decorative elements like trees, flowers, or other themed graphics. Use a consistent color palette to avoid clashing. Consider the background color for chroma keying (green).
Group elements for easy movement. Export the overlay as a PNG. Optionally, use a green background for chroma keying in OBS.
In StreamElements, create a new overlay, upload the overlay image, and add widgets: alert box, chat box, and labels for followers, subscribers, tips, and cheers.
In OBS, add a Browser Source, paste the StreamElements overlay URL, and resize to 1920x1080. Optionally, use a chroma key on the overlay image if green background is used.
The tutorial provides a comprehensive, step-by-step guide to creating a VTuber overlay using free tools, emphasizing layout, personalization, and integration with streaming software. It encourages experimentation and customization.
What canvas size is recommended for a VTuber stream overlay?
1920x1080 pixels.
00:42
What is the purpose of using a green background in the overlay?
To allow chroma keying in OBS to make the background transparent.
21:43
Which tool is used to create the overlay design?
Canva.
00:01
What are the four common stream labels mentioned?
Followers, subscribers, donations, and cheers.
04:18
How do you keep a line straight in Canva?
Hold the Shift key while dragging.
12:50
What is the purpose of grouping elements in Canva?
To move and rotate them together as a single unit.
15:48
In StreamElements, what widget is used to display follower, subscriber, and donation names?
Labels.
36:05
How do you add the StreamElements overlay to OBS?
Add a Browser Source and paste the overlay URL.
39:29
What is the recommended width and height for the browser source in OBS?
1920 by 1080.
40:37
Why might you want to use symbols instead of text labels?
To save space on the overlay.
08:07
Canvas Size Recommendation
Provides a concrete starting point for viewers creating their own overlays.
00:42Using Symbols for Labels
A practical space-saving tip for overlay design.
04:18Green Screen for Flexibility
Explains the advantage of using green background for chroma keying.
21:43StreamElements Widgets
Demonstrates how to set up dynamic labels and alerts for streaming.
31:12OBS Integration
Shows the final step to bring the overlay live, making the tutorial actionable.
39:29[00:01] hello and welcome to how to make your own vtuber stream overlay using canva and clip studio yeah also clip studio clip studio is not really that necessary for this tutorial it's just for final touches that you might want to do so
[00:15] let's get started alright so now we're here in canva so this is um canva the website for canva there's a lot of things you can do here i also make my youtube thumbnails here it's a very convenient website for
[00:28] layouts and like graphic design because snapping feature that makes it easier to arrange things in a very symmetrical or just a nice and orderly manner
[00:42] so first of all you can use this video format for streams uh i'm pretty sure most people use 180 p kind of setting for their size and i i personally use that for my stream so
[00:56] you can probably make it bigger but for streaming usually the quality is lower for like faster faster transfer of bites or something i'm sorry if i'm getting the terms wrong so just quickly make a video make a
[01:09] video canvas template thingy and here you go select this middle canvas thingy and pick a solid color to start off with
[01:22] we're going to focus on layouting first before we do the design elements so we're going to pick a color i'm just going to go with a blue color
[01:35] good and there now we have this rectangle plain very plain rectangle next we go to the elements tab elements tab is where most things are
[01:49] shape we're going to try and go through all of the other things later when we're designing the overlay a bit more be good you can be fancy and pick like a fancier
[02:03] shape or you can just go with the plain rectangle okay maybe not this one so that's like a little corner if you'd like kind of this shading look that's also okay i erased the background
[02:15] so we're just gonna pick i kind of like this one because of the nice little curved edges i think it's simple but very fancy so we're now we're just going to shrink it so you can as you can see there's
[02:30] big first thing to know is if you use these corners that have like um the straight line adjust the corners so it'll be very nice if you want to
[02:45] maintain the corners of certain vector shapes this isn't this doesn't work for all the objects but it works for vectors like these rectangles so what you're is uh select the circle in the corner and use
[02:58] that and it will shrink the edges to make them more um small and less um less pretentious looking
[03:10] to make the it will help make the edges smaller and now i'm gonna go and resize it in this way i'm just gonna put it all over i think for most games the sizing is
[03:24] also 180p but you might want to crop it a bit more because i think for games you want to crop off some edges sometimes i don't know if you do display capture you might want to crop off like the
[03:36] bottom task bar of your computer it really depends on how you're going to be using your your entire layout and so now it will keep this shape for the most part if you resize it
[03:48] right there it seems a bit big i think this is a pretty good size if you're feeling a little lost feel free to go check out and google some other people's youtube overlays and
[04:03] might like in your overlay and just take inspiration from those and i'm gonna keep it this dark color for now but later we're gonna turn it into green so that we can use chroma key on them but it really depends on what color if
[04:18] your background is green don't make your um screen also green so here we have a shape and now let's do some labels stream labels are the things in your overlay that goes new follower new subscriber or like donations and
[04:33] stuff so just those little stats that show up in the screen i don't know if um you might not think it's necessary i think for youtube streamers like if you're a youtube youtuber you might not need that at all
[04:48] find one you can like maintain this kind of format and just make everything like this or you can choose a rounded square if you prefer work it kind of gives the robotic vibe if you
[05:02] have like a robot themed feature maybe that will work for you go like white and you can change the corners like that wait they're all one by one that's kind of nice if you want to like alternate
[05:15] of nice if you want to like alternate your bolts on the corner so just the same way just resizing it it will not adjust the corners very much if you use this
[05:28] but if you make them big and then you try to shrink it to the same size as it's gonna be limited it's gonna look really clunky like a lego it's lego now we're just gonna resize it about like that
[05:48] a bit more maybe so um the first overlay that i made using this kind of technique i kind of made the name labels too big but it really depends on you should they keep this or should they just use a
[06:01] shape it's also rounded square if you're if you like that around this square could work it's gonna shrink it resize it
[06:15] resize it something like this
[06:27] you can put your labels on top of the stream labels on top of the stream or below the stream
[06:39] and we're just gonna put four of these about it too much just kind of place things where you want them to be as you can see they start they align you see that the little purple lines are
[06:53] the snapping the all the snapping and then you can kind of feel it if you try this out yourself and there you go there's like a little more space
[07:07] more space in this one i love it this one maybe a bit more if it doesn't snap properly you can just
[07:20] direction you want and i'm just eyeballing it right now since i'm not that technical with it so this is gonna be for um followers and this one's gonna be for subscribers it's gonna be donations and cheers
[07:36] uh it really depends which ones you wanna keep on the screen but for me those those four are what i keep you'll also put goals like follower goals and stuff that could work
[07:50] now we're gonna label it with text you can either use text or a symbol you followers or a shape to identify the subscribers um subscribers usually like stars i think so it would be like um heart star
[08:07] and dollar sign then for bits uh you can use like a diamond so it really depends on you though but to save space people would use symbols instead of the actual labels but we will try to do the labels today
[08:21] for this one i'm gonna copy put down a shape a color for the shape
[08:35] but it might be a bit difficult if you don't have your colors set up properly from the start i'm just kind of looking at which ones i want to have and since i'm just testing the layout
[08:49] and since i'm just testing the layout i'm not too particular about it but it will be much bigger if you set it up on stream don't worry about it too much i think a little darker
[09:05] something like that for this so once you've set up your actual divisions and stuff it will easily snap it will easily snap to the layout which is very convenient
[09:19] be like that or you can just make it a full bar sometimes you won't be able to see the handles corner handles if you're not zoomed in so go ahead and zoom in
[09:36] i think i'm gonna switch it to this i'm gonna erase it my tutorial is mostly gonna be just showing you what canva can do but uh in the end the graphic design details kind of are up to you
[09:50] you just have to like experiment with what kind of combinations you like but this uh this program reminds me of like when i used to make powerpoint presentations in school it's very easy and simple to use
[10:05] without a proper source of graphic graphics and stuff and you have to make everything as you go everything as you go it might get a little confusing
[10:19] you being able to use pre-made vectors and shapes make it a lot easier for you to go ahead and test out different layouts and experiment which ones you like the most and i like i like that convenience in
[10:34] so now we're gonna make a text here this will be the label so we're gonna do you follow
[10:49] i like this font i think it's very childlike very cute shrink it and put it there it's a bit
[11:01] and put it there it's a bit smaller maybe you can see the purple line appearing here when you snap it
[11:13] know you don't have to like eyeball everything sometimes the shapes will immediately allow you to snap things so i'm just gonna go speed it up here and just like
[11:26] and just like do all of the labels for a bit and you can just put the names here at the bottom later so the things that will
[11:38] update and stuff i use stream elements you can also use i think streamlabs has also labels that update automatically as you stream so that will just be left blank and so here we have pretty plain
[11:51] layout all together and then we're gonna put a little shape for chat uh we're just gonna use a shape for now i use a another rectangle you know we're not we won't get sick of the rectangles
[12:06] since we're gonna focus on the layout first there's going to be a lot of this for chat just copy this and drag it here
[12:22] text if you're just copying and pasting this way um the fonts and the settings and the colors will be already automatically there there you go just drag it to the corner
[12:36] just drag it to the corner tada and then you can put like a line a dividing line temporarily a dividing line temporarily hold shift to keep the line straight
[12:50] hold shift to keep the line straight just go here and drag it right there and then you can change the then you can change the style of it like dotted line and then the weight
[13:04] shapes and and objects in this uh program and you can go to your uh uploads you can upload your own assets here uh please don't mind all of the random things i have here we're just gonna put
[13:19] um at this point once you've gotten the layout done i recommend putting a png of your vtuber and or your logo you know whichever one you have and just select that
[13:32] and put it on top see if top cheer is going over it there's a lot of to be done when you're doing the overlay and just bring this to the front this way it'll be in front and this is um
[13:45] just this png this is just a png of my current model it will help me pull um some colors that are complementary and kind of just see what it will look like if it's on stream because you don't know if
[13:58] your model or your logo sometimes when clash and then you'll have to like readjust everything it's just a lot of so here's the logo right i see a lot of people putting their logo here and then
[14:12] putting chat below it like my logo is a bit big make it put it in the upper corner and we can remove the chat people do know it's chat remove the chat people do know it's chat but labeling chat also works
[14:25] so here we have there yeah doesn't seem very it seems very simple i'm gonna crop the extra um negative space on my
[14:41] png so i'm gonna uh if you wanna layer it you might wanna remove the logo after you're done with your overlay so that you can put the chat underneath it or you can just like set up the chat
[14:54] here at the bottom of it i think some people put their youtubers lower as well let's do that i've been doing this recently on my it's a bigger youtuber so there's more space to show
[15:07] stuff and there we go outline if you want to follow this outline kind of look for everything you might want to select this and select the color
[15:22] of the border and just send it to the back and there you can see it kind of zoom in
[15:34] it's one way to do it some shapes already have a border so maybe take that into consideration when you're designing which ones work better for you yeah now that we're done with the layout
[15:48] now that we're done with the layout it's time to go do other things empty space at the bottom and considering that you can put more
[16:00] readjust your entire setup a bit more group it once you're done with your design just group it you just group it and you can just move them all together a little um less
[16:16] hassle once you've gotten that done and see you can just move it around wherever you want it to be maybe you want to put this here like attach it to the corner that would work
[16:33] it's time to add a little add a little personality it's time to personalize this point you can like look up things that you like so i made it a little simple i just put the layout stuff but
[16:45] it's not final in the overlay that i made previously in i found this back the background of bamboos but let's think of something else it's not bamboo then what maybe trees so
[16:59] maybe a tree theme these are very cute you can adjust them to fit your colors and you can put them in the corner like that it's nice you found something and then if you click something you like you can
[17:13] also see for other things that are similar to that in theme so maybe like flowers or [Music] [Music] mushrooms maybe pumpkins
[17:26] or leaves if you want leaves in your background you can put them in the background um i recommend just like just leaving them all here it's gonna get really cluttered but
[17:39] um it'll be easier to see whether or not they fit your theme once you've already moved it in um so here's a lot more trees there's a lot more alternating trees but why there's so
[17:52] many of the same kind of trees and you can see the colors do not match using a palette or like a general color scheme might be easier i kind of like the well so here we're just going to switch out
[18:07] as we go okay so maybe i want pink trees pink yellow and blue and purple do work well but i'm gonna keep them all pastely so it doesn't clash and my background is
[18:22] rather cool toned so i would like to maintain so i would like to maintain that entire cool tone vibe i think the yellow would work and then making this red a purple to work better
[18:43] to see if they fit which is stressful and it's in its own which is stressful and it's in its own way sometimes you don't know whether your game is going to be like a bright screen
[18:58] or a dark screen so having a little corner on your frame for the screen is very helpful and i don't think i like the trees so now i've finalized that i will use this
[19:14] screen ah no no why did i make a new one
[19:27] it a bit more increase the size at this point you can like remove the bee tuber for a bit or like move it to
[19:40] the corner or you cannot see it and i feel like this is a very delicate kind
[19:52] everything else so can just switch out these things that i put earlier you can put the logo here in put earlier you can put the logo here in the corner
[20:08] notes so here's a little bit of a notepad thingy if you prefer won't work i'm thinking of something longer to use for chat keep in mind that
[20:20] some shapes and objects don't have editable colors like this one it should be a png that would not work for us we can change the colors to so that would be like a vector shape
[20:32] so i'm gonna have to give up on anything that has a pro label on it until i get pro so i'm assuming that if you're watching tutorial you might want to save a bit more and like not um commissioned an overlay elsewhere
[20:47] and just grab a bunch of things that i like i wish there was a way to filter the pro objects and the ones that are not pro i think um i think i think canva is trying to tempt us
[21:02] into getting pro so they like put all of the good things in with the things that you know just alternating them so you get to see the extensive catalog that get to see the extensive catalog that they have
[21:19] keep it so i'm gonna save it if you have things that you like but you're not sure if you wanna keep to experiment more you can just put them in the other in another slide
[21:31] and this way you kind of get to keep them and just you know see other things first and then come back uh it's a bit harder to see now so i'm just gonna change this middle part to green
[21:43] like a green screen green so it um i know which part i'm gonna delete later but it looks like a blackboard we're just gonna go ahead and um we're just gonna go ahead and um pick a label we'll put some text on it
[21:57] something like at um at keraleo you can put your handle um at keraleo you can put your handle here maybe your art tag or your live tag and then resize it a bit more
[22:13] group them and then grouping is very helpful if you want to rotate something everything is rotated at the same time
[22:29] now this is clashing but it should be an easy fix we're just but it should be an easy fix we're just gonna look for some tape we're gonna go to the other i feel like for stream labels sometimes
[22:44] it gets confusing because they're much smaller so if you wanna go design them without bothering with everything else you might have to go to another you might have to go to another slide just to see them better
[23:06] have to put it in a separate layer to see like how the text would look but for this one you might want to put like trial name so you can see
[23:19] tape design but white maybe we're going to copy this top area
[23:33] the box but this does have a lot more space because the tape is unadjustable so if the tape is unadjustable since expand it by putting two of the same object
[23:49] let's just put it in the back there you go it's a longer tape now because it's two tapes attached to each other this is a since um there's no outer lines it's not very you're just gonna have to like you have to be
[24:03] creative with the methods you use to with the methods you use to make new shapes and stuff so yeah i feel like this is a bit more artistic than these these just look like
[24:18] little window tabs alright so i had to ungroup them so i can group them again i select everything and group oh before you group them you should remove
[24:30] the names inside just enroll them removing the names then grouping it again i almost forgot and now we're gonna delete this as well no
[24:44] no here we go very cute i think i'm gonna put them on top since probably more space there and i think if you're a youtuber you
[25:00] tend to have like random things added here if you want stream avatars and you kind of want that space at the bottom it'd be very ideal to kind of make it this way so there's like space here for avatars
[25:13] or i don't know a table or if you have like collab guests helpful deciding an overlay really relies on you thinking about uh things like that like what is
[25:26] necessary and what they need to do for the background it seems pretty but making a gradient here in canvas a little weirder but i feel like the realistic background is truly clash with like the clip art
[25:40] so yeah we're gonna export it like this as is i think a notepad has too much space i don't know
[25:53] might wanna add another i'm gonna put my live it's a quick download and download then done so here's i called
[26:07] because that was the first text that i put um don't mind that doesn't matter that much i'm gonna go ah and now it's time to use the handy dandy
[26:20] magic wand tool this might be a bit difficult if um the objects you chose were a bit more difficult to like select in that case um maybe you don't you don't have to do
[26:33] it's just a little extra step might be a bit more annoying to do finishing touch to give it more pizzazz
[26:45] i'm gonna copy it ctrl c command c just paste it so um get some patterns like these like ah thin stripe it's so gigantic these are kind of
[26:59] vector-ish so if you want like lines like that but you can also just get a pattern like this flip it and um
[27:15] i would flatten or rasterize this image this way i can recolor it and then do this way i can recolor it and then do this opacity lock there we go so here's the other overlay i made and i like the note that i made here and i
[27:28] like the note that i made here and i like the chat is big and readable thing so in this one the if you can see the lyrics it is how came from the when it came from canva the background
[27:44] is very bland so i put a multiply layer on it and i put this gradient and then i put an overlay on top of it to kind of soften the colors a bit and a little soft light on top to add
[27:58] that blue hue on top it's just a very simple look and i ended up using it as my background as well so this background i'm currently using for my um little camera
[28:11] area in the side it's very simple very nice and very quick and so i put um i kind of forgot to put like a a border inside if you happen to not have it like like
[28:25] what you can do is select here and just erase the green part once you've erased the green you can go and do the thing we used to you can go and do the thing we used to do for the logo tutorial
[28:43] and you can just extend it a bit here i'm gonna make it red so you can see the extension of it you can put that and you select the color you might prefer
[28:55] for the border the darker purple that i used works very well and there and this way you can just use this as is without on the green
[29:10] i prefer the green because i'm extra like that just because you know just in case i want an animator or something but i very much if you want you can just export as a png
[29:24] if you want you can just export as a png like this and just use it as is and then this way um your overlay should look something like uh like this after
[29:37] there's the chat and you can see how gigantic everything is because i didn't made the overlay but i think it's also quite helpful in case you have some viewers who watch you on mobile now they can see everything
[29:52] because it's too big i am so small compared to this overlay and uh we can look at the overlay that we did export i can like switch it out with that there we go ah it's also very cute
[30:04] and everything's kind of smaller i think the frame is a bit bigger have to have this outside logo and this is how the overlay that we did
[30:16] um i think everything is still too big but it's not bad at least i'm pretty sure people who you who um watch my stream on mobile will be able to see my links
[30:32] you know that's important and you can see the problem if there's you can use the technique i showed you earlier to put a little border outside earlier to put a little border outside your white vectors with no outline
[30:46] sorry if it's a bit messy it's actually my second time recording it but i hope it was still very informative if you have any more questions or things that i the comment section below and i'll try to answer it as best as i can
[31:00] and after this i'm gonna have a little clip of something i recorded for the stream elements tutorial all right so we're gonna quickly tackle how to do stream elements i'm pretty sure this video is already very very
[31:12] patience to like last this long i will work hard to make you understand how to use stream elements so after you make an account okay there's like a dashboard and stuff those are not that important we're gonna just talk about overlays
[31:25] today so we're gonna do my overlays and um alright so i'm gonna make a new black overlay so it's a 180p we'll go ahead with that so it's a 180p we'll go ahead with that and we're gonna name the overlay um
[31:39] tutorial overlay okay so first things first go ahead and upload the image of your overlay so we go to static and image
[31:51] and set image here and upload your overlay right there i'm gonna go and drag my overlay here from my downloads folder elements it should look like this and just go ahead and click upload and it
[32:06] should start loading the image and now you selected submit i'm going to type the size it's going to be 1920 and 180 there you go that should cover the full screen and then afterwards you should
[32:19] lock this if you want you can rename it let's rename it overlay just give you the basics
[32:32] so follower subscriber top donation top cheer and chat and also the alerts so the fastest to do is alerts they're not really gonna go through customization of alerts so just make an alert boxes should work for
[32:44] every single alert let's just put them there i think the default stream elements alerts are very cool compared to the zombie thingy from streamlabs and there's a lot of variety so we're
[33:00] just what we have a follower event would have this there's the subscribe resubscribe for 13 months 31 months if you don't have anything to switch for them yet they they work really fine as is
[33:15] stream alerts box you can put it anywhere you think won't bother the middle that's okay too and uh the next thing that i would put something fast would be tap again i like this but it's not really necessary for
[33:30] like um a cool pop-out thingy top against a cool effect i don't know if everyone would like it but i really like it it kind of hypes up the stream a bit so if you do
[33:43] there will be like emotes flying all over the place these are all of my emotes even the old ones and that's a lot you can adjust how many um emotes you want to do or how many the duration is and stuff like that it's
[33:56] just a little simple effect that'll make your stream a lot cooler right so now we're gonna do the chat next easiest thing would be to set up chat you put chat here so chat is just this
[34:09] black box for now so you have to like customize it and put it like in the area try to keep it where the margins are and there we go and what i do is i change the theme to
[34:24] custom this will make it transparent and then we can just go ahead and so i think the time consuming part in using stream elements is looking for font but that just kind of for anything really is
[34:38] clash with any of your themes or it doesn't look bad with your overlay so let's pick after for now i'm not because i don't think i'll be using this
[34:50] will make it transparent so go full opacity and then just go up here or um you can't really do an eye drop so
[35:05] you might have to guess the color or go to canva and pick the color code but i'm just gonna guess a bit that works for me let's see about the i don't know what size this automatically is
[35:19] maybe 13. i'm going to save it check message do a test message on obs so type test
[35:34] so we're gonna raise it a bit maybe 20 would be good save it and then go test again it's a little bit bit better but it's um kind of too thin
[35:49] you can do bold and this will like affect your chat settings so go guess three guess three all right
[36:05] so now that that's done you have chat and now it's time to do this um your labels so they are really called labels here so we're gonna do um latest follower
[36:19] what else latest subscriber latest subscriber and um
[36:31] latest temporaries and tips if you want you can do like top tipper i think for mine it's actually just set as a reason donation but i don't know i see a lot of people do top tipper and top cheerer
[36:46] here we go so oh no everything says no data oops so if you don't have any i'll be no i don't know if that's proper
[37:01] think it's per session or something here you can change the all-time top tipper or last 30 days so i'm gonna do it last 30 days which makes sense to me
[37:16] is this like a monthly thing everything resets anyway so yeah now here you have the thing and they say latest follower and stuff because you can't just leave it as is with like the labels already there but
[37:32] since we already made it for the overlay so i'm gonna go remove that to just like leave the name and then you'll just have to like organize it yourself and try not to switch things up
[37:48] it's a really long thing just put name and currency amount and also for this one just remove that entire label and here we go so here is the cheer
[38:01] and here is the donation all right so first thing adjust the margin and set it to center put the position so widget so here
[38:15] and just do that for everything because some people have long names if you don't name so for example the name is like three words all at once it's like ipsum the lore if it's like
[38:28] really tiny you're not gonna be able to maintain you're not gonna be able to maintain everything size properly it could like go out or get cropped
[38:43] get cropped i'm not sure which effect is worse i'm gonna copy this real quick and go to each of these and just paste and go to each of these and just paste it
[38:57] text shadows text shadow remove text shadow remove text shadow remove and um we can change the font so just pick a nice font here's pangolin oh
[39:11] angle engelin looks similar to the other fonts that i already have i forgot about fonts that i already have i forgot about it for everything so let me teach you how to put it on stream
[39:29] your sources i just took out my sources so you can see it better my sources are a mess please do not judge so here is the stream overlay basic which is the stream
[39:43] overlay that i used before so it's yes you can see this is for the other um the other overlay that i have so i'm just gonna show you how to use it to properties and this this little window should pop
[39:58] up uh i'm sorry it's cropping so badly but this window should pop up and it will show you like what the overlay browser source looks like so this is a browser source file by the way
[40:12] if you do not know you can add it you can go to sources and add it here and it will be under browser file browser and it will source and that's where you put your um your
[40:25] new setup it'll turn out like this so these are mostly my overlays sound alerts and some of the um react pngs for when i do collabs so that's about it
[40:37] already have so it's easy because you have to size it don't forget to resize the width and the height according to how big your overlay is which is 920 by 180 if you follow this tutorial so
[40:53] now we head back to stream elements and over here you're going to want to click this overlay url it's the link thingy and then head back to obs and just switch the links here
[41:10] and once you switch the links when you go to your stream you can see that the text is already here and let's do some test chat check oh you can't see it
[41:22] it's behind my neck all right there you go that's what that's gonna look like isn't it very good uh so i think it looks really good that's this is a pretty clean overlay there might be a little less
[41:35] screen size but you can always um trial an error when you're working on it and oh i kind of forgot that the overlay has a green window all right we have to go back uh
[41:49] so if you leave your overlay here uh it's fine if you put your overlay in um in your browser source the image will as is and another one way to do it is to just
[42:03] put a chroma key on your stream to like turn this entire part transparent but i don't recommend it because i think one of the alerts is green so it might turn what you should just do is just erase it and just use the
[42:18] and just leave it separate from the browser source so this is just a guide to kind of allow you to find where all of the sections are i like to place it png of your overlay
[42:32] this so it's going to be invisible it's going to be right there but it should be fine once you save it and now we're back at stream there you go it's transparent your mouse and things that appear
[42:46] and let's do some um emulation so you can see the alerts while on stream it should look something like this it's like a double now let me just go into so no there's too many emotes
[43:01] and stream elements i know it's really intimidating compared to streamlabs which has everything on the program but once you know all of the basic stuff using stream elements it's not as difficult and as intimidating anymore so
[43:15] yeah i hope you found this bonus tutorial helpful and i hope you have fun making your overlay down in the comments below so that's about it thank you for watching um
[43:29] about it thank you for watching um please like comment subscribe and click the notification bell um down below [Music] bye bye titan
⚡ Saved you 0h 43m reading this? Transcribe any YouTube video for free — no signup needed.