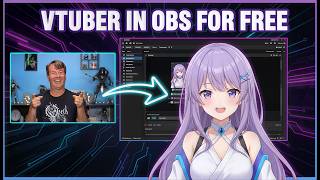

Free 3D VTuber in 15 Minutes?
35sThe promise of a free, fully animated VTuber in 15 minutes grabs attention immediately.
▶ Play Clip"Title accurately reflects content: the video shows how to create a 3D VTuber avatar for free, exactly as promised."
This video demonstrates how to create a fully animated 3D VTuber avatar for free using Vroid Studio, VC Face, and Warudo, and integrate it into OBS for live streaming. The presenter shows the entire process from character creation to motion tracking and OBS setup.
Use free software Vroid Studio to create a 3D avatar. Customize face, body, and clothing. Export as VRM file.
Edit textures in Vroid Studio, export layers as PNG, modify in free editor Photopea, and reimport to add logos or custom designs.
Use free VC Face software for face tracking. Load VRM avatar, start tracking. Works well for facial expressions but lacks hand tracking.
Warudo (free on Steam) provides face and hand tracking. Configure motion capture, calibrate face and hands, and customize settings.
Add game capture source in OBS, select the Warudo or VC Face window, enable transparency, and position the avatar.
VC Face offers more expressive facial tracking; Warudo includes hand tracking but may be less expressive. Both are free.
You can create a free 3D VTuber avatar using Vroid Studio and track it with VC Face or Warudo, then integrate into OBS. Both tracking options are free, with VC Face offering better facial expressions and Warudo adding hand tracking.
What free software is used to create the 3D avatar?
Vroid Studio
0:55
What file format is used to export the avatar from Vroid Studio?
VRM
6:38
Which free software is used for face tracking without hand tracking?
VC Face
7:46
Which free software provides both face and hand tracking?
Warudo
9:27
How do you add a custom logo to a shirt in Vroid Studio?
Export the shirt layer as PNG, edit in Photopea to add the logo, then reimport the edited PNG into Vroid Studio.
4:01
What type of OBS source is used to capture the VTuber window?
Game Capture
13:25
What setting must be enabled in OBS for the avatar to appear without a background?
Allow transparency
13:43
Which tracking software is described as more expressive for facial movements?
VC Face
14:35
Free VTuber Creation
Demonstrates that a fully animated 3D VTuber can be made for zero cost, challenging the assumption that VTubing requires expensive software.
0:03Custom Texture Editing Workflow
Shows a practical method to add custom logos to 3D models using free tools, enabling personalization without 3D modeling skills.
3:07Warudo Hand Tracking
Introduces Warudo as a free alternative with hand tracking, expanding VTuber capabilities beyond basic face tracking.
9:27Comparison of Tracking Software
Provides a direct comparison between VC Face and Warudo, helping viewers choose based on expressiveness vs. hand tracking needs.
14:10[00:03] Hello my YouTube friends!
[00:06] Believe it or not this fully animated 3D
[00:09] Vtuber cost me exactly $0 to make and the
[00:14] best part you can build one just like
[00:17] this and have it running in
[00:19] OBS in less than 15 minutes.
[00:21] I'm going to show you the completely free
[00:23] software stack for creating, tracking and
[00:27] how to bridge all of this into OBS for
[00:30] your next live stream.
[00:32] We're going from blank canvas to
[00:33] broadcast ready so you
[00:35] know what, let's get to it!
[00:38] I don't want to be repetitive today so
[00:40] everything I'm going to show you is
[00:42] completely free and there is a link to
[00:45] each piece in the description down below
[00:47] so you can download it and follow along.
[00:50] That is the best way to learn.
[00:52] Let's get right into character creation.
[00:55] So to set up our model we're going to go
[00:56] ahead and use Vroid Studio.
[00:59] It's totally free, you can see it's for
[01:00] Windows, Mac and you can download it on
[01:03] Steam or of course the App Store.
[01:05] We're going to go with Windows and it
[01:07] just puts it in there so now we need to
[01:09] just go to our download folder.
[01:11] Once it's downloaded we're going to go
[01:12] ahead and just double click on it and you
[01:14] don't need to put this in any special
[01:15] place just click next and we're going to
[01:17] create a desktop shortcut by clicking
[01:20] next and it's just going to install.
[01:22] And it's that easy we can just click
[01:24] Launch Vroid Studio and finish.
[01:26] Boom!
[01:27] There it is.
[01:28] So we're going to click Get Started and
[01:30] agree to the terms and since I'm going to
[01:32] show you what to do we're just going to
[01:34] go ahead and click Skip.
[01:35] Alright so this is
[01:36] Vroid Studio right here.
[01:38] For whatever reason the sample models
[01:39] isn't working, doesn't really matter.
[01:41] We're going to go
[01:42] ahead and create a new one.
[01:43] We want a masculine one.
[01:44] Really they pretty
[01:45] much both look the same.
[01:46] You can use your scroll
[01:47] wheel to zoom in and out.
[01:49] You can use your right
[01:50] mouse button to spin it around.
[01:52] See it at all the angles.
[01:53] If you press your scroll wheel you can
[01:55] move this guy around like this.
[01:57] All of this is pretty much
[01:58] exactly what you would expect.
[02:01] If you've ever done character creation
[02:03] for any kind of video game
[02:05] this is like that on steroids.
[02:08] You literally have access to every bit
[02:12] and piece of your character.
[02:15] On the face you can move every piece.
[02:18] Your ears, your nose, your mouth.
[02:22] You can change all of those things up but
[02:25] it goes a lot farther because you can
[02:27] adjust the whole body, the torso and
[02:30] every aspect of the clothing.
[02:33] And I could certainly go through every
[02:34] bit and piece but since I'm sure that
[02:37] you've already done character creation in
[02:40] a game just imagine character creation
[02:43] where you have access to every bit and
[02:46] piece on that character.
[02:49] There is one thing that I want to show
[02:51] you though because while you can modify
[02:54] these characters in any way you see fit
[02:56] it doesn't make any sense for me to tell
[02:59] you that but not show
[03:00] you how you can do it.
[03:02] Obviously that's not
[03:03] the look I'm going for.
[03:04] I'd rather have him look like he's
[03:05] wearing blue jeans or something.
[03:07] So what we can do is go to custom up here
[03:09] and we can adjust them.
[03:11] I already did the adjustment on these but
[03:13] I'll go ahead and show you how I did it.
[03:15] I'm just going to go to edit texture
[03:17] right here and it'll come up here with
[03:19] some colors, base colors and otherwise
[03:21] and I'm going to move him over here so we
[03:24] can see how the colors work and we'll go
[03:26] to the base color and I'm just going to
[03:28] go with some blue jeans, go with darker
[03:31] ones like that and we can have our accent
[03:34] color here and we want it to be blue but
[03:38] it can be dark like that.
[03:40] That'll work.
[03:41] So we can click out of here and we can
[03:43] save the item or close without saving.
[03:45] It'll still save the
[03:46] colors that we have right here.
[03:48] Now our shirt doesn't actually look black
[03:51] which we want it to be black so we're
[03:53] going to do the same thing.
[03:54] We're going to edit our texture and we're
[03:55] going to come in here and
[03:57] we're going to go black.
[03:58] There we go.
[03:59] So what if we wanted
[04:00] to add a big logo here?
[04:01] Well you would think you'd be able to
[04:03] just click it here and input your logo
[04:05] but it doesn't really work like that.
[04:08] And what we would do is right click on
[04:10] here and export and it's just going to
[04:12] export this layer PNG right here.
[04:16] So we're just going to save that and then
[04:17] we're just going to go
[04:18] into an editing software.
[04:21] In this case I use Photopita.
[04:23] It's totally free.
[04:24] I'll leave a link in the description.
[04:26] We can just drag our layer on there.
[04:29] Super easy.
[04:30] And then download whatever logo you want,
[04:33] drag it on and all we have to do is put
[04:36] it where we want it or shrink it up.
[04:38] Now needless to say there would be a
[04:39] little bit of warping or something like
[04:41] that because these are 3D assets.
[04:45] So one of the things that you could do if
[04:46] you wanted to is take this logo and maybe
[04:50] give it a little bit of a shift and then
[04:53] stretch it like this a little bit.
[04:55] It'll look a little weird here but it
[04:58] will look better on your character.
[05:01] And then we're going to click the check
[05:02] mark and we're going to go with file and
[05:05] export PNG and we can just
[05:08] call this whatever we want.
[05:10] And then what we can do is go back into
[05:12] here and all we have to do is go to our
[05:15] layers here and click on the image and
[05:18] just go to our downloads where that just
[05:20] went and click on it
[05:22] and click open and boom.
[05:24] There it is.
[05:25] And then all you have to do is remove
[05:27] your base color and you can see that it
[05:29] shows up and looks pretty good.
[05:32] Now you can go in here and tweak this up
[05:34] in your photopea so it's exactly how you
[05:37] want it or whatever but for the purposes
[05:40] of this that looks pretty good.
[05:42] We can click on here and save our tops so
[05:45] it's going to save it as an item.
[05:47] So we can come in here anytime if we
[05:49] wanted to dress them up in a different
[05:50] way and boom it's
[05:52] going to still be there.
[05:54] The last thing we have we've
[05:55] got to do is our socks here.
[05:57] Those look like socks that we would use.
[06:00] And right here we want to go with shoes
[06:02] and I'm going to go with a pair of
[06:04] sneakers of some sort.
[06:05] These kind of look like Jordans.
[06:07] I like it.
[06:08] That will work just fine.
[06:09] So now we've got our character all
[06:12] created and we can go into
[06:14] accessories and add them.
[06:16] There aren't really any in here.
[06:18] We can also look at our character and
[06:20] adjust or outline the width.
[06:22] All that sort of stuff.
[06:24] Add rim light shading, eye alignment,
[06:26] change up the bones,
[06:28] whatever you want to do.
[06:29] So you can get
[06:30] accessories and all that stuff.
[06:31] I'm going to show you how
[06:32] you can do that as well.
[06:34] But pretty much once you're done you're
[06:36] just going to want to
[06:37] save your character.
[06:38] So we're going to come up here and click
[06:40] export as VRM and we can reduce polygons
[06:44] and all that sort of stuff.
[06:45] But there's no real need to do any of
[06:47] that if you have a
[06:48] reasonably decent graphics card.
[06:50] So what we're going to do is export.
[06:52] It's going to bring this up.
[06:53] Now the program we're going to use is
[06:54] going to be a VRM 0 and all we have to do
[06:57] is put the name of
[06:58] our character in there.
[06:59] We'll call this one Mike
[07:00] and the creator is also Mike.
[07:03] And basically that's about all the
[07:04] information that we have to put in here.
[07:07] And we can put redistribution prohibited
[07:09] at whatever blah blah blah and export.
[07:12] It processes this up and we just get to
[07:14] decide where we want it to go.
[07:16] So that looks good.
[07:17] We'll save it right there.
[07:18] And now we're exported and
[07:20] ready to get this thing working.
[07:22] Now you could spend hours or even days
[07:24] creating your character.
[07:27] Every aspect can be modified and you can
[07:29] open each asset and paint your own bits
[07:32] and pieces if you're
[07:34] artistically inclined.
[07:35] That works exactly the
[07:36] same as the logo on the shirt.
[07:39] Every asset from the face to the shoes
[07:41] can be downloaded and modified.
[07:43] So to use these models with OBS we're
[07:46] going to go ahead and use
[07:47] a program called VC's face.
[07:49] It's totally free.
[07:50] All you have to do is
[07:51] click here to download it.
[07:54] Boom it downloads.
[07:55] Go to our download page and what we're
[07:57] going to do is right click and unzip it.
[07:59] And there is really no install here.
[08:02] You just run it right from here.
[08:04] So what we're going to do is right click
[08:06] and copy this and then we're going to
[08:08] take it and put it somewhere.
[08:09] We'll be able to find it later.
[08:11] So we'll just stick it over here.
[08:12] I'm going to right click and paste it.
[08:14] And we'll double click in here and we are
[08:17] going to right click on the faces here
[08:19] and we're going to copy as path.
[08:21] Then what we're going to do is go to our
[08:23] desktop right click and
[08:24] we're going to go to new.
[08:26] Shortcut and we're going to paste that
[08:27] path and click next and finish and boom.
[08:30] Now we have a shortcut on our desktop.
[08:32] We can just double click on
[08:34] that and we're ready to go.
[08:35] All right.
[08:36] So here it is.
[08:37] VC face loading an avatar is super easy.
[08:41] We already created one.
[08:42] So we're just going to add it.
[08:43] Click opened and then we can set our
[08:45] camera camera settings all this stuff.
[08:48] You can just click recommended settings.
[08:50] It'll scan your system and put the best
[08:53] settings possible right here.
[08:55] You can select our dude.
[08:56] We actually see him down here.
[08:58] Just click start and you can
[08:59] see it works really really good.
[09:02] When I blink it blinks.
[09:03] When my mouth moves it moves.
[09:05] It really does a nice job but you will
[09:08] see that my hands don't really work and
[09:11] that's really kind of the only bummer.
[09:13] Now there are free plugins that allow you
[09:15] to add hand tracking to CV face but I
[09:18] found them to be pretty
[09:20] bad and add a lot of latency.
[09:22] So I found another solution for face
[09:24] tracking with hand tracking built in.
[09:26] Let me show you.
[09:27] So to control our little guy we're going
[09:29] to use this program called Warudo and we
[09:32] could just go over here and click
[09:33] download and you can see that the
[09:36] unfortunate aspect of this is you have to
[09:37] download it on steam.
[09:39] It's really easy to get a steam account
[09:41] and all that sort of stuff.
[09:43] So I'm just going to go ahead and open
[09:44] steam and we're going to search for it
[09:46] and it's totally free.
[09:47] So we're just going to add it to our
[09:48] library and then we can just go over into
[09:51] our library here and
[09:52] find it and install it.
[09:54] So once it's
[09:55] installed we can just run it.
[09:56] Only thing annoying about this is that it
[09:58] has to run the steam
[09:59] client while it's running.
[10:01] So next we want to click on basic setup
[10:03] and so we're going to go ahead and select
[10:05] our character folder.
[10:06] In this case I have a character saved so
[10:10] this will be the folder.
[10:11] So what I'm going to do is cut our
[10:13] character and we're going to open the
[10:15] character folder here and I'm just going
[10:16] to paste it in there.
[10:17] And close all that stuff out.
[10:19] Then I'm going to drop this down and we
[10:21] can select Mike and click OK.
[10:23] And we're going to go ahead and let it
[10:24] help us configure our motion capture.
[10:27] So do we want to track full body?
[10:29] Probably not.
[10:30] Upper body.
[10:30] Yes.
[10:31] We don't have Leap Motion controllers.
[10:33] We don't have an iPhone or iPad that
[10:35] supports face ID because not everybody's
[10:37] going to have one but we
[10:38] do have a working webcam.
[10:40] That's our working webcam.
[10:41] We're going to click OK
[10:42] and then face tracking.
[10:43] There's a whole bunch of
[10:44] different ones that you can use.
[10:46] We're going to go ahead and start with a
[10:47] media pipe and we can customize our face
[10:49] tracking right here with different info.
[10:52] We know our blend was already VMR zero.
[10:54] So and body movements.
[10:56] Yes.
[10:56] Auto blinking.
[10:57] Yes.
[10:58] Eye movements.
[10:58] Yes.
[10:59] Head movements.
[10:59] Yes.
[11:00] And all this stuff is pretty good.
[11:03] Lip Sync.
[11:03] We're going to go ahead and click yes.
[11:05] We're going to select our microphone and
[11:07] we're going to go ahead and
[11:08] click yes on there and click OK.
[11:10] And we can customize our post tracking so
[11:12] we can use the keyboard the
[11:13] trackpad all this sort of stuff.
[11:16] Mere tracking fingers
[11:17] only and all that's fine.
[11:20] We're going to leave that and click OK.
[11:22] Yes.
[11:22] We want to import the expressions of
[11:24] course and click OK.
[11:25] And it tells you what your expressions
[11:27] are and how to access
[11:28] them with the shortcut keys.
[11:31] So take a picture of this or whatever.
[11:33] Write it down somewhere
[11:34] so you know what they are.
[11:35] We're going to click OK and we want to
[11:37] use a transparent
[11:38] background and we're done.
[11:39] So here we go.
[11:40] There are all kinds of settings that you
[11:43] can change and move and do so that you
[11:46] could literally set
[11:47] this up any way you want.
[11:49] You can change your environment.
[11:50] You can change the directional light.
[11:52] This will affect how your character looks
[11:54] and all that kind of stuff.
[11:56] It's really pretty amazing.
[11:57] Then we've got our character right here
[11:59] and we can go through and mess around
[12:01] with different media pipe settings and
[12:03] everything else on how this is handled.
[12:05] And we can change the shortcuts for our
[12:08] emotions if we want.
[12:10] So all of this stuff is in here.
[12:12] We can save animation profiles.
[12:14] The amount of customization that this
[12:16] program has is absolutely unbelievable.
[12:20] It's really really awesome.
[12:22] And then of course the media pipe.
[12:23] This is the motion tracker.
[12:25] We can go down here and what we want to
[12:26] do is go ahead and
[12:27] calibrate the face tracking.
[12:29] And then what we want to do is we could
[12:31] change the global sensitivity and all
[12:33] that stuff on here if we like.
[12:34] Our eye blinking
[12:35] sensitivity and all that stuff.
[12:38] And then hand tracking.
[12:39] We want to calibrate our hand tracking.
[12:41] So put your hands up and
[12:42] then go ahead and calibrate it.
[12:44] And there we go.
[12:45] So now when we go down here you can see.
[12:47] Now I don't know what this stuff is.
[12:49] So this gives you your frames per second.
[12:51] How fast it's tracking you.
[12:53] All that sort of stuff.
[12:56] And there we go.
[12:58] Turn the pendulum physics off.
[13:00] If you want that stuff off you can see
[13:02] over here it shows you your
[13:03] hand tracking when it's on.
[13:05] But we really need to kind of move
[13:07] ourselves or zoom ourselves out.
[13:09] So we can just go in the window.
[13:12] Zoom ourselves in and out.
[13:14] Basically move it around just like you
[13:15] did on the other piece.
[13:17] Rotate it around.
[13:18] So there we go.
[13:19] And of course we've got all of our hand
[13:21] movements and everything else.
[13:23] Now all we have to do
[13:24] is get this into OBS.
[13:25] Go ahead and click the plus.
[13:27] And this time we're going
[13:28] to do a video game capture.
[13:29] You can have as many of
[13:30] these in there as you want.
[13:31] We'll just call this VTube.
[13:33] Click OK.
[13:34] And we're going to go ahead
[13:35] and capture a specific window.
[13:37] We're going to drop this down
[13:38] and select the right window.
[13:40] Right.
[13:40] There we go.
[13:41] And then we're going
[13:41] to allow transparency.
[13:43] And that's it.
[13:44] Now all we have to do is
[13:45] place this wherever we want.
[13:46] And there you go.
[13:47] We're all set.
[13:49] Now I don't think this one is quite as
[13:51] expressive as the other one.
[13:52] Let me show you what I mean.
[13:54] If we go into our game capture again.
[13:57] Let me go to VTube.
[13:58] Let's just call this one VC.
[14:01] And what we're going to do is capture a
[14:02] specific window once again.
[14:04] And allow the transparency.
[14:05] Click OK.
[14:07] And there we go.
[14:07] So now we have two of them
[14:09] running at the same time.
[14:10] So you can see the
[14:11] difference in expression.
[14:12] Now I get it.
[14:13] This stuff is on here.
[14:15] It's really easy to get rid of these.
[14:17] All you have to do is
[14:18] hold down the alt key.
[14:19] And you can drag these off.
[14:21] And there we go.
[14:22] So I don't know.
[14:23] What do you think?
[14:24] Obviously it is really nice
[14:25] to be able to use your hands.
[14:27] But we've got VC on the left.
[14:29] And we've got Warudo on the right.
[14:32] Which allows you to
[14:34] use your hands and stuff.
[14:35] But I still think VC is much more
[14:37] expressionate and all that sort of stuff.
[14:40] And of course I have to use two different
[14:42] webcams in order to make this work.
[14:44] Because the same webcam can't share both
[14:46] without a lot of latency.
[14:48] But it just seems to me like there is a
[14:51] lot more expressive
[14:52] activities going on with VC.
[14:55] So it's up to you.
[14:57] And they're both free.
[14:58] So try them out.
[14:59] Now let me know what you think about the
[15:01] two trackers in the comments below.
[15:04] And do you want to
[15:04] see more about VTubing?
[15:06] There are a lot of different
[15:08] things that we can explore.
[15:10] From where to find assets, to creating
[15:12] and modifying the stock assets.
[15:14] And even advanced
[15:15] movements and character setups.
[15:17] Let me know about it
[15:18] down in the comments.
[15:20] And if you want something even simpler
[15:22] you should check out
[15:23] this video on PNG tubing.
[15:25] It's all totally free there as well.
[15:27] And if you're always looking for tools,
[15:29] tips and tricks to help make you a better
[15:31] live streamer or YouTuber,
[15:32] subscribe to the channel.
[15:34] My name is Michael Fire Jr.
[15:35] Thank you so much for watching.
[15:37] Have a great day.
[15:39] And I'll see you in the next one.
⚡ Saved you 0h 15m reading this? Transcribe any YouTube video for free — no signup needed.