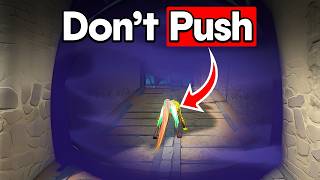

Stop Wasting Skye's Ultimate!
55sChallenges a common playstyle with a specific, actionable tip that can instantly improve viewers' gameplay.
▶ Play Clip"Delivers exactly what it promises: one mistake per agent, with specific, actionable tips. Some fluff from the coaching plug, but content is dense and on-topic."
This video provides a comprehensive guide to common mistakes made by players of every agent in Valorant, updated for the 2026 meta. It covers 23 agents, offering specific, actionable tips to improve gameplay, from utility usage to positioning and timing.
The video addresses new agents, balance changes, and a different meta. The creator offers a 10-week coaching program with a 500 RR gain guarantee or full refund, with a free first call.
Skye players often waste guided salvos by using them reactively. Instead, use them to delay the enemy and give your team time to rotate, or save them for retakes to flush out enemies or break crossfires.
Stop the Trailblazer (dog) at corners or inside smokes to get more value. On defense, hold it at choke points like a mini Deadlock sensor; on attack, stop it inside a smoke to allow your team to enter first.
Mix's ultimate is often used wrong. Instead of using it to execute or retake, use it to deny an execute or retake, as it knocks back and slows enemies. It combos well with damaging abilities like Raze nade or Killjoy ult.
Astra players forget the recall star smoke. Use it to enable better fights, catch enemies off guard, or take space on angles like fence on Split. It looks like a regular smoke but dissipates quickly, surprising enemies.
Fade's ult is often wasted. Combine it with other util like Prowlers or a well-placed Haunt (eye) to get clearer info, especially since the ult deafens enemies, making the eye harder to detect.
Vito's interceptor is undervalued for fighting for space. Use it aggressively to deny enemy util and gain an advantage in fights, not just defensively to hold space.
Don't use the knife early for info. Save it for when enemies are half-committed to a hit, as a well-timed knife can be a bigger deterrent than a molly due to the long suppression duration.
Reyna's flashes are misused. Throw them high for longer range to hit more enemies, but for close range, throw at the floor for faster activation and to prevent enemies from sitting under it.
Clove players often stand still when placing smokes, getting separated from the team. Practice moving while placing smokes and stay with your team during executes.
Breach is great at taking space but also excels at holding it. Use his stun and aftershock to anchor on defense and delay retakes on post-plant, mastering timing to not rely on teammates.
Don't over-prioritize playing for a post-plant lineup. Assess space and enemy utility to decide if playing with the team is better. Use molly at choke points to counter enemy util.
Don't always maximize dart scans. Use the dart to displace enemy crosshairs by throwing it at the floor and swinging, especially when half the team is alive.
Harbor's ult can be stopped manually, splitting it into a sweeping wall and a 15-second smoke. Use both parts for executes or retakes, and have Cove ready to deny defuse spams.
Don't always place mollies on the bomb. Use them to make retakes harder by placing them on CT or choke points, forcing enemies to move and enabling your team to get kills.
Despite nerfs, jump peeking on Neon is still powerful. You can throw a stun mid-jump and slide out on opponents.
With Yoru's nerf, you can't reactively throw saturate after dashing. Be aware of enemy positions and throw saturate before dashing to get more value.
Use slow orb to isolate fights, stop satcheling duelists, or counter pushes. For example, on A site Split, throw it as Raze satchels in to isolate her from her team.
Change Viper's utility setups to be unpredictable. Place thorns to isolate enemies, like on C site Lotus, and pair with pre-placed flashes.
Adjust utility order based on situation. For example, on A site Ascent, smoke door, paranoia site, then TP to generator instead of placing both smokes first.
Iso's wall can move at half speed. Use fast wall for long narrow areas, slow wall for wider areas to isolate angles and clear them effectively.
High-elo Cypher players like Benjyfishy don't place both cages. Save one to anchor, fight around, or use for retake. Also, take back trips for early info if enemies aren't coming.
Move Thrash like old Neon with bunny hops to make it harder to hit. Use left/right keys only, and you can pop the ult midair by clicking left click again.
Place clone facing into a wall at an angle to emulate a slow peek, effective against operators. Enemies are less likely to think it's a clone, allowing you to swing and punish.
Always keep at least 30% fuel for emergencies. Below 30%, you can't orb or wall up, leaving you vulnerable. Watch fuel when lurking or holding site.
When fighting up close, throw flash behind you to guarantee it's in front of the enemy and allow fluid swinging without turning around.
Use net before ulting to prevent enemies from running away. If they get broken out, they'll still be netted and can't run to cover.
Use one-way smokes to scale onto site or delay enemies. Examples: one-way on top of drop on Lotus A, or one-way short on Ascent to hold tree.
Use Raze's ult to trap enemies, like hiding in a choke and popping it when they arrive. It's like a nade but kills quicker, and combos with flashes.
Practice Headhunter by going to the range, shooting a bot with ult, swapping to Headhunter, flicking to another bot, and repeating to get used to the speed.
Mastering these agent-specific mistakes can significantly improve your Valorant gameplay. The key is to be intentional with utility, adapt to the situation, and practice these techniques to gain a competitive edge.
What is the recommended use for Skye's guided salvos?
Use them to delay the enemy and give your team time to rotate, or save them for retakes to flush out enemies or break crossfires.
00:17
How can you get more value from Skye's Trailblazer?
Stop the dog at corners or inside smokes to hold choke points or allow your team to enter first.
01:38
What is the best use of Mix's ultimate?
Use it to deny an execute or retake, as it knocks back and slows enemies, and combos with damaging abilities.
02:30
What is the 'recall star' on Astra and how is it used?
It's a smoke that comes from recalling a star. Use it to enable better fights, catch enemies off guard, or take space on angles.
03:33
How should Fade combine her ultimate with other util?
Use Prowlers after ulting to latch onto enemies, and place a Haunt up high where enemies can't hear it due to the deafening effect.
04:53
When should you use Vito's interceptor aggressively?
When fighting for space, like A main on Lotus, to deny enemy util and gain an advantage.
05:47
Why should you save Kay/O's knife instead of using it early?
A well-timed knife when enemies are half-committed can be a bigger deterrent than a molly due to the long suppression duration.
06:14
How should Reyna throw her flash for close-range fights?
Throw it at the floor for faster activation and to prevent enemies from sitting under it.
07:23
What mistake do Clove players make when executing?
They stand still when placing smokes, getting separated from the team. They should move while placing smokes.
08:07
How can Breach hold space effectively?
Use stun and aftershock to anchor on defense and delay retakes, mastering timing to not rely on teammates.
08:48
What should Brimstone consider before playing for a lineup?
Assess space on site and enemy utility to decide if playing with the team is better. Use molly at choke points to counter enemy util.
09:43
How can Sova use his dart selfishly?
Throw it at the floor to displace enemy crosshairs and swing, instead of always going for scans.
10:36
What is a key feature of Harbor's ultimate?
It can be stopped manually, splitting into a sweeping wall and a 15-second smoke, with blinding and slowing effects still applying.
11:19
When is it better to place Killjoy's molly off the bomb?
When it can make the retake harder, like on CT, forcing enemies to move and enabling your team to get kills.
12:13
What is still powerful on Neon after nerfs?
Jump peeking is still powerful; you can throw a stun mid-jump and slide out.
12:42
Skye's Salvos for Delay
Shifts the mindset from reactive to proactive utility usage, a core principle for many agents.
00:17Mix Ult as Denial
Reframes an ultimate's purpose from execution to denial, which is a strategic pivot many players miss.
02:30Astra Recall Star
Highlights an underused mechanic that can create unexpected advantages.
03:33Kay/O Knife Timing
Emphasizes patience and timing over early info, a valuable lesson for utility usage.
06:14Brimstone Lineup Balance
Warns against over-prioritizing a single playstyle, advocating for adaptability.
09:43Harbor Manual Ult Stop
Reveals a little-known mechanic that can drastically change ult usage.
11:19Gekko Thrash Movement
Provides a specific movement technique to make an ultimate harder to counter.
17:45Viper Fuel Management
Stresses resource management as a key to survival and effectiveness.
18:51[00:02] lot has changed. There are a bunch of new agents, balance changes, and a completely different meta with different mistakes compared to two years ago. decided to sit down and bring you this video of one more mistake that you make
[00:17] for every agent. And if you need any hands-on help implementing any of these tips, my team of VCT coaches and I can give you feedback inside our 10-week we're so confident in our coaching that if you don't gain 500 RR in 10 weeks,
[00:32] we'll give you a full refund. The first call with us is completely free, so use the link in the description to book your free call. Now, starting off with Skye, most Skye players are just wasting their guided [music] salvos. I get it. It can
[00:45] rocket where you see lots of people on the map, or when you hear someone more you could do with them instead of scenario, you want to be using your salvos to delay the enemy and give your
[00:59] team time to rotate and get ready. So, you'd want to position yourself beforehand to be ready to place a rocket for either site. But in times when you don't have time to react and the enemy is already on the site, and you're also
[01:13] waiting for your team to rotate, if you were to just throw a rocket to delay the plant by only a few seconds, it's one of the biggest waste you could possibly do. The only exception to this is if you're going to win the round by time or
[01:25] getting a kill with it. So, if you didn't have a chance to get your first rocket out on time, by saving even an extra single rocket, you're allowing yourself and your team so many more options during a retake. Being able to
[01:38] use it to flush out certain parts of the site or isolating enemies and breaking up crossfires. Make sure you're getting the maximum amount of value with your rockets. Next up is Skye. No one talks about this because it's a bit more
[01:52] advanced and hard to know when to do this. But when you're using Trailblazer, you've likely experienced that enemies are always trying to pre-aim and pre-fire it. So, if you actually stop the dog at certain corners or inside
[02:04] smokes, you can get a lot more value from it. For example, on defense, you can hold it around a corner of a choke point where enemies are trying to push through. It can be almost like a mini Deadlock sensor. And on attack, the dog
[02:17] is usually going to be in front of your team. So, if you're going ahead, you can actually stop your dog inside a smoke to make sure that your team can move into the smoke first, and then you can choose to exit the smoke because otherwise,
[02:30] your dog might get instantly destroyed [music] the moment it exits the smoke, which creates a timing for enemies to actually walk into the smoke and throw off your teammates and punish your team. Now, for Mix, using his ultimate can be
[02:43] a struggle. Sometimes it feels super weak, especially for an eight-point ultimate. Most people haven't truly figured out Mix yet, but I can tell you now that most players are using his ult wrong. You don't want to be using it as
[02:55] just another tool to execute or retake with, especially since it doesn't stun or make it harder for enemies to shoot, unlike a Breach or a Whaley ult. So, instead, try mainly using it to deny an
[03:08] execute or a retake, as it'll knock back the enemy and slow them down. And if they've already used utility and decided to commit, they'll be slowed while walking out of the smoke for the next few seconds. It also combos really well
[03:20] with any damaging abilities like a raise nade or a tail ult. And I know in lower elos, it might be harder [music] to combo utility with randoms, but it's still worth a try because a combo like that can be extremely deadly. And next
[03:33] up for Astra, most Astra players don't even use all of her kit. Of course, there's a smoke, pull, stun, and the ult, but there's actually one more that most people forget. It's the smoke that comes from recalling the star. And while
[03:47] some people do use it, almost no one uses it to its fullest extent. Every high-level player knows about the take back star on Pearl when you're trying to cross the B long ramp when you're on the attack side. This take back star allows
[04:01] for a safer cross and also a lurk potential since the defenders can't be certain about whether or not your team actually crossed with the smoke. But to be honest, that's often the extent of its use for most people. Even though
[04:13] the [music] take back star. For example, we can use it to enable way better fights, especially since it looks exactly like a regular smoke. So enemies can get caught off guard since they don't expect it to dissipate so quickly.
[04:26] If we place a recall star right on top of ourselves, we can be anywhere inside the smoke when it drops. Or we can use it on the enemy to help us swing scary angles like fence on split for attack. Since the defenders start with control
[04:40] of the angle, if we do a recall star, we can actually take a little bit more space and hold the smoke before it drops, which gives us control of this new angle. And if we decide after that we want to smoke it, we still have four
[04:53] more stars to use and another one coming up in 25 seconds. And next up is Fade. When we're playing Fade, people rarely get the most use out of her ult and they just end up wasting it half the time. So to make the most out of her ultimate,
[05:06] you need to be combining it with other parts of her kit. Of course, you don't want to be ulting without any info, but having some of your other util still left in your kit can make a massive difference. It's obvious that we can use
[05:19] our Prowlers after we ult to make sure they latch onto the enemy and give us even clearer info. But remember that your ult deafens. So a really well-placed haunt up high, like on top of C site Lotus where the enemy can't
[05:34] see it coming, can be super strong, especially since they can't hear it and they don't know which [music] direction the eye is being placed. So the next think of scenarios where you might not want to use your Prowler right away
[05:47] after your alt, but instead using your eye and then your prowlers. And onto Vito. Of course, there's no ability like his interceptor. And while it's very strong to use it to hold [music] space like a site on defense, his interceptor
[06:00] is often undervalued for fighting for space. For example, when both teams are fighting for A main on Lotus, our interceptor can be used to deny a ton of util and immediately gives us a great advantage in the fight. So, if you can
[06:14] recognize and read enemies' patterns and tendencies, don't be afraid to switch it up and use his interceptor a lot more aggressively rather than defensively. And next up, we have Kay/O. On Kay/O, it can be really satisfying to get that
[06:27] five suppressed knife on defense, and you might even try to seek this out. But too often, the enemy will just wait eight seconds and then execute with their full util anyway. So, instead, if you save your knife and wait for when
[06:40] determine either by jiggling or listening to audio cues, and then use the enemy half committed to their hit. This way, you may get a free kill on a Jett running in alone, or the enemy may use some other abilities like a smoke or
[06:56] dart and not be able to go out with it. I would even argue that a very well-timed knife can be a way bigger deterrent than a well-placed Kay/O molly in a choke point just due to the sheer amount of time that it takes for the
[07:10] suppressed to disappear versus the molly. So, if you're tempted to use a knife early on just to get info, just think again for a second and consider maybe using your flashes or your molly to take early space and get early info
[07:23] at the start of the round. And next up, we have another flash agent, and it's actually Reyna. Her nearsight flash is misused way too often considering how popular of an agent she really is. Her flashes are her only real utility, and
[07:38] because they're very easy to break, you need to be very precise about how you fights, you want to throw your flashes high as it's more likely to hit more enemies, but it also requires larger crosshair adjustments to break. For
[07:53] closer range fights, throwing at the floor means it's much harder for an activates faster since it's traveling a shorter distance. And actually another reason why you do this is also because they can't just sit under the flash to
[08:07] avoid the near sight. You just have to be aware though that in certain locations on the map, the flash can go through the floor. [music] And next up, we have Clove. A lot of Clove players end up way too far away from their team
[08:19] when they're executing. This is often due to standing still when placing the smokes. We also don't want to be iPad out running for 10 seconds waiting for you're on Clove, try to get used to moving while placing smokes as well as
[08:34] with your team before you pull out your smokes. For example, when attacking A on Split, you want to face main and ramp with your team. Then, when pushing through the choke, you pull out your smokes while still walking forward with
[08:48] your team. If there's no smoke on the choke, just be careful for someone that's swinging out. And next up, we have Breach. For Breach, people think too much about his ability to take and fight into space, and while he is great
[09:00] at it, most people overlook his ability to lock down and hold space. For example, on Split A site, his YouTube can be used in so many different ways to help himself anchor on defense. If we play top elbow, we can stun main as
[09:15] they're coming out through the A main choke. And we can easily spam the smoke. And if we're playing more towards back site or the TV, we can use the stun as they execute, and enemies will run into hell for safety, a spot that we can
[09:29] easily see. This also applies exactly the same on attack for post plant. From elbow, we can delay a retake with our stun or aftershock on the CT walkout or elbow if they're already out. What's truly important is to fully understand
[09:43] your options and master the timing of your util. That way, you don't always have to rely on your teammates to capitalize off of your utility to get kills. Now, with Brimstone, many rounds are won from a post-plant lineup. But, a
[09:57] big mistake is when a Brimstone player over prioritizes playing for a lineup. Often times, a round gets unnecessarily really close or even lost because a Brimstone decided to play for a lineup instead of playing with their team. You
[10:11] need to be aware of multiple different factors when deciding whether or not it is safe for you to play for a lineup versus playing on site with your team. You need to be aware of how much space that your team has on site, and you need
[10:23] to be aware of what kind of utility or ultimates that the enemies have for retake, so that way you can anticipate for how fast the enemies will try to retake the site. If you think that the enemies are going to flood the site with
[10:36] lots of ultimates or utility, you'll get way more value by using your Molly at a choke point to completely negate and counter any enemy utility or ultimates. Now, for Sova, the biggest mistake I can say most people make on this agent is
[10:51] not using his dart selfishly enough. Too many players try to maximize the value of the dart by trying to scan as many players as possible, but they end up getting way less value because it gets broken as soon as it's visible from more
[11:05] angles and it's being used predictably. A very underrated way to use his dart is by using it to displace enemy crosshairs instead of going for a scan. You can do this by just throwing the dart at the floor to the side of the enemy and swing
[11:19] with it. This is particularly useful when only half of your team is left alive as you'll need to focus more on using your gun. Next up, we have Harbor. Even in high immortal, many people don't know that you can stop his old manually.
[11:33] So split the old into two parts. The first is a sweeping wall and the second first is a sweeping wall and the second is a 15 second smoke after it stops. And keep in mind that the blinding and slowing effects still apply while the
[11:46] wall is static. So the best uses of his ultimates are where you can make use of both the sweeping and the smoke after. For example, you can use it on an execute to take a site and then you stop the wall and have the smoke stay up
[12:00] after to delay any retakes. Or on a retake, you might be able to push off attackers off the site and have your wall still up to block them off from seeing the spike. And since defusing takes 7 seconds, you can also have your
[12:13] cove ready to deny any spams. Now as for Killjoy, on attack, placing your mollies on the bomb for post plant is obviously smart. But even radiant players overuse this. You need to be aware of the value your molly can get if you place it to
[12:27] make the retake harder. For example, on Haven A site post plant. If you put your molly on CT and pop it as the enemy tries to retake, that can be way more valuable than having it ready for the bomb as it can help your team fight and
[12:42] enable them to get kills. Since the enemy will have less utility to fight and will be forced to move out of the way to not take damage from the molly. So think twice about whether throwing the molly to stop a retake will be more
[12:54] valuable than using it on the spike. And moving on, we have Neon. People think that Neon's recent nerf now means that jumping around with her isn't effective running out with a knife. Even though bee hopping around everywhere isn't
[13:09] broken anymore, jump peaking on Neon is still very powerful. In the middle of your jump peak, you can still throw a stun with little risk to then slide out on your opponent. Recently nerfed too was Yoru and most players either get
[13:22] lots of value from dashing in or very little and just end up teleporting back, which wastes most of her kit in just seconds. The issue is that these Whaley players aren't aware of the enemy and how they play. So, with Whaley's nerf,
[13:36] we can't reactively throw our saturate right after dashing in to try to save ourselves. This means we have to be much more aware of the enemy and throw our saturate before we dash. If we're taking note of where the enemies like to play,
[13:50] we'll be able to dash in without having to instantly teleport back and get way more value out of her kits. Another underrated agent is Sage, and her slow orb is an incredibly underrated ability. Most people just throw them the instant
[14:05] they see or hear anyone. Instead, you should think of what your slow is achieving and how you can get value around it. For example, we can use our slow to isolate fights when enemies are pushing out instead of just hiding. As
[14:18] they're out in the open and they can barely move. Or we can use it to stop an that's satcheling in. This way you can isolate her and completely counter their push. For example, on A site on split,
[14:32] you can stand on top of rafters and as soon as you hear a raise satchel in or jet dash in, quickly throw your orb and now the rest of her team is stuck in main while the duelist that just dashed in is all alone on site with no help.
[14:46] And next up, we have Viper, another agent with a slow. In the previous one mistake for every agent video, I mentioned that for Killjoy, it's important to have a goal for your setup. And the same applies to Viper, except
[14:59] it's also important to change your utility around to make it way harder for enemies to predict. Otherwise, your opponents can easily bait out your wall and shoot the thorns, especially since they're so big. So, the ideal way to get
[15:12] the most value out of Viper's kit is to make sure that the enemy does not expect it, and you still want to place the setup in a way where the enemy team will get all split up. It makes it really easy for your team to take isolated
[15:26] fights. So, to do this properly, think about how the enemy team might want to path onto the site with the agents that they have. And think about ways that you can actually isolate them. For example, on C site Lotus, we can place thorns on
[15:39] the choke point, but we can also place it right outside of bend to isolate bend. And you can even pair it with a pre-placed flash, and it's the easiest how you want to be prepared with the utility, when you're playing Omen, you
[15:56] need to be aware of your own preferred utility order, which will change depending on where you're going and what you're doing. In some situations, if you don't need two smokes down right away, it could be better to instead put the
[16:10] first smoke down and then go in sooner with a blind and TP to make sure that you can trade your team. A good example for a situation like this is A site on a site as you don't immediately need a smoke on heaven when you're executing.
[16:23] So, you can quickly throw a smoke on door, then you can paranoia site, then teleport to the generator. And speaking of being flexible with the order of your utility, as Iso, a lot of people don't realize the flexibility of his wall and
[16:37] forget that you have the option to place it to move at half the speed. When you're going through long, narrow areas of the map, you should make sure to place a wall to move fast as you can cover more ground with it up. But when
[16:50] you're trying to push through wider areas, you want to make sure that the wall moves slower as that way you can use it much better to isolate angles and have more time actually clearing those angles. Now, for Cypher, on defense,
[17:03] when doing a site setup, most of the time you put your trips, your camera, your cages, and call it a day. But what a lot of high elo Cypher players do, such as a pro player like Benjyfishy, he never places both cages down. Instead,
[17:17] he waits to see where the enemy is going and if they are coming to his site, he'll pop the first cage and he'll throw another cage to be ready to anchor and site, he'll be able to use his extra cage as his own smoke to fight around
[17:32] different parts of the map and even have it available for the retake. And another quick tip, if they're not coming to your site, you can even take back your trips and place it deeper out into main and then rotate off quickly because trip
[17:45] allows your team to get very early info to be able to rotate back onto the site if they do decide to throw some sort of fake or a late rotate to the other site Gekko, if you're finding that your ult dies way too quickly, you're most likely
[18:00] not moving enough with it. You should think of using Thrash like the old Neon with the bee hops. By bee hopping, Thrash instantly becomes a much tougher target and is also super difficult to prefire or break through a smoke. Thrash
[18:13] normally slides on the ground when moving, which can also make it really awkward to change directions or go around corners. But this doesn't apply actually really easy to go around corners when doing this. It's also even
[18:25] easier because you don't have to press the W key or the forward key when you're ulting. You only have to use the left and right direction keys. And always, don't forget that while you're diving with the ult by pressing left click, you
[18:37] can click left click again to pop the ult midair. Now, for Yoru, there's a really effective way to counter op that you might not have considered. His clones are often too obvious, so it's important to switch it up so that the
[18:51] the enemy to be scared that a clone that they didn't shoot is actually a real Yoru. So, one way that we can do this is by placing our clone facing into the wall at a slight angle. So, it walks
[19:04] slowly into the angle, which emulates a slow peek. This is really effective against an op, especially because they can't see who it is before reacting. So, they're less likely to think that it's a clone, and this allows us to swing and
[19:17] punish them when they take the bait. And just like how that operator player got caught with their pants down on Viper, we also don't want to be caught out with zero fuel. So, if we're holding site on defense or if we're lurking on attack,
[19:31] we want to always make sure that we have at least 30% fuel at all times and use that 30% mainly for emergencies. For example, like if the enemy starts throwing util at you. Otherwise, if we're below 30%, we can't orb or wall up
[19:47] until our fuel reaches the 30% threshold. And the lower our fuel, the longer we'll be stuck waiting. So, the next time you're lurking on Lotus or holding site on mid on Split, watch your fuel so you're not stuck with nothing
[20:00] throwing the kitchen sink at you. Now, we've got Phoenix. Most players have the instinct to throw the flash around a corner, but the flash can often go past the enemy if they're way too close to the angle. And this actually allows them
[20:15] to accidentally dodge your flashes. So, when you are fighting enemies up close, throwing the flash behind you guarantees that the flash will be in front of the enemy. And it also allows you to be able to swing more fluidly as you don't have
[20:28] to turn around from your own flash. Next up, and speaking of whiffing our flashes, often times when we're playing Deadlock, it's very easy to whiff our ults because popping your ult and shooting it often times misses as it
[20:40] takes a long time to wind up her ult, and enemies just run away or get prepared to break each other out. So, instead, using your net right before ulting means enemies can't as easily run away from the ult. And also, if you do
[20:55] ult an enemy who is netted, if they do get broken out, they'll still be netted and won't be able to run to cover. And next up, we have Jett. Most Jett players that I see still overly rely on their smokes to be able to dash out on the
[21:09] site. But, oftentimes they're not aware of how they can use their smokes in one way that her smokes are underutilized is with one-way smokes. For example, when we're executing Lotus
[21:21] on A site, we can throw a one-way on top of drop to help us scale onto site and not have to worry about drop for a few seconds while we're clearing back site. Or, when we're holding tree on Ascent, we can one-way short to delay the enemy.
[21:35] And if they swing, we have a free kill. And speaking of Jett, another dash duelist we have is Raze. Oftentimes when we think about her ultimate, players like to think about how we can take space with the ult by pushing forward,
[21:48] satcheling out, and so on. But, a lot of players often forget just how good of an ability it can be for trapping. Imagine her ult like it's her nade, except it just kills enemies much quicker. For example, if you're always playing A and
[22:03] the enemy keeps going C, you can switch playing towards C and hide in the C site choke. And when they get to mount, you pop your ult and there's no counterplay to it. And if you can get a teammate to throw in a flash as you go, then it's
[22:17] even stronger. And last but not least, we have Chamber. Oftentimes players still don't know how to make proper use of the Headhunter. It's quite a unique ability as it shoots like a Guardian, but pulls out way quicker than any other
[22:30] gun. So, for that reason, it can be the best sidearm to a slow weapon like the Operator. But, there aren't ways to practice using it. So, people often aren't used to using the Headhunter and panic easily while shooting it. To
[22:42] practice this, you can go directly into the range, we can get ourselves more accustomed to the speed by practicing shooting a bot with our ult, then swapping to our Headhunter right away, and flicking and killing another bot.
[22:54] And then we can switch back to our ult and rinse and repeat. That's all for the one more mistake that you make for every agent in Valorant. And if you haven't check that out as well. Thanks for watching.
⚡ Saved you 0h 23m reading this? Transcribe any YouTube video for free — no signup needed.