
How to Stop Wasting Utility on Split
60sOffers a concrete, map-specific tip that directly addresses a common ranked frustration, making it highly relatable and shareable.
▶ Play Clip"Delivers a dense collection of tips, though the '100 tips' claim is a stretch as many are repeated or overlapping."
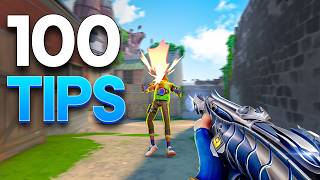
This video is a comprehensive compilation of over 100 tips for Valorant players, covering everything from map-specific strategies to role-specific advice, movement mechanics, and mental game. The creator, who has coached hundreds of players to Immortal and Radiant, shares the most valuable insights from the past 7 months of content, aiming to help players rank up by addressing common mistakes and providing actionable techniques.
The creator has 6 years of experience and has helped hundreds hit Immortal and Radiant. This video is a highlight reel of the most valuable advice from the past 7 months. They also mention a 10-week coaching program with a 500 RR guarantee.
On Bind, winning control of long is crucial for defenders. Players should not give up long easily, use jump spots for info, and delay utility to buy time. Proper execution avoids impossible retakes on B.
On Split, attacking is tough. A key tip is to bait out utility in mid by breaking the Sage wall and pressuring the mid defender, forcing them to use utility before a B execute or mid play.
On Pearl, focus on getting connector control. Use smokes on cross and B link, and a dog to clear doors. Utilize abilities like Astra pull or Breach stun to slow enemies. Sometimes doing nothing in connector is effective as defenders will try to clear it, making them vulnerable.
On Haven, a common mistake is defenders wasting utility during A retake. Instead, slow down and use less valuable utilities to bait out enemy reactions, improving retake success.
Many ranked players overcomplicate strategies. Most low-to-mid elo rounds can stay simple. Pay attention to enemy econ, pacing, and rotation info. For example, if the enemy is on a save, do a fast site push.
Watching teammates and blaming them keeps you from ranking up. Focus on your own impact and what you could have done better. The best players focus on themselves.
Dive agents like Jett and Reyna often rush in without a plan. Communicate with your team for utility support and let them know where you want flashes or smokes.
Second entry players often assume angles are clear. Always check off angles and ratty spots yourself, as defenders love to sit in unpredictable positions.
Phoenix and Yoru can flex between leading and supporting entries. Avoid playing them the same way every round; adapt to the situation.
Sova, Fade, and KAY/O bring essential tools, but using recon blindly wastes utility. Only use when needed, especially late in rounds.
Gekko's flashes and KAY/O's knife come back after every use. Use them at the start of rounds to gather info or take space.
Don't place traps on obvious choke points. Switch up placements to outthink opponents. Aggressive sentinels like Chamber and Viper should vary their angles.
Mistiming smokes costs rounds. Throw smokes just as your team pushes. Avoid using the same smokes every round; use unusual spots to deny info.
Ospa constantly side steps and taps between strafes. Practice with a metronome at 100-160 BPM, mixing strafe patterns and shooting accurately.
Ospa calculates risks and plays aggressively without dying, taking unexpected angles and pushing at stupid timings.
Nats is the best Sentinel due to his discipline with lurks and rotations. He waits for the right moment and changes patterns to avoid predictability.
Use utility the same way until enemies take it for granted, then exploit their expectation.
Forsaken can play any role at an insane level. His secret is playing aggressively in every role, treating utility as tools to get kills.
Broxah reads enemy macro movement and prefires enemies. He uses Odin to spam walls and mentally break enemies.
Mako smokes aggressively far up and plays around his smokes, catching enemies off guard during retakes. Use smokes as opportunities for off angles.
Avoid filling every game. Build a player identity by limit testing roles you enjoy. Don't rely on stats alone.
Don't wait for the perfect moment. Use ultimates to win rounds and snowball. Practice jiggle peeking with utility out.
Analyze enemy team comp to predict tendencies. For example, no flashes means they rely on utility to take space.
Pulling out your knife in DMs or ranked gets you killed. Practice not pulling it out to train mechanics.
Lazy crosshair placement ruins aim. Keep crosshair at head level and practice with reference points.
Holding the same angle every round makes you predictable. Mix up positions and off angles to avoid being read.
When holding angles, move in and out to avoid one-taps. When pushing, use faster tap strafes.
Pistols like Ghost, Sheriff, and Classic have reset times. Spamming bullets leads to whiffs. Respect the reset time.
Bronze players dump utility without thinking. Bad utility is worse than no utility. Ask yourself what each utility does for your team.
Silver players chase clips and ego peek. Practice disciplined aggression: after a kill, ask if going for more is risky.
Gold players should anchor and hold sites, looking for patterns in enemy macro movement instead of chasing sound cues.
Plat players make economy decisions out of sync. Press tab and ask what everyone can afford together. Save if the team saves.
Diamond players become robotic. Use conditioning: intentionally show behavior, then break the pattern. Note starting positions.
Ascendant players accidentally bait teammates. The trade window is 1-2 seconds after contact. Stay within 1-2 steps of entry.
The gap between Immortal and Radiant is game sense and mental endurance. Treat every round like 12-12 and ask what the best play is.
Holding crosshair too close to the angle forces clunky adjustments. Practice with a friend or in TDM.
Exposing yourself to multiple angles at once is risky. Use slice the pie to clear angles one by one.
Trading prevents outnumbering. Position near teammates, peek half a second after entry, and ensure your peek is wide enough.
Some players have smooth aim, others flicky. Watch pros like Jing or Yay to match your style and tweak sensitivity.
Spend 10-20% aim training, 70% ranked, and 10-20% VOD review. Focus on specific weaknesses.
Don't blame others. Focus on what you can control. Know when to stop queuing to avoid tilt.
During site executes, hug left or right side of walls to isolate angles. First player out takes space, second trades, third covers opposite, fourth/fifth anti-utility.
Use a tense fast flick then smooth micro adjustment. Practice with sheriff/guardian in deathmatch focusing on reading target.
Understand what happens beyond vision. Make mental notes on player tendencies and exploit them.
In clutches, wait to re-swing to make enemies worry about multiple angles.
Jiggle to bait, stand close to wall, and swing off contact. Anti-utility role is crucial.
Use silent jumps and drops to gain surprise. Techniques include holding shift and jumping, or crouch-jump.
Iron players should get comfortable with basic movement. Use the range parkour to learn air strafing and bunny hopping.
Default to movement. Strafe and stop to shoot. Practice the 100 bots challenge with strafing.
Use A/D only when peeking to achieve maximum horizontal velocity. Pre-aim where enemies will be.
Use jiggle peeks and jump peeks to gather info safely. Silent jump peeks are safer.
Use air strafing and bunny hopping to escape. Bind mouse wheel to jump. Combine with jump peeks for safe shots.
Vary strafe lengths and directions to be unpredictable. Mix in crouches to throw off enemy aim.
Move right before the enemy shoots. Practice in deathmatch with intentional movement.
Use crouch to duck under shots. Don't fully commit. Crouch peak almost every angle.
Think about positioning, trading potential, and utility before peeking. Use off angles and double swings.
Don't overreact to first utility. Think about where enemies want to end up. Focus on process over outcome.
The video provides a comprehensive collection of tips for Valorant players of all ranks, emphasizing the importance of map control, role-specific strategies, movement mechanics, and mental discipline. By focusing on these fundamentals and avoiding common mistakes, players can significantly improve their gameplay and rank up.
What is the key to winning control of long on Bind as a defender?
Fight for long control a few times per half, use jump spots for info, and delay utility to buy time.
01:06
What is the tip for attacking on Split?
Bait out utility in mid by breaking the Sage wall and pressuring the mid defender.
02:27
What is the key area to control on Pearl?
Connector control.
03:45
What is the common mistake on Haven when retaking A?
Wasting all utility during the retake, which gets countered by enemy abilities.
05:03
What are the three signals to pay attention to for simple strategies?
Enemy econ, pacing of rounds, and info on enemy rotations.
06:09
What is the most common mistake dive agents make?
Rushing in without a clear plan.
07:41
What is the main job of a second entry duelist?
Clear off angles and ratty spots.
08:21
What is the secret to Forsaken's versatility?
Playing aggressively in every role, treating utility as tools to get kills.
16:45
What is the trade window?
The one to two second window in which you can swing right after your teammate makes contact.
32:29
What is the recommended time split for improvement?
10-20% aim training, 70% ranked, and 10-20% VOD review.
38:52
What is the technique to avoid angle stacking?
Slice the pie: peek out step by step, clearing angles one by one.
34:39
What is the key to movement timing?
Move right before the enemy is about to shoot.
55:33
What is the difference between a good crouch and a bad crouch?
A good crouch is timed to duck under the shot, while a bad crouch is done early making you a stationary target.
56:40
Fight for long control on Bind
Emphasizes the importance of map control and proactive defense.
01:06Keep rounds simple
Challenges the misconception that complex strategies are always better.
05:42Focus on yourself
Highlights the mental aspect of ranking up and avoiding blame.
07:01Ospa's movement
Provides a concrete example of advanced movement mechanics.
13:09Forsaken's versatility
Shows that any role can carry with the right mindset.
16:45Mental endurance in Immortal
Identifies the key difference between Immortal and Radiant.
33:07[00:01] for the past 6 years and helping hundreds hit Immortal and Radiant through our coaching program and guides, I've put together a collection of new know. This video is essentially a highlight reel of the most valuable
[00:15] advice I've shared over the past 7 months, so you might notice a few quick transitions as I pull the best from everything that I've created. From aim we're covering it all here. And the
[00:27] ultimate goal is to help you finally rank up. I also want to say that even if you watch every guide out there, figuring out exactly what you need to tough to figure out on your own. And
[00:39] in. My Radiant and VCT coaches will coach you for 10 weeks and help you rank up 500 RR guaranteed or your money back. On average, 80% of our students reach their promised rank in just 6 weeks. So, if you want fast results, we're the best
[00:53] interested in seeing if we'd be a good fit to work together, you can check out the link down below. Now, let's jump into the first tip. Bind is a map that rewards confidence, and this is because you must fight hard for map control. On
[01:06] both sides, you're much better off if you win control for one of the lanes. My Fighting for long control a few times per half is crucial for the defenders to have good B holds. When I'm coaching players, I see far too many players give
[01:19] up long way too easily. They don't jump spot or listen for early round info. B play, meaning we need to make the attackers use at least some utility to buy time for our team is to help. And another reason we fight for long is that
[01:34] the attacking hookah players often don't wait for the long players to retake it execute, which is actually a mistake since this breaks up their split push. but here's how you can do it properly. First off, we need info. So, of course,
[01:48] a Sky flash or a Sova or a reveal deep long can help us know when to push or leave the site. But, consistent jump spots can show us how far up long the we need to choose when to fight wisely,
[02:00] want to take our fights when the enemy is in this box. To put it simply, we just need to delay utility or put a smoke at the bottom of long followed by opponent is too far back or they're playing anti-flash, you've likely wasted
[02:13] utility out. So, fighting for long with this strategy will give your teammates site. And when executed well, you'll avoid impossible retakes on B. And next up, we have split. We all know how tough attack sites are on split. So, here's a
[02:27] tip that helps with that. Learn how to bait out utility in mid. Any good attack pressuring mid. The only exception being if you want to rush A. Most players will choose Sage, Viper, or another agent that is very strong at controlling mid
[02:40] on defense. These B heaven players can shut down B main or mid very quickly how to deal with this delay utility is charge into the mid Sage wall head first. But if you go for a straight-up
[02:53] mid push, you also end up using a flash, a smoke, or other important utility to this often fails because you simply just coming up after you break the wall. You basically give the enemy loads of info,
[03:06] lose map control because the defenders react to that info. So, this can often be a disastrous way to start the round. So, my tip is just break the wall, smoke vents or mail, and put a little pressure on the Sage or whoever is playing mid.
[03:19] really need is for the mid defender utility because you're pushing. So, do this before a B execute or before actually going into your mid play of heaven or vents. And once they've used
[03:31] their utility, wait it out and continue with your more valuable util like a Sky me know in the comments how much easier it is to play split. Next up, we have back to the pool and some players hate it. That's because Pearl is tricky to
[03:45] different from other mid-focused maps that we've seen. Specifically on Pearl, we want to focus on getting connector control. Connector is a key area because longer play A or B lane comfortably. Feeling pressure from connector may
[03:58] force them to give up these positions or play more aggressively into your teammates elsewhere. And as we know, if a defending side gives up our control, to get connector control, we need a smoke on the cross and B link and a dog,
[04:12] doors. Utilize abilities like an Astra pull or a Breach stun to slow down the enemy players playing near doors. This is crucial for the entry fragger to secure a quick kill before the enemies can fully retreat. And now that we have
[04:25] it? Actually, sometimes doing nothing is great in this scenario. The defenders will not want to let you stay in connector and will often try to clear it as soon as possible. And this is because they can no longer rotate safely due to
[04:37] as well as making them vulnerable to splits. So, sometimes it's best just to that they're not going to re-clear you. everything goes to plan, you'll be able to take A control very easily and push
[04:51] into A with your teammates in main. And for our last map, Haven, the tip is simple but effective. Bait out utility before retaking A. This is the easiest and quickest fix you can implement onto this map. A common mistake in ranked is
[05:03] defenders wasting all their utility during an A site retake, only to be immediately countered by enemy abilities like a Breach stun, an Aftershock, or an is because the attackers are expecting your retake utility, so they have
[05:16] counter utility ready. So, my number one tip here would be to slow down your team and use some of the less valuable utilities to bait out this reaction. Even just running up and peeking out at a few angles may bait a huge reaction
[05:28] guarantee this will improve your success in this scenario if done correctly. Many ranked players confuse strategy with unnecessary complexity. They watch pro VODs and think every round needs four-step executes or lurks, even when
[05:42] who don't even know what playing post-plant means. In reality, most low-to-mid elo rounds can stay simple and don't require over-planning. And honestly, this applies even in high elo to some extent. Trying to force complex
[05:56] strats often creates confusion, and if anything goes wrong, it can cause tilt, throughout the game. The real problem is ignoring key signals and your team's actual game knowledge. And the signals you need to pay attention to are the
[06:09] enemy econ, pacing of the rounds, and info on enemy rotations. With economy, one enemy save or half buy, a fast, simple site push all grouped up with your team works best. Since you deny time for the sheriffs and shotguns to
[06:21] stack value. So, press tab during the buy phase and check the enemy's econ to call the simple, fast site push. Pacing is also a key signal you should pay you're getting to site and planting or diffusing the spike. A simple call here
[06:34] is to ask your teammates to commit and not waste any more time when there's seem simple, but I often see students wait too long to start the retake or the site push. So, asking your team to hurry up because time is running out is a very
[06:47] constantly watch their teammates, waiting for them to lead or clutch end up focusing on their teammates' mistakes rather than their own game. And this keeps you from ranking up because expecting your team to lead is a sign
[07:01] of the game. You end up getting frustrated at people whose actions you can't even control, which then makes you passive and hinders you from trying wasting mental energy on others instead
[07:15] of spending all that energy to maximize your own impact. The best players and are the players that are able to focus just on themselves. They focus on what spend time thinking about what they should have done instead without being
[07:29] too harsh on their teammates. Dive agents like Jett, Reyna, Neon, and Yoru are all about entering the site first and showing no fear. But the most common mistakes players make on these agents isn't hesitating. It's actually rushing
[07:41] in without a clear plan. Sprinting in aimlessly almost always leaves you stranded alone, especially if your team isn't ready with the utility or the you go for the entry, it's important to communicate with your team. Even a
[07:55] simple call for a flash, smoke, or recon can make all the difference. So, let your teammates know where you want the utility as well as you dive, so you aren't left isolated against multiple players or, for example, a recon dart
[08:07] you were hoping for. The next mistake crops up for second entry players, and that involves assuming every angle is clear when that's almost never the case. As a second entry duelist, your main job is to clear the off angles and ratty
[08:21] miss in the heat of the moment. Too often, players make the mistake of assuming every spot is safe just because a dive duelist is still alive after diving in. When in reality, defenders love to sit in unpredictable positions
[08:34] waiting to punish careless entries. A classic example is logs on B ascent. That's why you need to check every angle for yourself. Skipping this step only sets you up to get caught out and wonder what went wrong. And last up for our
[08:46] duelists, we have hybrid entries. Hybrid duelists like Phoenix and Yoru can flex between leading and supporting entries. Phoenix's ult makes him perfect for taking early space because he can entry safely, draw util, and let teammates
[08:58] trade with no risk. His flash and wall also make him great as a second entry, which allows him to set up teammates when your team lacks any flashes. And for Yoru, his flash, TP, and decoy give him similar versatility. He can surprise
[09:11] defenders, create pressure, or safely set up another duelist push. The biggest mistake that most players make when playing hybrid duelists is playing them in the same way every single round. If you always push out first, you're going
[09:23] never entering first, you're wasting your potential. Hybrid duelists thrive on adaptation, taking space when it's right, and supporting your team when they need it. So, make sure that you never autopilot. Every solid team needs
[09:36] a recon initiator. Sova, Fade, and KAY/O bring essential tools for clearing information gaps and protecting your team from those ratty corners or ops waiting for freebies. But, just having a recon agent isn't going to be enough.
[09:49] using a recon utility blindly, especially with the recent nerfs. This can look like dumping darts, dogs, and drones in areas that your team has already cleared. And this happens on both attacking and defender side, where
[10:02] players get in the habit of launching a dart or Fade dog without even thinking needed. Not only does this waste your utility, but it also leaves your team without the utility when they actually really need it, such as in the late
[10:15] trying to stick the bomb. Next, let's dive into the common mistakes flash initiators make and how to avoid costing your team rounds. A good flash initiator can completely flip the tide of any game, and one common mistake I see
[10:28] players make is misusing their third, rechargeable ability on flash agents. The key here is to understand that your flashes on Gekko and your knife on KAY/O come back after every use. So, using them at the start of rounds to gather
[10:42] info or take space is essential. Sentinels are the backbone of your team's defense, and you don't just hold sites. You control the flow of making mistakes. If you want to be a true sentinel player, you need to stop
[10:56] mistakes I see players is placing their traps on obvious choke points where enemies expect them. This makes it way too easy for opponents to spot and destroy your utility before it even gets a chance to help your team. You need to
[11:09] outthink your opponents. Try to switch up your tripwire placements constantly. Drop them deeper into less obvious areas or completely switch it up where you Now, there are more aggressive sentinels, such as Chamber and Viper.
[11:22] They're built to take aggressive angles, find early frags, and escape with their players make is playing way too predictably by peeking the same spots read. Just like how a Jett who always holds the same op angle will lose their
[11:37] impact. So, to really farm your opponents, you have to keep your constantly on the move. So, change up your setup and take new angles each round so enemies never know where that early peek is going to come from. Smokes
[11:50] are one of the most powerful tools that you have as a controller, but mistiming your smokes will cost your team rounds even before the gunfight starts. If you defenders a favor because they'll sit back and wait for your utility to fade
[12:03] out before they retake or challenge a push. So, how do you fix this? You're going to need to throw your smokes just as your team or the attackers are about to push onto the site. For example, on Curvature, don't smoke link too early.
[12:15] Wait until your team is ready to push. Then, deny the defenders sightline right Another common mistake is using the same smokes every round, which makes your place predictable and easy to counter. Smokes need to deny info. For that
[12:30] reason, there are plenty of situations where you can smoke in unusual spots to position. For example, let's look at Lotus. I know it just left the map pool, but I hope you get the idea from it. On attack, a lot of people commonly smoke
[12:43] stairs, but instead, you can smoke closer to main. And this will help deny the enemy the fight for rubble and keep them wondering if you're even there in the first place. As a defender, don't forget to use deep smokes to take mid
[12:55] control on maps like Abyss, Curvature, and Ascent. For example, smoking top mid on Abyss helps to secure mid control and makes lurking way easier. And if you defensive half, you'll keep the enemies always scared of flanks. Anyone who
[13:09] plays against Ospos will be bombarded with precise taps from a target who constantly moves and dodges bullets. So, let me explain this with a real game I'm talking about. You can clearly see how he's constantly side stepping in
[13:22] each gunfight. And notice the stutter side strafe, two more taps, strafes again, and so on so forth. You can also clutch. His cross replacement is almost robot and he usually doesn't flick that
[13:36] much because he lets his movement handle part of these small adjustments. movement while staying accurate with your shots is not easy. But the only way gradually increasing the rate of your taps in between your steps. Before we
[13:51] get into training this, you have to start with a simple setting change you to see exactly where you're misstepping or mistiming the shot to be next, we're going to go into the range and practice this idea of using a
[14:05] metronome. You can use a web browser, your favorite song, or whatever else to keep track of the beat, but generally you want to start between 100 to 160 beats per minute. The goal here is to use the bots or targets outside to
[14:17] accurate and shooting the bots while mixing up your strafe patterns. While Ospa's movement was a key part of his playstyle, as a duelist, I also have another bonus tip. The bonus tip that makes Ospa so good is his ability to
[14:30] calculate the risks and as a result, play aggressively without dying. Specifically, he's incredible at taking unexpected angles and pushing aggressively in seemingly impossible scenarios. For example, instead of
[14:42] dashing away and playing safe, he closes the distance at stupid timings from spots that enemies completely ignore. For the Sentinel role, Nats is arguably the best Sentinel player Valorant has ever seen. The reason for that is his
[14:54] discipline. Specifically with his lurks and rotation. Unlike Alfajer who thrives on firepower, Nats is a big brain player that dominates through timings. If noticed that he's never rushing or forcing bad fights. And in fact, Nats'
[15:07] secret weapon is his patience. If he has to wait an entire round for his moment, other hand over commit to lurks and rotations. But Nats' lurks work because reacts. When he's attacking, he gets utility plays for flanks as early as
[15:24] Then, he takes space methodically and only pushes up when defenders commit to another part of the map, and he keeps track of the pressure that his team is making elsewhere, as well as where enemies tend to play round by round.
[15:37] Plus, he's also changing his patterns to avoid being predictable. And on defense, depending on the situation. If enemies weaker, he won't even waste a second, and he'll rotate the instant that the
[15:50] that the enemies are throwing lots of stopping power, he'll even wait the full round on his site unless he sees that the enemies are actually pushing as five. How do we achieve Nat's level of
[16:03] game sense? One part of it is constantly thinking about the macro movements of what you can and can't do in ranked. The other part is studying what pros like Nat's does in terms of their timing and rotations. But, there's one very
[16:16] effective, simple trick Nat's uses that you can copy without wasting any hours. That means using your utility the same way until enemies take it for granted. times, defenders become conditioned to it, which are smokes, Sova arrows, or
[16:32] cages at the same place each round. If you keep placing it, they react the same way, allowing you to exploit their expectation. Now, let's move on to someone who's famous for being able to play anything. Forsaken is seen by many
[16:45] as APAC's best player. He's also considered the world's best flex because of his insane versatility. This guy can literally play any role at an insane level. If you ask pros why he's so good, they point to how he can IGL on any
[16:57] agent while maintaining crisp mechanics and adapting instantly to any scenario. Most flex players are just fill players who perform decently across multiple numbers on duelist, initiator,
[17:10] sentinels, and even controllers, often even switching roles mid-series. And his secret weapon is pretty simple. Play aggressively in every role. Most players feel they have no impact on playing Sentinels or Controllers, but Forsaken
[17:22] proves you can carry on any role. He basically plays every role like a duelist with utility as support for himself. To steal Forsaken's playstyle, you should treat your utility as tools to get kills, especially in ranked. He
[17:34] relies on any utility to make gunfights easier. So, to practice this in ranked, completely change how you use them. A good goal to become more aggressive is forcing yourself to be first or second contact, and depending on the role,
[17:47] mind, your utility must enable your especially in ranked. But there's one thing that you shouldn't copy from Trust me, you don't want to copy Forsaken by playing every single agent.
[18:01] every different agent, and your consistency will go down. So, unless to simply steal his mentality and treat your utility as a personal entry tool. Now, a recent up-and-comer, and arguably
[18:14] Valorant is Broxah, but let me explain why his playstyle is actually broken and not just cringe. Broxah is a goat initiator because he not only uses utility well, but he also revolutionized the game by mentally breaking enemies
[18:28] with his Odin plays. But the reason Broxah gets so much value out of this you can spam, but it's because he's amazing at reading enemy macro movement. He watches for patterns, mini-map timings, and prefires enemies when they
[18:42] to focus on enemy movements across the map and always keep an eye on the to switch your position every round to your shots correctly, the enemies might peek expecting to be safe, then they eat
[18:56] unexpectedly. And to find these spammable walls, there's also tons of VODs that you can watch. And trust me, nothing makes enemies tilt like getting if you're an Initiator main and you combine it with a reveal, you'll be a
[19:09] nightmare for the whole enemy team. And finally, we move onto the goat of controllers, Mako. This one tip that he uses a lot won't just win you more post plants, but it'll help you storm up the ranks. The key here is that he smokes
[19:22] aggressively far up and plays right in and around his smokes. That way, he can catch enemies completely off guard while they attempt to retake the site. So, here's how to steal that post plant aggression. Instead of playing passive
[19:35] behind your smoke, wait for the enemies to use their drone or any kind of reveals and then push up to the smoke to hold funky off angles that enemies won't check. So, instead of using smokes as cover, use it as an opportunity for
[19:49] place the smokes to block common retake of them or right outside of them. And you need to keep in mind that your smokes are a distraction. When enemies focus on the smoke, you shoot from an
[20:02] unexpected angle and they won't know how to react. So, to practice this in ranked, try placing aggressive smokes to close the distance on post plants and create chaos. And after planting the spike, smoke the main retake, then
[20:15] immediately put yourself in an odd position. If you're defending, after push your site, place a smoke and playing corners like this to surprise the enemy. What makes this play style even stronger is if you're using a judge
[20:29] or bucky on eco rounds. Those guns are made to play closer range around smokes. You need to lock in your most comfortable roles and avoid filling every game. Well, filling is bad because you lose out on a fundamental aspect of
[20:41] most high-level players, and that's building a player identity. Your player secondary role you play the most. So, how do we transition from that? The every game to finding a main role is to limit test on the roles you like to play
[20:55] the most. It's not beneficial to look into stats like your win rates, ADR, and tracker across every agent. That's because your identity wasn't either. Instead, you want to find something you enjoy playing so you can
[21:08] time. You don't always need to take space with a double satchel off the first 10 seconds of the round. Often times, having better mechanics can give with your utility also means you have more options throughout a round, whether
[21:23] same is true of ultimates. One of the most significant issues I see in all my for the perfect moment. If your team had to win, that could be great if you're one round away from winning the game.
[21:36] game and your whole team waits until the half change to use a single ultimate, those ults could have made the difference between winning or losing that round and snowballing that further into more wins. If you want to stop
[21:49] practice this technique. One of my favorite habits I teach to my students is to jiggle peek with utility out. Usually, doing this in the open is a bad thing. But if you're using cover or have a path to safety, you can get a lot of
[22:02] value, especially if you have an ultimate that affects AoE. Take Viper as ultimate as a jiggle tool when she has an escape route. Because once she gets running to safety to then fight aggressively immediately after. You can
[22:16] also do this with flash utility like Phoenix to get better info and timings includes these techniques, you can go into TDM and practice them consistently. You can also do a disciplined version of utility practice by limiting yourself to
[22:30] certain utility in TDM. For example, if you're on Clove, you don't have to smoke practice using your heal and decay a lot more. Or if you're on Sage, you can practice only using slow orbs so you aren't over reliant on your wall to take
[22:43] fights. Practicing them in TDM can be a great fix for breaking bad habits built over time. Util tendencies, peeking tendencies, and even player habits overall are not just something you want to improve on yourself. It's also
[22:55] opponents. Let me explain this a bit further. You can find out what your enemy will do right after the agent selection. Just at their team comp. If you encounter two controllers, two duelists, and an initiator, you're
[23:07] likely dealing with explosive hits or slow methodical defaults with multiple doesn't have any passive info, so they have to use bodies or their solo initiator utility to take space and gather info on both sides of the map.
[23:20] Now, if we compare that team comp with a different team comp that has a Deadlock, Cypher, Clove, Sova, and Jett, you might see a weakness to exploit. They have no flashes, so to take space, they have to rely with more crowd control utility.
[23:34] Deadlock sees every time you fight for space, which lets you counter their tendency to throw early utility. While before, utility as a solution leads you to missing out on mechanics as a strength. But your knife negates your
[23:46] talking about the habit of pulling your knife out, especially in DMs? It's formed. You try to move around after a kill by pulling out the knife, and you you to dying a lot in ranked. This is why in deathmatch, avoiding your knife
[24:01] entirely can help you focus on training your mechanics more clearly. And in fact, if you look back at any of your current DMs, TDMs, or even ranked matches, you can see how often your knife might be getting you killed. So
[24:13] whenever you do play death matches or TDM, have the simple goal of not pulling your knife out the entire deathmatch. Having lazy crosshair placement can ruin what I mean by lazy crosshair placement is that whenever you're not in a
[24:25] gunfight, you can notice your crosshair dipping slightly up or down, then go enemy. And that's not good because you'd be way better off having your crosshair already at head level compared to having to do a bigger flick to get there. Even
[24:38] placement is already perfect, there's no player in the world who has perfect crosshair placement. Yes, seriously. While pros and some Radiants look like they still make some small mistakes. They all still work on their crosshair
[24:51] spend some focused practice time on it. You You do this by imagining reference points or stable lines on where your crosshair needs to be. And either way, into it to effectively practice your aim. When you hold angles or stay in one
[25:05] spot as your default play, that you'll find yourself losing far more duels. reading player tendencies in our previous bad habit? The idea behind moving around more and swapping positions is to precisely avoid being
[25:17] predictable with your own tendencies. Take Lotus C site as an example. As a defender, you can make an active choice to push into mount if you have the right kind of utility. But if your default option is to always push and hold mount
[25:29] in the same position every single round, eventually you'll be read so easily. So, to avoid this, mix it up more often. Try to take new off angles, new positions, and limit test your ability to take space after certain round markers. When
[25:42] and off angles, it's also important to have a fallback in case things don't go as planned. Being stationary can help you do some aura farming if you're very rare that you can hold angles against every player that you come
[25:56] even a troll jumping around with a shotgun could seriously catch you off movement when you're in awkward positions and when you're entering into sites. Some of the best movement players in the world aren't limited to their
[26:09] from preferences, such as Pr0lly, or like with Yay. So, no matter who you look to for better movement, here's a Whenever you're holding angles, keep moving in and out of the angle to avoid
[26:23] getting one-tapped. And whenever you're pushing angles, you need to have faster tap strafes to throw off your opponents, especially at distant gunfights. >> A very common and specific mistake that you can easily fix as an iron player is
[26:36] how you use pistols like the Ghost, the Classic, and the Sheriff. When reviewing VODs of my iron students, I often notice how they lack key knowledge about gun mechanics. Iron students often spam their bullets, rather than cautiously
[26:48] taking their time with every shot. Pistols like the Ghost, the Sheriff, and the Classic each have a specific reset time in between shots. If you don't respect the gun's reset time, you'll whiff every shot and wonder why your gun
[27:00] is not accurate. The same mechanic happens with the Guardian at long range. respect. After mastering your pistol rounds, there's one huge mistake that every bronze player makes that some of you might not even notice. Let me
[27:13] players, many believe that using abilities automatically means helping your team. And that's just wrong. A common example is when a bronze Sova constantly darts as soon as the round starts while he's completely alone. No
[27:26] reveals nothing, or enemies hide from it, meaning your utility is completely wasted. This is a big issue in bronze lobbies. Bronze players often dump their utility whenever they see or hear enemies, wasting most of it. Instead of
[27:39] actually thinking about what you want to do with your abilities and using them correctly, you just panic and use them all at once. Something bronze players often don't understand is that bad utility is even worse than no utility.
[27:52] For example, a bad smoke is worse than no smokes at all. A bad smoke can block your team's crossfires and give enemies free space. If you're the type of player thinking about it, and you're desperate to fix this, you could try playing some
[28:06] swift plays with unbinded utility buttons. I know this sounds a bit extreme, but if nothing has worked already, this drill will force you to stop using it mindlessly. And once you stop spamming util with this method, you
[28:18] keys. But this time, you'll be very mindful about using them when needed. Ask yourself before every piece of utility, "What is this piece of util doing for my team right now?" If you can't answer that in one sentence, don't
[28:31] is something a lot of players don't even realize they're doing, which is chasing clips instead of winning rounds. If you're silver, you've probably started landing a few clean clips. As a result, the problem silver players fall into is
[28:45] overconfidence. At this rank, the problem often isn't that you can't aim, it's that you start making every decision based on proving it. You dry swing into unknown angles, ignore flashes or utility, and stick with the
[28:57] ego peak mindset. It feels good in the moment, but those peaks are quietly costing you games and RR. This is what pros call overheating, and it's the number one reason silver players throw easy rounds. To fix this ego peaking
[29:11] issue, you first need to recognize it. In fact, ego peak is often don't even your replay and see if you usually re-peak and die after getting a kill. Once you recognize this issue, you can fix it with something I would call
[29:24] disciplined aggression. Disciplined aggression basically means knowing when to stop looking for kills. After a kill, ask yourself, is going for more kills risky here? If the answer is yes, then you don't peak, you reposition and play
[29:36] with your teammates. A disciplined anchor doesn't chase sound cues or panic off a few pieces of utility. They look for patterns in the enemy's macro movement and they exploit it. Practically, you fix this by forcing
[29:48] games, pick the site you're going to play on and decide, I'm not leaving until X happens. This can be that they have a player on site or a duelist, a controller, and an initiator are spotted close to the site. You'll quickly see
[30:01] how many rounds you used to lose to fakes and how many more you'll win by simply staying put. Most plat players have decent micro, but their macro and economy decisions are completely out of sync with the team. For example, you
[30:14] and your team is all planning to buy pistols. Instead of ecoing with your team, you decide to buy a Vandal with light armor and pray you win the round. Yes, you might steal a round off luck or a hero play, but in the long run, these
[30:27] because you're not just affecting one round, you're messing up your team's money for the next two or three. You constantly create mismatched buy rounds where you have a pistol or a weaker gun against rifles while your team has
[30:39] bought full rifles. The fix is simple but uncomfortable. Before you buy anything in your next ranked game, press tab and look at everyone's money. Then ask, "What can we all afford together?" If everyone's saving, you save, too,
[30:52] instead of being the hero with a solo rifle. By Diamond, you're decently skilled. Your aim is sharp, your utility usage is clean, and you've learned to often not making beginner mistakes anymore. So, why does the climb suddenly
[31:05] feel impossible? A common issue in Diamond is that players become too robotic. You fall into a predictability loop, doing the same thing every round. reacting to info, but you're actually just running the same script. You act
[31:19] like, "If X happens, I do Y." In the same spot every round. Once opponents realize where you play and how you play, the enemy can pre-aim that exact angle with a Vandal and punish you. Enemies don't even need insane game sense to do
[31:33] this. They just need a few rounds to realize your habits. As a side note, feel like you always get one-tapped. Maybe you're just too predictable. The way out is what high-level players call conditioning. This means intentionally
[31:46] behavior, then breaking the pattern. A great thing you should do if you feel like you're becoming too predictable is to take note of some starting positions that you can use in game. Watching pro VODs or simply through trial and error,
[32:00] positions work for your agent and play style. By Ascendant, you've learned opponents. But, here's the part most of you won't admit at first. You're accidentally baiting your teammates without even noticing it. A lot of
[32:14] teammates to trade, arrive late to every fight, and only peek once their duelist is already dead. In their head, they're playing smart and staying alive. But, nowhere to be seen. Most of you aren't trying to bait. You just don't
[32:29] understand what a real trade window looks like. The trade window is the one to two second window in which you can swing right after your teammate makes ready, you can swing as soon as your teammate takes contact and either get
[32:42] the kill or put some damage on the enemy. The fix can be pretty simple if you apply it to all of your games. This means intentionally playing within one to two steps of your entry player rather than being too far behind. If they're
[32:54] more than one to two steps ahead, then you're too far away. On defense, you can site, have one of you hold the angle while the other is prepared to swing as soon as you get contact. The gap between Immortal and Radiant isn't about
[33:07] mechanics. It's game sense, mental endurance, and consistency. Sometimes when it comes down to the most important rounds, most Immortals don't notice when they've checked out. They lose a few unlucky clutches, throw a 1v3, or get
[33:20] bad or toxic teammates and instantly check out. Figuring out the fix has everything to do with how you think within the game. No matter what the scoreboard says, whether that's 0-12, 3-9, or 10-2, you treat every round like
[33:33] the score just reset to 12-12 and it's overtime. For your next five ranked games, before every buy phase, take a three-second breath and ask one question. If this was 12-12 and we needed to win this round, what's the
[33:46] best play? If you actually stick to this for a few weeks, you'll notice you stop mentally giving up on games, allowing you to win a lot more games in the long >> Many players, especially in low ranks, instinctively rest their crosshairs
[34:00] holding an angle. And it might feel safer, but this habit actually limits the wall with your crosshair, you leave it way too far from where the enemy's head will appear, which forces a clunky adjustment the second a gunfight starts.
[34:13] And this makes your shot late or forces you to overflick while under pressure. To fix this habit of holding too close to the angle, load up into a custom game have them peek you at different spots around a certain area of the map. Then,
[34:26] heads away from the angle. Alternatively, if you you you can use TDM instead and focus on taking as many close-range fights as possible. Besides crosshair placement, positioning is just as crucial, but it's easy to overlook
[34:39] how exposing yourself to multiple angles puts you at risk. Angle stacking happens spot that you're visible to multiple angles and enemies at the same time. For example, when you swing B site on Ascent, enemies in market, stairs, CT,
[34:53] and and boat house can all see you at once. So, how do we avoid making this mistake? When you're peeking out to avoid over exposing yourself to multiple break down angles one by one, which makes it much easier to win individual
[35:05] fights and avoid getting instantly traded by enemies. This example from clearing the pie works. You're peeking out step by step, gradually clearing any possible angle and off angles on a site. And notice how when he does this, he
[35:18] peeking wider. You won't be able to clear everything with a slice of the pie technique, but when you're unsure of the enemy's position, slicing the pie is a good habit to peek safely. And one important tip to note is to use
[35:31] while scaling up. Instead of running towards the center of the site, utilize the extremities and walls of the site to reduce the amount of angles that you're into your favorite map and pick a bomb site and slowly clear angles one by one,
[35:44] only ever exposing yourself to angles you've already cleared. And this is also matches, although it might be a bit harder since people just constantly move around. Trading means working closely with your teammates. If one of you dies,
[35:56] instantly. This prevents your team from getting outnumbered early on, which can lose rounds fast. So, on attack, trading lets you keep numbers for site takes and post plants. And on defense, it helps eliminate the first entry and makes
[36:09] well, position yourself near your teammates and peek wide enough so they able to support them. Usually, this means being just one to two steps behind behind them so you block their movement or get collared. And pay attention to
[36:24] don't want to be lining up with our teammate, so make sure to pay attention as for the timing, you're going to want to peek about half a second after the entry goes out. Not so slow that your teammate dies alone, and not so fast
[36:37] once. The goal is for the defender to shoot at the entry or the first player, another thing to keep in mind is that you need to make sure that your peek is could have killed your teammate. An example of this in action looks like
[36:51] this. You're attacking C site on Haven. You're right behind your jet and she defenders start shooting at the jet and eventually kill her. You're already kill the defender who killed your entry. And this essentially gives you a
[37:05] one-to-one trade. And as I've always mentioned, one-for-one trades usually the defenders will need to rotate in a four-versus-four post plant with site control is easier to play compared to a retake. On defense, trading kills plays
[37:18] a different but equally important role compared to attack. The primary goal is less about keeping the numbers even and more about controlling space and slowing effectively on defense, you prevent enemies from easily gaining site
[37:32] control, which forces them to use more utility or even make mistakes. Your attackers free uncontested kills. If you peek poorly or sit in an aggressive being picked off instantly, which can open up huge areas of the map. By
[37:46] defenders can hold a site down a lot easier. In Valorant, every high-ranked Some players have calm, steady aim, while others rely on fast flicks and on smooth tracking, smooth crosshair
[38:00] under pressure. While flicky aimers excel at snappy flicks and being able to still aim accurately while playing on high sensitivity. So, what you can do is similar to yours, watch how they practice, and study their habits and
[38:14] of aiming style that you have, a simple and easy way to figure this out is by watching your own gameplay through the new replay system. Pay close attention which is relying on fast flicks and quick responses, or if you play with
[38:28] precise smooth aim and rely more on small micro adjustments. If you notice that you're flicking a lot, then try to find pros such as Jing or something and watch their bots to see how they play. And the same thing goes for if you have
[38:40] smoother aim. Find pros such as Yay or Less that match your style. And if sensitivity, you can try copying the pro and tweak it from there based on how it feels. Over time, you'll develop your
[38:52] own aiming style that feels comfortable and unique to you rather than looking at to rank up as fast as possible in the shortest amount of time, you need to can't just log in, spam a bunch of ranked team matches, post Valorant, and
[39:06] mindlessly and wasting your time. Instead, here's my recommendation for how to divide up your time. Spend 10 to 20% of your time aim training in the range or using aim trainers like Aim Lab and Kovaaks. Now, spend 70% of your time
[39:19] playing ranked and the remaining 10 to 20% watching your own VODs or pro ranked replays of your agent. If your issue is raw aim mistakes like missing flicks, prioritization, then make sure that you focus your time on the right scenarios
[39:33] with those issues. You can check this document that I'll link down below to find playlists targeting specific aim skills like micro adjustments, tracking, you're struggling with crosshair placement, spray control, or movement,
[39:47] then make sure to spend more time practicing in the practice range and death matches. These components of your mechanics are much more trainable in obvious reasons. And if you're not sure what drill can help you out, there are
[39:59] plenty of resources on my channel. For example, you can check out my 46-minute mechanical mastery guide. And lastly, to improve your game sense, mark down didn't know what to do or how to use your utility. Then, look for pro replays
[40:13] from the best players on your agent to see what they do in similar scenarios. game sense learning outside of ranked games, you'll be able to fully focus on fixing everything and trying to figure
[40:26] Your mentality is a fundamental part of ranking up in Valorant because you'll be and all kinds of different obstacles. Instead of blaming others, focus on what you could have done better. You can clip important rounds and review them after
[40:40] out some mistakes or missed opportunities. The difference between some of the best players in the world. However, it's important to note that one of the most crucial aspects of having the right mentality is knowing when to
[40:52] easy to let greed take over and queue one more game only to lose more. The same goes for when you're on a losing streak, thinking in the mentality that just makes you tilt and play worse. Tilt is one of the biggest enemies to
[41:06] triggered by anything from toxic teammates to backseatters to simply also very important to be able to identify your tilt trigger. When you feel frustration building up, don't hesitate to do what needs to be done to
[41:20] that's muting the toxic teammate or standing up and taking a step back mindset helps you stay focused and confident. Scaling is a fundamental part about gun fights and peaking, most Valorant rounds are actually team
[41:34] fights. I'm talking about 3v5 executes or huge retakes. You're not going to crash peak angles or strafe side to side in these scenarios, but they're often what decides the round. The most crucial part when scaling during a site execute
[41:46] or skirmish is to either hug the left or right side of the wall. For example, if running straight out towards dice will expose you to too many angles at once, making it almost impossible to survive. Instead, scale towards the left side or
[41:59] close the door and take cover behind the generator. And if we scale to the right side, we can tuck behind the brown box and isolate 1v1s if needed. The next role during the execute. If you're the first player out, then your job is to
[42:13] typically done in Valorant by Jett dashing in or Raze actually out as far onto yourself so that your other teammates can trade you. If you don't to wide swing out of the choke. If you jiggle peek or commit to a spray in the
[42:28] lane, which makes it impossible for your your whole team spammed. Once you get out of the choke, your job is to scale as fast as possible and take as much space possible. For example, if you dash
[42:41] the switch, players can run up market and CT focusing on just one angle. But, stairs control or close market, players into a crossfire. The second player out is responsible for trading the entry.
[42:56] direction as the entry. You want to be as tight as possible to your entry and try to trade them. Just like the entry fragger, you want to take space as fast flood from being too easy for the defenders. The third player has a
[43:10] the opposite direction from the first two players. If the first two players then you would scale towards logs, locking down the flood and setting up players. Once you feel like the flood has been prevented, you can scale the
[43:25] than the first two entries to ensure that you don't give a free one-v-one, The fourth or fifth player has a role of being anti-utility. This usually means mini-map pretty much baiting your teammates. If someone flashes out the CT
[43:40] smoke or market smoke, you're immediately ready to swing out and save holding onto the space that you've acquired, but still being ready to help on the same side on Ascent, if the site is being played for retake, you'll
[43:53] likely want to hold onto B main to prevent any flank retake attempts. three-v-three or two-v-two situation, you want to help your teammate take the rest of the site. If we want to have the benefits of fast flicks and a smooth,
[44:05] calm aim, then we need to utilize touch control. What this means is that as we go for the initial flick to the target, we want to have a snappy, tense, fast flick onto the target. Then, we want to smoothly and calmly micro adjust onto
[44:17] multiple parts of our body that we can use to aim. So, this usually means tensing up our arm for a fast flick, then having smooth and relaxed wrist and correction. If we can instantly recognize the frame when someone starts
[44:31] obviously we can react so much faster compared to waiting for them to switch directions entirely. So, how do we improve this skill? To be honest, most understood or thought about this concept in depth, but developed it through just
[44:44] amassing hours in the game. However, now that we're aware of this skill, we can faster. The best way is to play death match using a weapon like a sheriff or a guardian and go for one taps only. However, focus extra hard on the target
[44:57] and try to be 100% confident in the shot before you take it. Over time, you'll develop the skill of reading the target and anticipating their position in the next few frames, which allows you for an easy shot. Object permanence sounds
[45:09] intense, but it's a simple idea of understanding what is happening beyond players in the world are absurdly skilled at this. They understand the perfectly, meaning when they, let's say for example, kill a player on rubble on
[45:22] Lotus, they know how far they can run with their knife out to get a timing on even shorter turn notice, they know what the player who just went behind cover is thinking and how they will most likely try to peek or get away, which allows
[45:35] easy kills. This is essentially what many players refer to as game sense, understand their intentions even beyond your vision. Inexperienced players perceive all risks at all times and play overly safe to avoid things that aren't
[45:51] good, experienced players are constantly taking risks based on their understanding of a player' tendencies, situation, or experience. And to work on the skill, we can start simple by making a mental note every time a player
[46:04] out what they're trying to achieve and what they can do from that position. As the game progresses, make notes on what players like to do, especially if it past. Another big brain key element that you need to learn is understanding the
[46:18] enemy's object permanence and learning how to exploit it. For example, if you're in a one V one clutch retake on Ascent A site and they just saw you door, rather than try to make a play or peek at the enemy instantly, wait
[46:30] the number of possible positions you can come from just by doing literally nothing. Now, when you re-swing door, the enemy will have to worry about three different angles, A main, door, and heaven, instead of just one single
[46:43] angle. Valorant is a team game and most of your rounds are won with your team trade effectively and fight with your teammates is one of the most essential overlooked fundamentals of Valorant. So, how do we trade effectively? Well, it
[46:56] depends on the scenario. We discussed scaling earlier, but what about holding somewhat close to our teammate and swing this may seem simple and you've probably done it before, you're probably not
[47:09] doing it at 100% efficiency. The best way to swing off contact is to jiggle the enemy if he doesn't know where your teammate who is holding contact is. This harder for him to clear angles effectively as he knows you can peek him
[47:22] a higher chance of getting the kill. The second tip is to stand as close to the wall as possible, which minimizes the time to swing off of your teammate's adjust his shot after killing your teammate. Another essential part of team
[47:36] fighting is the anti-utility role. In almost every single scenario, someone needs to be vigilant on either destroying or avoiding utility. On site dart or drone to prevent the other team
[47:48] there are Breach stuns, KO flashes, and Omen blinds that need to be avoided to stop your entire team from getting wiped out by a single piece of utility. This silently around the map and understanding all its silent mechanics
[48:02] provides an extra element of surprise that can lead to round wins. For example, you can silent jump if the drop is not that high and this is exploitable jumping up ramps like the ramp as you rotate from Ascent spawn to A heaven. By
[48:16] the ramp, you can catch an unexpected timing compared to shift walking the whole way up. There's also two more ways to silently jump. If you have a surface blocking your jump like hell on Ascent, you can hold shift and jump repeatedly
[48:29] silently jump without hitting any surface, crouch before jumping and then uncrouch midair. This extends your leg out tricking the game into thinking that dropping works the same way. If you want to drop from higher surfaces to lower
[48:43] ones without making noise, then we need to crouch and uncrouch mid drop. Now, before, but from the players that I have coached, iron players are getting familiar with the complex movement mechanics of Valorant. At this rank, we
[48:56] but instead we need to get super comfortable with basic movement advanced movement mechanics more efficiently. Even though we could just spam games and simply focus on stopping before shooting, there's a lesser known
[49:10] mechanics and that is to utilize the range parkour. The parkour course introduces you to basic movement concepts such as air strafing and bunny the basic Valorant mechanics, it's time to start applying them in real gun
[49:23] movement advice for bronze players is tries to trick you into thinking that you need to stand still or crouch to shoot accurately, your default state in this game should always be to be moving.
[49:35] Holding angle, keep moving left and right. In a gun fight, strafe side to your screen, don't commit to a crouch spray, but strafe and focus on one this is to do the 100 bots challenge in the range. Stand close to the bots so
[49:49] you can't see all the spawns at once. Now, after you kill one bot, keep your crosshair is ready to shoot the next. And after you kill the next bot, strafe to the opposite direction until you're ready to shoot the next bot. The
[50:02] the move and hard to hit while still being able to adjust your aim. And you must understand that you need to default to movement. If an enemy catches off guard, don't immediately try to flick onto a target you haven't yet focused
[50:14] on. Instead, move, strafe, and once your crosshair is lined up on their head, then you stop and shoot. So, once we can stay mobile in gunfights, we should be you hit silver, there's one thing that most players complain about regarding
[50:28] movement. And it's that you're always dying the moment you peek. The most important advice when considering movement at this level is to use W and S as little as possible when peeking out of an angle. By using A or D only when
[50:41] peeking or during gunfights, we can achieve the maximum horizontal velocity makes it harder for enemies to hit you. using the T rule, and I still get one-tapped." And that's because it's
[50:53] also essential to pre-aim where we think the enemy will be. Simply imagine yourself having wall hacks and pre-aim the area where the enemy is likely going to be standing. Then, swing only using A or D to peek and land your crosshair
[51:07] still dying, it might be because you're peeking at the wrong distance from the disadvantage, meaning you're closer to the wall than the enemy, you'll need to jiggle peek the angle instead of using a standard peek. And this prevents you
[51:21] angles at once. If you want to swing an enemy wide, then we want to get as close a closer target moves faster compared to a farther one on your screen. So, by past where their crosshair is likely to be positioned. And for all other swings,
[51:37] we want to stand as far back from the wall as possible, as this will give us the most angle advantage. Because the further we stay back from the angle, the swinging, and this will give us more time to react and hit the shot. And now,
[51:50] should focus on refining what we mentioned for the previous ranks, but what also matters a lot is improving our movement when it comes to gathering info. The most consistent and reliable way to get info is with your body.
[52:02] timed, but having a player at the right spot, during rotations, and holding information. The first fundamental trick to gain info is jiggle peaking. Simply exposing as little of your body as possible, then strafe back in to avoid
[52:18] being hit. You can do this repeatedly to gain info, and another way to be even so that we can move in and out of the angle much faster. An even safer way to get info is to jump peak. It's basically the same mechanic, but we're jumping at
[52:31] then strafing back in. You can press W to move forward towards the angle, then strafe back behind the angle. These peaks, however, involve risk and giving away your position, so the safer option is the silent jump peak. You can do this
[52:45] un-crouching right before you land. There's also numerous spots around the map where you can jump spot by peaking above something. A good example of this spot simply by jumping and hitting your head on the roof. Here, you can safely
[52:59] instantly use it to counter the push. But, if you want to get to platinum, you'll need to learn how to move to get out of tricky scenarios. Movement during matters. A lot of the time, you're going to need to use evasive movement. Evasive
[53:13] don't apply. For example, you miss an op shot as Jett and you're trying to movement players in the world almost have a poetic way of escaping every these scenarios, you need to be air strafing and bunny hopping as much as
[53:27] possible, meaning we're jumping as soon as we hit the ground to consistently to do this is to bind the mouse wheel scroll up or down to jump, and this mouse wheel and not have to worry about timing your jumps. You can combine this
[53:41] and you'll become extremely hard to hit as players can't rely on predicting your trajectory to hit the shot. And another trick is to combine jump peeking with spots we were talking about before? Well, we can actually use those same
[53:55] weapons. For example, take jet knives. We can jiggle jump peek an angle and actually go for a relatively safe one tap while being extremely hard to hit. another shotgun at close range. For example, try sitting in pit on Carow B
[54:10] site on the execute, you can go for jump peeks, which allows you to get free kills while being extremely slippery and hard to hit. Now, once we get past plat, we're onto the higher ranks, which means our movement needs to adapt. When we
[54:23] techniques we've learned before won't be enough to consistently win gunfights. master the art of varying your movement. This means you're in a fight and do it up by making your next strafe bigger, then switch up your next strafe again to
[54:37] be smaller. If you're also combining this with well-timed shots, you'll will try to predict your movement to make it easier to headshot you, but this being more unpredictable is to throw in
[54:49] really messes with people when they try to predict your movement. For example, then strafe again to the right. This, when mixed with varying strafe lengths, The most important part of this unpredictable movement is trying to
[55:03] is a skill in itself, but if you can guess how the enemy will predict or outplay his prediction. You can manipulate this yourself, too. For few times, his crosshair will naturally move really close to the angle. Then,
[55:18] him whiff as he tries to correct. Once we can be unpredictable in our movement, tip that will get us from Ascendant to Immortal. If you hit Ascendant, you're leaderboard. And to make that final step, you need to learn movement timing.
[55:33] understanding that the best time to move is right before the enemy is about to shoot. There's no point in doing a wide swing if you just stop right as the easy shot. The players who master this skill seem like they barely move at all,
[55:47] up a shot. Then, right as you flick onto dodge your bullet. So, how do we practice movement timing? Well, we need to play deathmatch and try to get into the rhythm of intentional movement. No
[55:59] more auto piloting spamming AD AD. Instead, understand when enemies are most likely to shoot. When an enemy pops up on a screen, don't just stand still little bit to the right when they stop to shoot to throw them off. Then, finish
[56:12] and go for the kill. Once you move onto immortal, everyone is conditioned to actually time to abuse crouching. Some like Primy are known for crouching in almost every single fight. And while
[56:25] this tendency might be bad at lower ranks, almost every single player in placement. So, we need to find an alternative way to avoid getting tapped. difference between a good crouch and a bad crouch. A bad crouch in a gunfight
[56:40] enemy reacts, which makes them line up a very easy shot on a stationary target. A good crouch, on the other hand, is done making you literally duck under the shot. You also never fully commit to the
[56:53] right before you hit the crouch position, which makes your head crouching at a high level is about constantly making your head a vertically moving target compared to just an easy shot for the enemies to hit. Another
[57:06] This is what pro players actually do. No one holds an angle at body height, and you to getting one tapped. The best players crouch peak almost every single practicing this as much as possible. Just swing out and tap crouch at the
[57:22] from the angle. And once again, don't fully commit to the crouch or you'll become too stationary. You also need near perfect pre-aim when crouch peaking momentum to bail you out if you miss your shot. Aim can win you games some of
[57:36] the time, but to get that consistent long-term growth and improvement, you need to make fights easier for yourself. A foolproof way to make this happen is to think of three aspects before peaking. Your positioning, ability to
[57:48] trade, and utility. With positioning, think could I position myself at an off angle where the enemy would never expect me to be in. And for trading potential, you need to think if I was to swing this angle, are my teammates close enough to
[58:00] trade me? Or can I double swing with my teammate to get this kill easily? And finally, for utility, you need to think about the bigger picture. Are there any piece of utility from myself or my team that can be used to help me get the kill
[58:12] on this player? Think of flashes, drones, smokes, and so on. In low elo, many players massively overreact to the first piece of utility they see or hear picture. Like what have the enemies been doing for the entire half? For example,
[58:26] do they fake going B a lot? Do they play default very often? Consider these That's where most players stumble. Instead of thinking they're going A, you want to think where do they want to end up by taking the space or using this
[58:40] matter if you're still making this next mistake and most ranked players are guilty of it. When you obsess over the outcome of a match, you start to play and make mistakes. And by losing confidence mid-game, it'll overall lower
[58:54] your performance and diminish your impact in the game. So, once you understand that obsessing over the outcome of the game or even rounds can actually be the problem, shift your focus and measure of success based on
[59:06] your inputs and the process. Instead of thinking about your rank, the RR, your KD, or whatever else is outside your control, focus on the factors that you can actually control such as your crosshair placement, utility usage, your
[59:19] having clear communication. Measuring your success based on the progress you're making towards improving those skills will give you a clear plan for skills will give you a clear plan for playing better each round.
⚡ Saved you 0h 59m reading this? Transcribe any YouTube video for free — no signup needed.