

Make $100/Day Trading This Simple Pattern
43sThe promise of earning $100 per day with a simple pattern is highly enticing and clickable for beginners.
▶ Play Clip"Delivers a real strategy but oversells the $100/day promise with unrealistic assumptions and lacks empirical evidence."
This video presents the 'three bar pattern,' a candlestick trading strategy claimed to help traders earn $100 per day. The tutorial explains how to identify the pattern, avoid common mistakes, combine it with other strategies, and manage risk with specific position sizing and leverage recommendations.
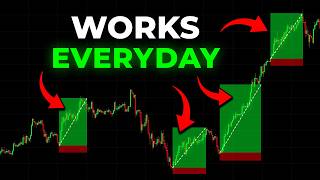
A high win rate candlestick pattern with three consecutive bars: an igniting bar (large body, strong momentum), a pullback bar (small, opposite color, size not exceeding half of igniting bar's body), and a confirmation bar (medium to large, closes above/below pullback bar).
Green igniting bar, small red pullback bar, green confirmation bar closing above pullback. Enter long at close of confirmation bar; price made an uptrend.
Red igniting bar, small green pullback bar, red confirmation bar closing below. Enter short at close of confirmation bar; price moved downwards.
Igniting bar must have a significantly larger body than previous candles. If not, it's not a valid pattern; don't force a trade.
Patterns after sharp, unsustainable moves are less valid. Look for patterns in the middle of a clean, gradual trend.
Combine with 50-period EMA. Only take bullish patterns when price is above EMA, bearish when below. Stop loss above pullback wick, profit target at 2x stop loss.
Combine with support/resistance. Look for three bar pattern at key levels (e.g., support bounce). Stop loss below pullback, profit target 2x stop loss.
Combine with channel breakouts. If price breaks support with bearish three bar pattern, take short. Stop loss above pullback, profit target 2x stop loss.
To make $100/day, need ~$5,000 capital. Beginners can start with $5-$10/day and scale up.
With $5,000 portfolio, position size $500 per trade. Target 20% profit, stop loss 10%. Use 5x leverage, so actual price move needed is 4% for profit, 2% for stop loss.
Max 4 trades per day on 15-min to 1-hour timeframe. Target 50% win rate (2 wins, 2 losses) to net $100/day.
The three bar pattern is a simple, high win rate strategy when traded correctly, but requires discipline to avoid common mistakes and proper risk management with leverage to achieve the $100/day goal.
What are the three bars in a three bar pattern?
Igniting bar, pullback bar, and confirmation bar.
00:18
What is the maximum size of the pullback bar relative to the igniting bar?
It should not exceed half of the igniting bar's body.
01:27
When do you enter a trade in a bullish three bar pattern?
At the close of the confirmation bar.
01:41
What is the first common mistake traders make with the igniting bar?
They try to force an igniting bar even if the candle's body isn't significantly larger than previous candles.
03:31
Why are three bar patterns after sharp movements not ideal?
Because quick sharp movements are generally not sustainable and will result in a pullback.
04:40
How can you combine the three bar pattern with a trend confirmation indicator?
Use a 50-period EMA; only take bullish patterns when price is above the EMA and bearish when below.
05:52
What is the recommended position size for a $5,000 portfolio?
$500 per trade (10% of capital).
10:03
What leverage is recommended and what price move is needed to hit the 20% profit target?
5x leverage; the asset needs to rise by 4% (4% x 5 = 20%).
10:57
What is the recommended maximum number of trades per day and win rate target?
Maximum 4 trades per day, targeting a 50% win rate.
11:40
Definition of Three Bar Pattern
Provides a clear, testable definition of the pattern's three components.
00:18Igniting Bar Validity
Emphasizes the importance of a significantly large igniting bar, a key filter for valid setups.
03:31Avoiding Sharp Moves
Highlights the importance of trend quality over pattern presence alone.
04:40Leverage Calculation
Demonstrates how leverage reduces the required price move, a critical risk management concept.
10:57Realistic Win Rate
Sets a realistic expectation of 50% win rate, countering the 'high win rate' claim.
11:40[00:02] to learn the exact way on how to make $100 per day by just trading this one single pattern so without further Ado let's dive right into it now the pattern that we're talking about today is called the three bar pattern so what exactly is
[00:18] the three bar pattern it is a high win rate Candlestick pattern that is characterized by having three consecutive bars an igniting bar a pullback bar and a confirmation bar once the sequence of candles appear in a
[00:32] chart it is usually followed by the price forming a strong Trend afterwards which we could take advantage of and so the idea is that if you could just spot this pattern and trate this specific setup on a daily basis it's very
[00:45] possible that you can make $100 per day using the strategy and in this video you're going to learn exactly how to identify the pattern evaluate the trade setup and know when to enter and exit the trade next I'll also give a quick
[00:59] rundown on the proper risk management that you should use because evidently no chart pattern has a 100% win rate so let's begin but first how do we actually spot the three bar pattern so in either direction the pattern must exhibit three
[01:15] consecutive candlesticks the first Candlestick is called an igniting bar which is a Candlestick with a large body that signals strong momentum the second Candlestick is called pullback bar which is a small
[01:27] Candlestick with an opposite color of the igniting bar ideally the overall size of the pullback bar should not exceed half of the igniting Bar's body the third candle stick is called the confirmation bar which is a medium to
[01:41] large sized Candlestick that closes above the pullback bar once the sequence is complete you can enter a buy position at the confirmation bars close let's see how this would look in a real chart so here we can see a green candle
[01:56] with a large body that formed which is an igniting bar followed by a small red candle which is our pullback bar and then we have a green candle that closes above our pullback bar which is our confirmation bar and so because the
[02:10] momentum of the sequence is heading upwards it indicates that this is a bullish three bar pattern and so we take a long position at the close of the confirmation bar and after the pattern is formed notice that the price made a
[02:23] nice uptrend so that would have been a good long entry opportunity let's look at another example here we have a nice red candle with a large body signaling a strong downwards momentum which will be our igniting bar
[02:38] then it is followed by a small green candle which the size does not exceed half of the igniting Bar's body this will be our pullback bar next we also have a red candle that closes below it which is our confirmation bar in this
[02:51] case it is a bearish three bar pattern because the momentum is heading downwards and so we could open a short position at the close of the confirmation bar and we can see that the price made a
[03:03] downwards movement after the pattern has formed so when traded correctly the three bar pattern is a very simple and high win rate strategy however there are mistakes that Traders tend to make when trading this setup which could lower its
[03:16] instead and so to make sure that you don't fall for these common mistakes I'll be showing you how to avoid them mistake number one so we know that an igniting bar is the first candle that formed in a three bar pattern and it's
[03:31] also the most important reason being is that it shows that high liquidity is present so in order for an igniting bar to be valid it needs to have a large body and so the mistake that Traders usually make is that they try to force
[03:44] an igniting bar even if it's not there remember if the candle's body isn't significantly larger then it's not an igniting bar here's an example in this chart we can see what looks like at first glance a three bar pattern because
[03:58] we have a green candle a small red candle and another green candle but in reality this is not a good three bar pattern setup because the opposite igniting bar doesn't have a large enough body and if you compare it to the
[04:11] previous candles it has a relatively similar size remember an igniting bar needs to be significantly larger than the rest of the candles so if you have one candle that doesn't fit the criteria of the pattern don't risk a position now
[04:26] bar pattern looks like as you can can see in this setup the igniting bar clearly has a large body and notice how it's significantly larger than the previous candles that formed mistake number two on some
[04:40] occasions a three bar pattern may form after the price had already made a sharp movement in a short period of time like in this example and so this is generally not an ideal setup to enter long positions because quick sharp movements
[04:54] like these are generally not sustainable and will result in a pullback how however patterns that appear in the middle of a clean trend is much more valid so a clean Trend can be identified by the price gradually heading towards
[05:08] One Direction like in this example remember the keyword here is gradual it's not a sharp movement in this case the trend tends to be more sustainable now before we move on if you like this video so far kindly hit the
[05:24] like And subscribe button it only takes two clicks but it means so much to me two clicks but it means so much to me now back to the video now although the three bar pattern is a powerful strategy there's still so much
[05:38] room for improvement you can actually combine the three bar pattern with other complimentary strategies to further increase your chances of profitable trades Advanced strategy number one three barar pattern plus Trend
[05:52] confirmation what of the strategies that consistently gave me a high success rate is by combining the three bar pattern with a trend confirmation indicator such as the exponential moving average so let's look at this chart as an example
[06:05] here we have a 50 period exponential moving average applied onto our chart which acts as our Trend confirmation indicator and so this indicator can now help us by making sure that we're not trading against the main Trend if the
[06:18] price is below the indicator it indicates that the overall Market is on a downtrend meaning we only look for bearish three bar patterns and if the price is above we would only look for bullish three bar patterns and so the
[06:31] idea behind the strategy is we want to trade the three bar pattern while following the main Trend like in this example we had a bearish three bar pattern that formed while the price is below the moving
[06:43] average so this is a good opportunity to enter short now for your risk management you can place a stop loss above the pullback candle swick and set a profit pullback candle swick and set a profit Target at two times stop
[07:00] bar pattern plus key levels another strategy that you can use in combination with a three bar pattern is by applying key price levels such as support and resistance let's observe this chart as an example here we can see that the
[07:14] price went down to this level Consolidated as it failed to break below this area multiple times before bouncing upwards and so we can actually draw a support level below this area to remind us that there's strong buying pressure
[07:28] next as the price approaches that previous key support level it failed to break through it once again and we can see that the price slightly bounced upwards while forming a bullish three bar pattern so what this setup tells us
[07:42] is that first price have bounced upwards after hitting this level in the past and now there's a potential that it might do so once again and because we have a bullish three pattern that formed it further strengthens the idea that it may
[07:55] bounce upwards once again so this is now a good setup to a buy position for your risk management you can place a stop loss slightly below the pullback handle and set a profit Target at two times stop
[08:13] three bar pattern plus breakout another method for combining key levels with a three bar pattern is by looking for breakout opportunities let's look at an example in this chart we can see that the price is moving sideways and is
[08:26] forming a channel pattern as it hovers between the two support and resistance areas next we can see that the price breaks out below the support level of our Channel while also forming a bearish 3 bar pattern now generally if price
[08:40] breaks out of a channel it tends to move sharply towards the direction of that breakout and in this case it broke the channel to the downside while also forming a bearish three bar pattern which further supports the idea that the
[08:52] price may break out to the downside and so this is a good opportunity to take a short position next a stop loss could be placed above the pullback handle and a profit Target at two times stop loss and so with all the strategies that
[09:07] you've learned about the three bar pattern how much Capital do you actually need in order to make $100 per day here's a complete breakdown But first you need to understand that the process of making $100 per day would not look
[09:21] like this it would realistically look more like this you will have some winning days and some losing days and the idea a is to aim for more winning days than losing days that's why it's important to only choose the best setups
[09:34] when trading this pattern so to make $100 per day you realistically need to have around $5,000 in total trading capital and for beginners who don't have $5,000 you can always adjust the trading size based on your own capital and it's
[09:50] completely fine to start small you can Target just $5 to $10 profit per day then if you're able to do that consistently you can then begin to scale as you increase your trading skills and grow your Capital now let's get into the
[10:03] specific position sizes and money management that you should use so assuming that you have a $5,000 portfolio you want your position size to portfolio you want your position size to be $500 for each trade next is profit
[10:16] Target and stop loss so from your $500 position you want to Target 20% profit per trade and stop loss at 10% per trade be $100 and your maximum loss will be
[10:32] $50 now I know what you're thinking but how do we possibly catch a 20% movement from one trade well the answer to that is by using margin or leverage so margin
[10:44] can be a double edge sword if you use it carelessly it will blow up your account but if you use it with the right risk management it can be a powerful tool for Traders who want to grow their account and so for this strategy I recommend
[10:57] and so for this strategy I recommend using five times more for each trade so from your $500 position size set the margin to five times now because of this in order to reach our initial 20% profit Target the asset that you bought only
[11:11] Target the asset that you bought only needs to rise by around 4% because 4% needs to rise by around 4% because 4% multiplied by 5 times is 20% similarly our stop-loss Target will be hit if the asset drops by only 2% because 2%
[11:24] asset drops by only 2% because 2% multiplied by 5 equals to 10% but bear in mind that this calculation does not include fees but to summarize for each position you invest $500 then you aim for 20% profit and 10% stop
[11:40] loss next is trade frequency and time frame so I recommend taking a maximum of four trades per day trading on the 15 to 1 hour time frame next is the target win rate I recommend targeting a 50% win rate which means you're aiming to get
[11:56] two winning traits per day out of your total four but of course if you can aim total four but of course if you can aim for higher that would be much better now confused so here's a practical example to hopefully clear things
[12:09] up so let's say you enter a position because you spotted a bullish three bar pattern forming in this chart and based on our guidelines you enter a buy position using $500 with five times margin now because
[12:24] you're using five times margin each percentage point up or down is multiplied by five so in order to achieve our Target of 20% gain and 10% risk per trade you want to set the takeprofit at 4% and stop loss at
[12:39] takeprofit at 4% and stop loss at 2% by doing this for every losing trade you would only lose $50 and for every winning trade we would gain $100 that means if you had one losing trade and one winning trade you'd still
[12:52] be up a total of $50 next if you do this four times a day assuming you get a 50% win rate which equates to two winning traes and two losing traits per day you'd make a total of $100 for the day and so that was the
[13:08] exact method on how you can earn $100 per day by trading the three bar pattern now remember the more you practice the strategy the better your trading skills will become which will increase your win rate further now if you want more simple
[13:22] and easy to understand trading tutorials like this you can check out my other videos here so thank you for watching and I'll see you in the next video


⚡ Saved you 0h 13m reading this? Transcribe any YouTube video for free — no signup needed.