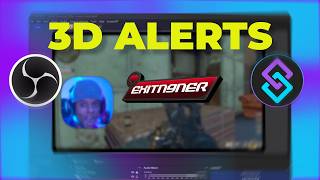

I Made 3D Alerts for Twitch – Here's How!
45sThe visual of a 3D alert flying in and out is immediately eye-catching, and the promise of a step-by-step tutorial hooks viewers who want to replicate it.
▶ Play Clip"Delivers a solid tutorial that matches the title, though some parts are repetitive and could be trimmed."
This video provides a step-by-step tutorial on creating 3D animated alerts for Twitch streams using OBS Studio and Streamer.bot. The creator demonstrates how to combine skills in OBS, plugins, and Streamer.bot to build a custom alert system that flies in and out with a 3D effect and background blur.
The creator emphasizes that every idea should stem from a combination of your skills, as this is the only way ideas become reality. If you lack a skill, give yourself time to learn it.
The tutorial uses OBS Studio with the Move plugin, 3D panel, and Composite Blur plugin. Streamer.bot is used for displaying information and triggering actions.
In Streamer.bot, navigate to alert banners and select from three groups. Enable the desired alert and add an image source and text source in OBS.
Use a maximum size boundary for text so it adjusts to fit. Group the image and text sources together for easier manipulation.
Apply a 3D block filter to the group. Animate the scale and rotation to create a fly-in and fly-out effect, adding wiggle rotation for extra movement.
Use the Move plugin's move value filter to animate the position of the 3D block. Record start, middle, and final positions using 'Get Values'.
Add the alert scene as a source in other scenes. Use Composite Blur filter to blur everything except alerts, applying it to camera and gameplay groups.
Animate the blur using move value, setting blur from 0% to 100% (15 pixels) with custom duration and end delay. Use reverse to loop the blur in and out.
Create actions in Streamer.bot: one to add Twitch target info (grabbing user login), another to change text and trigger the blur animation in OBS.
Test the alert by simulating a follow. The alert flies in with the user's name, blurs the background, and flies out after a couple seconds.
The video successfully demonstrates how to create a custom 3D alert system for Twitch streams, combining OBS Studio plugins and Streamer.bot. The creator encourages viewers to use their skills to generate creative ideas and provides free images in the description.
What is the core principle for generating ideas according to the creator?
Every idea should stem from a combination of your skills.
00:26
Which plugins are used in OBS Studio for this tutorial?
Move plugin, 3D panel, and Composite Blur plugin.
00:57
How do you ensure text stays within a boundary in OBS?
Set text to maximum size only, so it adjusts to fit within the boundary.
02:46
What is the purpose of the Move value filter?
It allows you to animate the value of previous filters, such as position and blur.
04:03
How do you loop the blur animation?
Set the first move to blur 0%, second to blur 100%, and use reverse for the next move to loop.
06:18
What does the 'Add Twitch Target Info' action do?
It grabs information from whoever triggered the action, such as user login.
07:17
Ideas from Skills
Emphasizes a fundamental principle for creators: combine skills to generate feasible ideas.
00:263D Block Filter Animation
Demonstrates a specific technique for creating 3D effects in OBS using filters.
03:17Blur Animation with Move Value
Shows how to animate blur using move value, a key technique for dynamic scenes.
05:49Streamer.bot Action Setup
Illustrates how to integrate Streamer.bot with OBS for interactive alerts.
07:02[00:00] Let's test one more time so it flies in. This is really in focus. And then flies out. So all you have to do is play around with it a little bit.
[00:13] So I recorded a very long video explaining step by step how I did that. So let me just explain to you how the whole thing works.
[00:26] This is a tip that I've been giving a lot Every idea you Should stem from a combination of your skills. This is pretty much the only way that your ideas will ever become reality.
[00:40] You will have no idea how to do something. You might be stuck. obviously you're going to give And if you don't, give yourself a time Even though you might learn some new So in my case, I knew I wanted a 3D alert.
[00:57] And blur the background while it Of course we're doing all of this in OBS studio. The move plugin, If you're not familiar with it.
[01:09] can make things 3D in OBS studio? And of course the 3D panel, but it's kind of redundant. And that will be the Composite Blur plugin for OBS studio.
[01:26] How do we display information? We're going to use streamer bot. The next step was actually making the panels
[02:01] If you go to You will find alert banners which you can click on. You'll see three groups.
[02:15] And then turn this one on. while you're there. I added an image source in OBS studio, then added
[02:30] a text source. usually is type a random name and then I'll press Ctrl e. I'll make sure that it stays centered no matter what.
[02:46] It's a maximum size only, which means that no matter the length of the name, it's actually going to adjust and stay within that boundary. Like if I grab this and I do this,
[02:59] you'll see that the text will do its best to stay within it, right? I didn't put those two elements, the image and the text inside of a both sources, right clicking And going to group selected items.
[03:17] A 3D block filter. I already made a video on it, And this is the result that you'll get. And of course, what we do is we animate it, we animate the scale,
[03:33] we made basically rotate away and then fly at the bottom here we add wiggle rotation and we bump up the wiggle all the way up.
[03:46] Okay. And the move plugin will usually give you a bunch of move filters. because move value lets you animate the value of previous filters.
[04:03] as you can see here, is have a move value for the first position and then for the final position when it flies off.
[04:15] So every single time I would go to the 3D block, manually place and then go to my move value and click Get Values to record that position for each. to back with the timing that I wanted, I just scroll down
[04:30] So that's my middle position. And then in on screen I set my next move to final position. everything plays and it flies in and it flies out.
[04:46] It might be a little laggy. It comes in, you see the wiggle is what's moving it slightly and then it flies That's
[05:02] And of course I'm going to add this scene as a source in my other scenes. And this was kind of tricky because we have multiple elements here. and I want everything to be blurred except for alerts for example.
[05:17] to each of happen to have my camera inside of a group on top of it already being nested, and also my gameplay in a group. So it was super easy for me to just add a composite blur filter.
[05:33] It's a plug in Google Composite Blur OBS. You'll find I needed to animate this at the same time that my 3D and slowly blur in and then slowly blur How do I do that?
[05:49] The same way move value allows you to basically grab that slider, automatically, slide it in, and then slide it out. with the blur at 0%, and then blur 100%, which is 15 pixels.
[06:05] And this time you can see custom duration a whole second to get there, and then an end delay to make it wait basically before it starts going back, and this time for the next move, I picked reverse.
[06:18] So any action it took is just going to reverse that action or making it go to the first one, the first one sends us to this one. So sending it back to the first one will just mean a loop of blurring
[06:33] and on blurring we don't want So I added that to my game scene and also my full screen camera, because those are the two scenes Once again, my camera happens to be in a group, so
[06:47] If I click on it, it'll blur slowly, stay for about a second two seconds and then on blur. You. Oh.
[07:02] But first thing I did in my action I called my action follow for the follow I created three in total, but I only went through with two. first one was to add twitch add target info.
[07:17] This basically grabs the information from whoever triggered your action. Because we need that information to use later on in the text. So when it says user login I put user as a variable.
[07:33] that first position on the 3D panel. since the complete animation is already settled in OBS studio, This happens pretty much at the same time as the previous one,
[07:49] to change the text and wait a little bit so it doesn't appear, it's fine. In our case, the 3D panel is coming from off screen, so it has plenty of I don't even know I have a user here and then I have target user.
[08:04] It seems to work fine so we'll see. Anyways, I have target user as my variable here because that's one of the examples. to get the name of the person who triggered the whole thing.
[08:17] hey, on my full screen scene, my just chatting scene. Activate that blur zero filter that plays its own blur animation. Then in my game scene, for my cam, activate the blur zero filter
[08:30] and also for my game, activate the blur zero filter. Here I have like a command to test it, but we're not even going to use that. I can delete if someone follows me, I can right click and test it.
[08:44] And it's actually going to simulate a different name from my followers. I. So this is just with the plain background so we can make sure everything is working
[08:57] Right now we're going to test trigger and we should see a fly in do its little thing for a couple seconds and then fly out. And you can see the concept is pretty much straightforward.
[09:13] Flies in with the name of the person who triggers the alert and then flies out. that on my just chatting scene, which is this one, I'm here, I'm talking. Doing someone follows. It's going to fly in.
[09:26] I'm going to say, hey venture, thank you so much for the follow. while I'm right here playing my game, I'm sorry, the camera position is awkward. blur everything, lag my computer a little bit and then fly out.
[09:43] especially when it comes to multiple heavy sources. It's probably screaming at me right now.
[09:55] how I manage to make it happen. And yeah, how I executed And if I'm lucky, you'll get your own creative ideas from Once again, the images are available for free.
[10:09] Just make sure you check the link in the description to get them. If you enjoyed this, you would probably enjoy my other streamer. So remember to subscribe so you don't miss the next one.
[10:23] I stream every full moon.

⚡ Saved you 0h 10m reading this? Transcribe any YouTube video for free — no signup needed.